2. How do I add an employee to my org and get them fully set up?

 10:24
"How do I add an employee to my org and get them fully set up?"
To add a person or employee to your org, an admin first needs to invite them, and then do their admin onboarding.
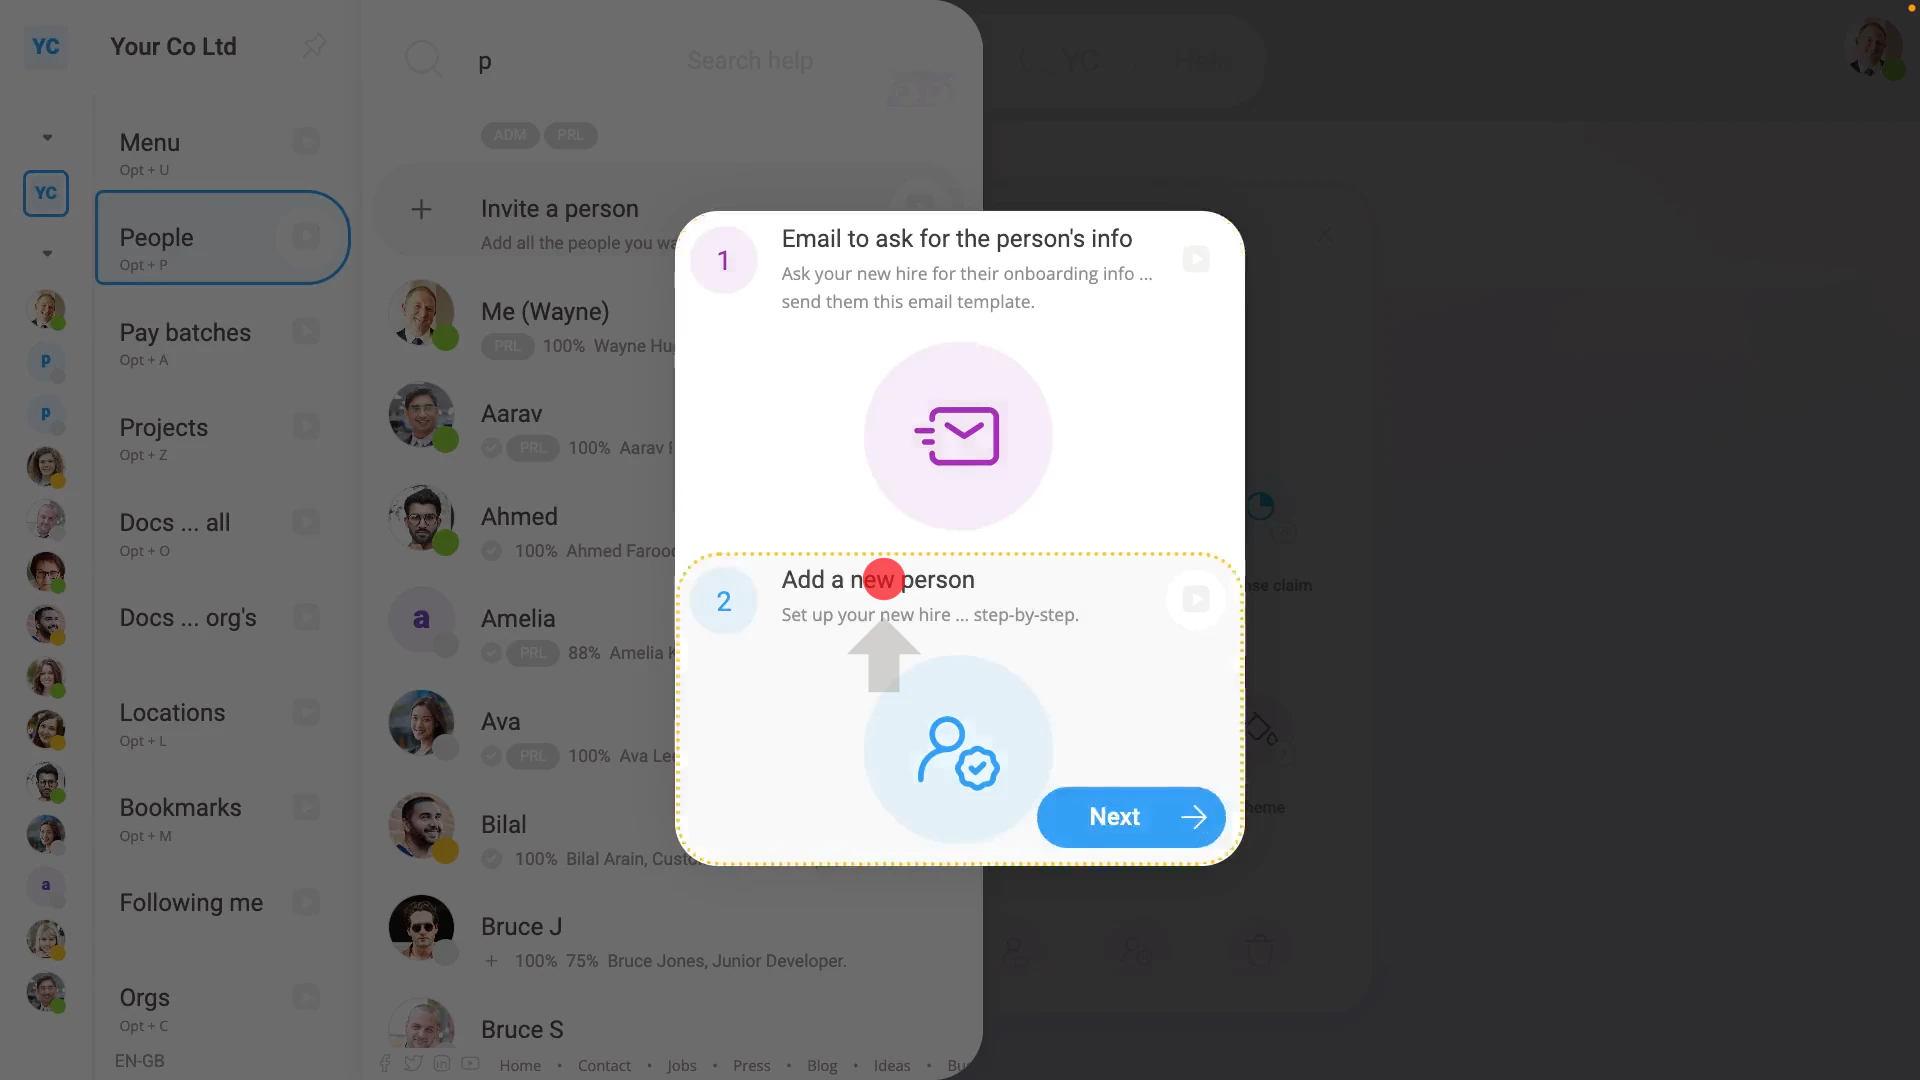
To invite an employee to your org, and do their admin onboarding:
- First, tap: "Menu", "People", then "Invite a person"
- If you've not done so yet, you may want to tap: Request info
- To learn more about emailing for the employee's info, watch the video on: Getting onboarding info
- Once you're ready to enter the employee's info, tap Add a new person. Enter the person's email, then tap: Invite
- An invite email's immediately sent to the employee. The employee can now, or at any point in the future, accept your invitation, set their password, and log in.
- Next, fill out the employee's name.
- Set their employment type.
- And set their payroll group, then tap: Next
- Then when asked about their P45, tap: Yes
- And enter, from their P45, their "Leaving date" from their previous job, and tap: Next
- Then also from their P45, enter the "Employee's National Insurance number", and tap: Next
- Now set their "Title" and "Middle name", and tap: Next
- Now, if the employee's P45 says there's a student loan, then turn it on and fill out their student loan info.
- To learn more about adding student loans, watch the video on: Student loans
- Then tap: Next
- Now enter the employee's tax code from their P45.
- To learn more about tax codes, watch the video on: Setting UK tax codes
- Then tap: Next
- Now, using the amounts printed on their P45, enter their: "Total pay to date ... in previous"
- And then their: "Total tax to date ... in previous"
- To learn more about previous pay and tax to date, watch the video on: Total pay and tax to date
- Then tap: Next
- Normally, you'd continue by filling out the employee's "Right to work" details.
- To learn more about "Right to work", watch the video on: Confirming "Right to work"
- In the example, to skip "Right to work", tap: Skip
- Next, enter the employee's: "Job title"
- Set their: "Job grade"
- And set their: "Date joined"
- Then tap: Next
- Now, set the employee's managers, supervisors, and work location, then tap: Next
- Now, set the employee's contact details, then tap: Next
- Now, to set the employee's pay rate, first decide if you're entering it yearly or hourly.
- Then enter the employee's pay rate amount.
- And set their "Target hours per week", then tap: Next
- Now, in order to verify the employee's National Insurance number, you'll need to enter the person's "Date of birth", "Legal gender", and home address.
- Then tap: Next
- Now set the employee's "National Insurance ... category letter". You won't find it on their P45. Instead, it's up to the employer to select the best one.
- To learn more about NI category letters, watch the video on: The NI category letter
- Then tap: Next
- Now tap: Verify NI
- Their National Insurance number is now verified by HMRC.
- It usually takes about 10 seconds for HMRC to finish processing your verification request.
- As part of the verification, the employee's name, address, legal gender, date of birth, and payroll ID are all sent to HMRC.
- Once HMRC's finished verifying, you'll see the confirmation message, and the employee's National Insurance number is now verified with a blue check.
- Then tap: Next
- Now set the employee's pension settings. To learn more about pensions, watch the video on pensions. Then tap: Next
- Now set the employee's paid time off settings. To learn more about paid time off, watch the video on paid time off. Then tap: Next
- Now set the employee's agreement settings. To learn more about agreements, watch the video on: Agreement doc. Then tap: Next
- You're now in the last part of onboarding, which is sending the onboarding docs.
- Each of the onboarding docs are listed with a blue switch , meaning it's queued to be sent.
- To start the sending process, tap Next, and then: Sign
- You may prefer to tap: Turn on ... one-tap signing
- And then tap: I accept & electronically sign
- Because there's multiple new docs, you may also prefer to tap Turn on ... auto-send, and then: Start auto-send
- And now, once all the onboarding docs are sent for the employee, you'll see a summary of all the employee's onboarding.
- Any steps that you skipped are marked in yellow.
- To go back and do any skipped steps, hover your mouse over it, and tap the arrow button:
- Alternatively, to go back to any step, at any time, tap any of the gray circles (at the top).
- And finally, to close the onboarding process at any time, tap off it.
 Getting onboarding info

Keep in mind that:
- If you close the admin onboarding, everything's still saved, and you can return and continue onboarding again at any time.
- Also, the "Admin onboarding" completion percent is tracked separately to the employee's: "Self onboarding"
- "Admin onboarding" is all the onboarding steps that can only be done by an admin, like setting pay rate.
- "Self onboarding" is all the onboarding steps that can only be done by the new hire, like setting their personal bank account info.
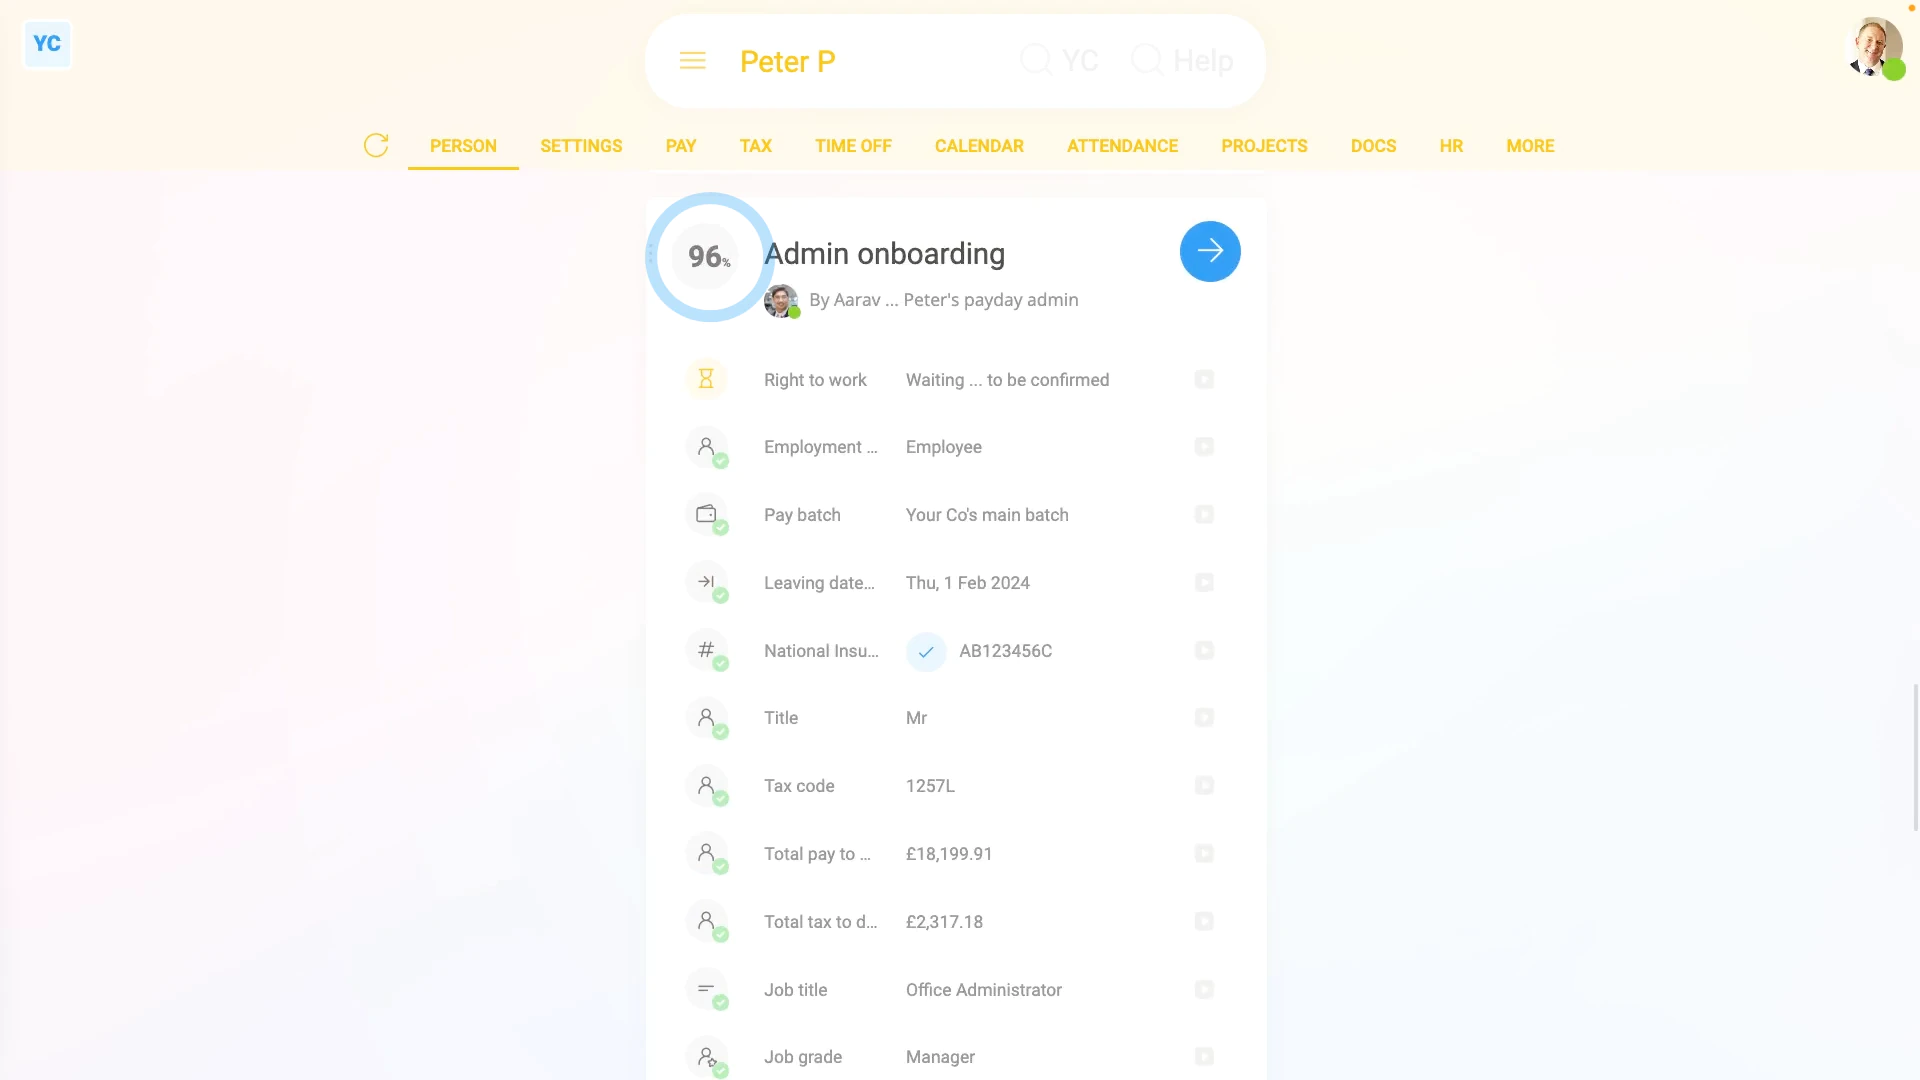
To see an employee's "Admin onboarding" list and completion percent:
- First, select the employee on: "Menu", then "People"
- Then while on the default "Person" tab, scroll down to: "Admin onboarding"
- The percentage (at the top) shows you how complete the onboarding is.
- To continue onboarding, tap the circle: (at the top)
- Or scroll down to the bottom of the onboarding list, and tap: Continue onboarding
- And finally, the onboarding automatically works out what info's needed next, and takes you right there.
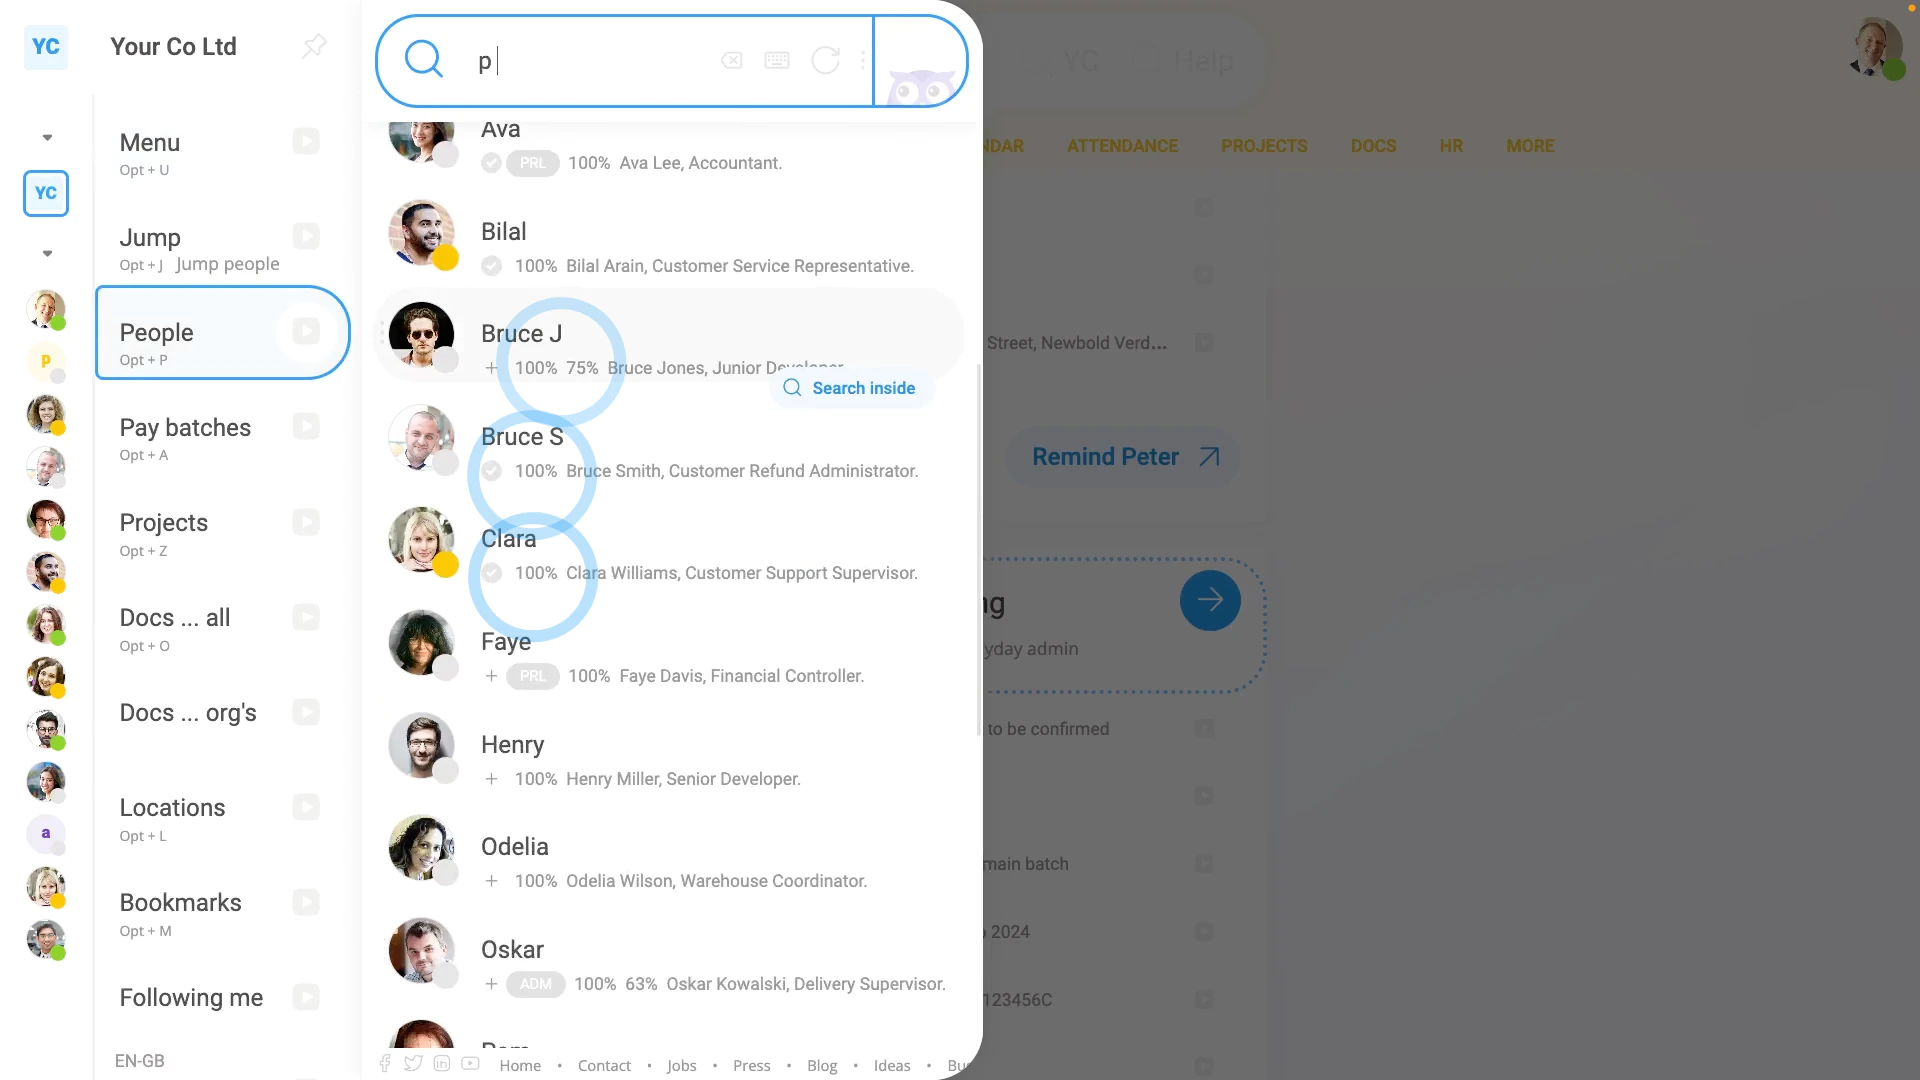
To see onboarding completion percents for all your people:
- First, open the "People" menu on: "Menu", then "People"
- As long as you've got at least "View org admin" permissions, beneath each name you'll see each employee's onboarding percentage.
- If both "Admin onboarding" and "Self onboarding" are 100%, you'll see only a single 100% number.
- When you hover your mouse over the onboarding percentage, you'll see a note explaining it.
- If their "Admin onboarding" and "Self onboarding" are at different percentages, you'll see both numbers.
- You can tap any of the percentages to jump to that employee's onboarding.
- And you'll see the name of the employee who's responsible for getting that employee to 100%.
- Alternatively, to see the full onboarding list for your whole org, go to your org.
- Then tap: "HR", then "People"
- And you'll see two onboarding percent columns.
- And finally, when you tap any of the blue onboarding percentages, it takes you directly to that employee's next onboarding task. Making it the easiest place to complete your org's onboarding to 100%.
You may notice:
- That the onboarding list for some people is different to others.
- Different employment types, for example contractors, ask for different kinds of info.
- As you answer questions about each new hire, the onboarding software intelligently works out which other steps and info need to be added or collected.
- As long as you get each employee to 100% onboarded, you'll likely have all the employment info that's required.
And that's it! That's everything you need to know about inviting a new hire, and doing their admin onboarding!
1. What do I do with the log in invite email, and what's onboarding3. What's the best way to ask for a new hire's info, before joining
www.1st.money/help/Onboarding/2._How_do_I_add_an_employee_to_my_org_and_get_them_fully_set_up