

Org
 4:00
4:00 1:30
1:30 1:55
1:55 1:16
1:16 3:03
3:03 2:52
2:52 2:02
2:02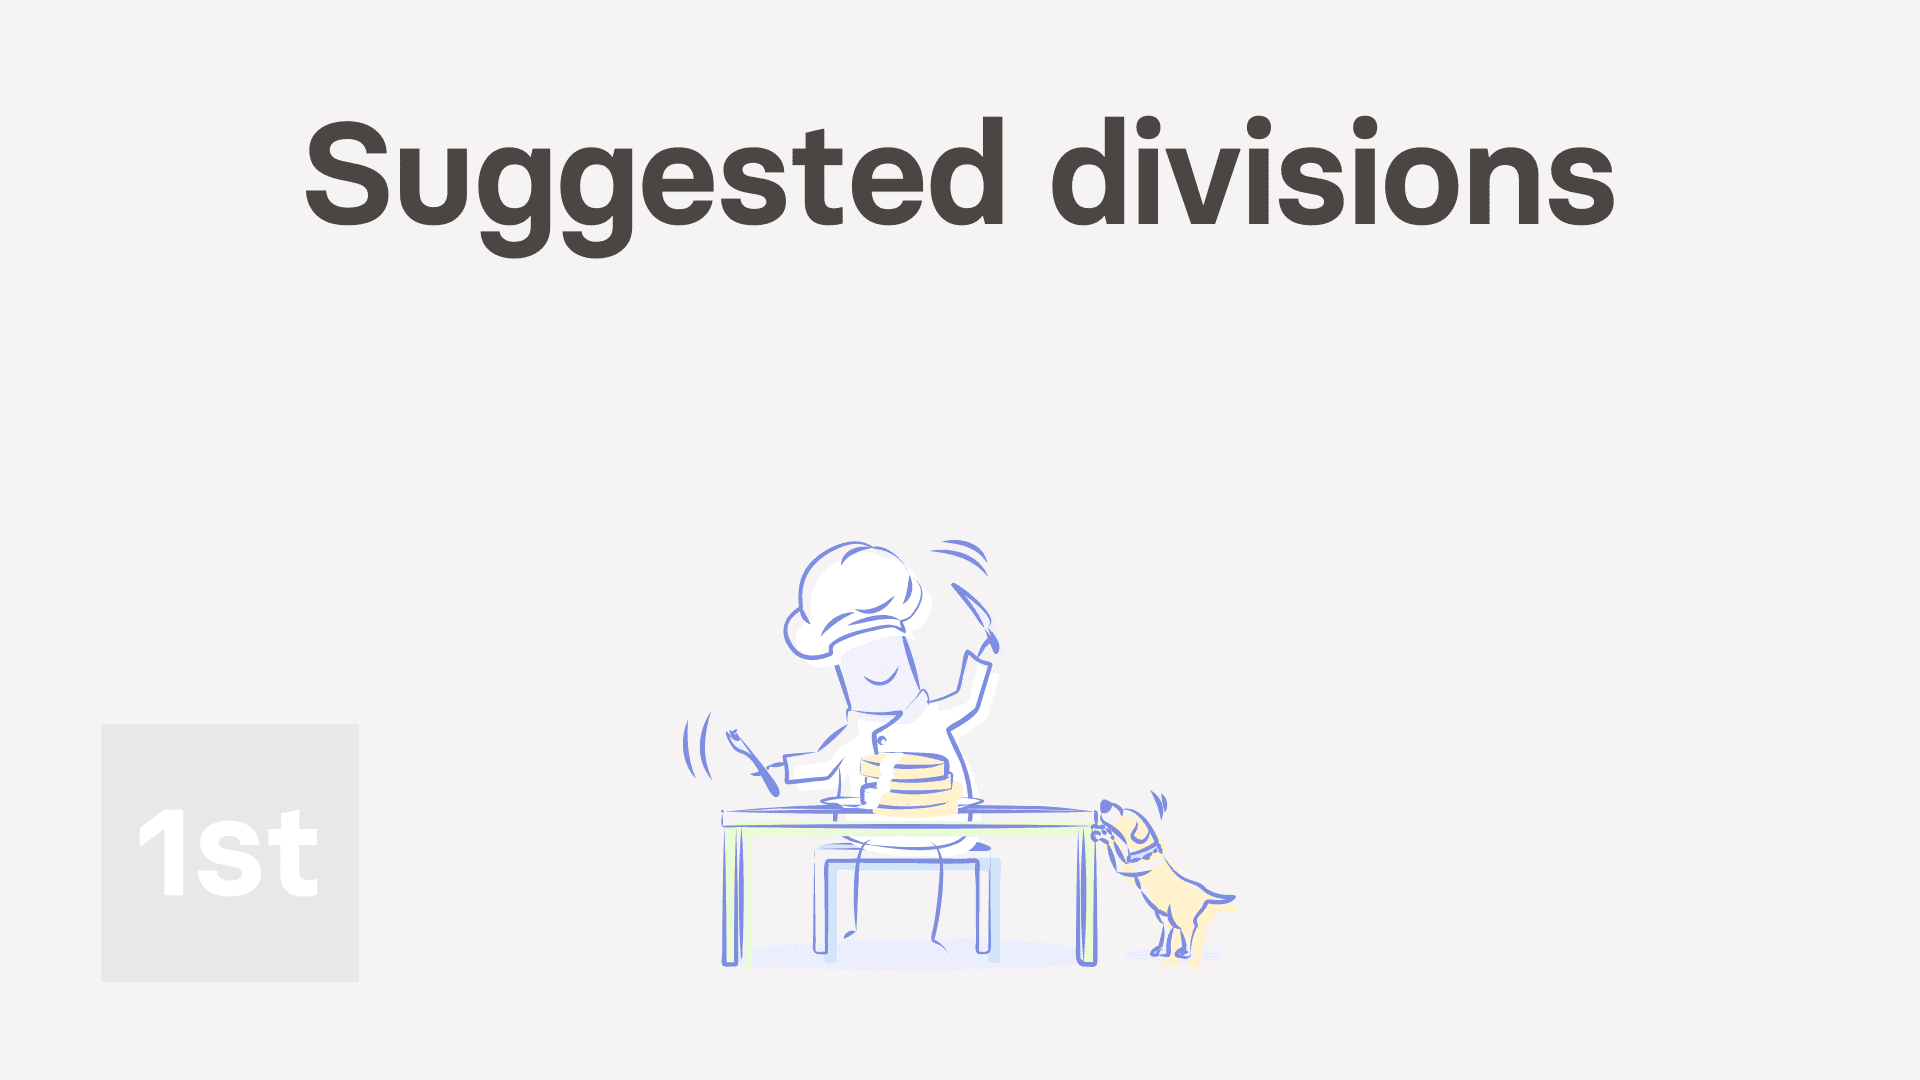 1:56
1:56 1:59
1:59 2:15
2:15 2:04
2:04 2:43
2:43 1:34
1:34 2:41
2:41 2:14
2:141. How do I create a new org and set the name and logo?

 4:00
4:00
"How do I create a new org and set the name and logo?"
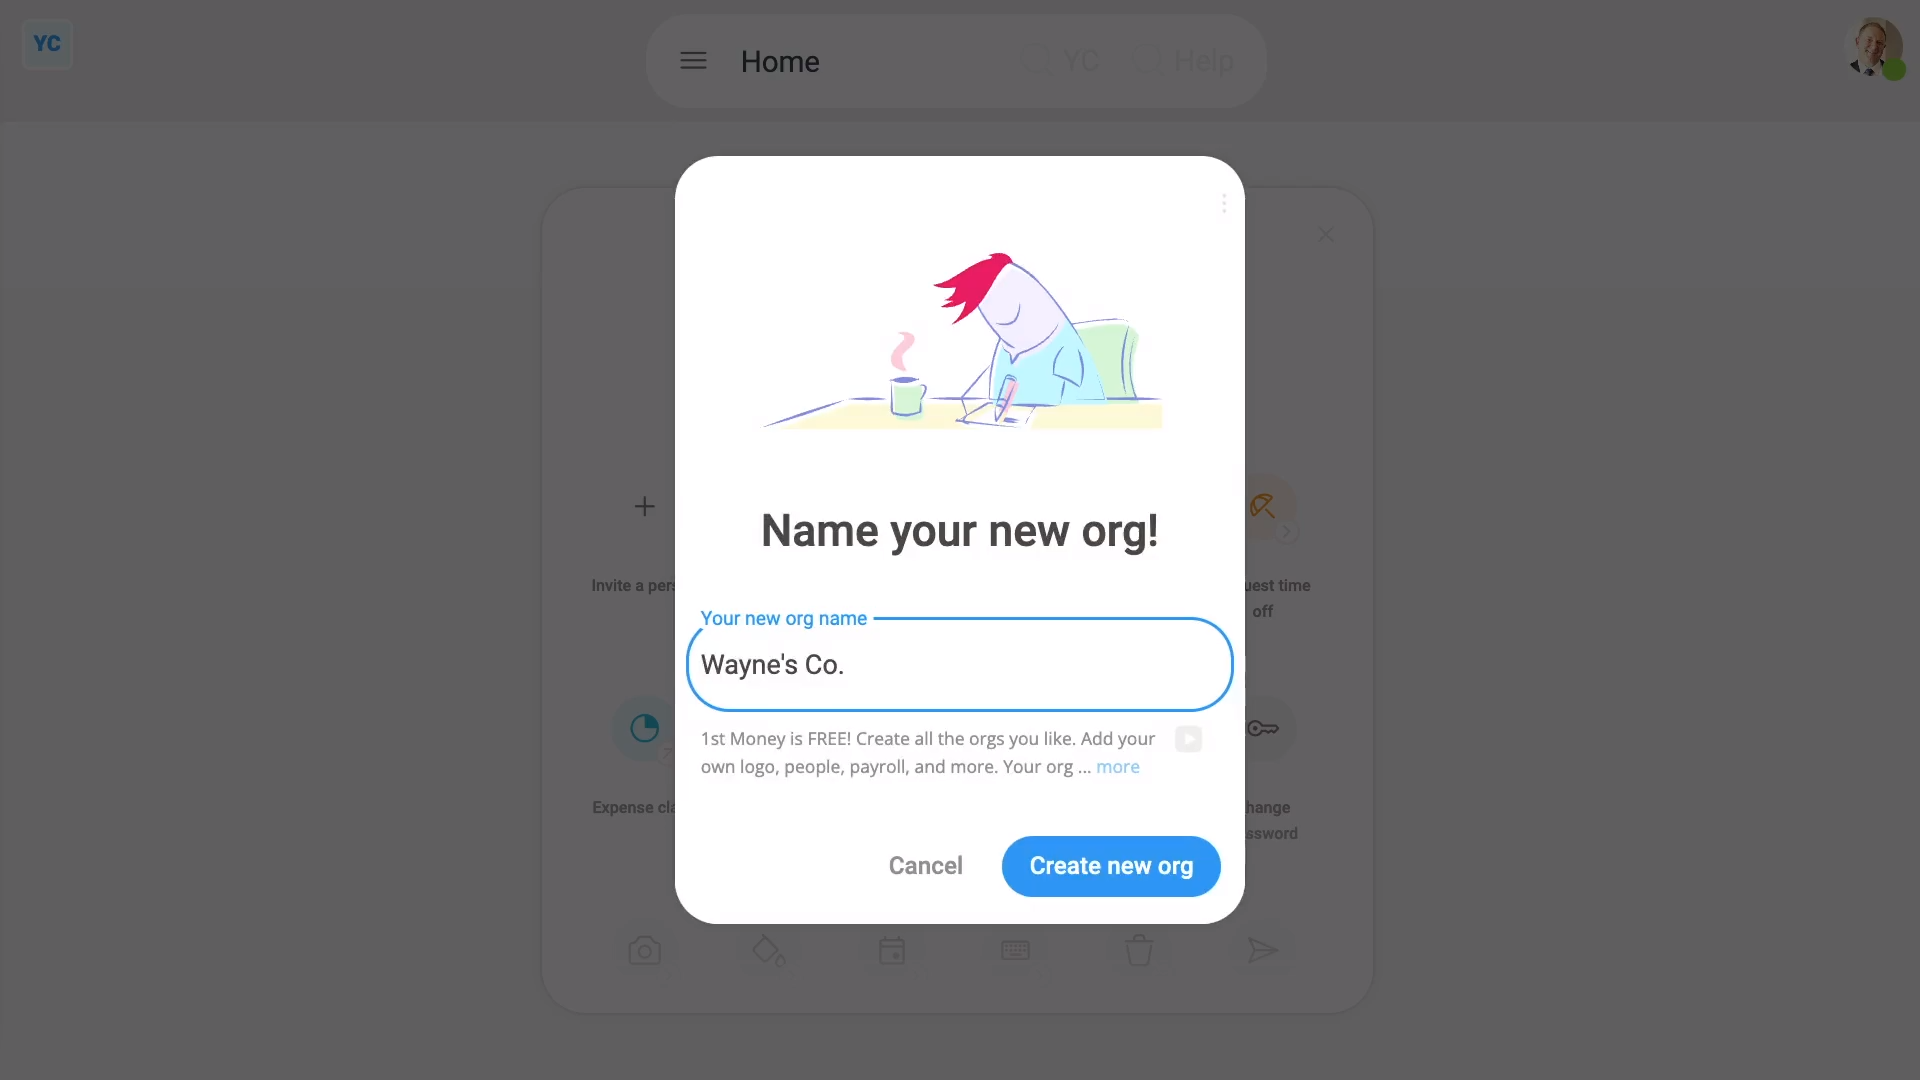
Setting your org's name, logo, and contact details are important steps to creating a new org. Feel free to make as many orgs as you want.
To create a new org:
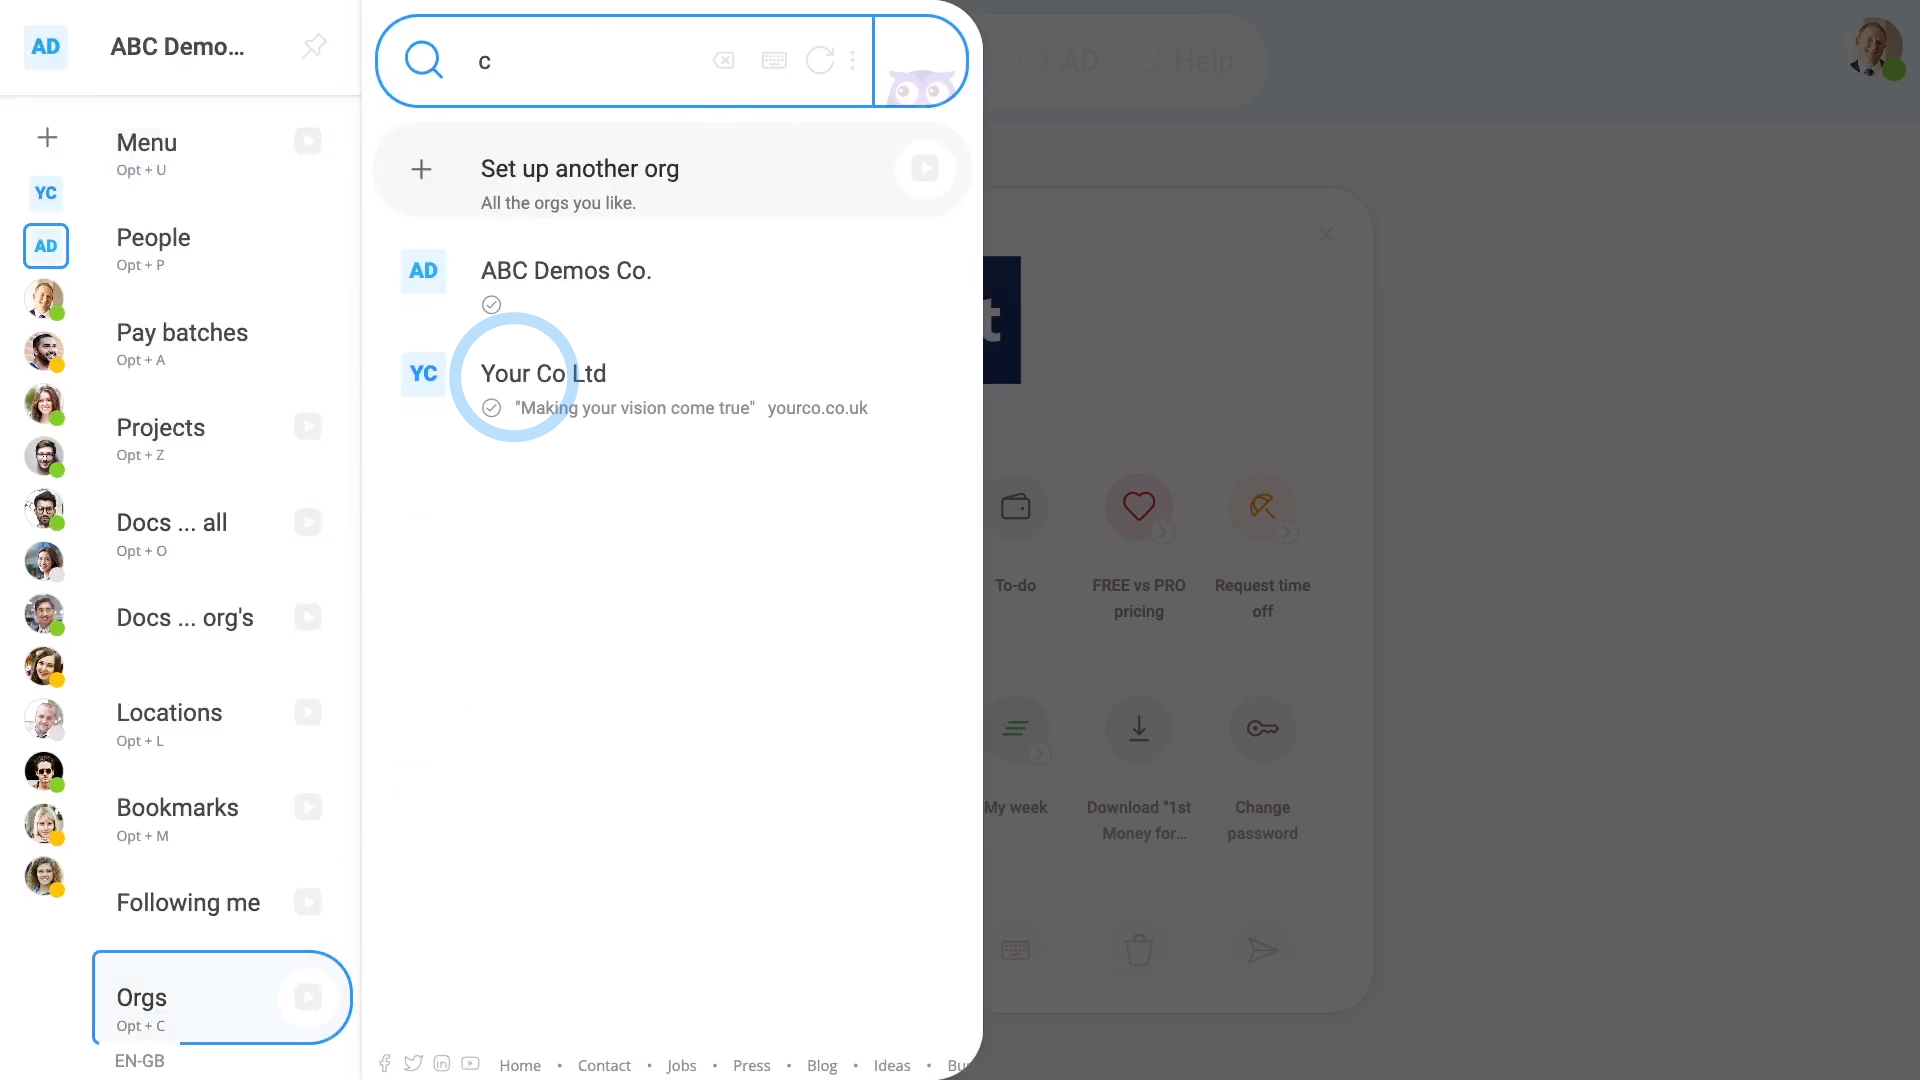
- First, tap: MenuOrgs
- Then tap: Set up another org
- Type in the name of your new org.
- Then tap: Create new org
- And finally, your new org's been created, and you've now been automatically switched into it.
To switch back to your previous org:
- First, tap: MenuOrgs
- And finally, tap your previous org.
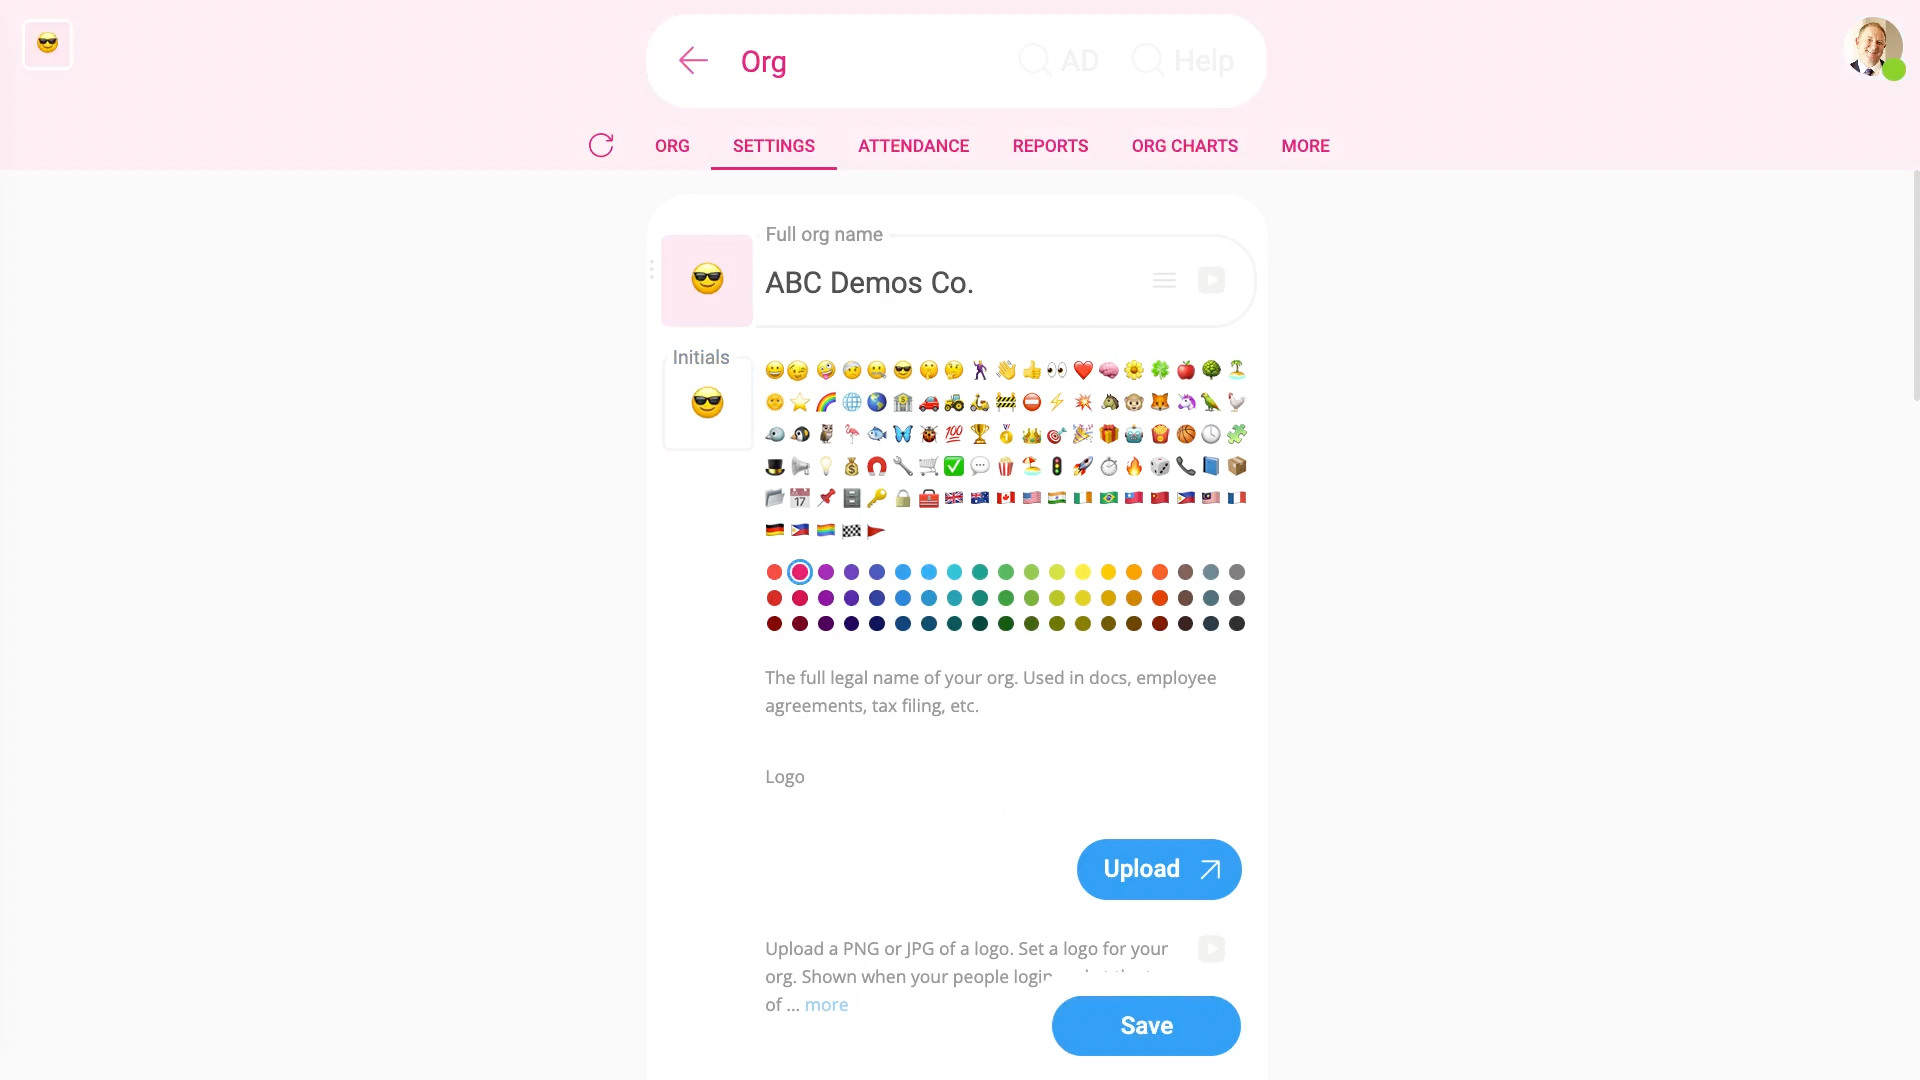
To set your new org's appearance options:
- First, on your home screen, tap: Org
- Then go to: SettingsOrg settings
- Next, tap the square, and pick your preferred colour.
- You can select a picture of your choice.
- Or you can instead type in any two letters of your choice.
- Next, to upload your org's logo, tap: Upload
- You can upload any size logo. Read the notes to understand the best logo image size.
- Next, optionally, type in your: Slogan
- And then type in your: Website domain
- Next, to type in your org's postal address, tap Set address, and type in your address.
- Lastly, you can add up to five org phone numbers, each with their own optional label.
- And finally, tap: Save
You may notice:
- Your uploaded org logo shows on your home screen (when your people first log in).
- It's also shown on your letterhead (on PDFs, docs, and some tax submissions), and it's shown on some system emails to your people.
For advanced usage:
- The same logo is shown on both light, and dark themes, so uploading an image as a transparent png is recommended.
To see how your new org now looks:
- First, tap: Preview letterhead
- Now you'll get an idea of how your org looks for PDFs and documents.
- To see how your org looks in emails, tap: SettingsDefault email signature
- Then tap: See your sig (at the bottom)
- You'll see a preview of how your email signature now looks (at the bottom).
- And finally, tap MenuHome to see how your new org looks to people when logging in.
With a few seconds work, you've got a beautifully set up org. Every doc or email that you send is now nicely presented.
Keep in mind that:
- Everyone can make their own new orgs. You don't have to have admin permissions to make your own org.
- There's no limit to the number of orgs you can create. 1st Money is free!
- Your orgs stay private. No one else sees them until you invite them.
And that's it! That's everything you need to know about setting your org's appearance!
How do I change which day each week starts on?
 1:30
1:30
"How do I change which day each week starts on?"
Some people, or cultures, prefer that their week starts on a Sunday, Monday, or some other day of the week.
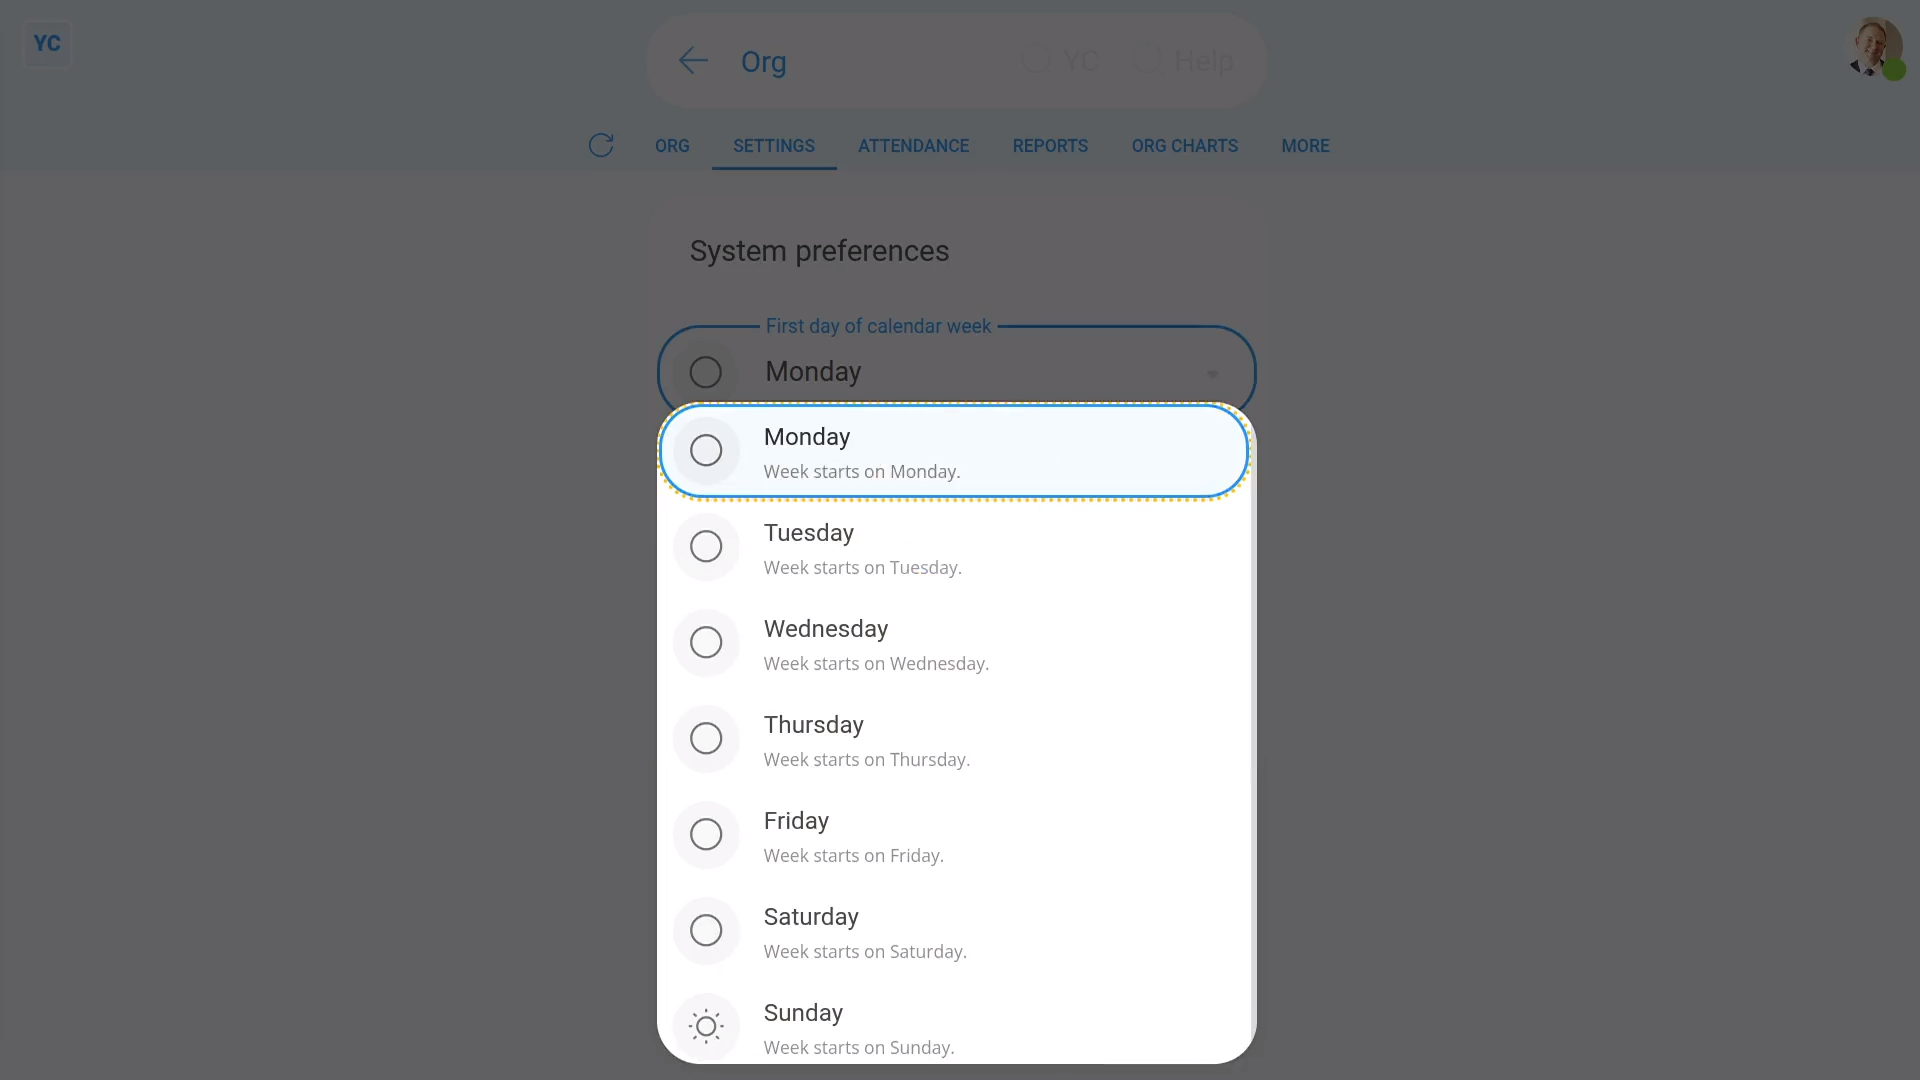
To set which day appears as your org's first week day:
- First, open your org on: MenuOrgs
- Then tap: SettingsSystem preferencesCalendar week's first day
- Select which day you'd like each week to start on.
- And finally, tap: Save
To see how setting which day each week starts on looks:
- First, as you visit each of the following, you'll notice that each now start on your selected day of the week.
- Including all calendars.
- All "Timelines ... weekly" reports.
- All "Hours weekly" reports.
- And finally, even all target hours per week.
Keep in mind that:
- The "day each week starts on" setting applies equally to every person in your org.
- It can't be set differently for each person.
- Also, the "day each week starts on" setting is purely visual and doesn't affect paydays or pay in any way.
And that's it! That's everything you need to know about changing which day each week starts on!
How do I make changes from org charts?
 1:55
1:55
"How do I make changes from org charts?"
If you're an admin, org charts are a great place to review your org's layout, and make changes.
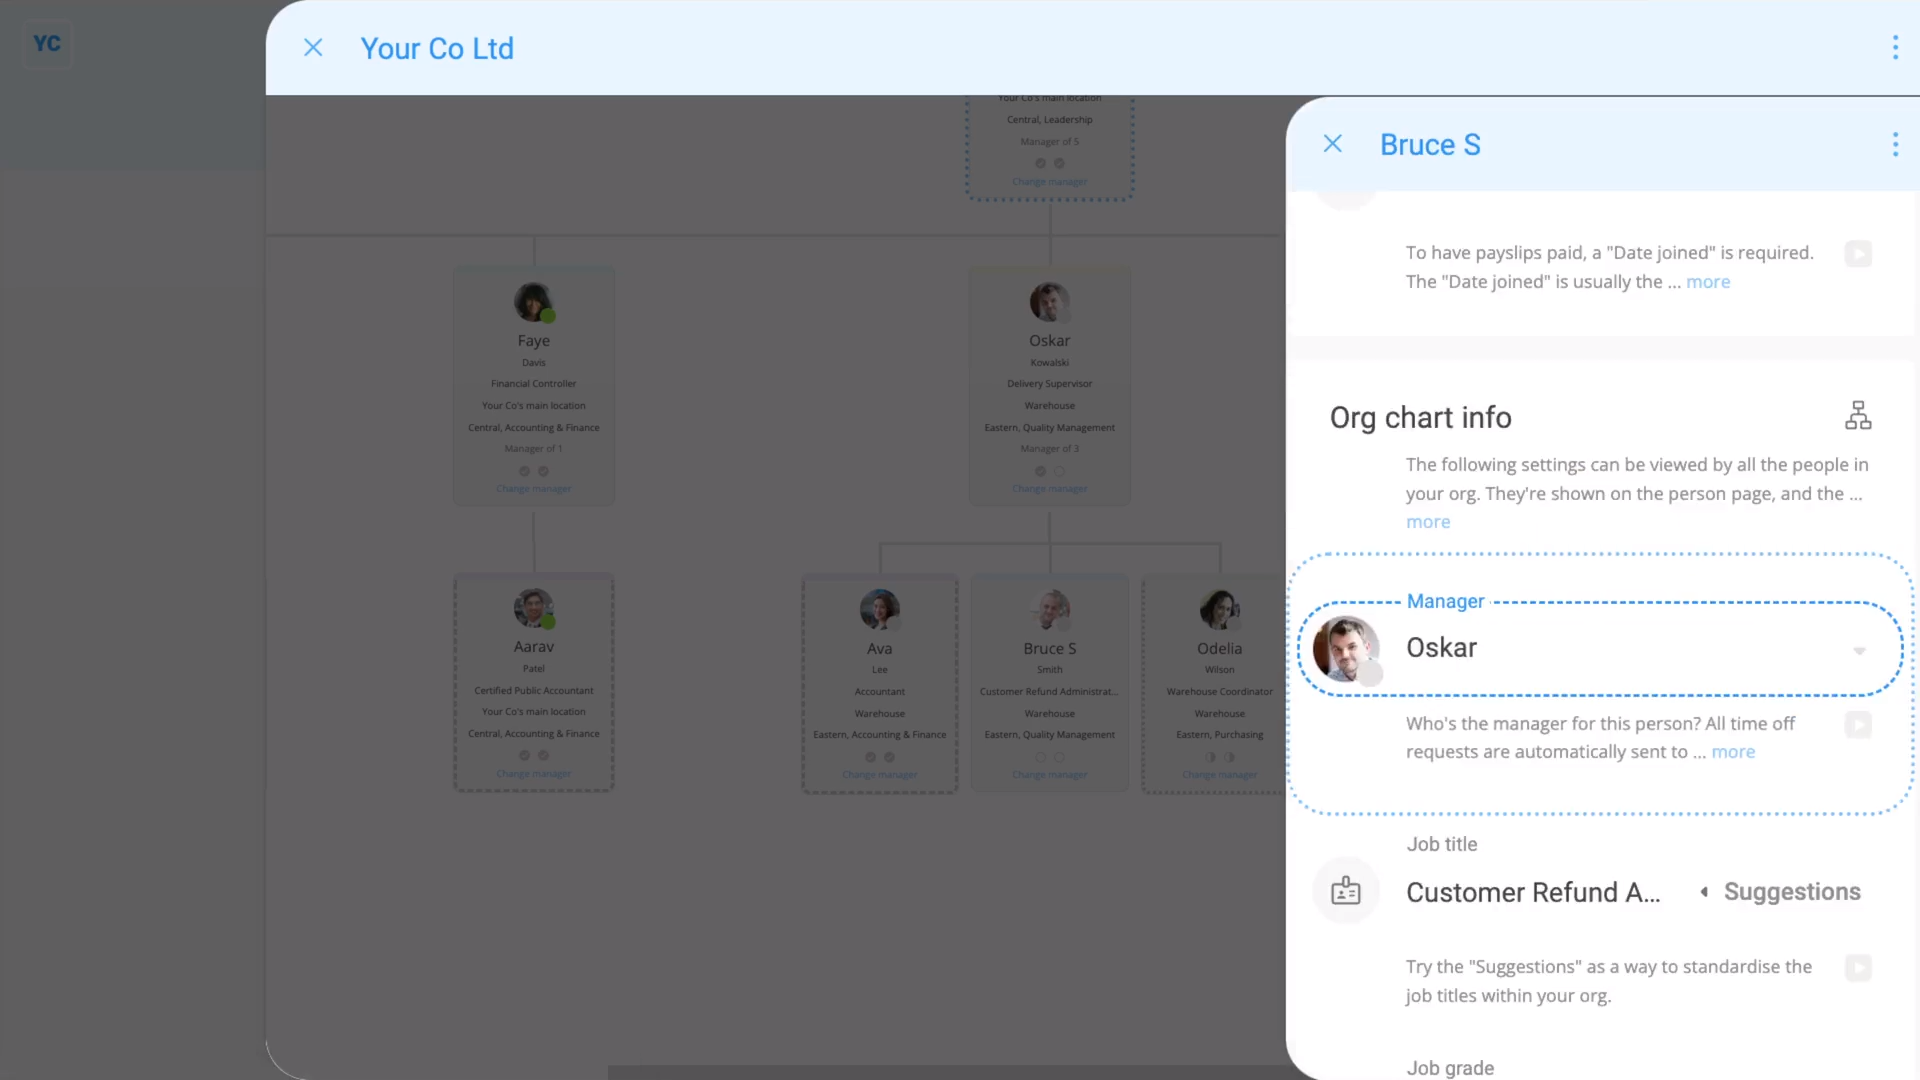
To change a person's manager from your "Management" org chart:
- First, open your org on: MenuOrgs
- Then tap: Org chartsManagement
- Once it's open, find the person you'd like to change manager for.
- And tap: Change manager
- Once it slides out on the right, select the person's new manager.
- And finally, your org chart instantly updates, and you'll see that the person's now been moved under their new manager.
To change other info from any org chart:
- As an admin, you can tap almost any info on your org charts, and make changes.
- For example, if you tap the job grade colour, it takes you to the person's "Job grade" setting.
- And if you tap the permission circles, it takes you to the person's permission settings.
- Feel free to tap around and make as many changes as you like, until things look the way you want.
Keep in mind that:
- The same tap and change approach also works for the "Payroll" and "Location" org charts.
And that's it! That's everything you need to know about making changes from org charts!
How do I save an org chart to a PDF?
 1:16
1:16
"How do I save an org chart to a PDF?"
Sometimes it's helpful to save a PDF copy of an org chart, so you can print it and put it on the wall.
To save a PDF of any org chart:
- First, open your org on: MenuOrgs
- Then tap: Org chartsManagement
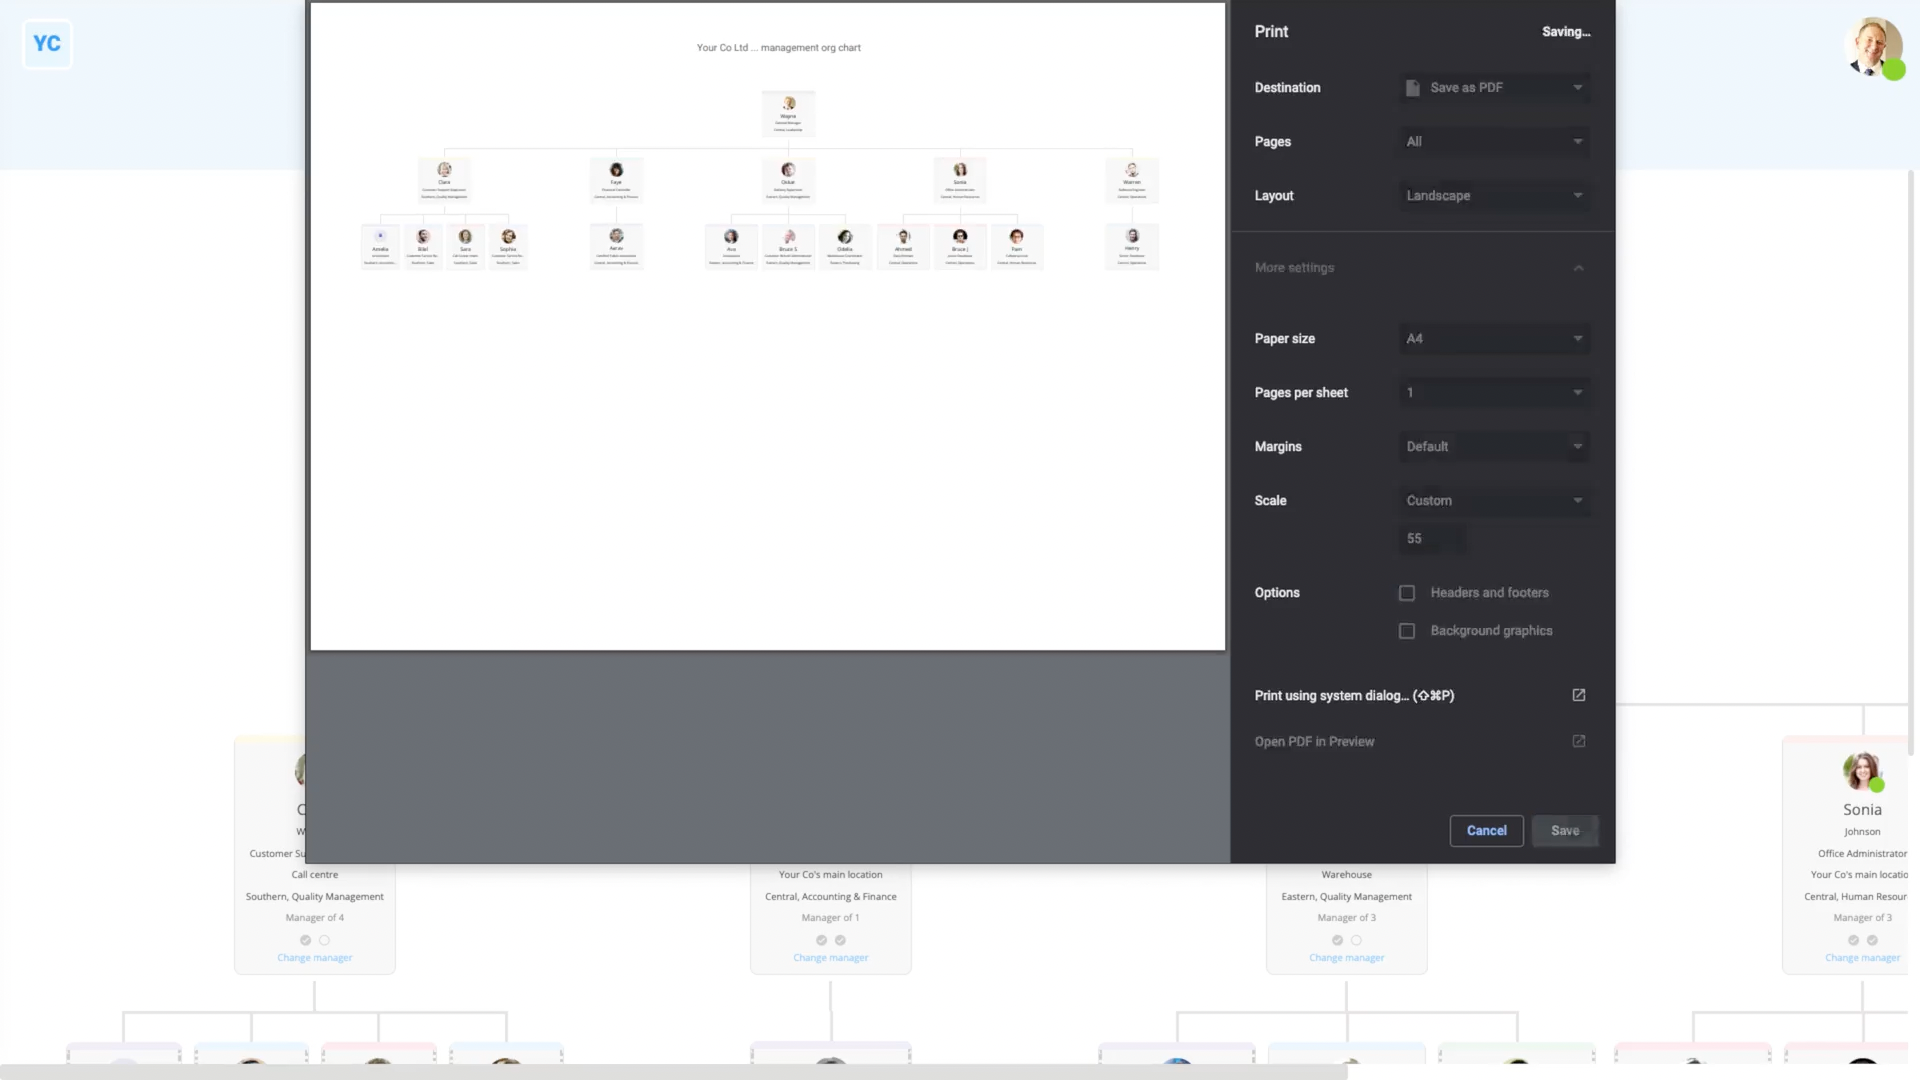
- Then tap: Print (at the top)
- The first thing you'll notice is that in the print version, people's last name, location, permissions, and other info is hidden. The info hiding is to maintain people's privacy.
- In the print settings, set "Destination" to: "Save as PDF"
- Next, set "Layout" to: "Landscape"
- Next, tap "More settings" and set "Scale" to: "Customise"
- Then shrink the size until it fits for you.
- Untick: "Headers and footers"
- Then tap: Save
- And finally, you'll have a nice looking PDF of your org chart.
And that's it! That's everything you need to know about saving an org chart to a PDF!
How do I use assessment metrics?
 3:03
3:03
"How do I use assessment metrics?"
Assessment metrics are a way to rate your org's people with labelled attainment scores ranging from 0 to 100%.
Each person can see, but not change, their own scores. Only org admins can see everyone's scores, and only org admins can change them.
To change your org's existing assessment metrics:
- First, open your org on: MenuOrgs
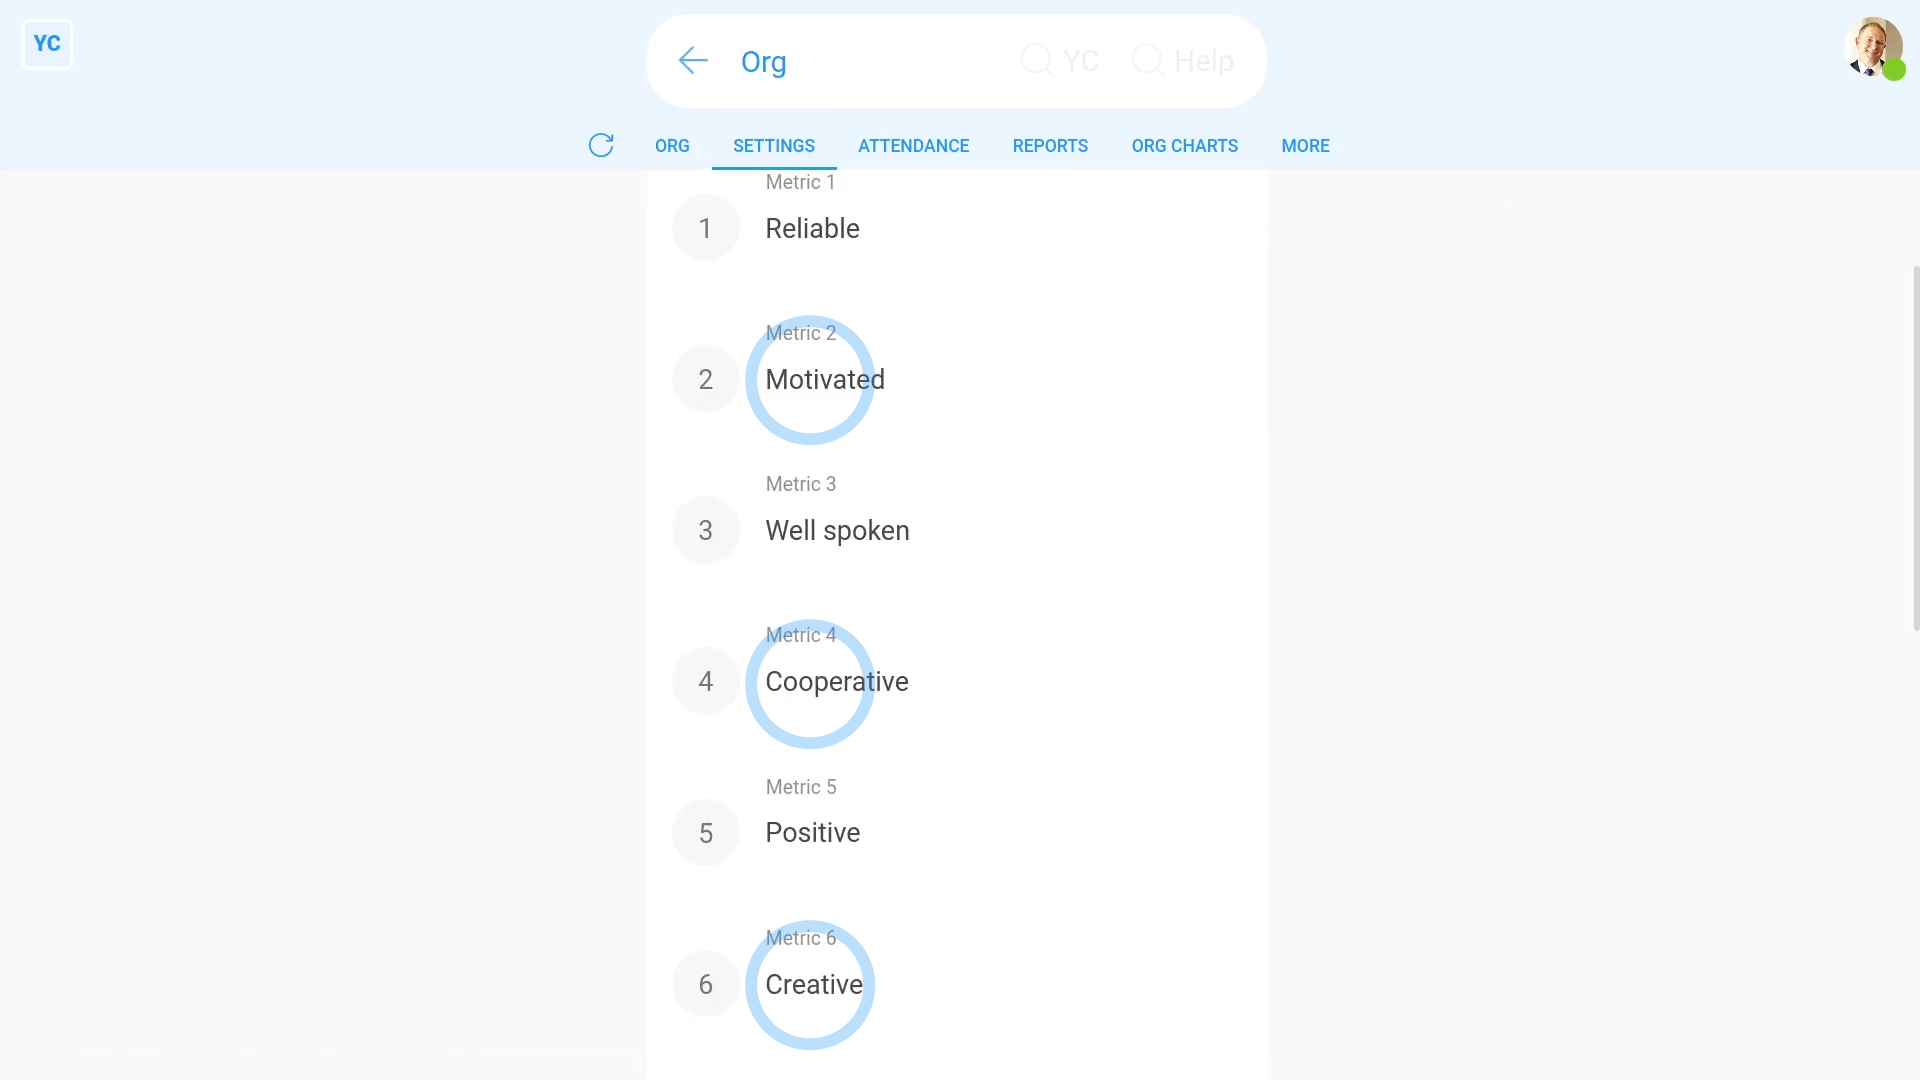
- Then tap: HRAssessment metrics
- You'll now see all the existing assessment metrics.
- You're welcome to change the assessment metrics names to match the needs of your org.
- Then tap: Save
- And finally, you can always come back later to add more.
Keep in mind that:
- Changing the name of an assessment metric is going to change the name for everyone in your org.
- However, the percentages that had previously been saved is going to remain the same.
To add a new assessment metric:
- First, open your org on: MenuOrgs
- Then tap: HRAssessment metrics
- Scroll down and find an empty assessment metric slot.
- And type in the name of your new assessment metric.
- Then tap: Save
- And finally, to see your new assessment metric, scroll to the top and tap: See yours
Also remember that:
- Even if you've got full org admin permissions, you still can't change your own assessment metrics.
- Ask another org admin to change it for you.
To see and update assessment metrics on your org's "People" report:
- First, to open your org's "People" report, first tap: HRPeople
- Once it's open, you'll see a list of people.
- You may prefer to tap the tick boxes (at the start of any row).
- With the highlight turned on, it's easier to keep track of rows as you scroll across.
- When you scroll across, you'll see a grid of scores for each person and each metric.
- You'll notice that any recent assessment metric changes have already shown up.
- You can now tap the empty assessment metric for each person, and set a percentage value, one-by-one.
- And finally, once you tap Save, the assessment metric instantly updates.
You may notice:
- Assessment metrics are an optional feature.
- Assessment metrics have no effect on people's pay, permissions, or anything else.
And that's it! That's everything you need to know about using assessment metrics!
How do I use job grades?
 2:52
2:52
"How do I use job grades?"
Job grades are an optional way to categorise your org's people into labelled colour groupings.
To change your org's existing job grades:
- First, open your org on: MenuOrgs
- Then tap: HRDocs ... job grade onboarding
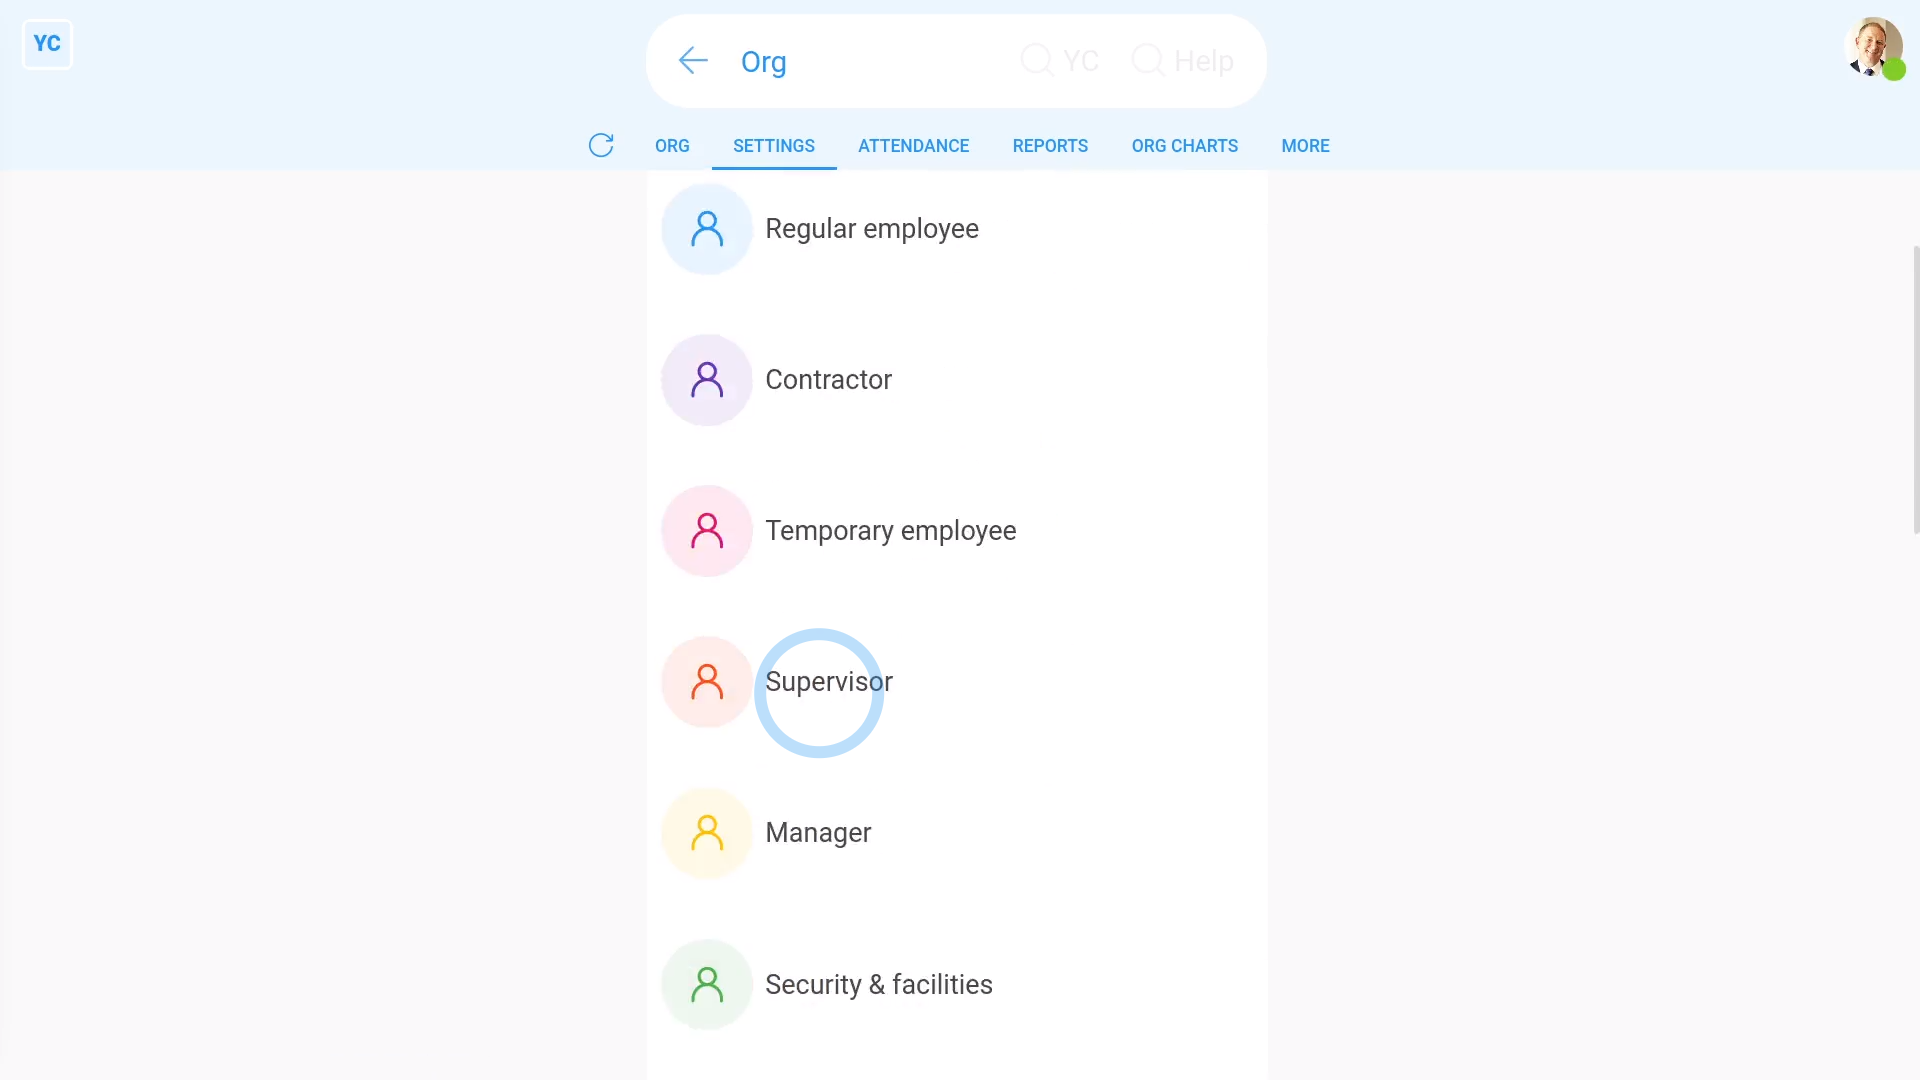
- You'll now see all the existing job grades.
- You're welcome to change the name and colour of the existing job grades to match the needs of your org.
- You may decide to organise job grades by employment type, such as regular employees, contractors, or managers.
- Or you may decide to organise job grades by job function, such as security clearance, location, customer function, or anything else.
- Then tap: Save
- And finally, you can always come back later to add more.
To add a new job grade:
- First, open your org on: MenuOrgs
- Then tap: HRDocs ... job grade onboarding
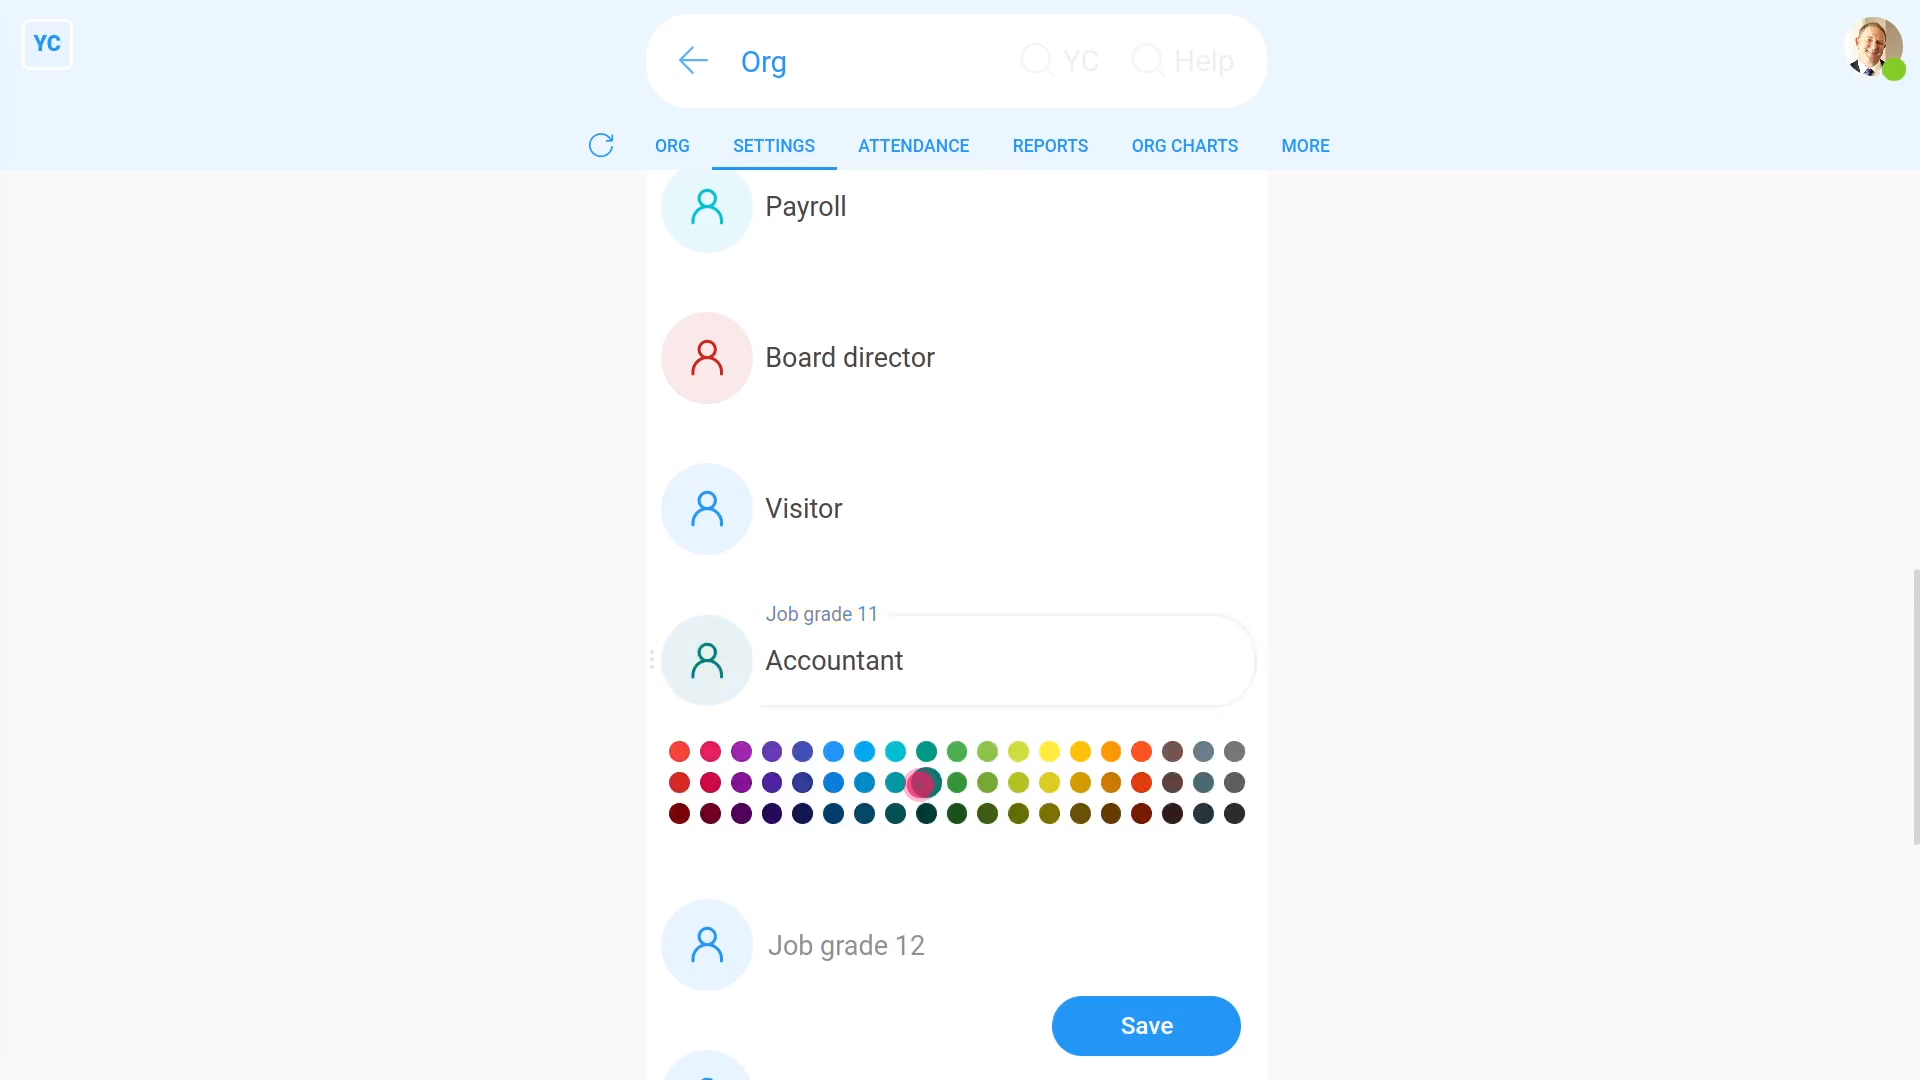
- Scroll down and find an empty job grade slot.
- And type in the name of your new job grade.
- Then tap the circle to set the colour.
- Next, once you're happy with the new name and colour, tap: Save
- And finally, to see your new job grade, scroll to the top and tap: See yours
To set another person's job grade:
- First, select the person on: MenuPeople
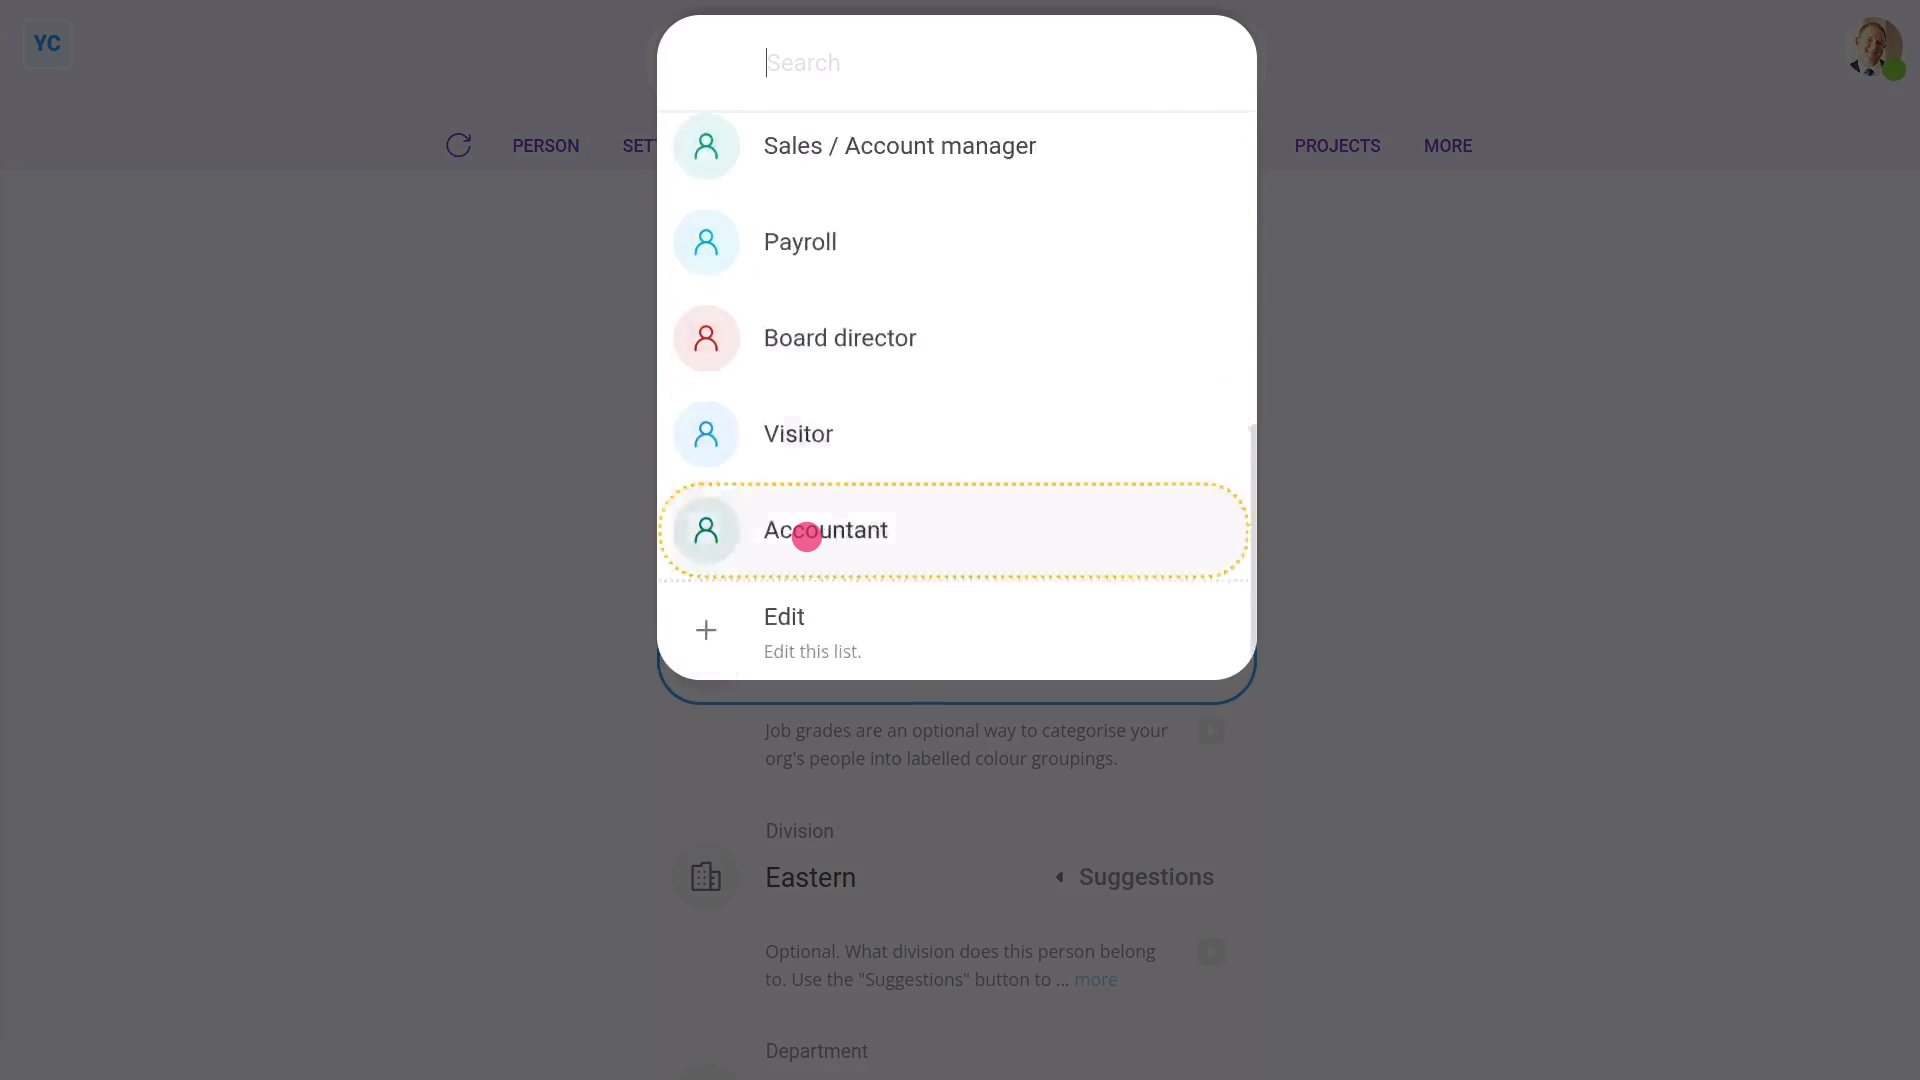
- Then tap: SettingsJob settingsJob grade
- Then select their new job grade.
- Then tap: Save
- And finally, you'll see the top bar change to the new job grade colour.
Keep in mind that:
- You'll see the new job grade colour, both on the person top bar, and on org charts.
- Also remember that job grades are a purely visual feature to help you organise your people.
- Job grades have no effect on people's pay, permissions, or anything else.
And that's it! That's everything you need to know about using job grades!
How do I use suggested departments?
 2:02
2:02
"How do I use suggested departments?"
Suggested departments are a way to standardise the department names used in your org. Rather than having inconsistent spellings or capitalization of department names, instead set your org's official list once. Then your admins can pick department names from the list.
To change your org's existing suggested departments:
- First, open your org on: MenuOrgs
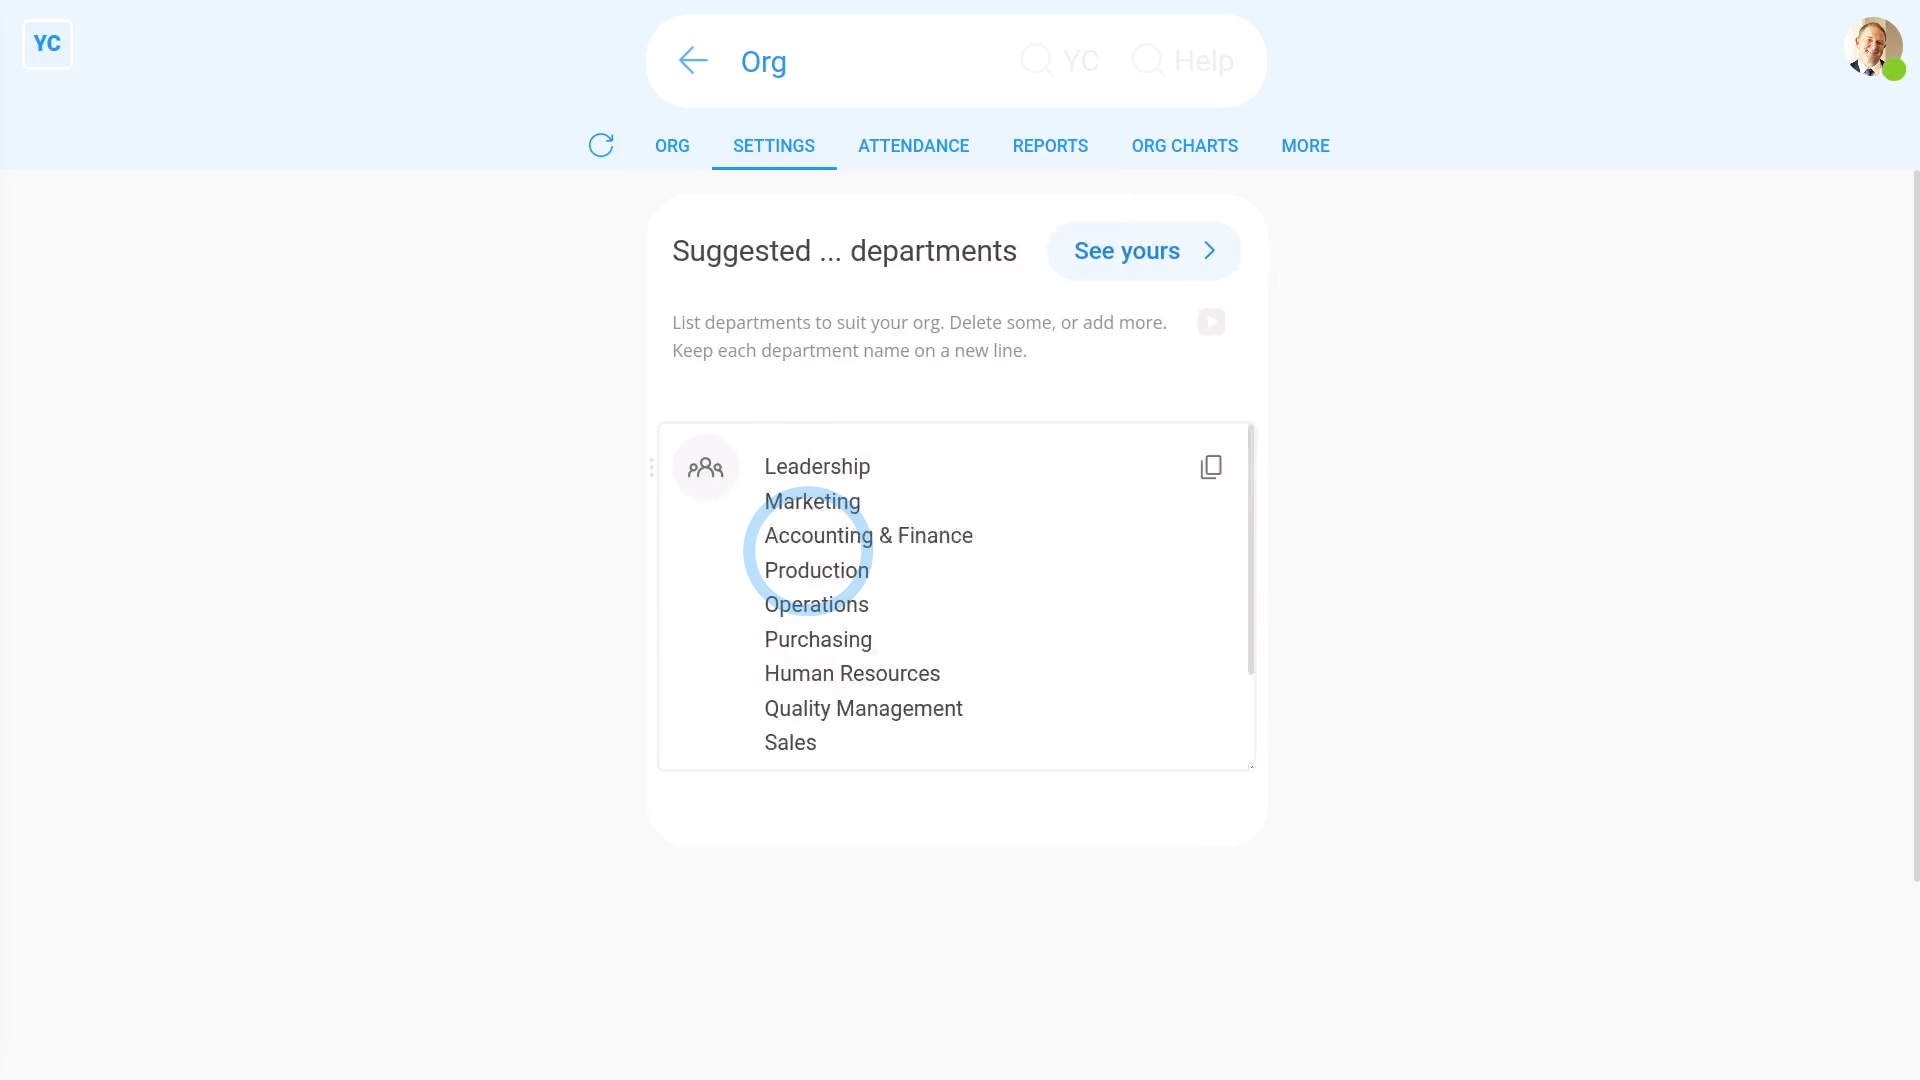
- Then tap: SettingsSuggested ... departments
- You'll now see a list of the default department names.
- Next, delete out all the existing default department names.
- Then type in the department names that your org would actually use.
- Check that each department name is on a different line.
- Once you're happy with your list of suggested department names, tap: Save
- And finally, to see your new suggested departments, scroll to the top and tap: See yours

To set another person's department:
- First, select the person on: MenuPeople
- Then tap: SettingsJob settingsDepartment (optional)
- Then next to "Department", tap Suggest, and select their new department.
- And finally, tap: Save
Keep in mind that:
- Changes to a person's department are applied instantly.
- And departments can always be seen by everyone inside your org.
- Also, departments have no effect on people's pay, permissions, or anything else.
And that's it! That's everything you need to know about using suggested departments!
How do I use suggested divisions?
 1:56
1:56
"How do I use suggested divisions?"
Suggested divisions are a way to standardise the division names used in your org. Rather than having inconsistent spellings or capitalization of division names, instead set your org's official list once. Then your admins can pick division names from the list.
To change your org's existing suggested divisions:
- First, open your org on: MenuOrgs
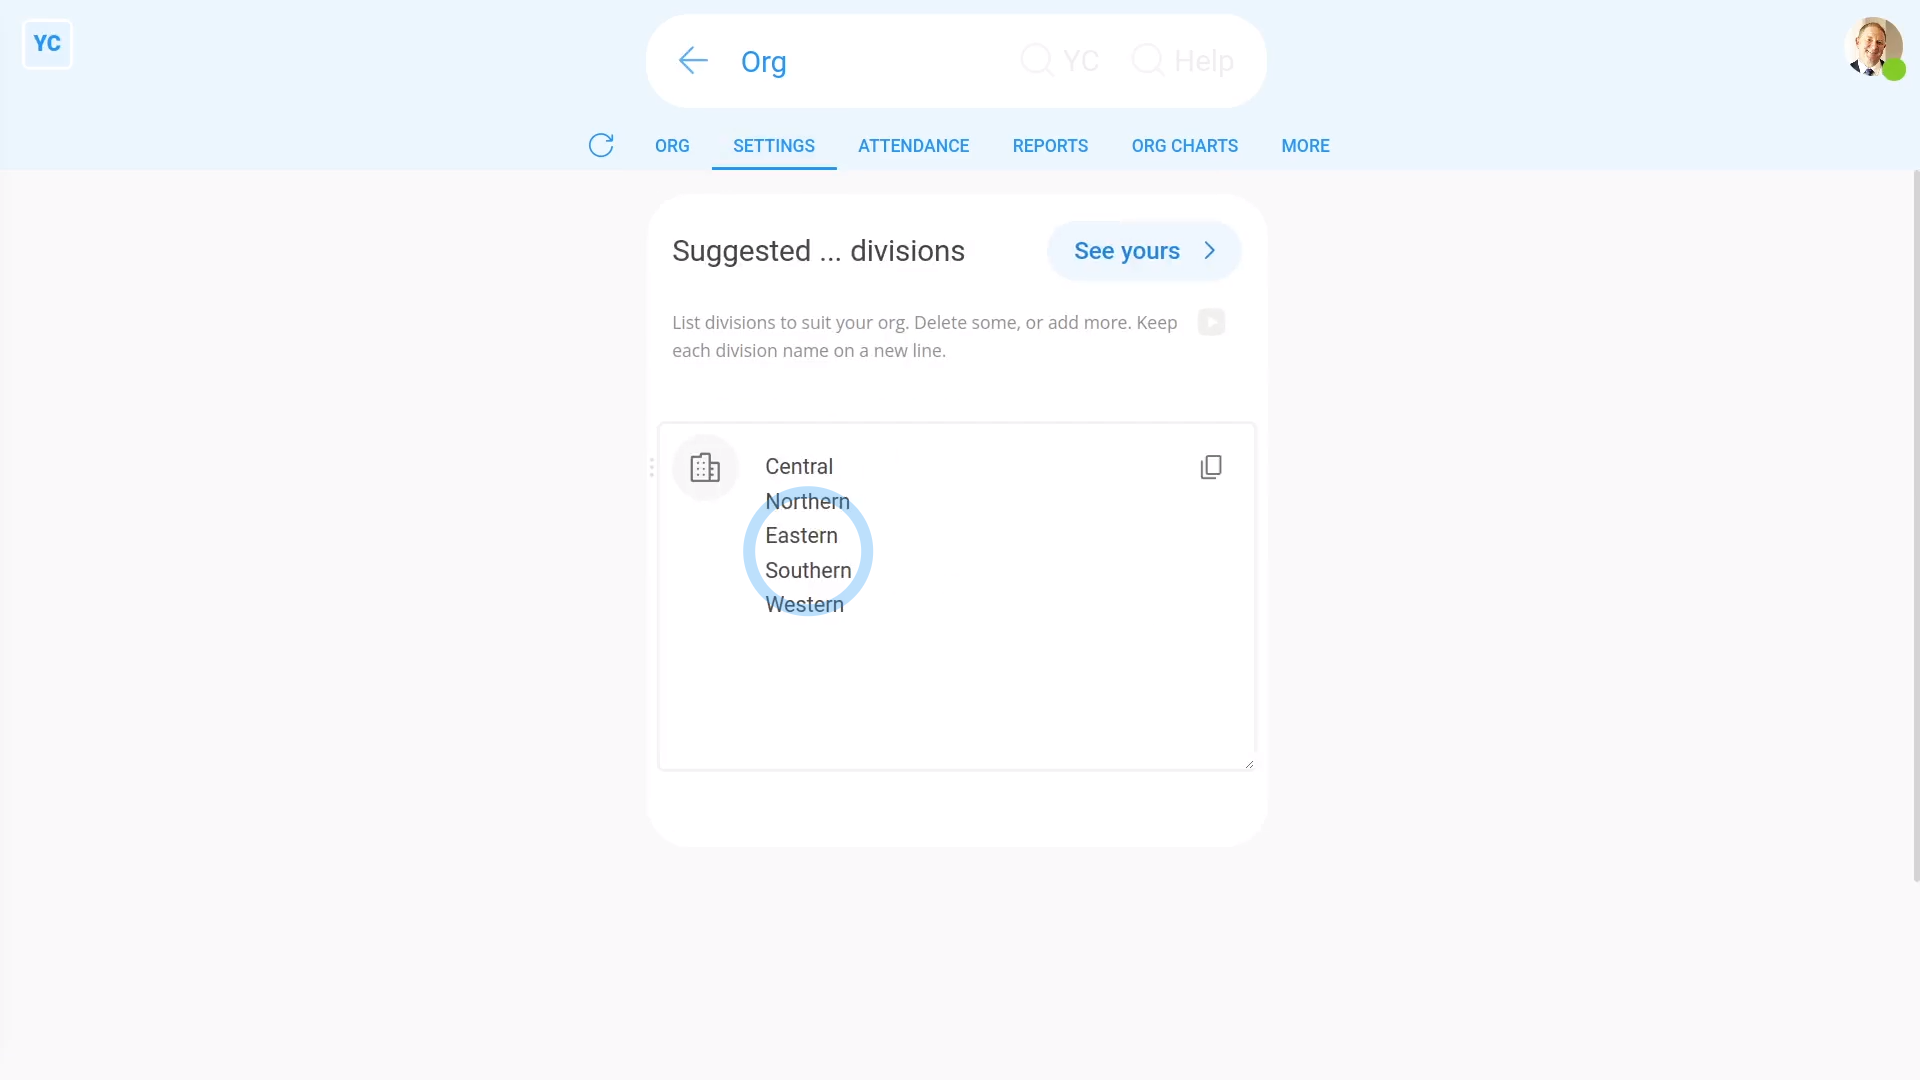
- Then tap: SettingsSuggested ... divisions
- You'll now see a list of the default division names.
- Next, delete out all the existing default division names.
- Then type in the division names that your org would actually use.
- Check that each division name is on a different line.
- Once you're happy with your list of suggested division names, tap: Save
- And finally, to see your new suggested divisions, scroll to the top and tap: See yours

To set another person's division:
- First, select the person on: MenuPeople
- Then tap: SettingsJob settingsDivision (optional)
- Then next to "Division", tap Suggest, and select their new division.
- And finally, tap: Save
Keep in mind that:
- Changes to a person's division are applied instantly.
- And divisions can always be seen by everyone inside your org.
- Also, divisions have no effect on people's pay, permissions, or anything else.
And that's it! That's everything you need to know about using suggested divisions!
How do I use suggested job titles?
 1:59
1:59
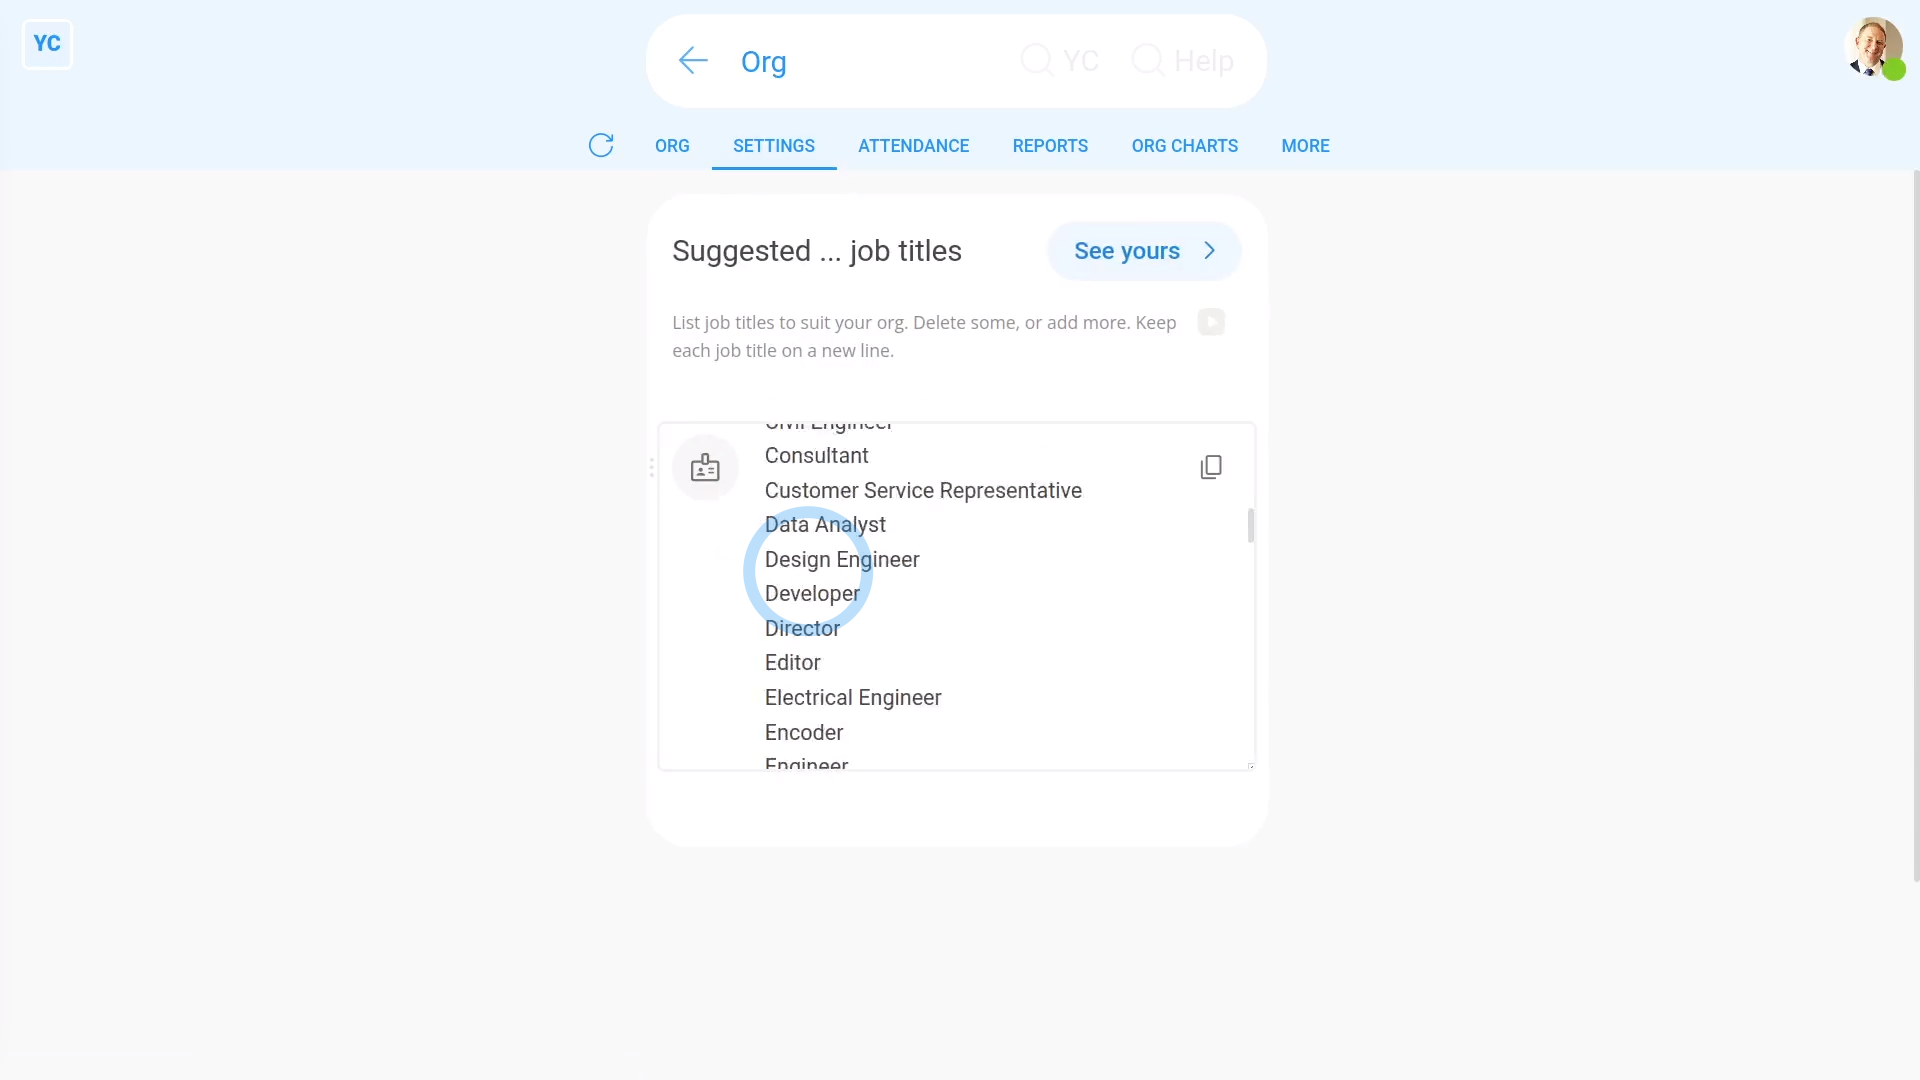
"How do I use suggested job titles?"
Suggested job titles are a way to standardise the job titles used in your org. Rather than having inconsistent spellings or capitalization of job titles, instead set your org's official list once. Then your admins can pick job titles from the list.
To change your org's existing job titles:
- First, open your org on: MenuOrgs
- Then tap: SettingsSuggested ... job titles
- You'll now see a list of hundreds of the most common job titles.
- Next, delete out all the existing default job titles.
- Then type in the job titles that your org would actually use.
- Check that each job title name is on a different line.
- Once you're happy with your list of suggested job titles, tap: Save
- And finally, to see your new job title, scroll to the top and tap: See yours
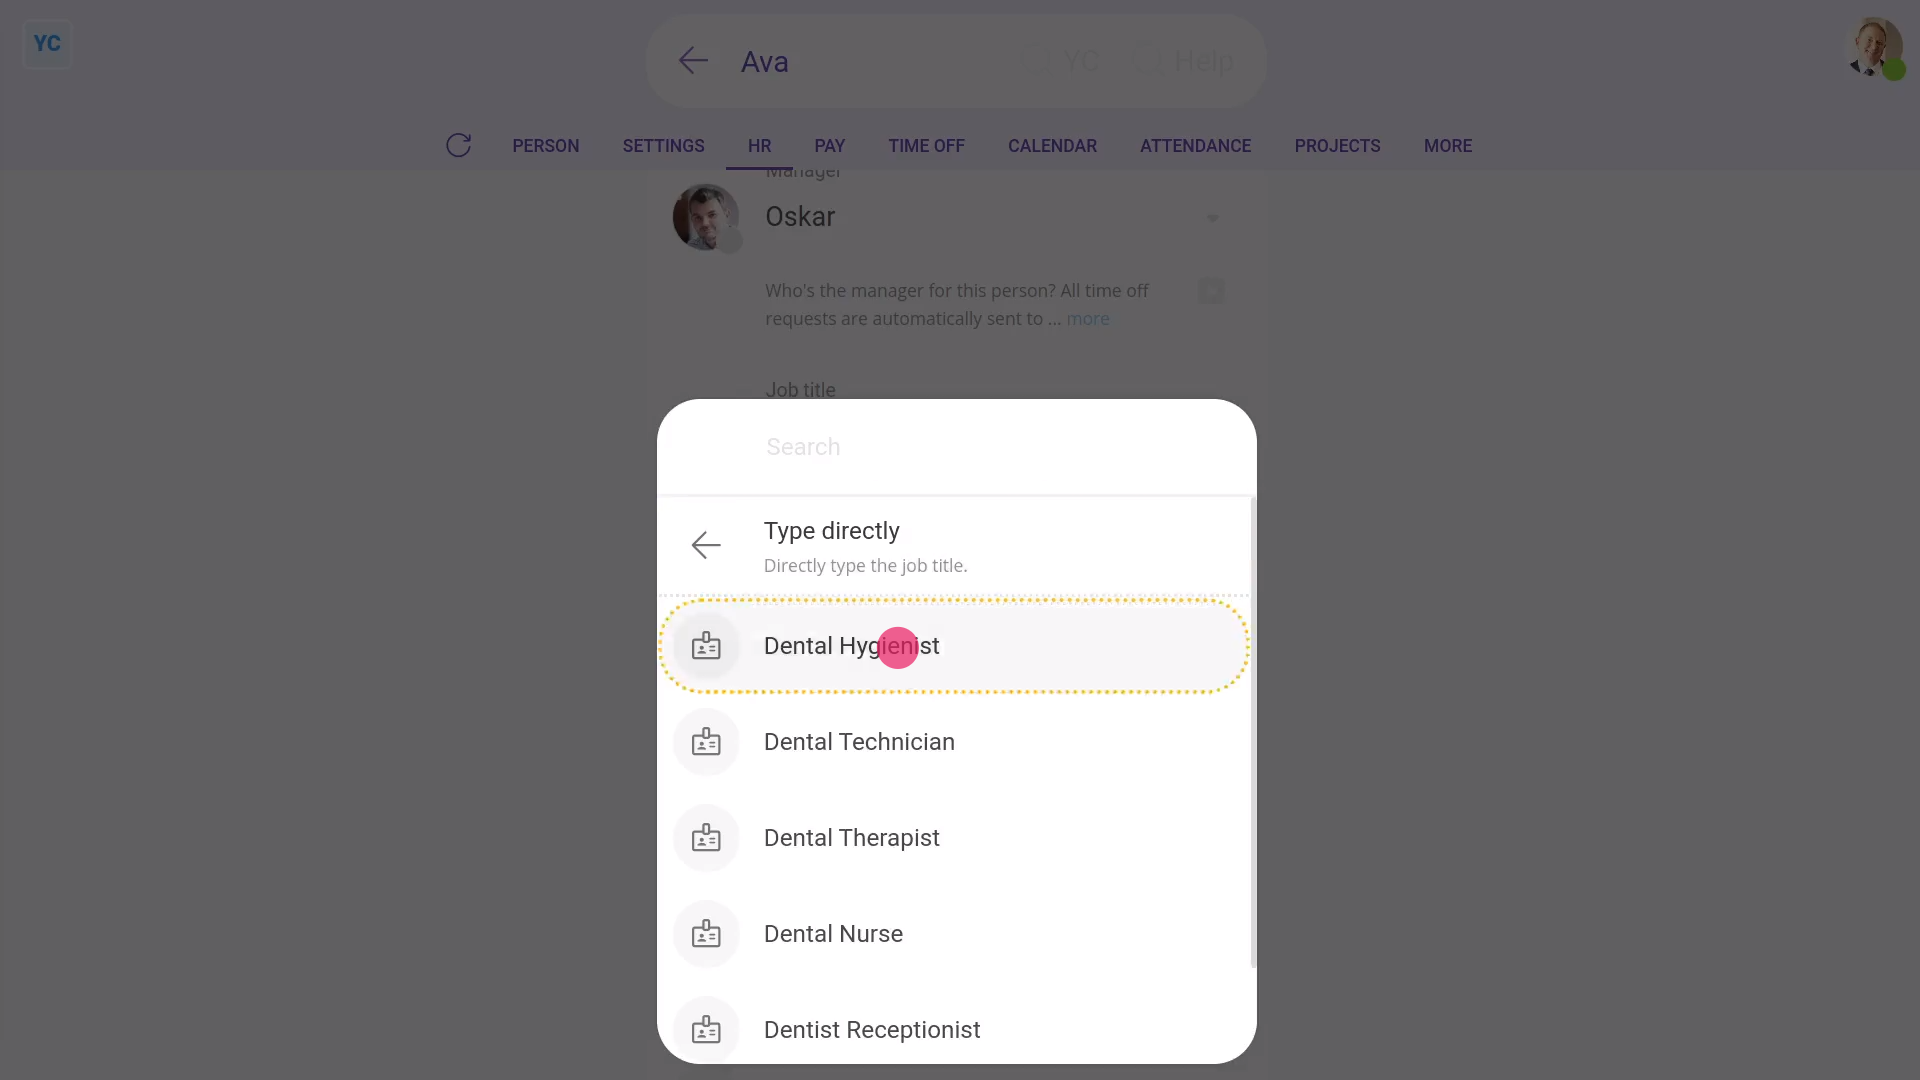
To set another person's job title:
- First, select the person on: MenuPeople
- Then tap: SettingsJob settingsJob title
- Then next to "Job title", tap Suggest, and select their new job title.
- And finally, tap: Save
Keep in mind that:
- Changes to a person's job title are applied instantly.
- And job titles can always be seen by everyone inside your org.
- Also, job titles have no effect on people's pay, permissions, or anything else.
And that's it! That's everything you need to know about using suggested job titles!
How do I use the 'Actions' report?
 2:15
2:15
"How do I use the "Actions" report?"
The "Actions" report shows you who's been doing what in your org, including creates, saves, deletes, undeletes, and log ins.
To see an "Actions" report:
- First, open your org on: MenuOrgs
- Then tap: ReportsActions
- At first, you'll see a pie chart showing all actions by everyone in your org, over the last 30 days.
- When you hover your mouse over the pie chart, you'll see the numbers of each person's actions, by action type. The numbers helps you to quickly see who's doing what.
- Then when you tap any pie chart segment, it slides out on the right, showing a drill-through to all the actions the person did.
- When you tap a person's pie segment, in the history list you see the most recent 25 of their actions.
- You can tap through to more pages of results (at the bottom of the page). More pages of results lets you see all of the person's actions over the last 30 days.
- When you tap a row, you'll see even more details.
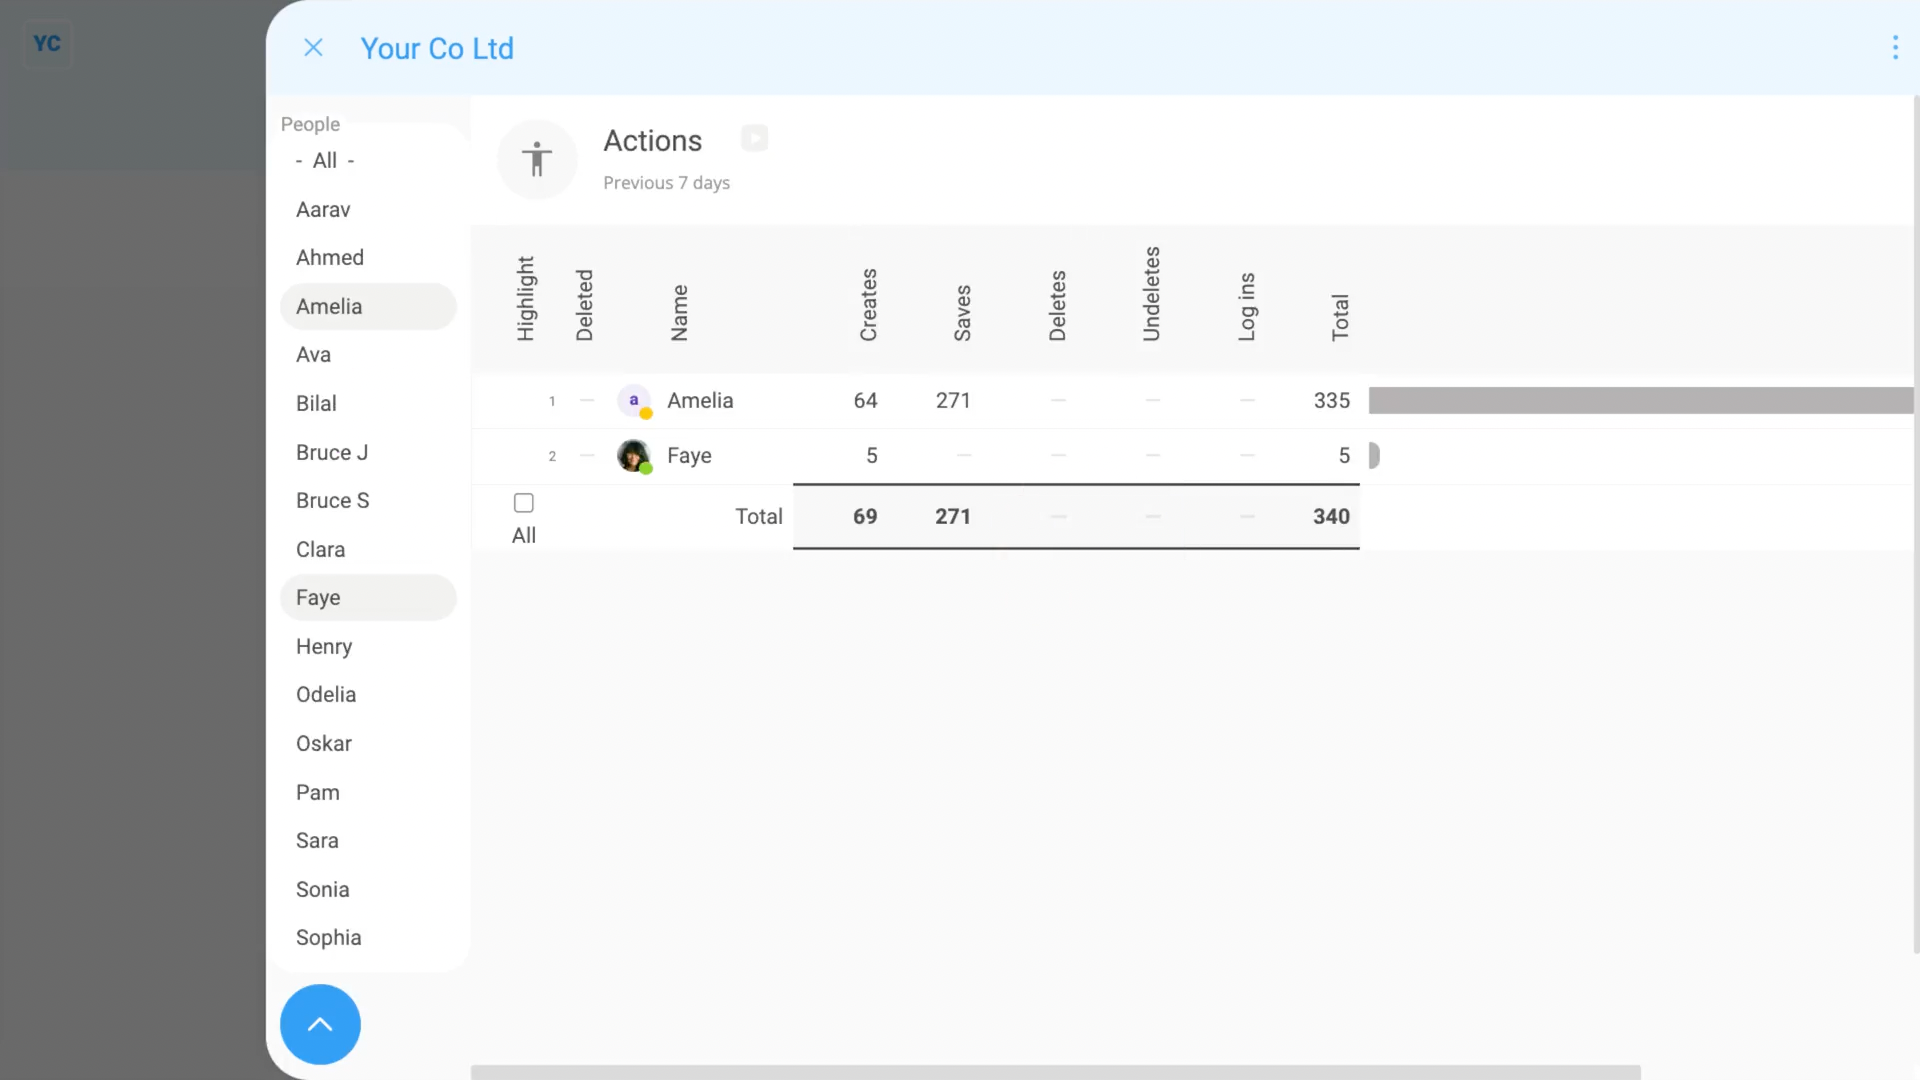
- To only see actions that happened with-in 7 days, tap:
Show settingsDatesPrevious 7 days - To see any actions from only a set of selected people, tap:
Show settingsShow people - Then Ctrl+Tap the people you want to see actions for.
- To see a table of numbers instead of a pie chart, tap:
Show settingsShow grid - And finally, to see a count of only one type of action, like "Saves", tap:
Show settingsActionsSaves
There's a lot of settings you can adjust to help you find exactly the info you're looking for.
Keep in mind that:
- The "Actions" report is only available to people with org admin permissions.
And that's it! That's everything you need to know about using "Actions" reports!
How do I use the 'Log ins' report?
 2:04
2:04
"How do I use the "Log ins" report?"
The "Log ins" report shows you who's been logging in to your org recently.
To see a "Log ins" report:
- First, open your org on: MenuOrgs
- Then tap: ReportsLog ins
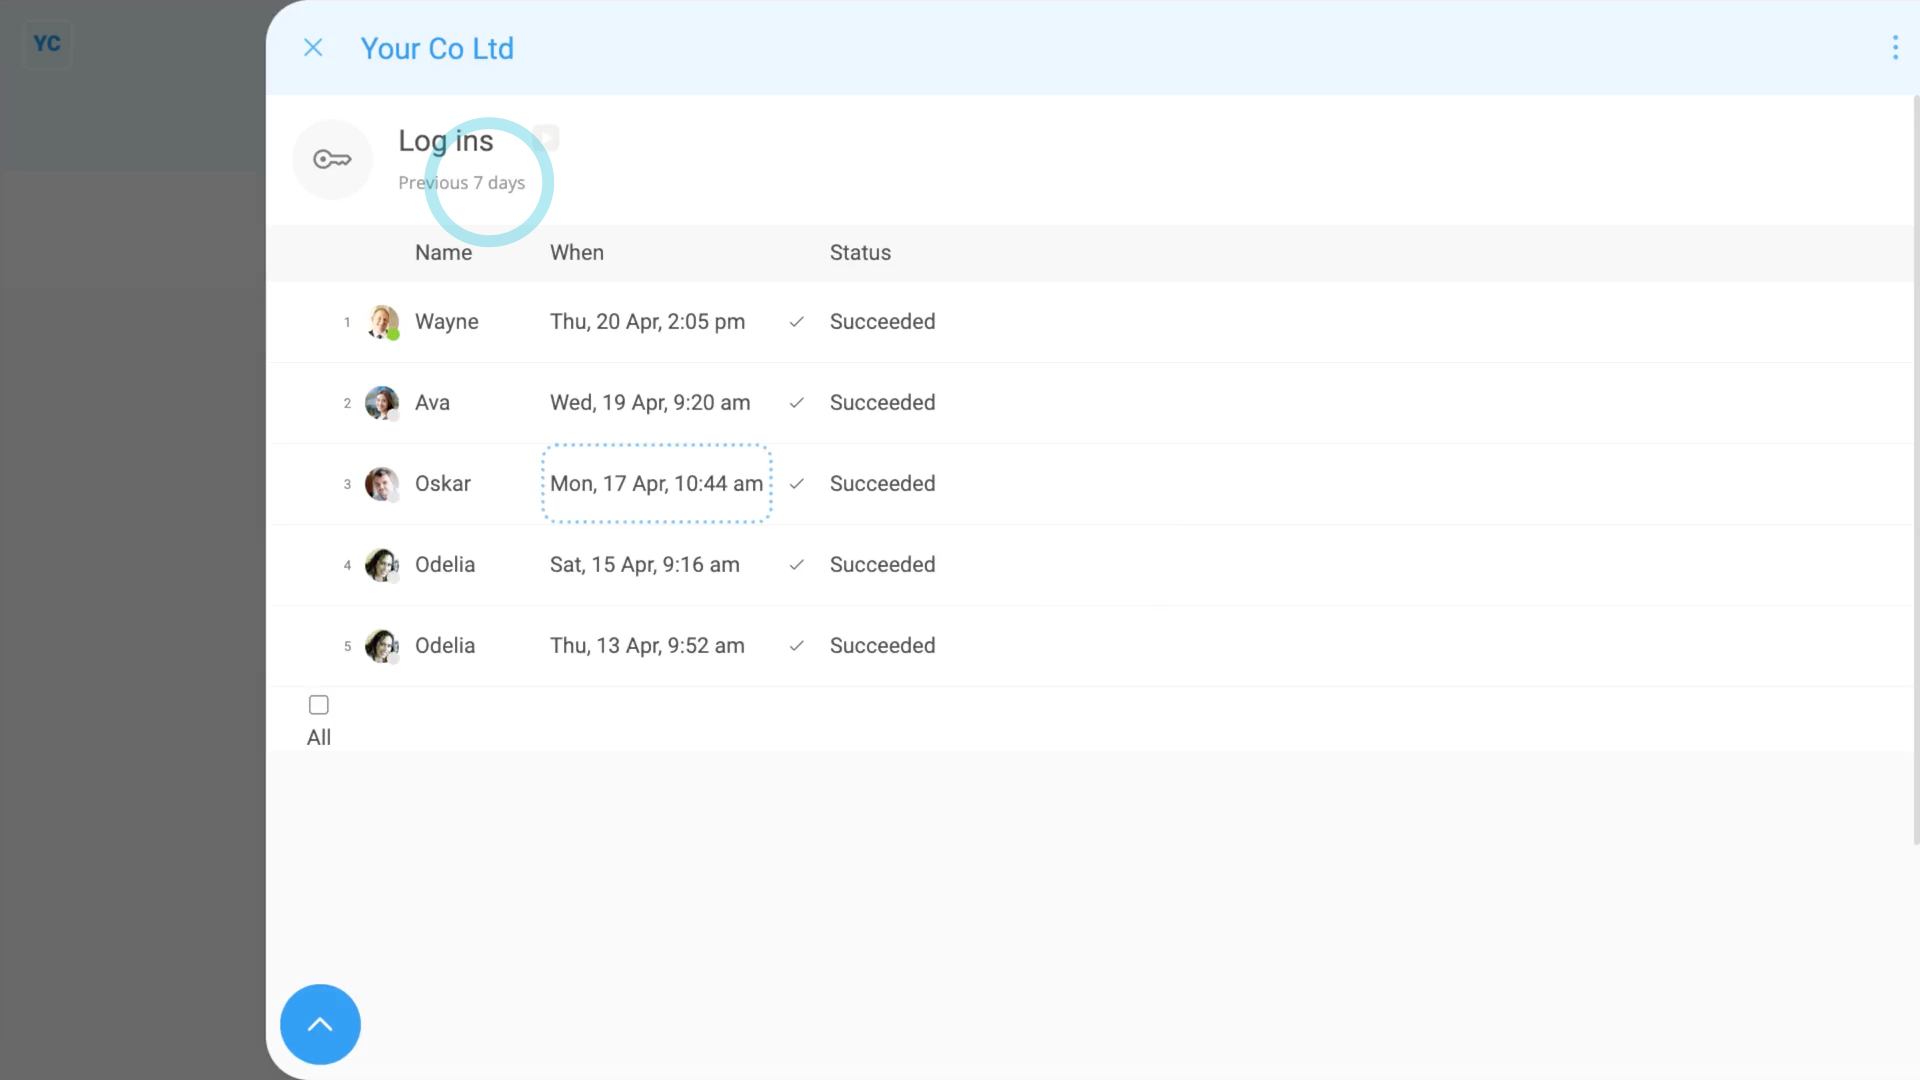
- Once it opens, you'll see a list of all the log ins by everyone in your org.
- By default, the log ins are from the last 30 days, with the most recent listed (at the top).
- And when you hover your mouse over each row, you'll see additional details about the device and browser that each person connected through.
- To only see log ins that happened with-in 7 days, tap:
Show settingsDatesPrevious 7 days - To see any log ins from only a set of selected people, tap:
Show settingsShow people - Then Ctrl+Tap the people you want to compare.
- And finally, when you tap any row, it slides out on the right, showing even more details.
Keep in mind that:
- The "Log ins" report is only available to people with org admin permissions.
For advanced usage:
- You can think of a login as being each time a person is asked to enter their password.
- The person might log in through a browser on their laptop, and also log in through the app on their phone.
- The log ins shows up as two different login rows because the person entered their password each time.
- If, on the login screen, a person turns on Keep me logged in, the person won't be asked for their password for 30 days.
- In which case, you might not see an entry in the "Log ins" report, for the person, for another 30 days.
And that's it! That's everything you need to know about using "Log ins" reports!
If I don't need payroll anymore, how do I close my org?
 2:43
2:43
"If I don't need payroll anymore, how do I close my org?"
If you don't need 1st Money anymore, you can close your entire org.
To close your entire org:
- First, open your org on: MenuOrgs
- Then tap: MoreClose org
- Before continuing, you'll be advised that closing your org first requires the following steps.
- Terminating all employees. Running final pay. Stopping employment for all your pay batches. And sending your final EPS to HMRC.
- When you're ready, tap: Yes close
- If you've not stopped employment for any of your pay batches, you'll get a warning.
- If you get a warning, stop and do all the "stopping employment" steps before continuing, as shown in: EPS: Stop being an employer
- Once you've stopped employment for all your pay batches, open your org again on: MenuOrgs
- Then tap: MoreClose org
- And tap: Yes close
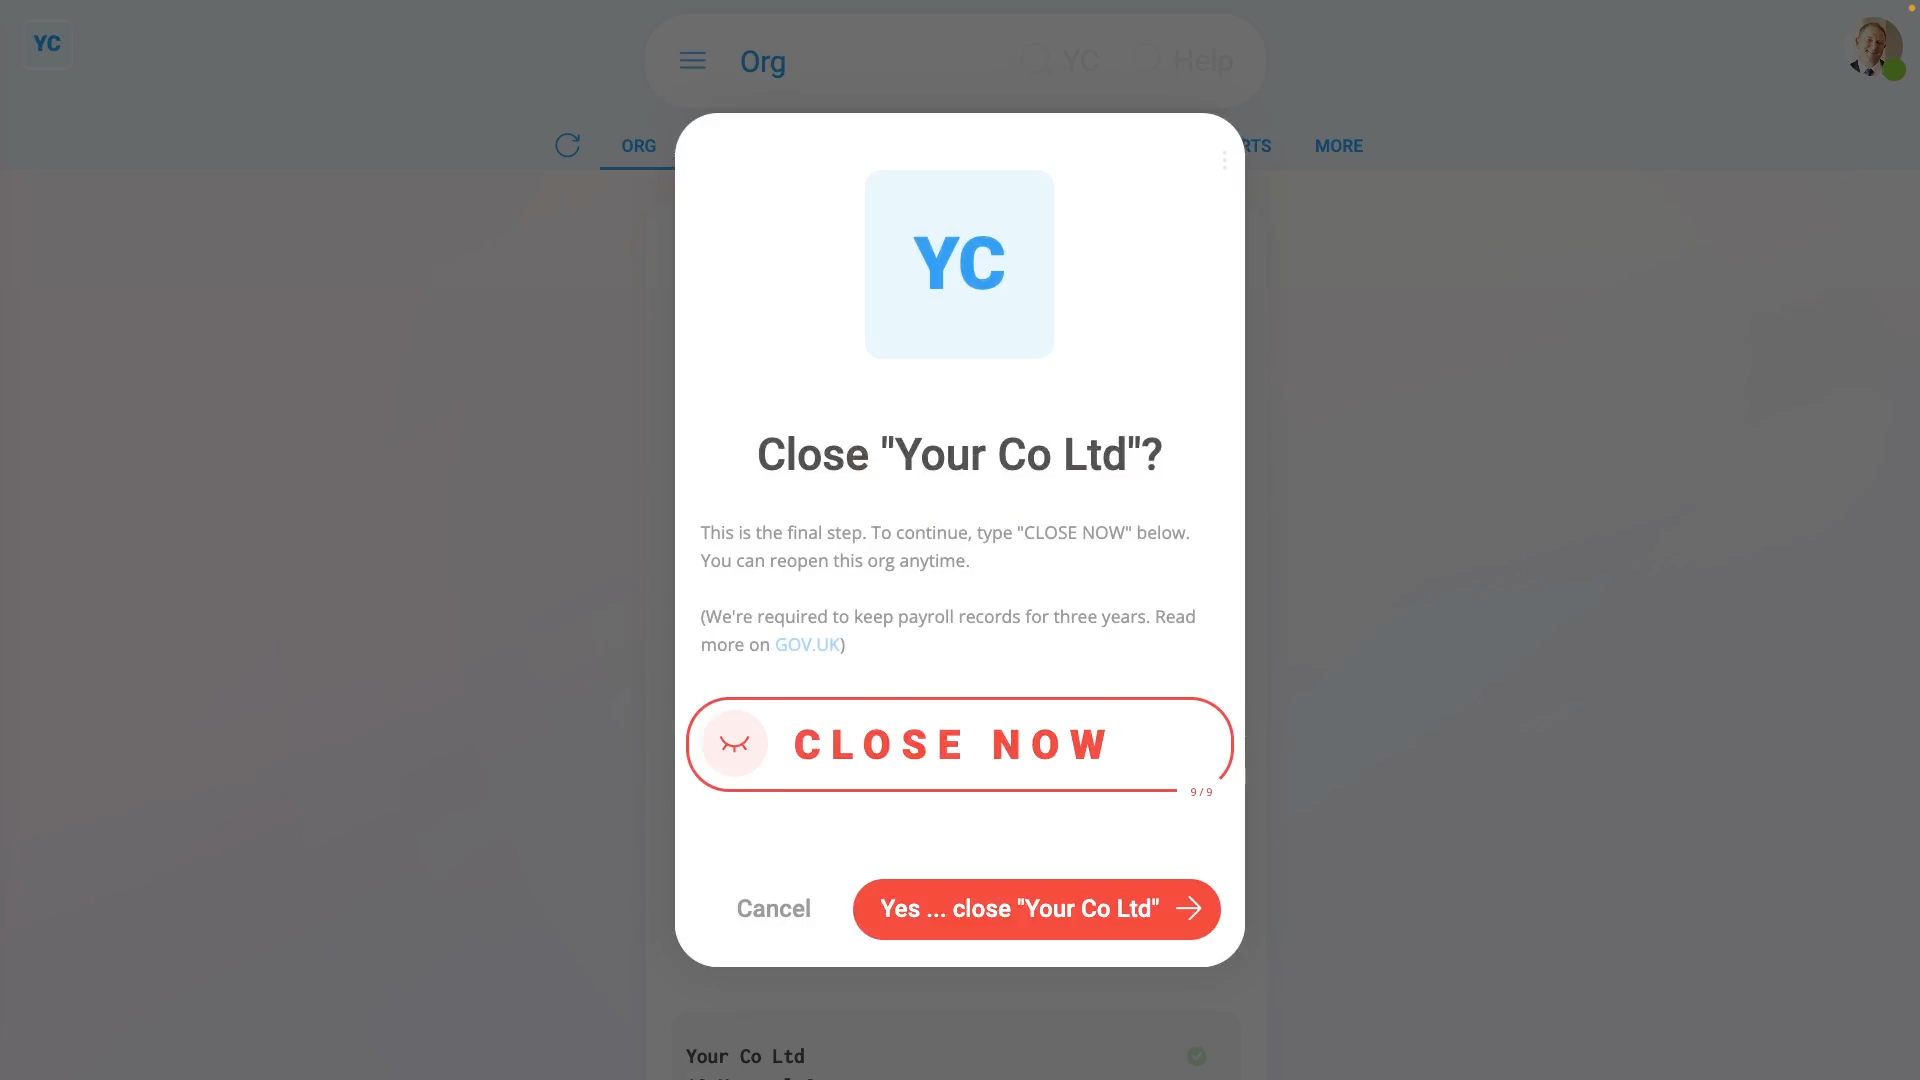
- You're now on the final screen in closing your org. Next, type: "CLOSE NOW"
- Once you've typed it correctly, the close button becomes active, and then tap: Yes close
- And now your org is closed.
- Now, when you tap the items in the side menu, you'll see that it's all crossed out.
- However, you can still see your closed org and create new orgs with your login.
- To create a new org, tap: MenuOrgsNew org
- And then tap: Create new org
- Alternatively, for your org you've closed, you can still look up info, and download PDFs.
- However, you can't make any changes, or add other people, until it's reopened.
- At any time that you want to start using your org again, to reopen it, tap: Reopen (at the bottom)
- And then tap: Yes reopen
- And finally, everything's open and you can use it all again.
 EPS: Stop being an employer
Keep in mind that:
- Your org can stay dormant and unused for up to three years.
- 1st Money is required to store your payroll records for three years.
- You can read more about record storage on: GOV.UK
And that's it! That's everything you need to know about closing your entire org!
What info that I set in one org, also shows in a different org?
 1:34
1:34
"What info that I set in one org, also shows in a different org?"
A limited set of your info set in one org, is also shared to all other orgs that you join. The purpose of the info sharing is to save you time, and keep things consistent, as you update your info between your orgs.
To understand what info is shared between your orgs:
- First, the following are shared between all your orgs.
- Your name and nickname.
- Your mobile number.
- Your social contacts.
- Your login password.
- Your home and postal address.
- Your bank account info.
- Your external tax agent info (which only affects accountants).
- Your doc PIN and signature image.
- And finally, your decided language setting.
Keep in mind that:
- Because the info is shared, if you update any of it in one org, the changes automatically show as updated in all your other orgs.
For advanced usage:
- If you don't want to share info between orgs, when you join each org, log in using a different email.
And that's it! That's everything you need to know about what info is shared between your orgs!
What org charts can admins see?
 2:41
2:41
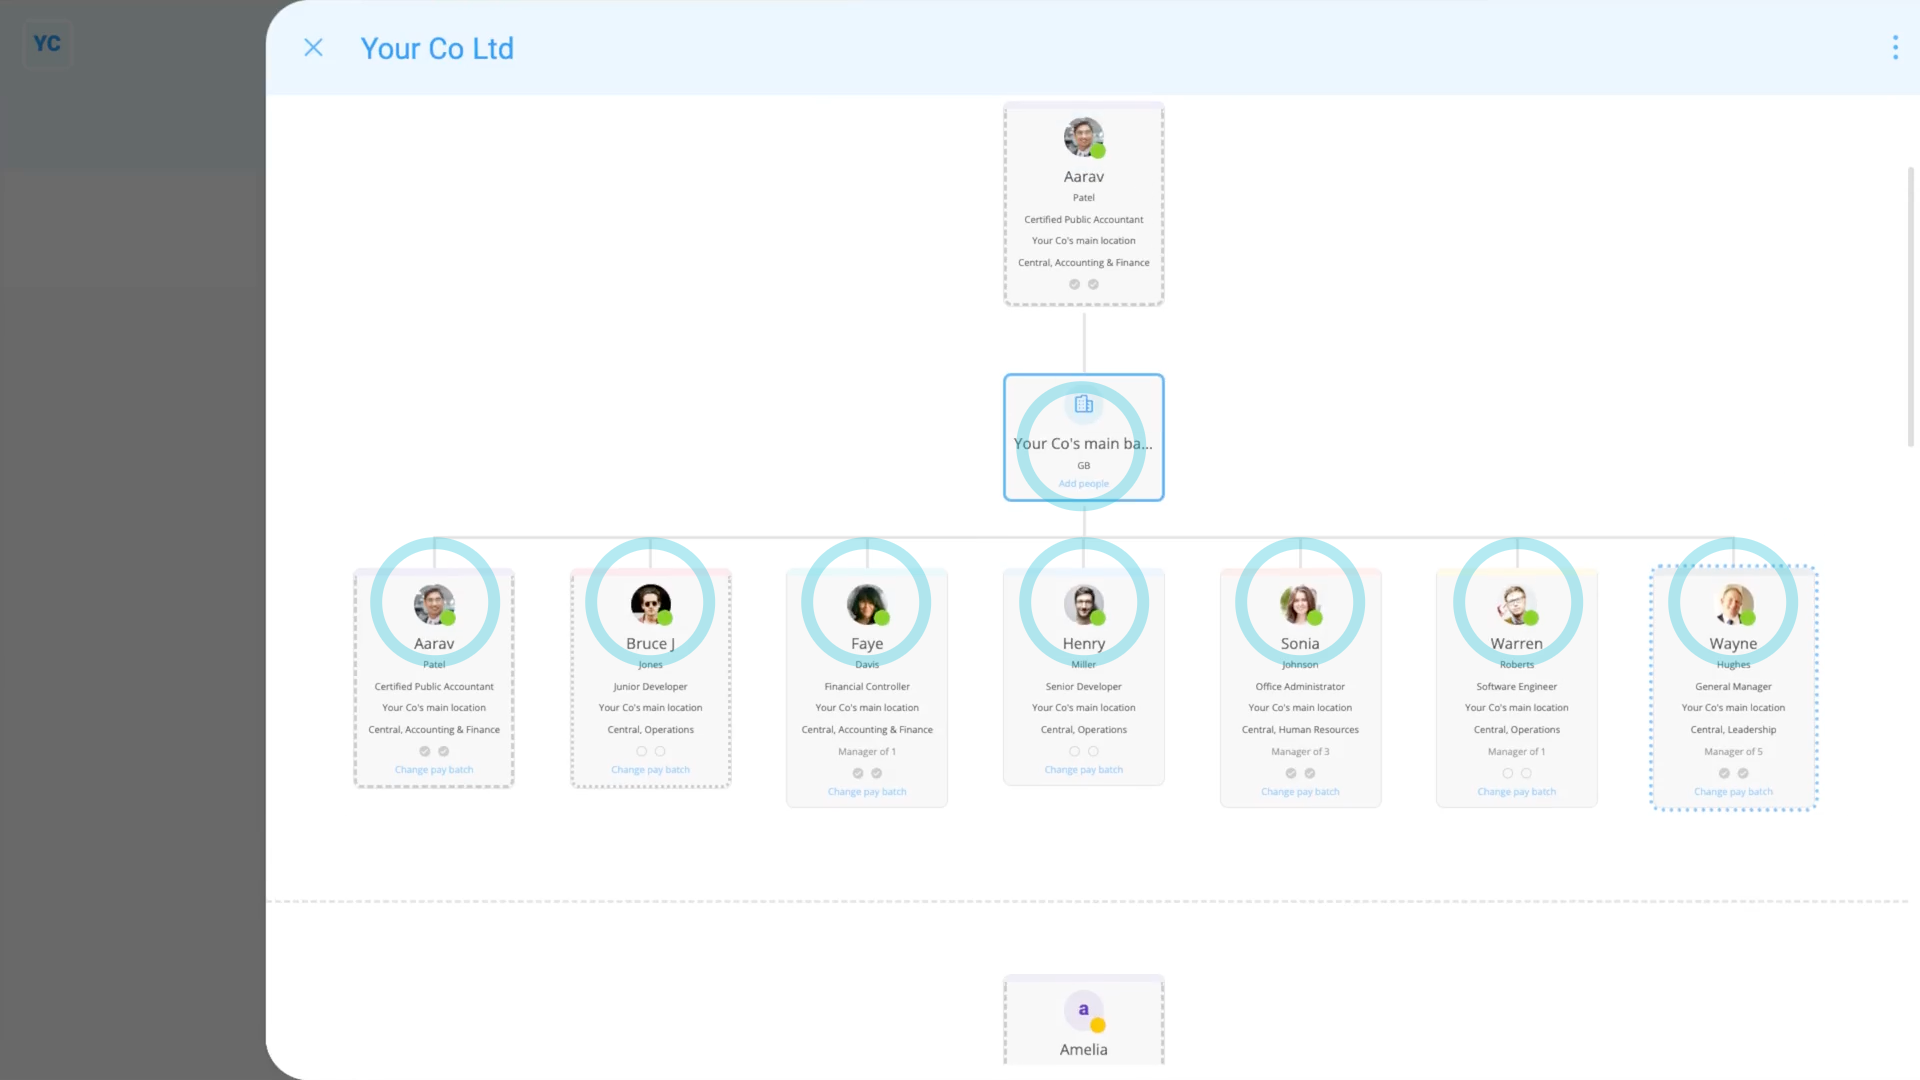
"What org charts can admins see?"
If you're logged in as a person who's got "Full org admin" and "Full payroll admin" permissions, you can see all three org charts. Admins can also see additional org chart info that's normally hidden to others.
To open your org's org charts:
- First, open your org on: MenuOrgs
- And finally, tap: Org charts

Your org's three org charts are:
- First, Management
- Second, Payroll
- And finally, Location

To see your "Management" org chart:
- First, tap: Org chartsManagement
- Inside the "Management" org chart, admins can see people's full name, job title, and location.
- Admins also see division, department, how many people the person manages, and their permissions.
- And finally, when an admin taps on a person in an org chart, the admin can then see that person's contact info.
To see your "Payroll" org chart:
- First, tap: Org chartsPayroll
- Inside the "Payroll" org chart, payroll admins can see who belongs to each pay batch.
- Payroll admins can also see who each pay batch's payday admin is, shown above it.
- When you scroll to the bottom, you'll see a list of the people, if any, who aren't connected to any pay batch yet.
- And finally, you can tap Set pay batch to put them into a pay batch.
Keep in mind that:
- Only payroll admins can see the "Payroll" org chart.
To see your "Location" org chart:
- First, tap: Org chartsLocation
- Inside the "Location" org chart, org admins can see who belongs to each location.
- When you scroll to the bottom, you'll see a list of the people, if any, who aren't connected to any location yet.
- And finally, you can tap Set location to put them into a location.
To learn more:
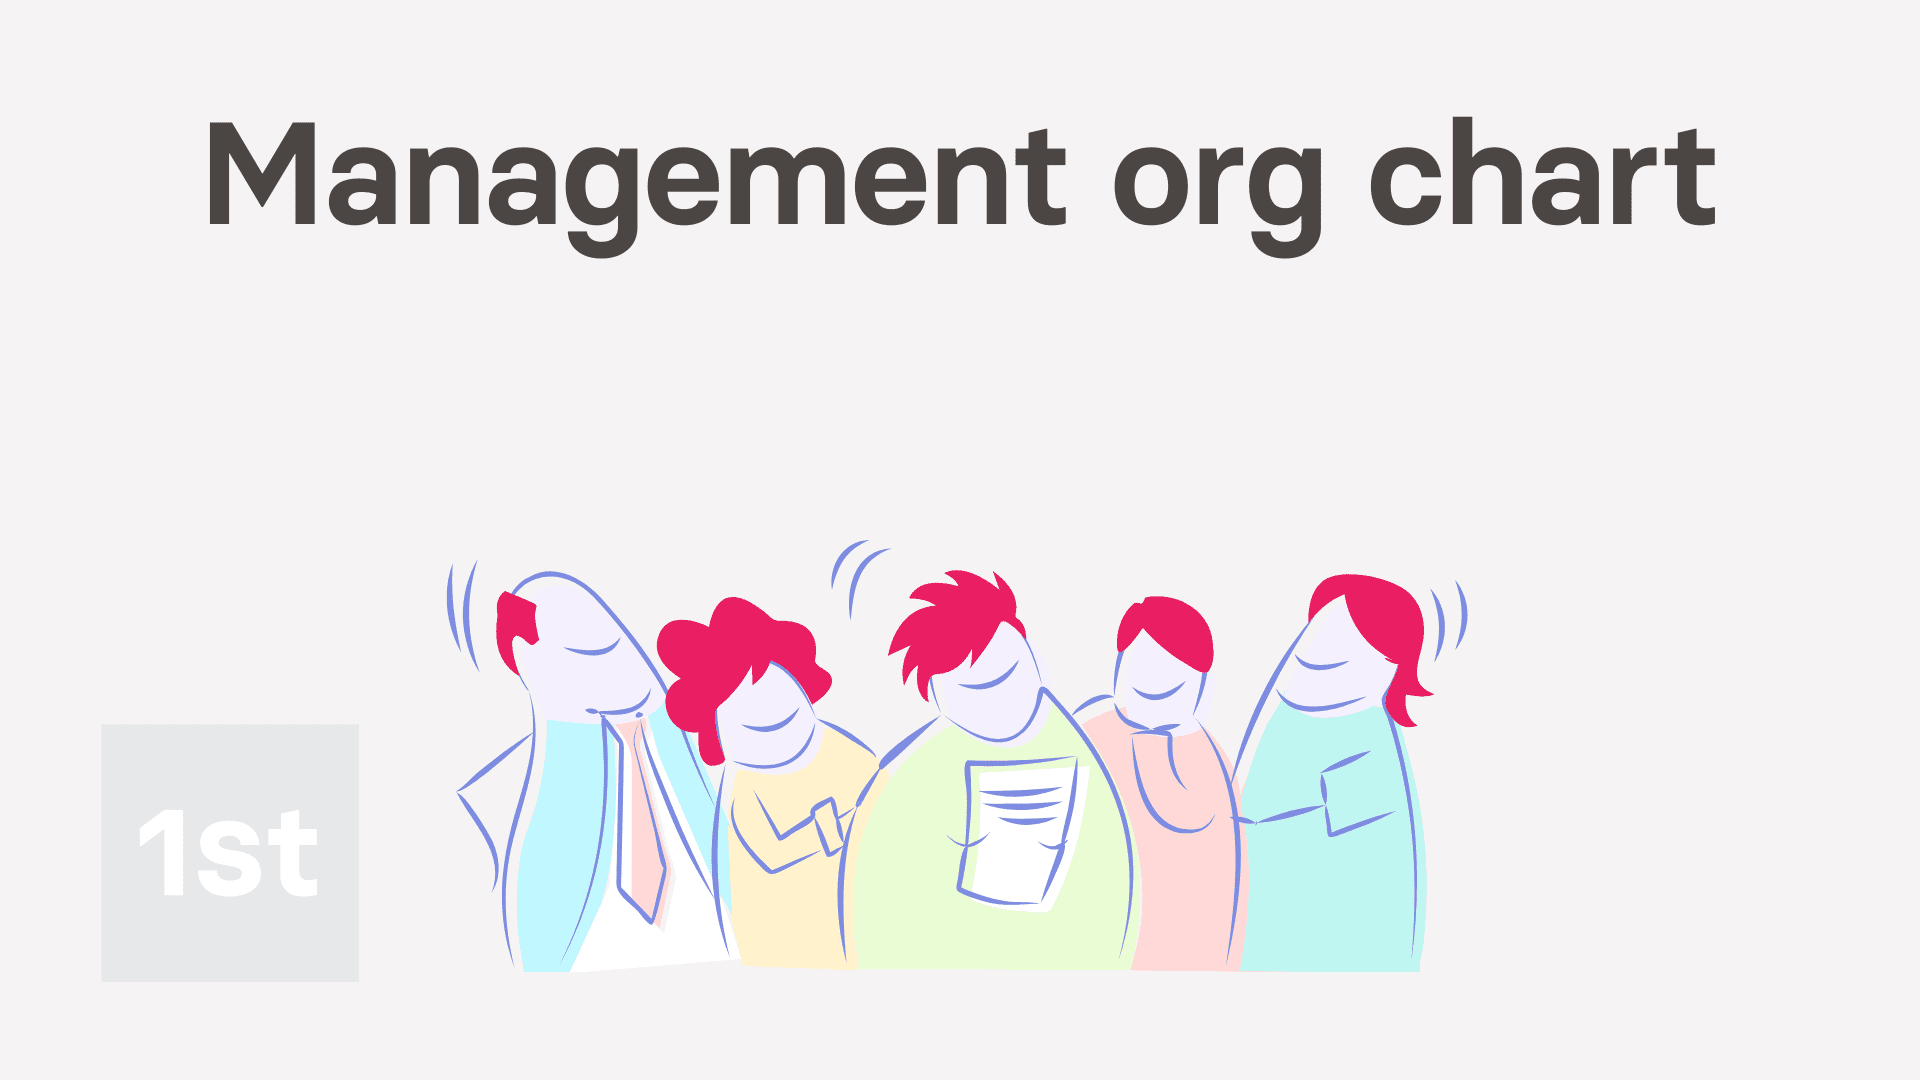
- About how contact info is kept private on org charts, watch the video on: Management org chart
- Also, to learn how to print an org chart, watch the video on: Org chart PDFs
And that's it! That's everything you need to know about which org charts can be seen by admins!
Who can see the management org chart, and what info is shown on it?
 2:14
2:14
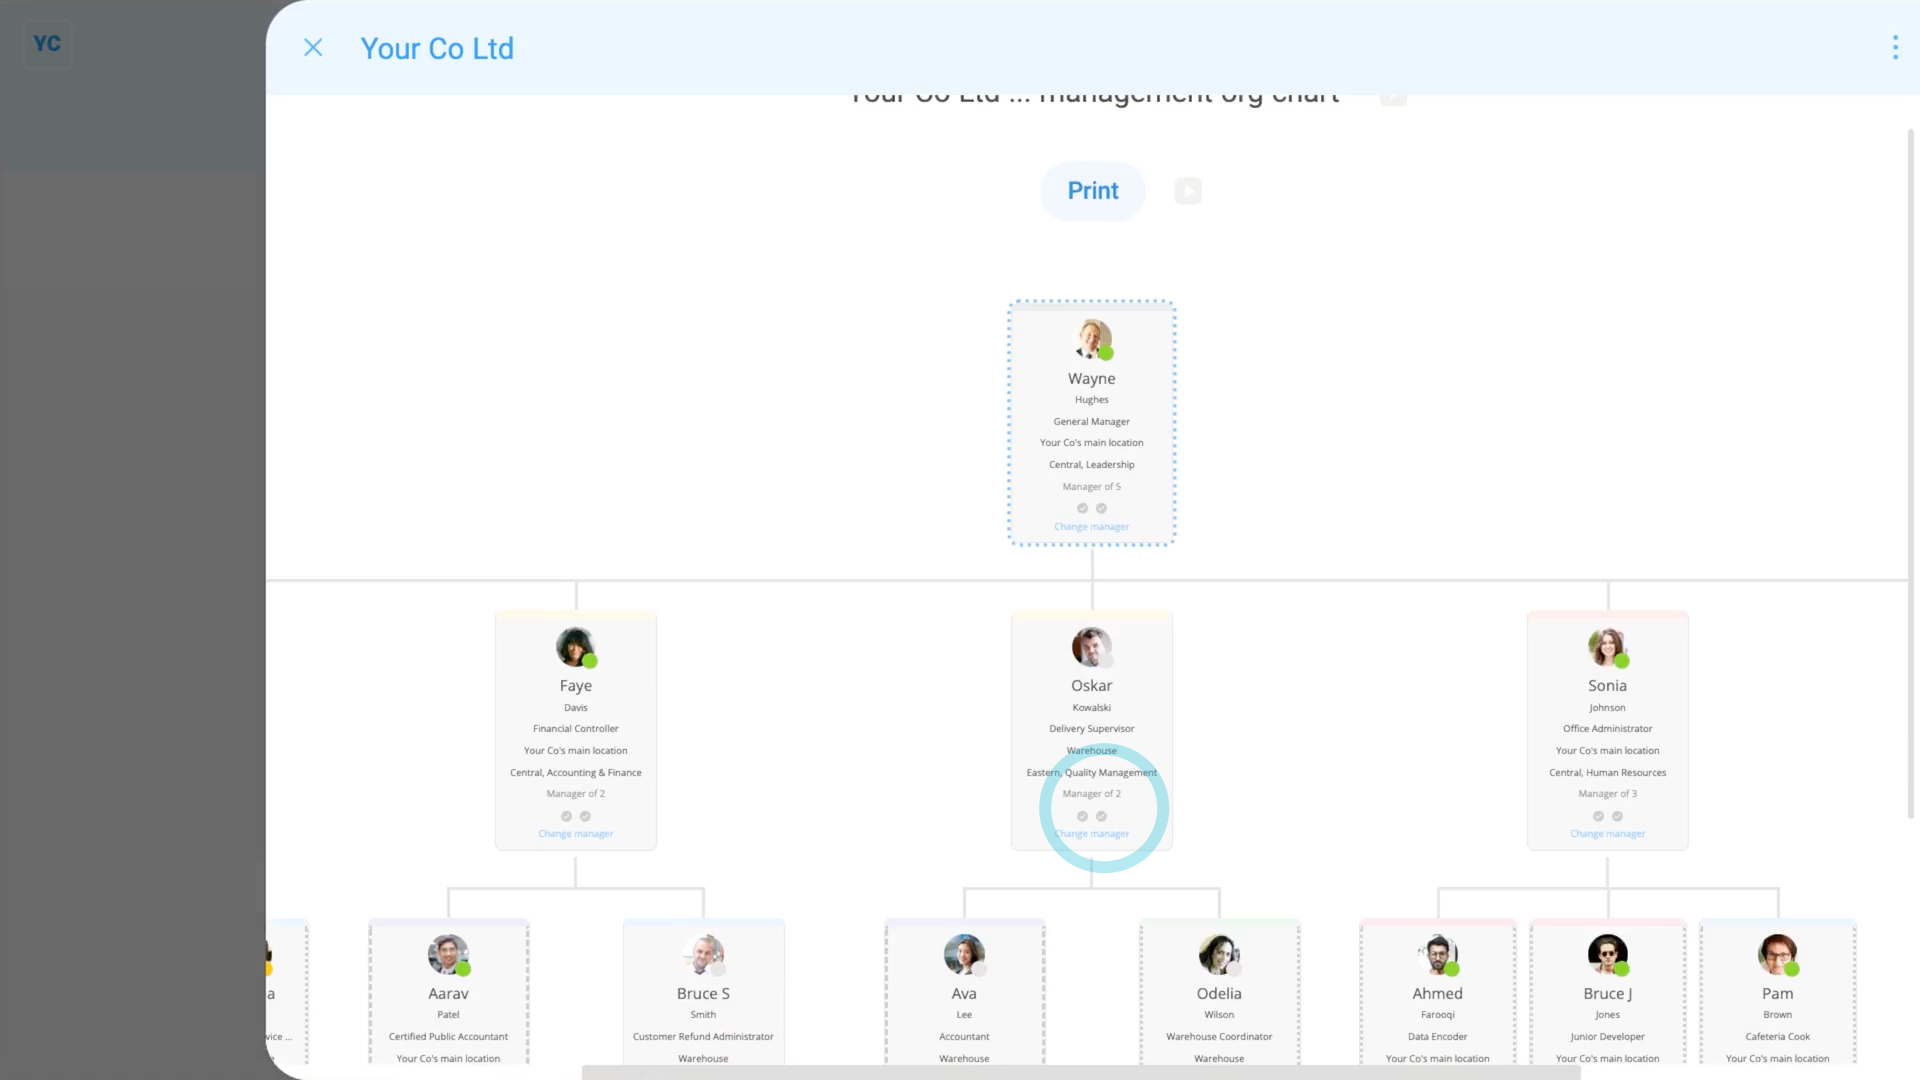
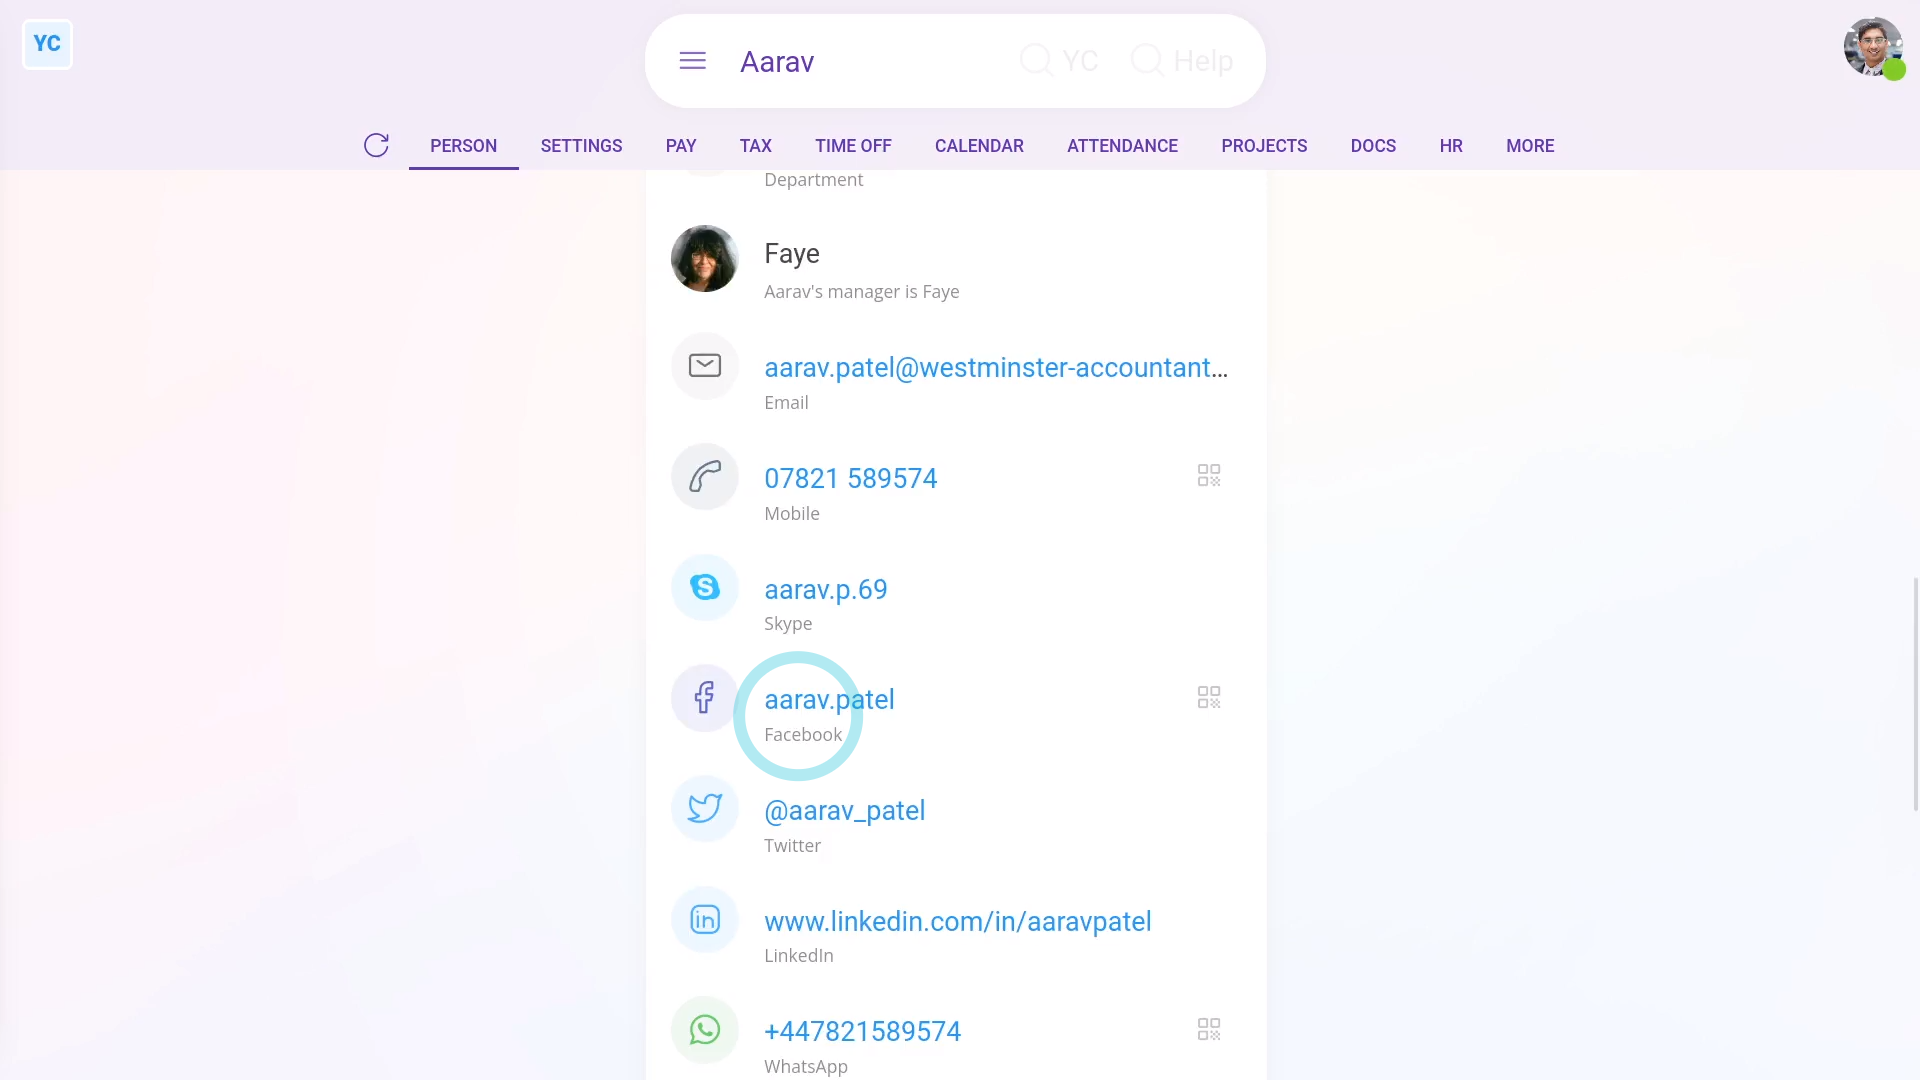
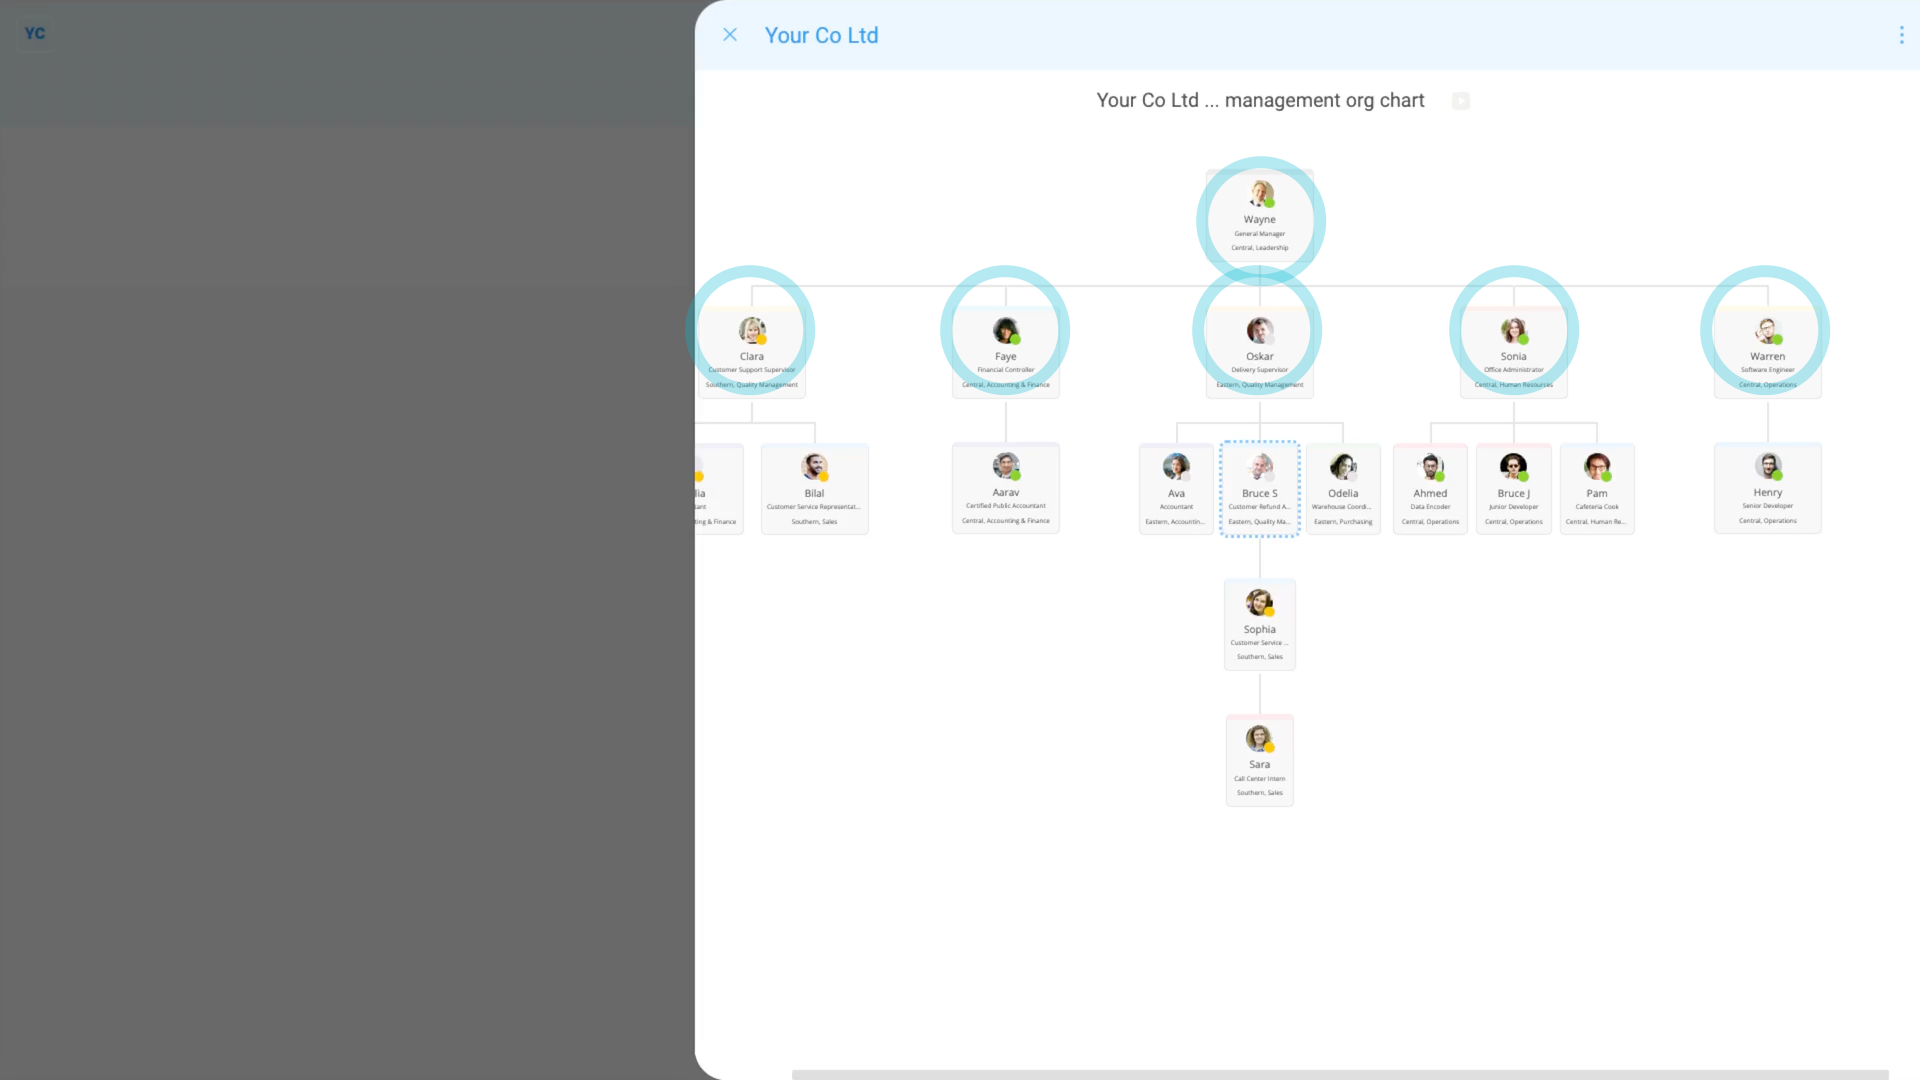
"Who can see the management org chart, and what info is shown on it?"
The management org chart can be seen by everyone in your org. If you're logged in as a person who's got "No org admin" and "No payroll admin" permissions, you can still always see the management org chart.
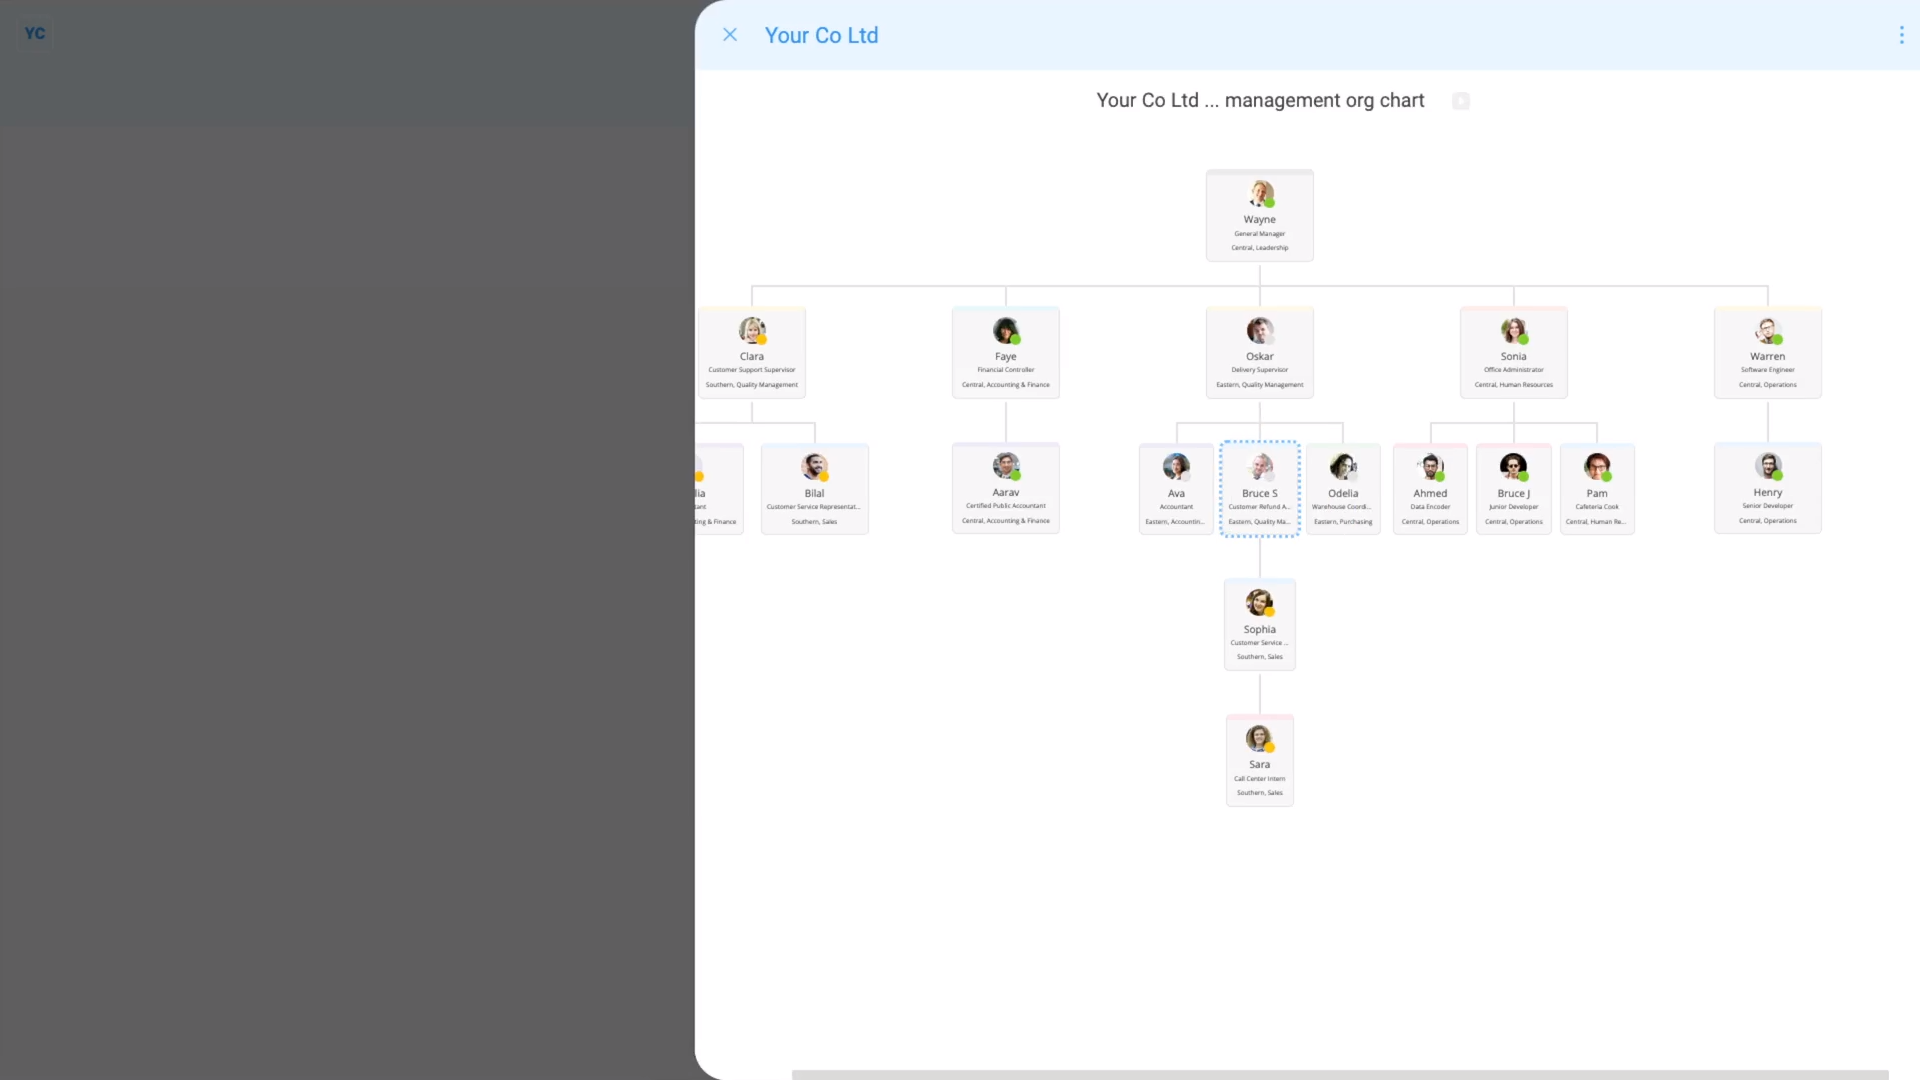
To open your org's management org chart:
- First, open your org on: MenuOrgs
- Then tap: Org chartsManagement
- And finally, people with no permissions can only see the management org chart, and not any other org charts.
Inside your management org chart, a person with no permissions can only see:
- People's job titles, divisions, departments, and who's manager of who.
- When a person with no permissions taps on most people, the person still can't see other people's full names.
- Their contact info, or any other info (except job title, division, department, and manager) is also not shown.
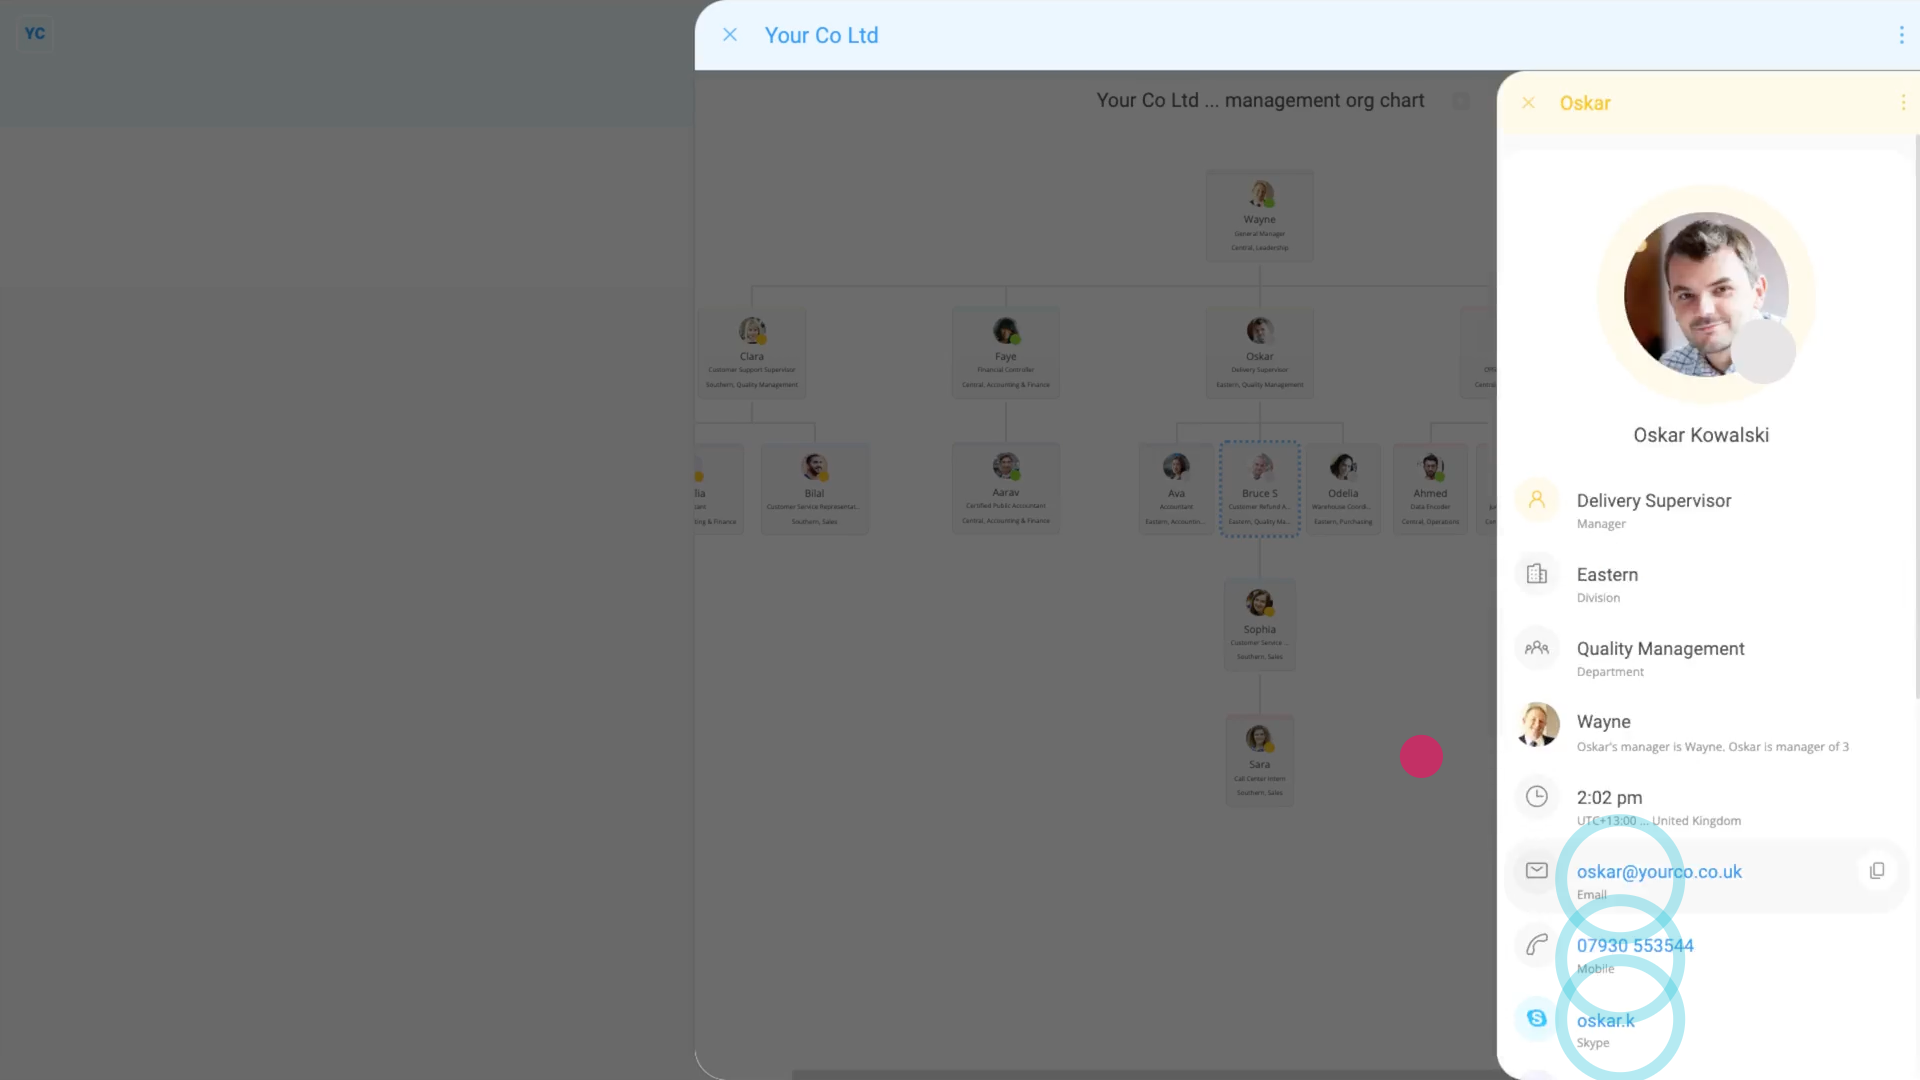
A notable exception (for a person with no permissions) is for them to see contact details for:
- Themselves.
- And for people directly one layer above, or in other words, your direct manager.
- And for people directly one layer below, or in other words, anyone you directly manage.
You may notice:
- If you tap more than one layer up or down, it still blocks access to contact info.
- If you tap people either side (under the same manager), it also blocks access to contact info.
- Because of contact info blocking, even in very big orgs, you can still maintain good privacy.
- And do so, whilst still providing reasonably limited access to manager, and managee, contact info.
And that's it! That's everything you need to know about who can see org charts!