How do I bridge from one type of payday schedule to another?
 5:06
"How do I bridge from one type of payday schedule to another?"
Bridging closes the pay period gap that's sometimes formed when your org's switching from one pay period type to another. For example, switching from "Monthly" to: "Weekly"
To bridge from one payday schedule to another:
- First, select the payroll group on: "Menu", then "Payroll groups"
- Then tap: "Settings", then "Payroll group settings"
- The first step:
Is opening your "currently active" payday schedule. - Which you can open if you tap its "List payday schedules" button:
- Select the payday schedule that says: "currently active" (with the yellow star)
- Then scroll down and expand the "Bridging" heading (at the bottom), and look for: "Ends ... payday schedule ends on"
- For now, you'll see a red warning about how you'll need to make a new payday schedule.
- The second step:
Is creating the new payday schedule that all your people are switching to. - So tap the "New payday schedule" link, then tap: "New payday schedule"
- Then set the "Pay period" of your new payday schedule, with what you'd like your people to switch to being paid with.
- And then set the "Pay period's last day" of your new payday schedule.
- And then expand the "Bridging" heading (at the bottom), and look for: "Starts ... payday schedule starts on"
- But before setting a start date, first you'll need to find out when the "currently active" payday schedule's paid up until.
- The third step:
Is finding out when the "currently active" payday schedule's paid up until. - So tap the "currently active" payday schedule's: "Calendar" (at the top)
- And hover your mouse over the blue payday circle of your most recently paid payday.
- Once you've hovered, you'll see grey circles covering each paid date of the recent payday's pay period.
- Next, make a note of the date of the last day of the grey circles.
- Or, in other words, that's the date that your people have been paid up until.
- The fourth step:
Is going back and setting the start date of the newly created payday schedule. - So now that you've got that date of when the "currently active" payday schedule's paid up until, go back and tap on: "Starts ... payday schedule starts on"
- And then carefully select the earliest date that's right after the date your people have been paid up until.
- Then tap: Save
- Next, you're expecting to see a red warning about a payday schedule overlap.
- The warning is a reminder that you still need to set the end date for the "currently active" payday schedule.
- Tap the link in the warning, then open the "Ends" options and select the date with the grey label that says: "current pay period ends"
- Once you select that date, it automatically saves both payday schedules.
- The fifth step:
Is checking for any days that've been missed, or aren't covered by any payday schedules. - So tap the payday schedule's: "Calendar" (at the top)
- Then tap the Reload on the calendar to see all the blue payday circles for your newly created paydays.
- Hover your mouse over each blue payday circle and check that there's a grey circle covering each day of the month.
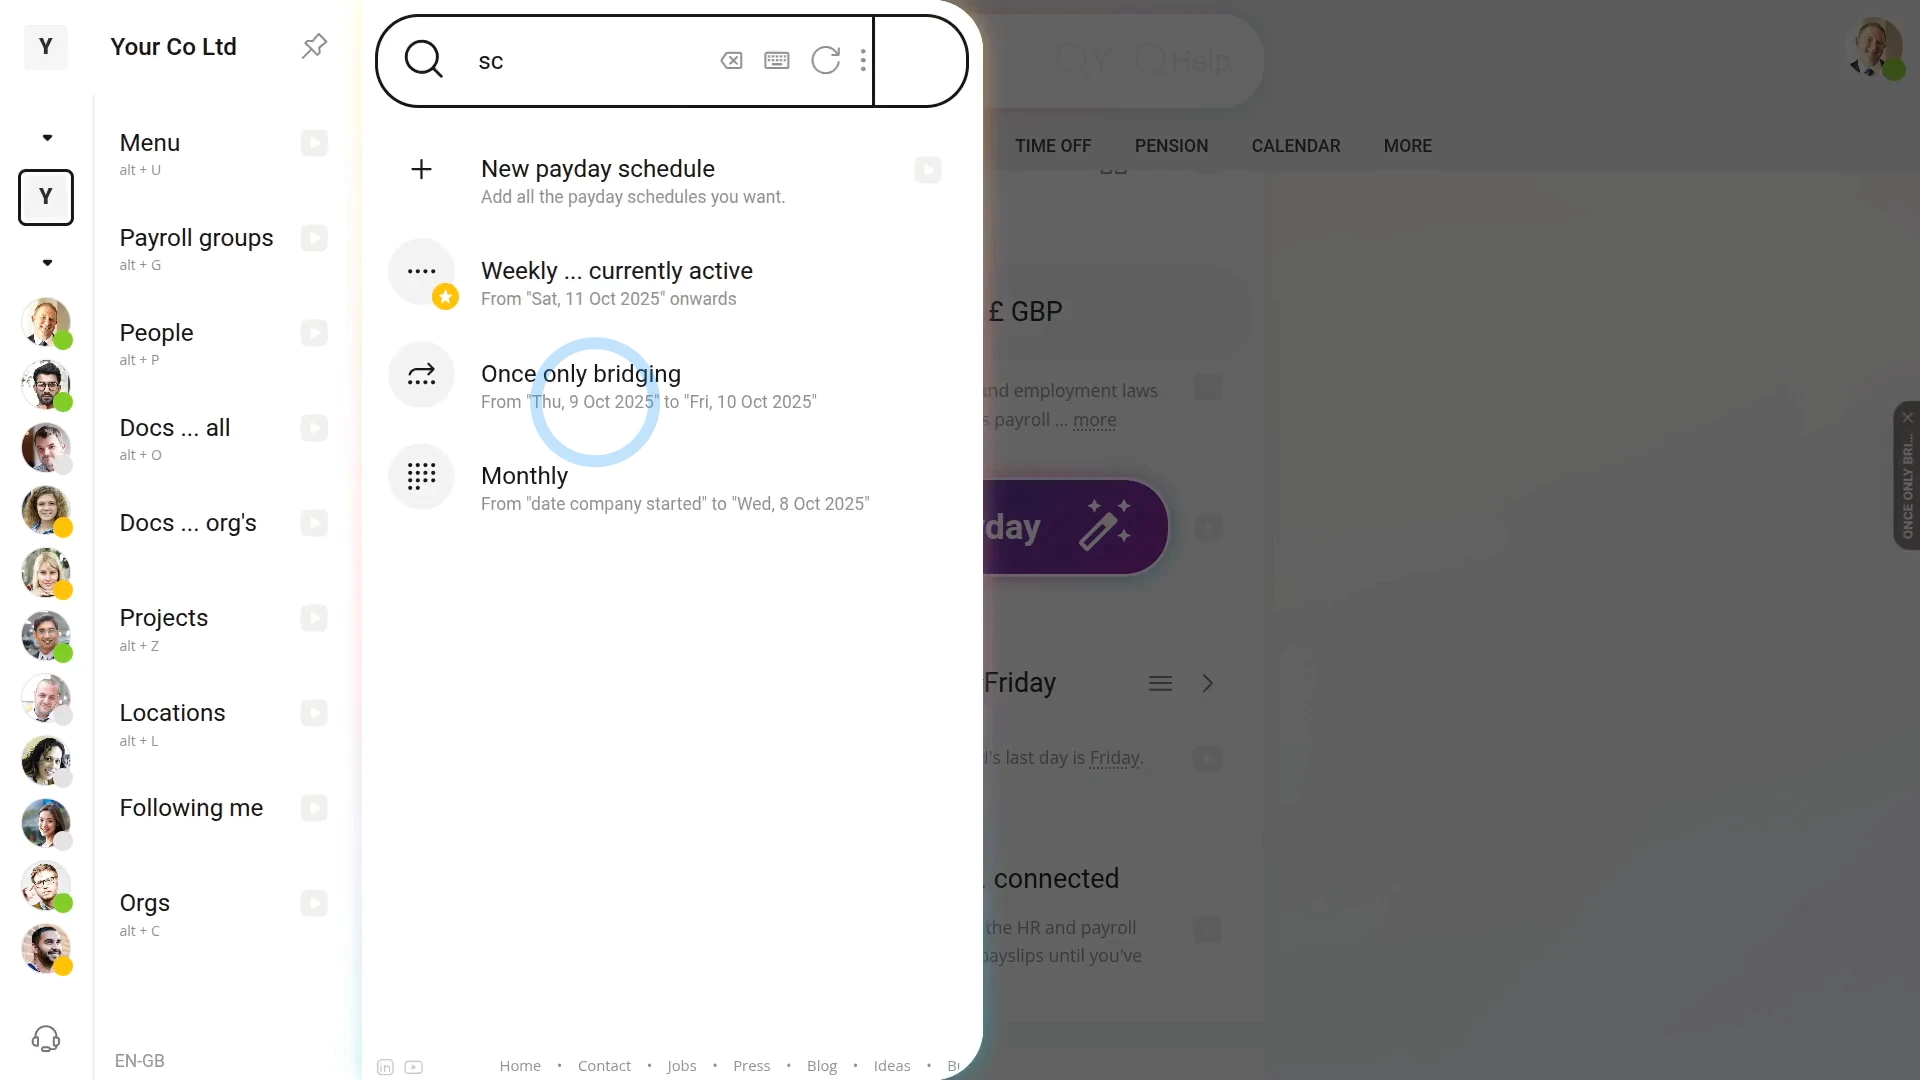
- If there's any days that're missing a grey circle, your people may miss out on some of their pay. To avoid any missing pay, you'll need to create a: "Once only bridging"
- For example, when you hover the two blue payday circles, you can see a two-day gap that's not covered by any of the payday schedules.
- You'll want to make a note of the start and end dates of any gap.
- The final step:
Is to create a new "Once only bridging" payday schedule to cover any gap between the two payday schedules. - But you can always skip the bridging step if there weren't any days that're missing a grey circle.
- Next, tap More, then List payday schedules, then: "New payday schedule"
- Set "Pay period" to: "Once only bridging"
- Now, scroll down and look at "Starts" and: "Ends"
- It automatically suggests the recommended start and end dates.
- Make sure that the suggested start and end dates match the dates you noted earlier.
- If everything's correct, tap: Save
- The final check:
- Now, to see all your final payday schedule changes, tap the "List payday schedules" button.
- And you can now see all the start and end dates connecting without any gaps, so no one misses out on their pay.
- Alternatively, you can also tap: "Calendar" (at the top)
- And finally, when you hover the blue payday circles, you'll see that every date is covered by a grey circle.

Keep in mind that:
- It's very rare that you'll ever have to bridge payday schedules.
- Also, be sure to communicate all the payday date changes to your people.
- And, while the software gives you reminders, don't forget to pay them on each payday of the newly created payday schedules.
And that's it! That's all you need to do to bridge payday schedules!
4. How do I set the delay for a pay period's last day to its paydayHow do I delete a payday schedule
www.1st.money/uk/help/Payroll/Payday_schedules/How_do_I_bridge_from_one_type_of_payday_schedule_to_another