

1. How do I create a location?
 2:26
2:26
"How do I create a location?"
A location groups people together based on where the people physically work. Once people are grouped into a location, you can share bookmarks and notes with each of those people.
To create a new location:
- First, tap: MenuLocationsNew location
- Once it's open, type in the name of your new location.
- Optionally, you can also tap the circle and set the list colour and image.
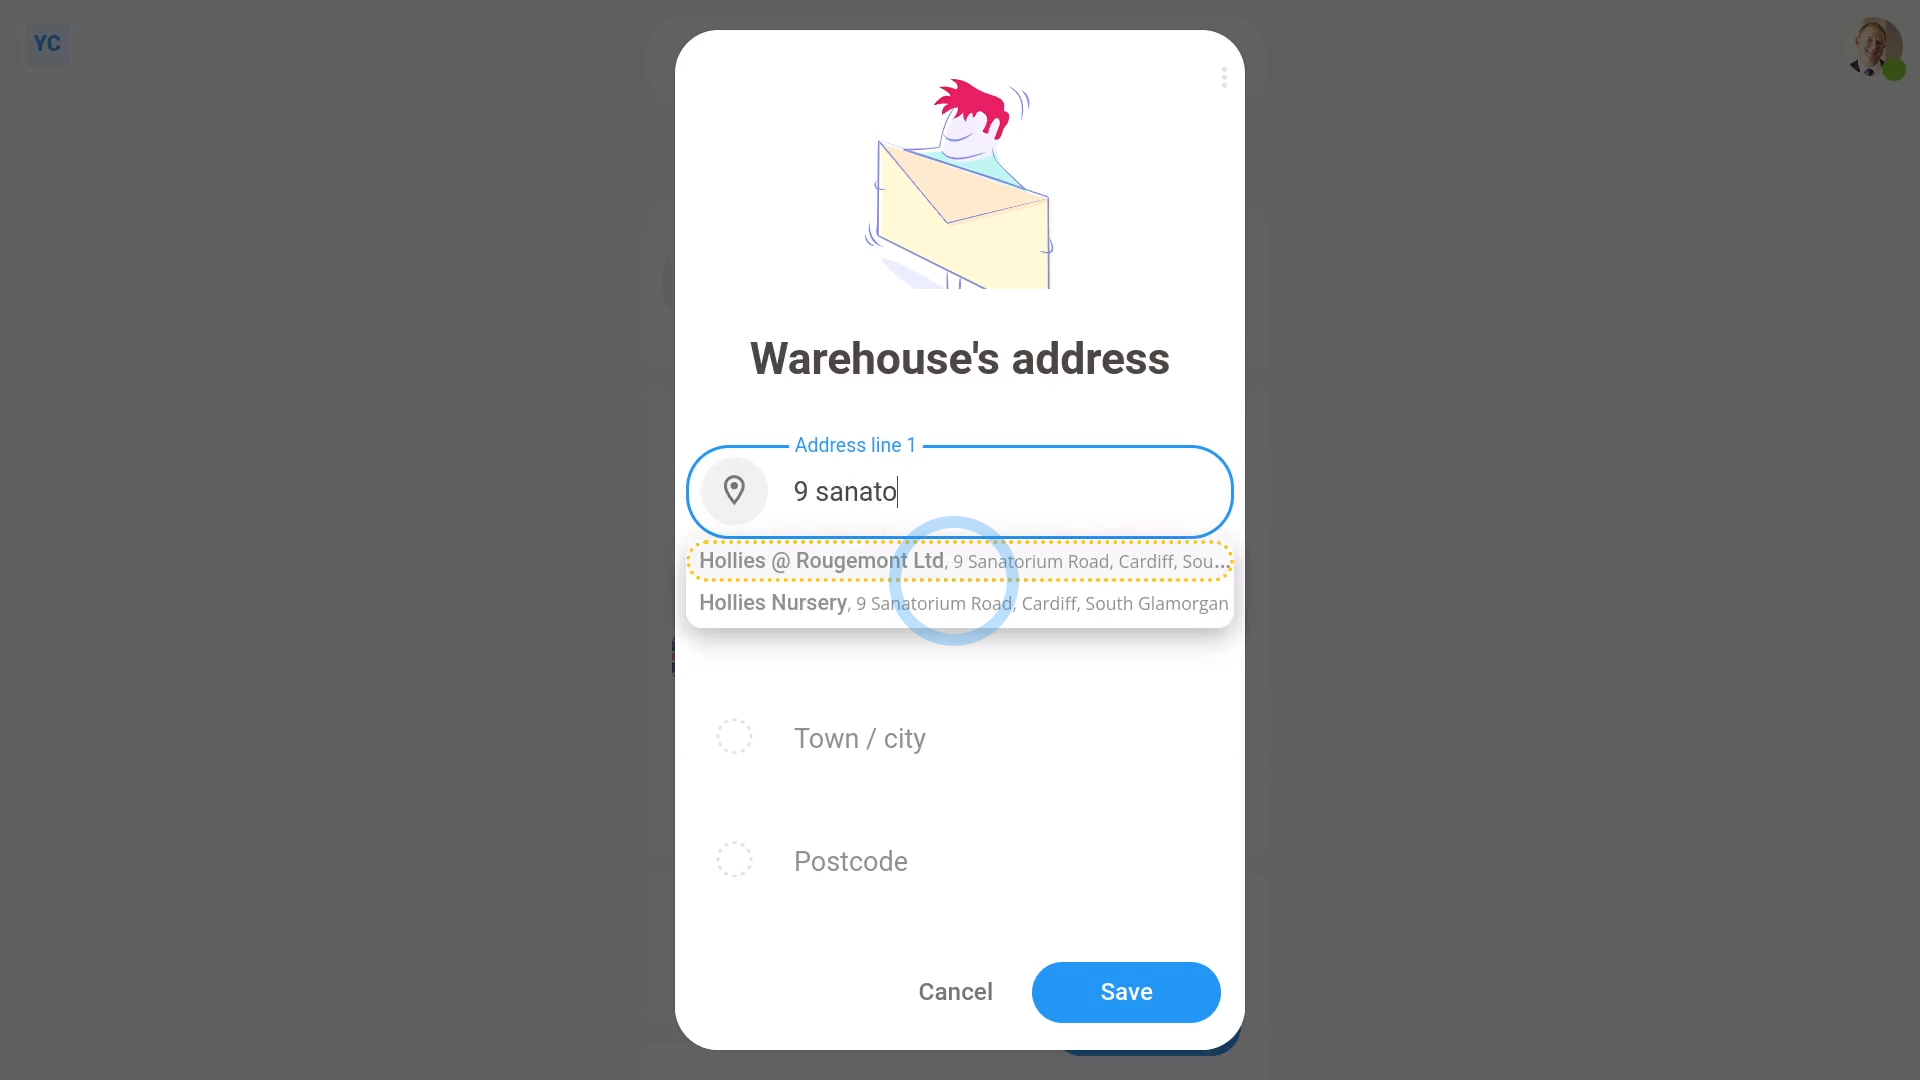
- Next, tap: Set address
- And type your location's address. As soon as you start typing, it automatically suggests similar addresses.
- Once you've tapped on your address, it fills everything else in for you, but you can still type in your own changes.
- Once you're ready, tap: Save
- Once it's saved, you'll see the full address with a matching map preview.
- And finally, optionally, you can also add notes to your location. For example, notes on Wi-Fi or fire exits.
To add notes to a location:
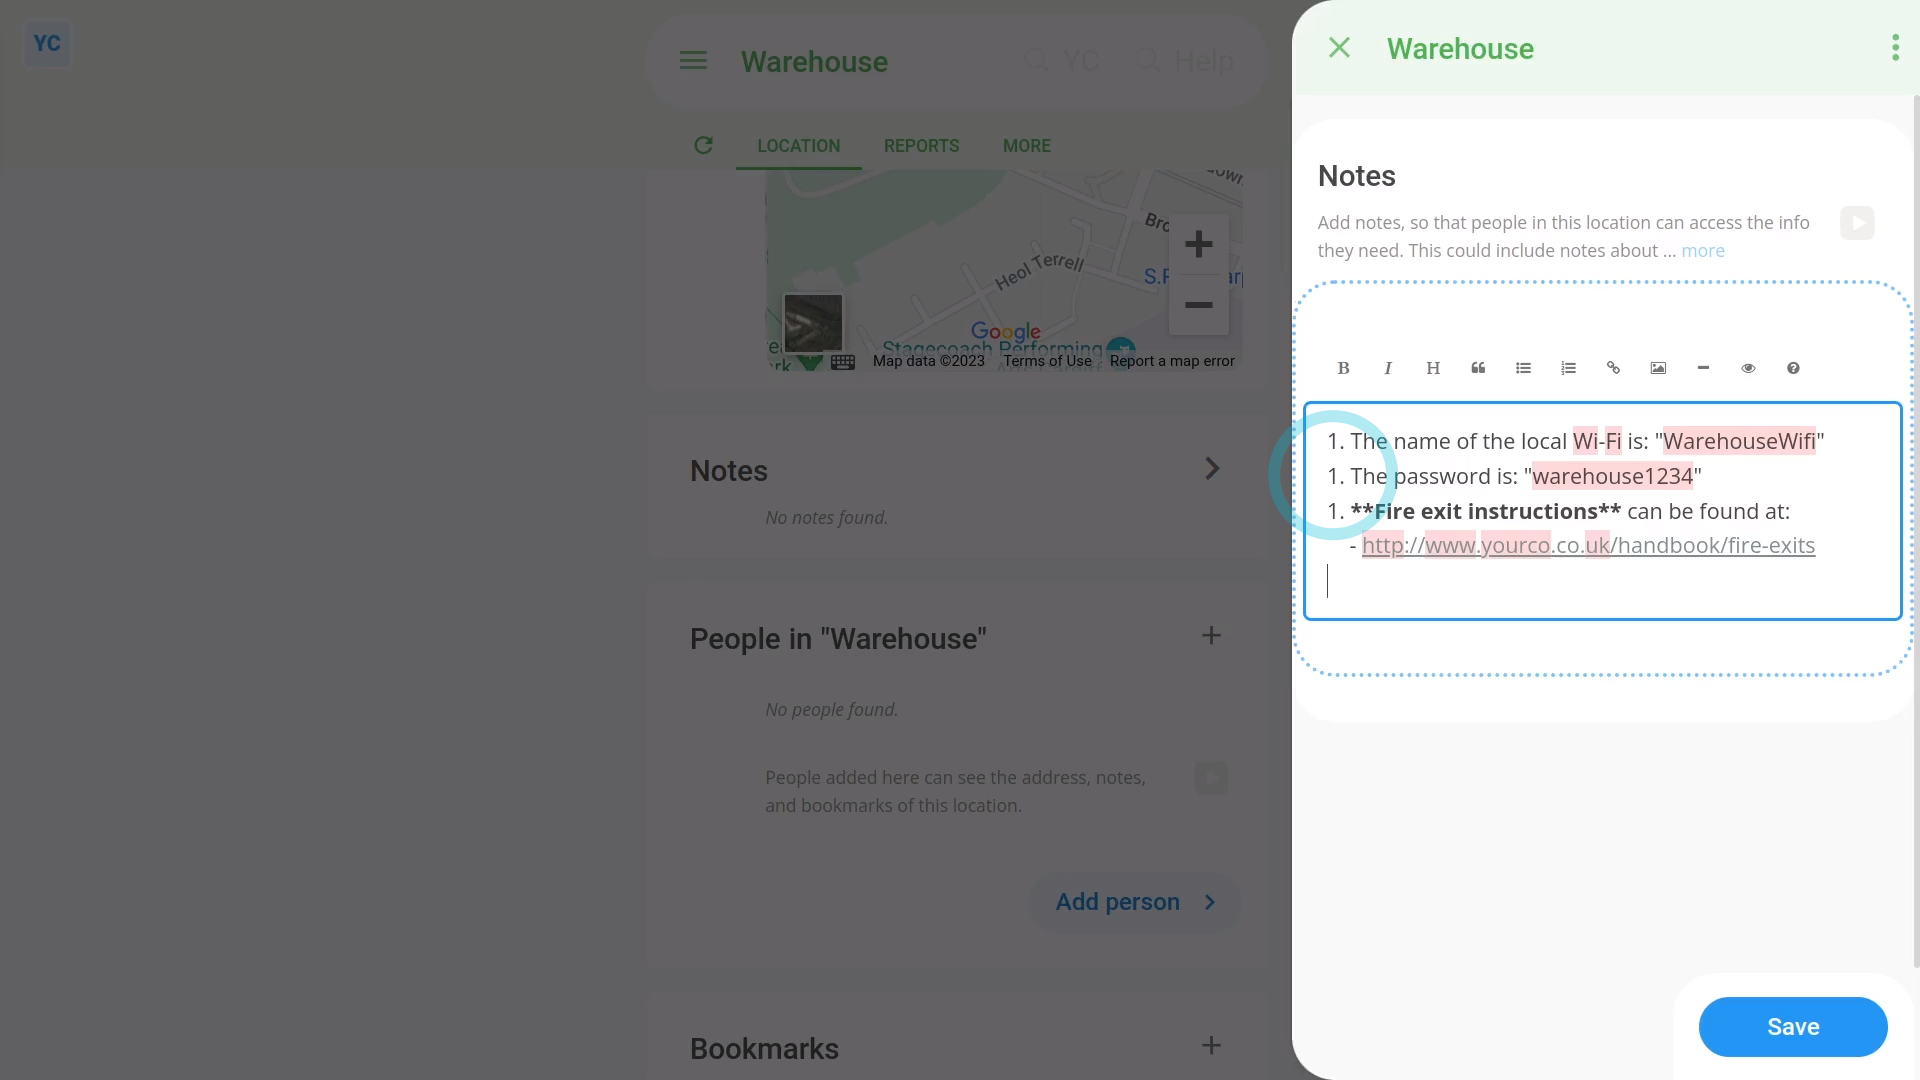
- First, select the location on: MenuLocations
- Then scroll down to the "Notes" heading, and tap the "Edit" button:
- Once it slides out on the right, type out the notes you'd like to share with the location's people.
- You can format your notes using Markdown, including: bold text, and bullet lists.
- To learn more about formatting with Markdown, tap the question mark button:
- You can type in as many notes as you want. Even pages of notes is fine. Once you've finished typing your notes, tap: Save
- And finally, once it's saved, you'll now see your notes shown on the main page for your new location.
Keep in mind that:
- Anyone who's added to a location can see all the notes and bookmarks of that location.
- Only people who've got "Full org admin" permissions can create, make changes, or add people to a location.
To learn more:
- About how to add people to a location, watch the video on: Adding people to a location
 Adding people to a location
And that's it! That's everything you need to know about creating a location!
Was this page helpful?