
Email signature


1. How do I use email signatures?

 2:05
2:05
"How do I use email signatures?"
Setting your email signature gives you a consistent public appearance when you communicate by email, including all your up-to-date contact info.
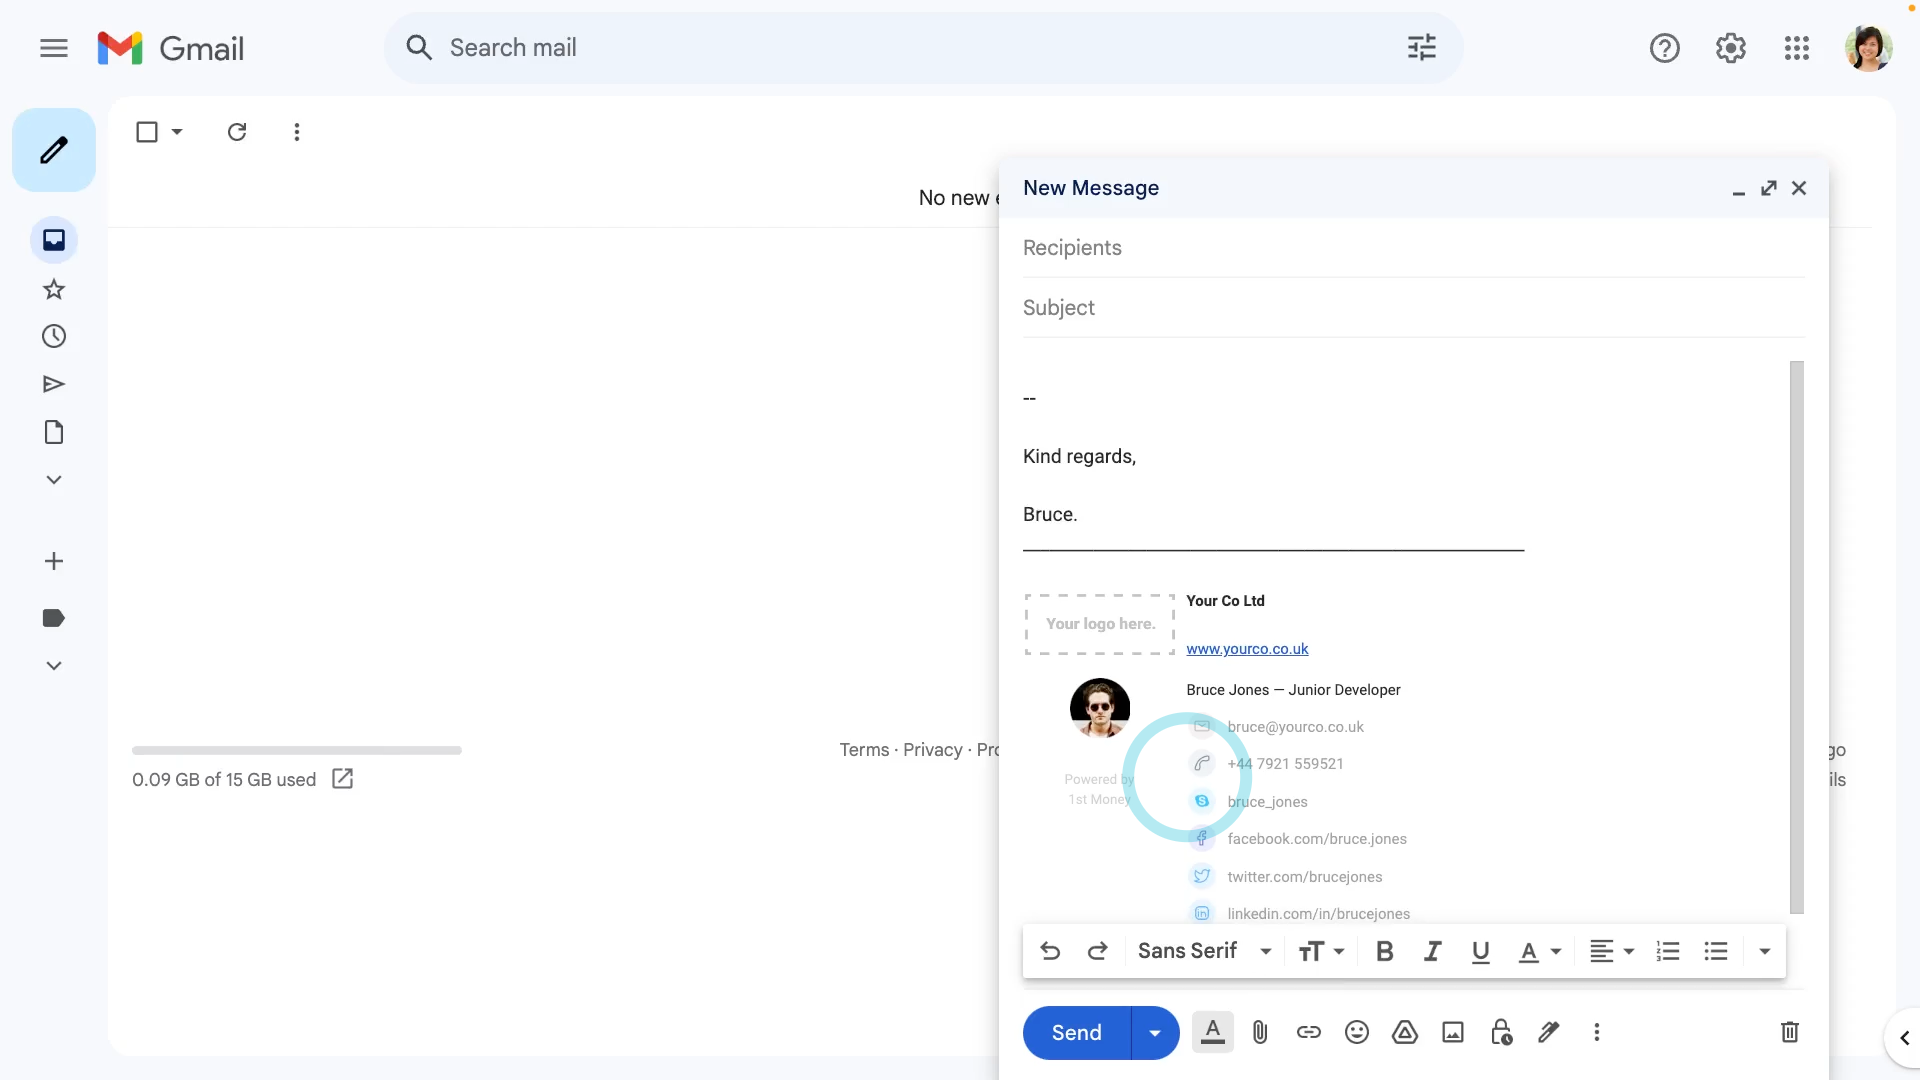
To add your org's email signature to your emails using Gmail:
- First, open yourself on: "Menu", then "Me"
- Then tap: "More", then "Email signature"
- And then tap Copy email signature to copy your signature.
- Next, in your browser, log in to Gmail and tap the settings cog: (at the top)
- Then tap: See all settings
- Once in settings, scroll down to "Signature" and tap: Create new
- Now give your new signature a name, and tap: Create
- Now you'll see the signature box. Paste your signature into the box.
- Then select your signature name under: "Signature defaults"
- Next, scroll down and tap: Save changes (at the bottom)
- And finally, when you compose a new email, your email signature now shows (at the bottom of the email).

Keep in mind that:
- To prevent your email signature from getting too large, only the first 8 contact details are ever shown.
For advanced usage:
- If you want to preview how it looks in your email inbox, tap: Send test email
- The button sends you your email signature in a test email to your own email inbox.
- Alternatively, to see the HTML used for your email signature, scroll to the bottom, and tap: Show HTML
To learn more:
- About how to set customise your org's email signature template, watch the video on: Customising the default email signature
 Customising the default email signature
And that's it! That's all you need to do when setting your email signature!
2. How do I customise the format of my org's email signature?
 1:34
1:34
"How do I customise the format of my org's email signature?"
Email signatures give the people in your org a way to have a consistent email signature, with their up-to-date contact info.

To customise your org's default email signature:
- First, open your org on: "Menu", then "Orgs"
- Then tap: "Settings", then "Default email signature"
- To see how it looks before you make any changes, tap: See your sig
- Now go ahead and make any changes you'd like to your org's default email signature.
- Then when you're ready to see your changes, tap See your sig again.
- And finally, if you want to preview how it looks in your email inbox, tap Send test email. Which sends you your email signature in a test email to your own email inbox.
For advanced usage:
- Tap the "Inserts" button , to select from the additional inserts that are available.
To learn more:
- About how to set your email signature in Gmail, watch the video on: Using email signatures
- To learn more about how to try inserts in your org's email signature, watch the video on: Email signature inserts
And that's it! That's everything you need to know about customising your org's default email signature!
3. How do I use inserts in my org's default email signature?
 1:46
1:46
"How do I use inserts in my org's default email signature?"
With inserts, you can add each person's contact details, department, and more, into your org's default email signature.
To try inserts in your org's default email signature:
- First, open your org on: "Menu", then "Orgs"
- Then tap: "Settings", then "Default email signature"
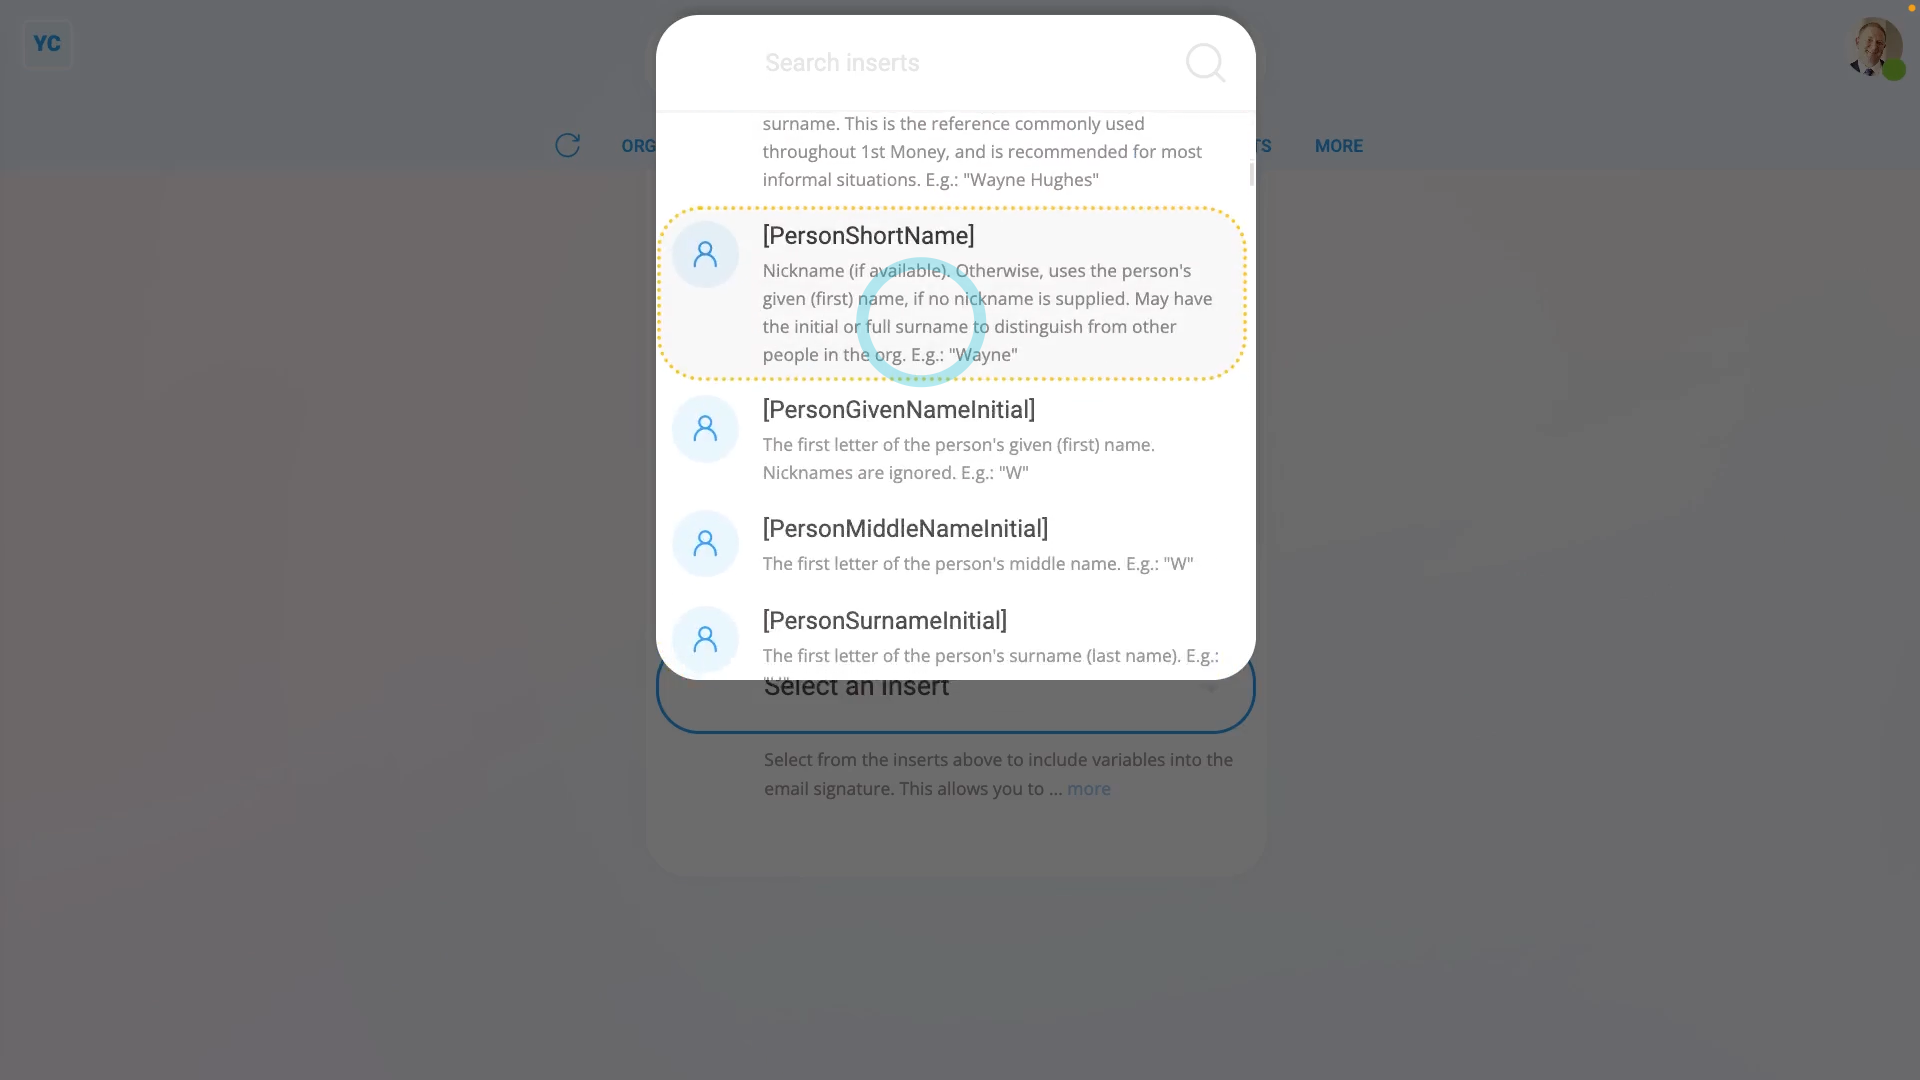
- Then to open the inserts list, tap the "Inserts" button , and you'll see a list of all the available inserts.
- There's lots to pick from, and each one has an example of the text it inserts.
- You may find it easier to try the search box to find the one you're looking for.
- To try an insert, tap into your org's default email signature (at the point where you want to put it).
- Then tap back on the inserts list, and tap the insert you want to try.
- You'll see that it's added the insert text (in square brackets) to the point of the email signature where you left your cursor.
- Then when you're ready to see your changes, tap: See your sig
- And finally, you'll notice that the email signature has substituted the inserts with the selected person's text.
To learn more:
- About how to set your email signature in Gmail, watch the video on: Using email signatures
And that's it! That's everything you need to know about using inserts in your org's default email signature!