
Bookmarks
 2:28
2:28 1:46
1:46 1:19
1:19 1:33
1:33 2:00
2:00 1:44
1:441. How do I create a bookmark?

 2:31
2:31
"How do I create a bookmark?"
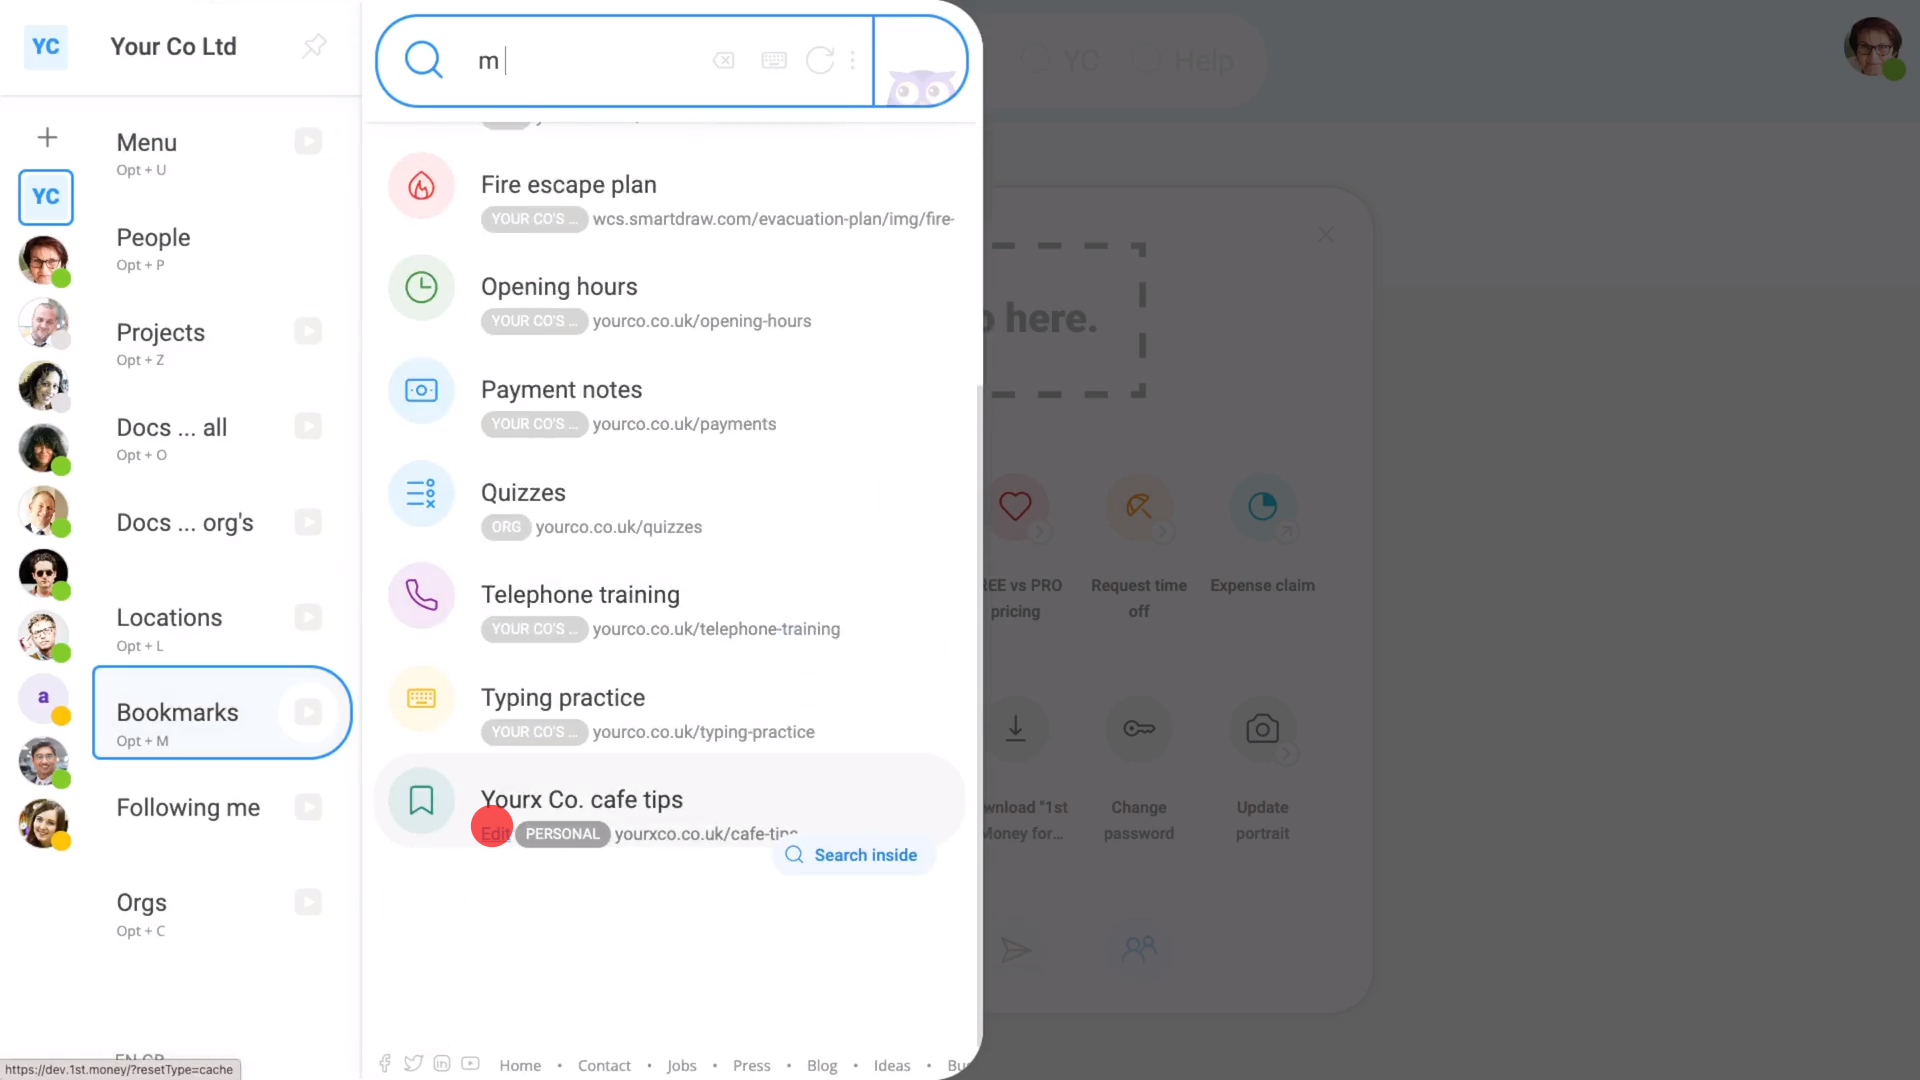
Bookmarks are a convenient way to share internet links with the people in your company.
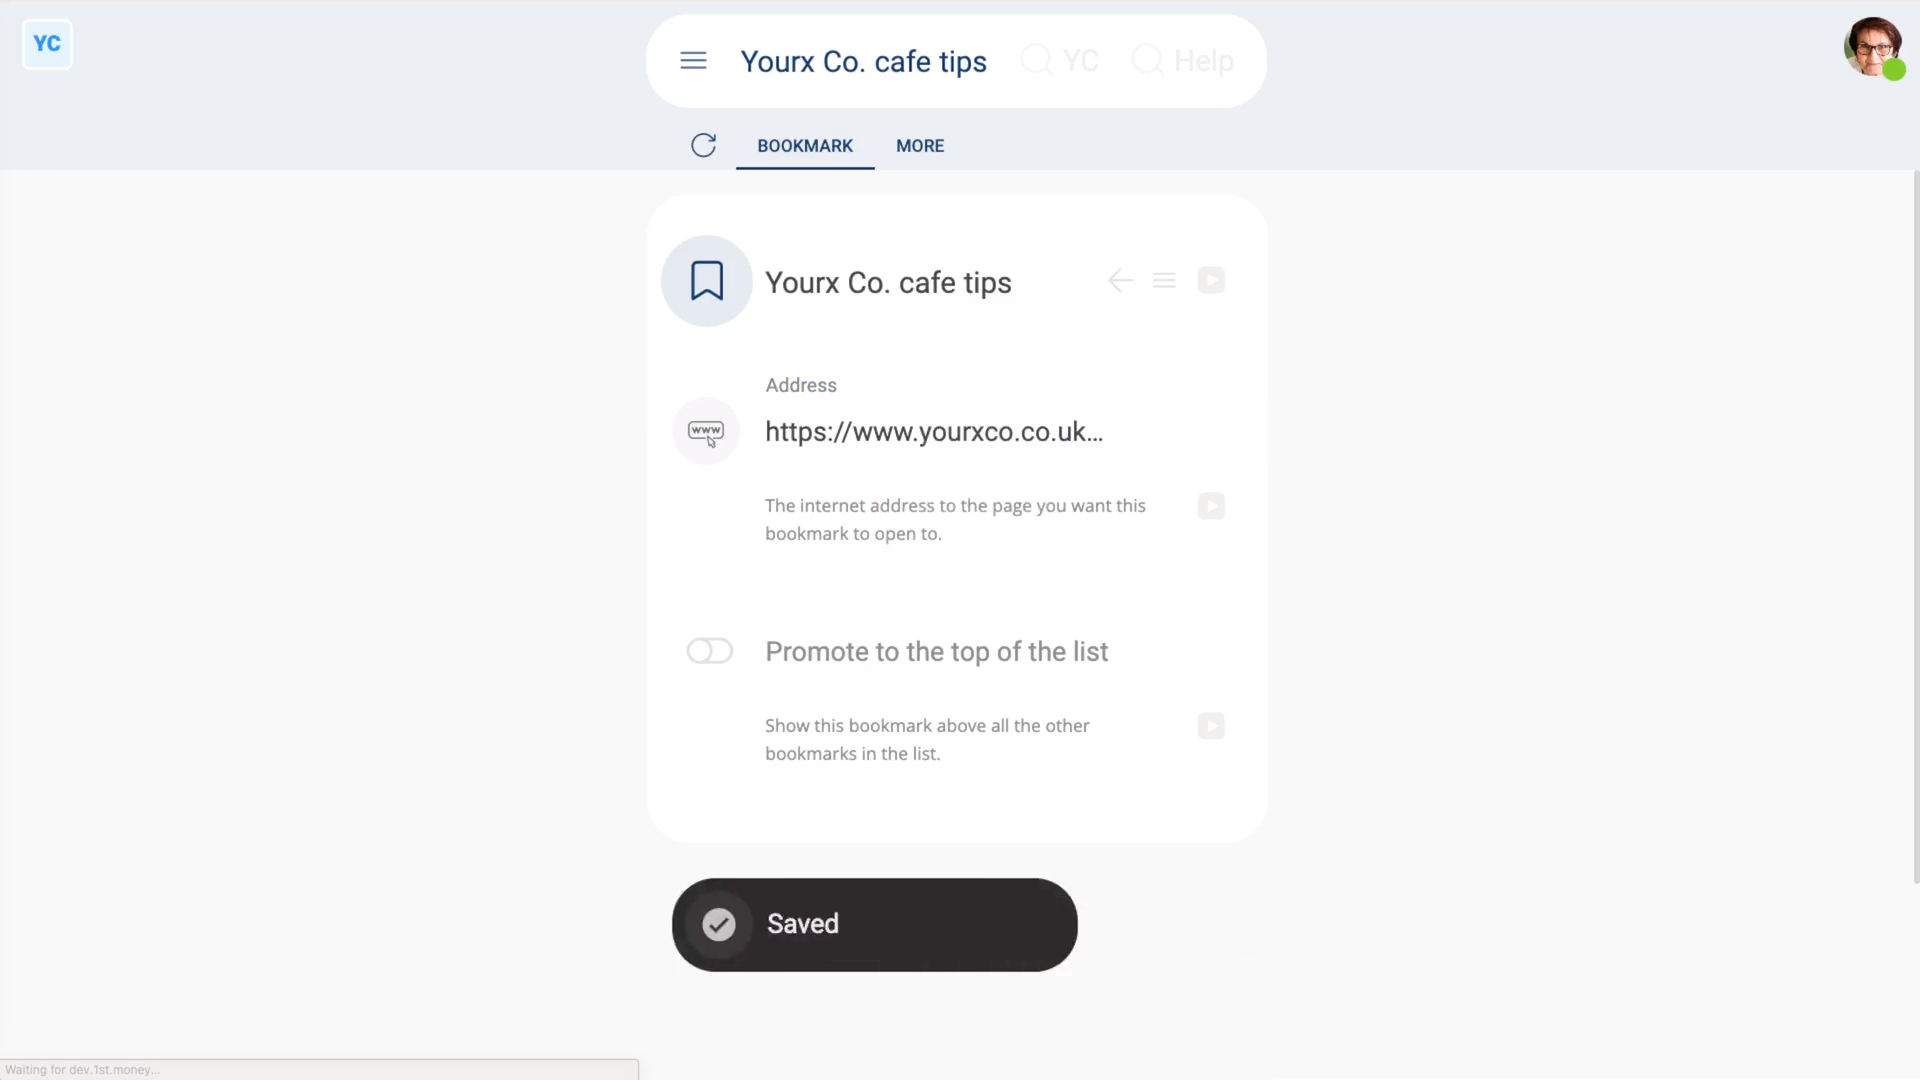
To create a personal bookmark:
- First, tap: "Menu", "Bookmarks", then "New bookmark"
- Once it's open, enter the bookmark's name. Which is the name that'll show on the bookmarks menu.
- Then enter the bookmark's address. Which is the link that the bookmark opens to.
- And finally, tap: Save
To see your new bookmark:
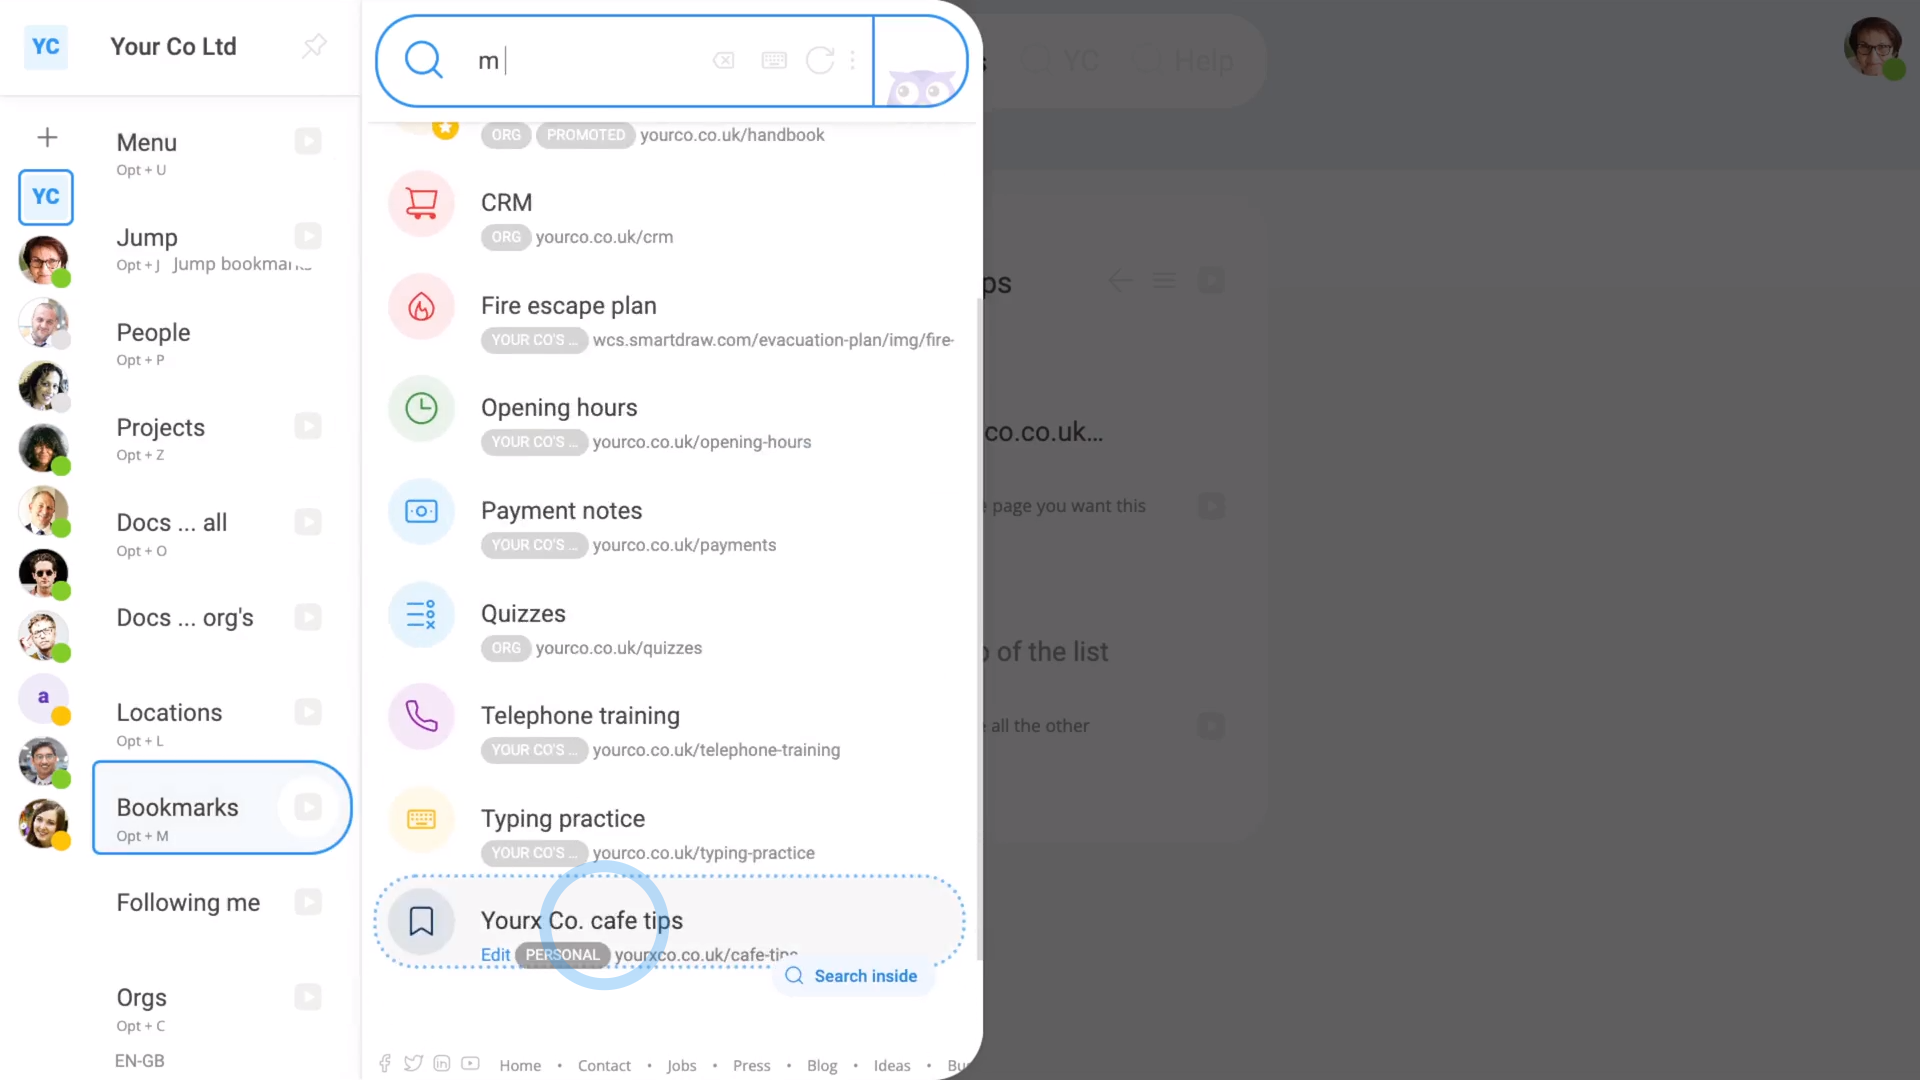
- First, go to: "Menu", then "Bookmarks"
- And finally, you'll now see it in the list.

Keep in mind that:
- When you tap New bookmark from the menu, it creates a "Personal" bookmark that can only be seen by yourself.
- If instead, you make the bookmark from your org, pay batch, project, or location, then your bookmark is shared, and can be seen by others.
- Pay batch, project, and location bookmarks are automatically shared with people. The bookmarks are shared as soon as the person is added to a pay batch, a project, or a location.
- Org bookmarks are automatically shared with all your org's people, as soon as the people are added to your org.
 Sharing bookmarks
Examples of org bookmarks, include:
- A link to the company handbook.
- Links to company policies.
- Or a link to the company CRM login, or other online tools.
For pay batch bookmarks, you could bookmark:
- A link to the guidelines for expense claims.
- Or links to answers about common pay related questions.
For projects, you could bookmark:
- A link to the project guidelines.
- Or links to project training videos, and other materials.
And for locations, your bookmarks could include:
- A link to the fire safety guidelines.
- Or links to instructions about connecting to printers, or wi-fi, etc.
And that's it! That's all you need to do to create a personal bookmark!
2. How do I change or promote a bookmark?
 1:43
1:43
"How do I change or promote a bookmark?"
You can change or promote a bookmark at any time. Including changing its name, updating the address, and changing its list colour and image.
To change or update a bookmark:
- First, select the bookmark on: "Menu", then "Bookmarks"
- You'll see an "Edit" link on the bookmarks you've got permissions to change.
- Once you've decided on the bookmark you want to change, tap its "Edit" link.
- Once it's open, make your changes.
- Optionally, you can also tap the circle and set the list colour and image.
- And finally, tap: Save
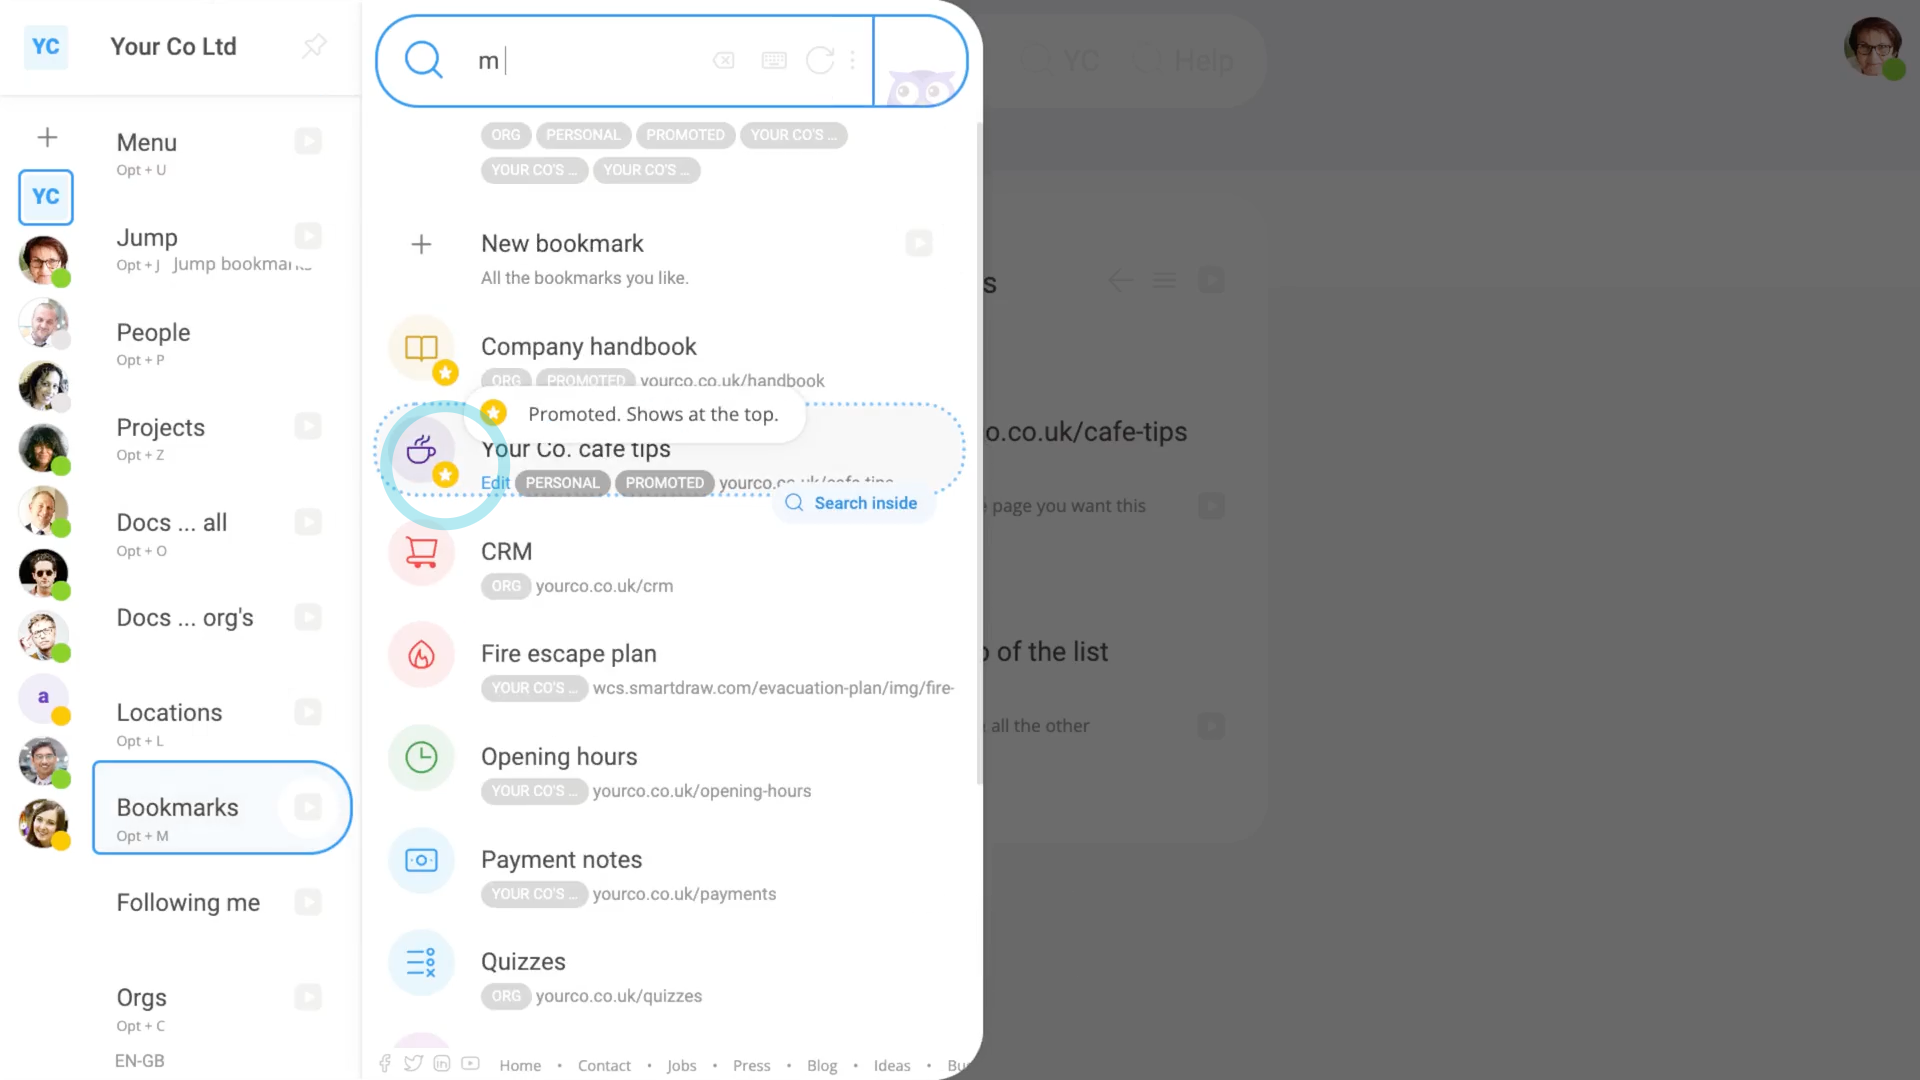
Promoting a bookmark moves the bookmark's position to the top of the bookmarks list.
To promote a bookmark:
- First, select the bookmark on: "Menu", then "Bookmarks"
- Then tap the "Edit" link on the bookmark you want to promote.
- Once it's open, turn on: "Promote to the top of the list"
- Then tap: Save
- And finally, the bookmark now shows (at the top of the bookmarks list), with the yellow "promoted" star.
Keep in mind that:
- People who've got "Full org admin" permissions can add or update all org, project, location, and personal bookmarks.
- But only payroll admins can add or update pay batch bookmarks.
And that's it! That's all you need to do to change or promote a bookmark!
3. How do I share bookmarks to people in my org, or pay batch, etc?
 1:17
1:17
"How do I share bookmarks to people in my org, or pay batch, etc?"
A bookmark's sharing is automatically set based on where you created the bookmark.
To share a bookmark with all people in your org, pay batch, project, or location:
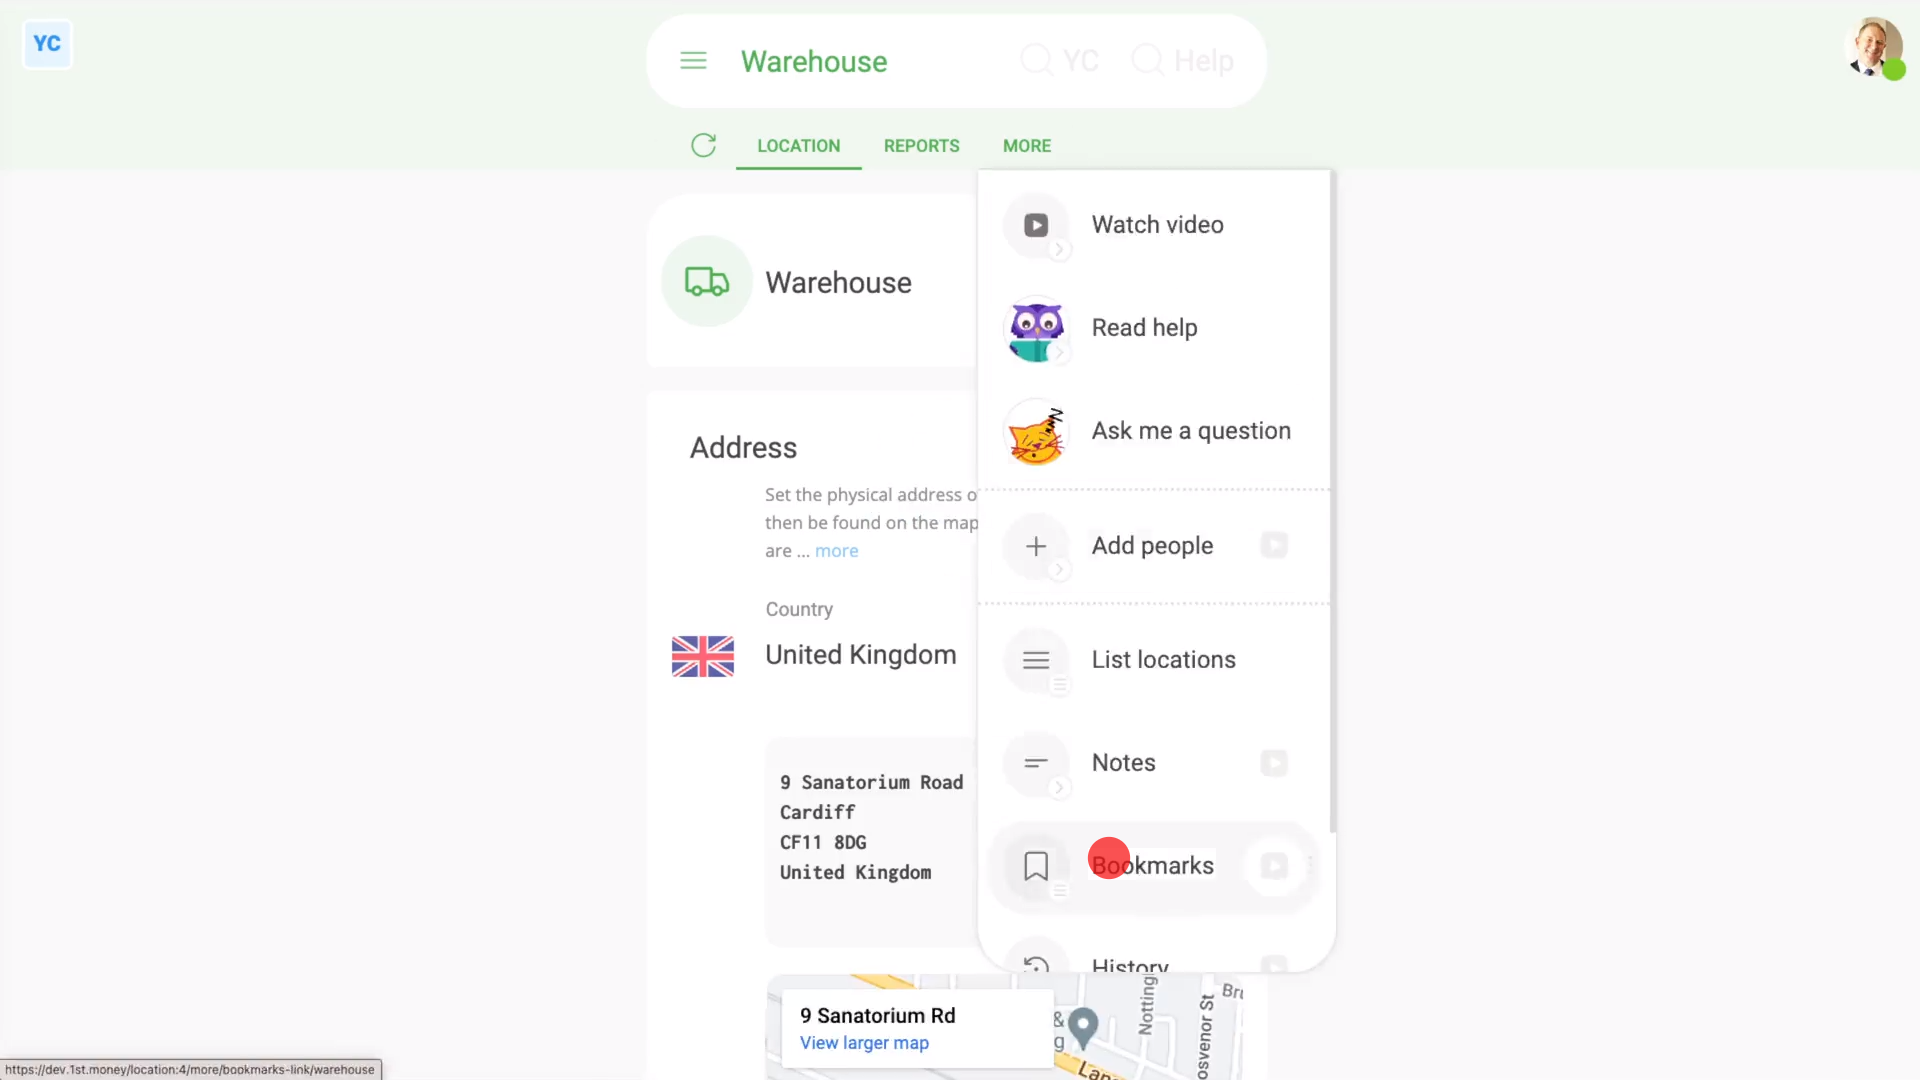
- First, open your org, pay batch, project, or location that you'd like to share a bookmark from.
- Once it's open, go to: "More", then "Bookmarks"
- Then tap: "New bookmark"
- Once it's open, enter the bookmark's details.
- Then tap: Save
- And finally, the bookmark is now shared to all the people in whatever org, pay batch, project, or location that you created the bookmark from.
Keep in mind that:
- People who've got "Full org admin" permissions can add or update all org, project, location, and personal bookmarks.
- But only payroll admins can add or update pay batch bookmarks.
And that's it! That's all you need to do to share a bookmark with whatever groups of people you've got in your org!
4. How do I show bookmarks when a person ends their working day?
 1:31
1:31
"How do I show bookmarks when a person ends their working day?"
Bookmarks can be used as a helpful reminder of websites that your people may need to visit when ending their working day.
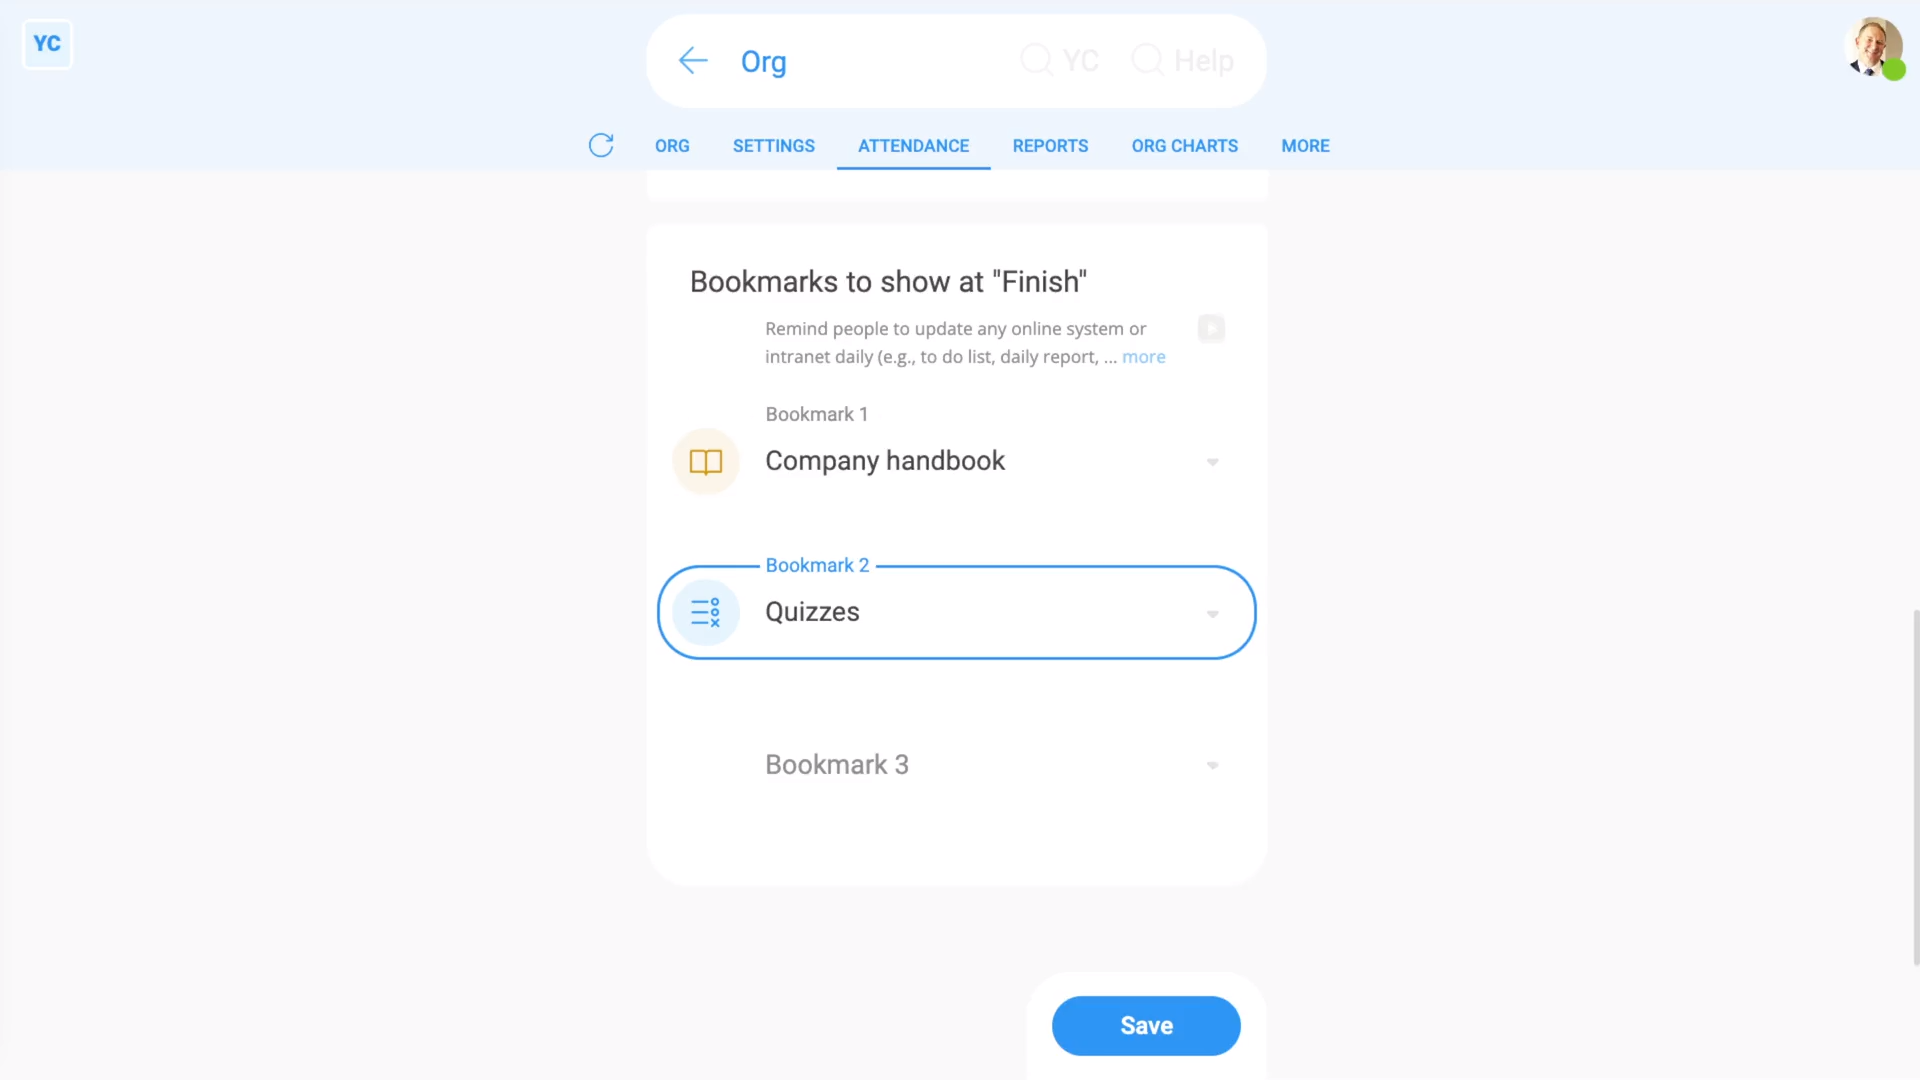
To set which org bookmarks are shown when a person ends their working day:
- First, open your org on: "Menu", then "Orgs"
- Then tap: "Attendance", then "Attendance settings"
- Then scroll down to the empty bookmark slots (at the bottom).
- And select the bookmarks you want to add. You can set a maximum of three.
- If the bookmark you're after hasn't been added yet, tap New, to make the missing bookmark.
- After you've selected your bookmarks, tap: Save
- And finally, everyone in your org can now see the bookmarks when your people finish their working day!
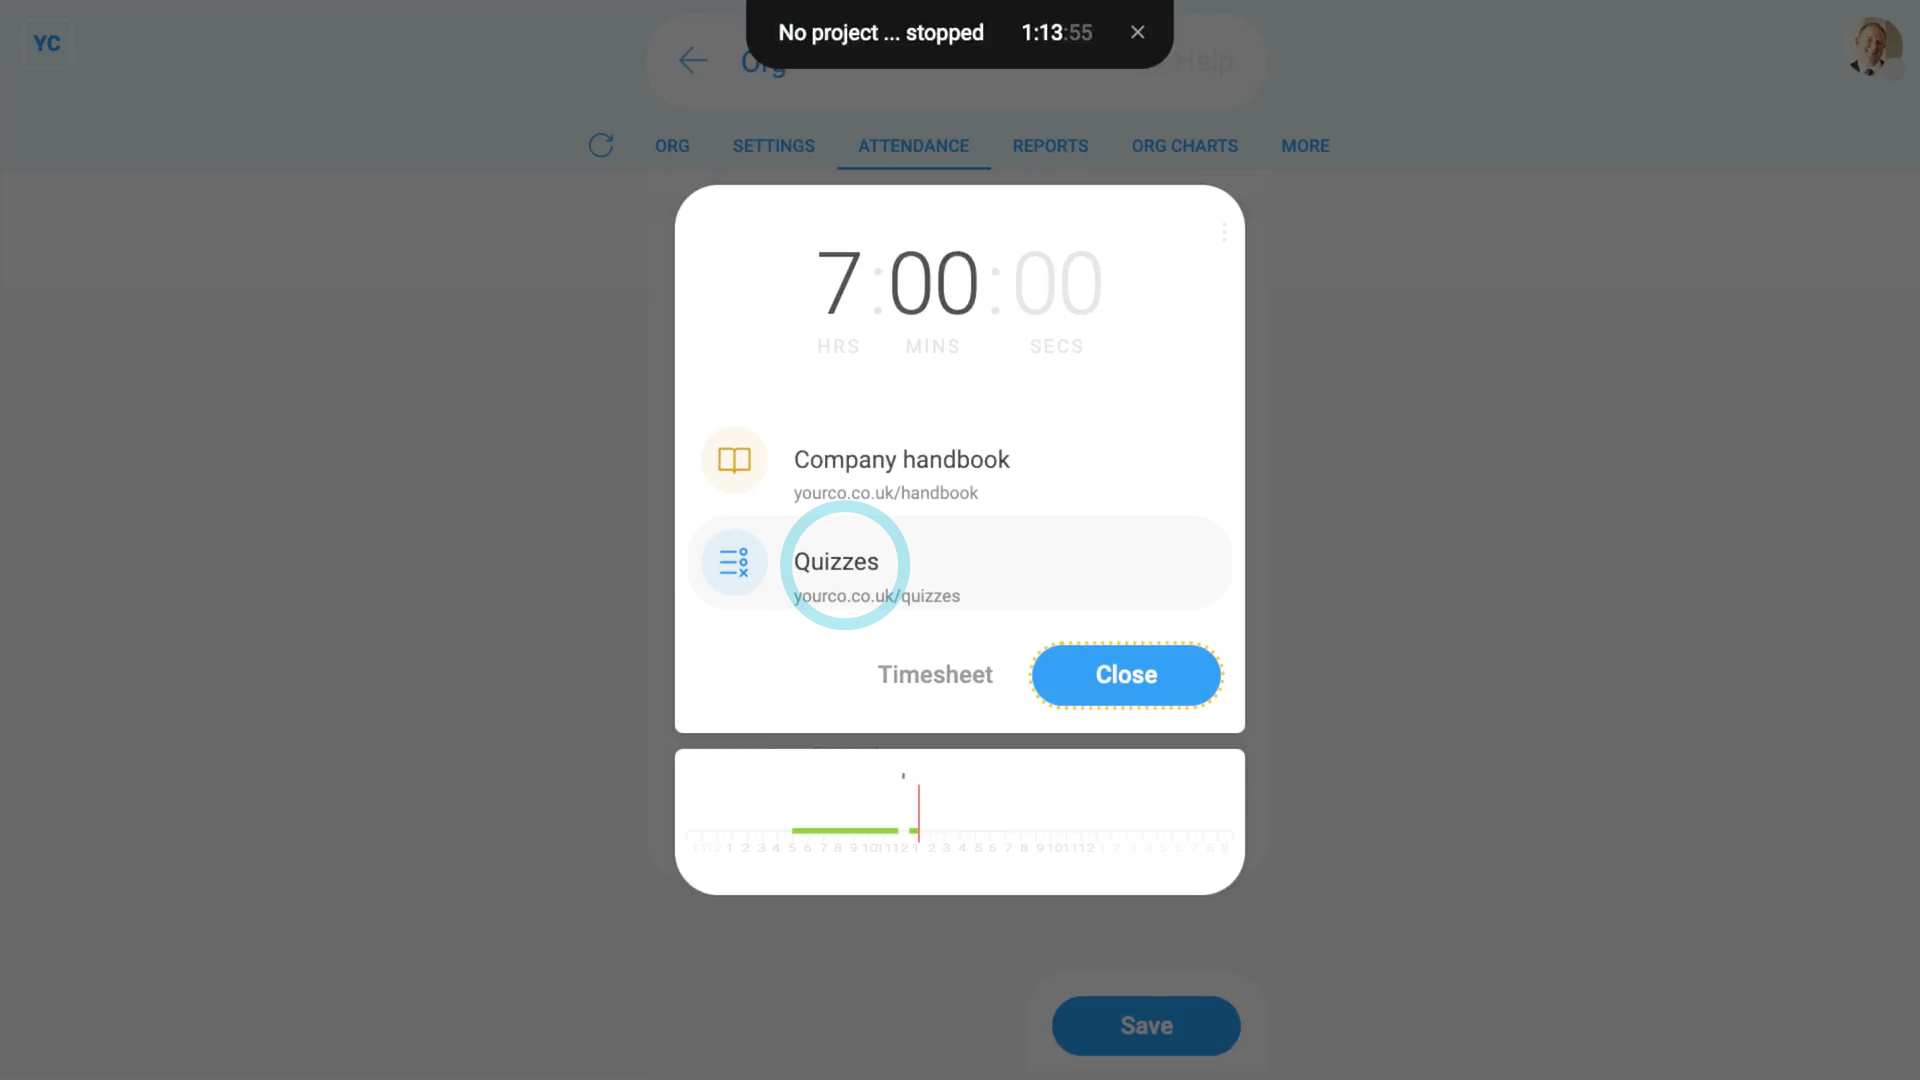
To see your org's bookmarks at "Finish":
- First, tap: "Work-time menu", then "Finish"
- Then enter any notes and your feeling.
- And finally, you'll see the bookmarks that are shown at: "Finish"
Keep in mind that:
- Only bookmarks created in your org can be selected to show at "Finish", because only org bookmarks can be seen by everyone in your org.
And that's it! That's everything you need to know about how to show bookmarks when a person ends their working day!
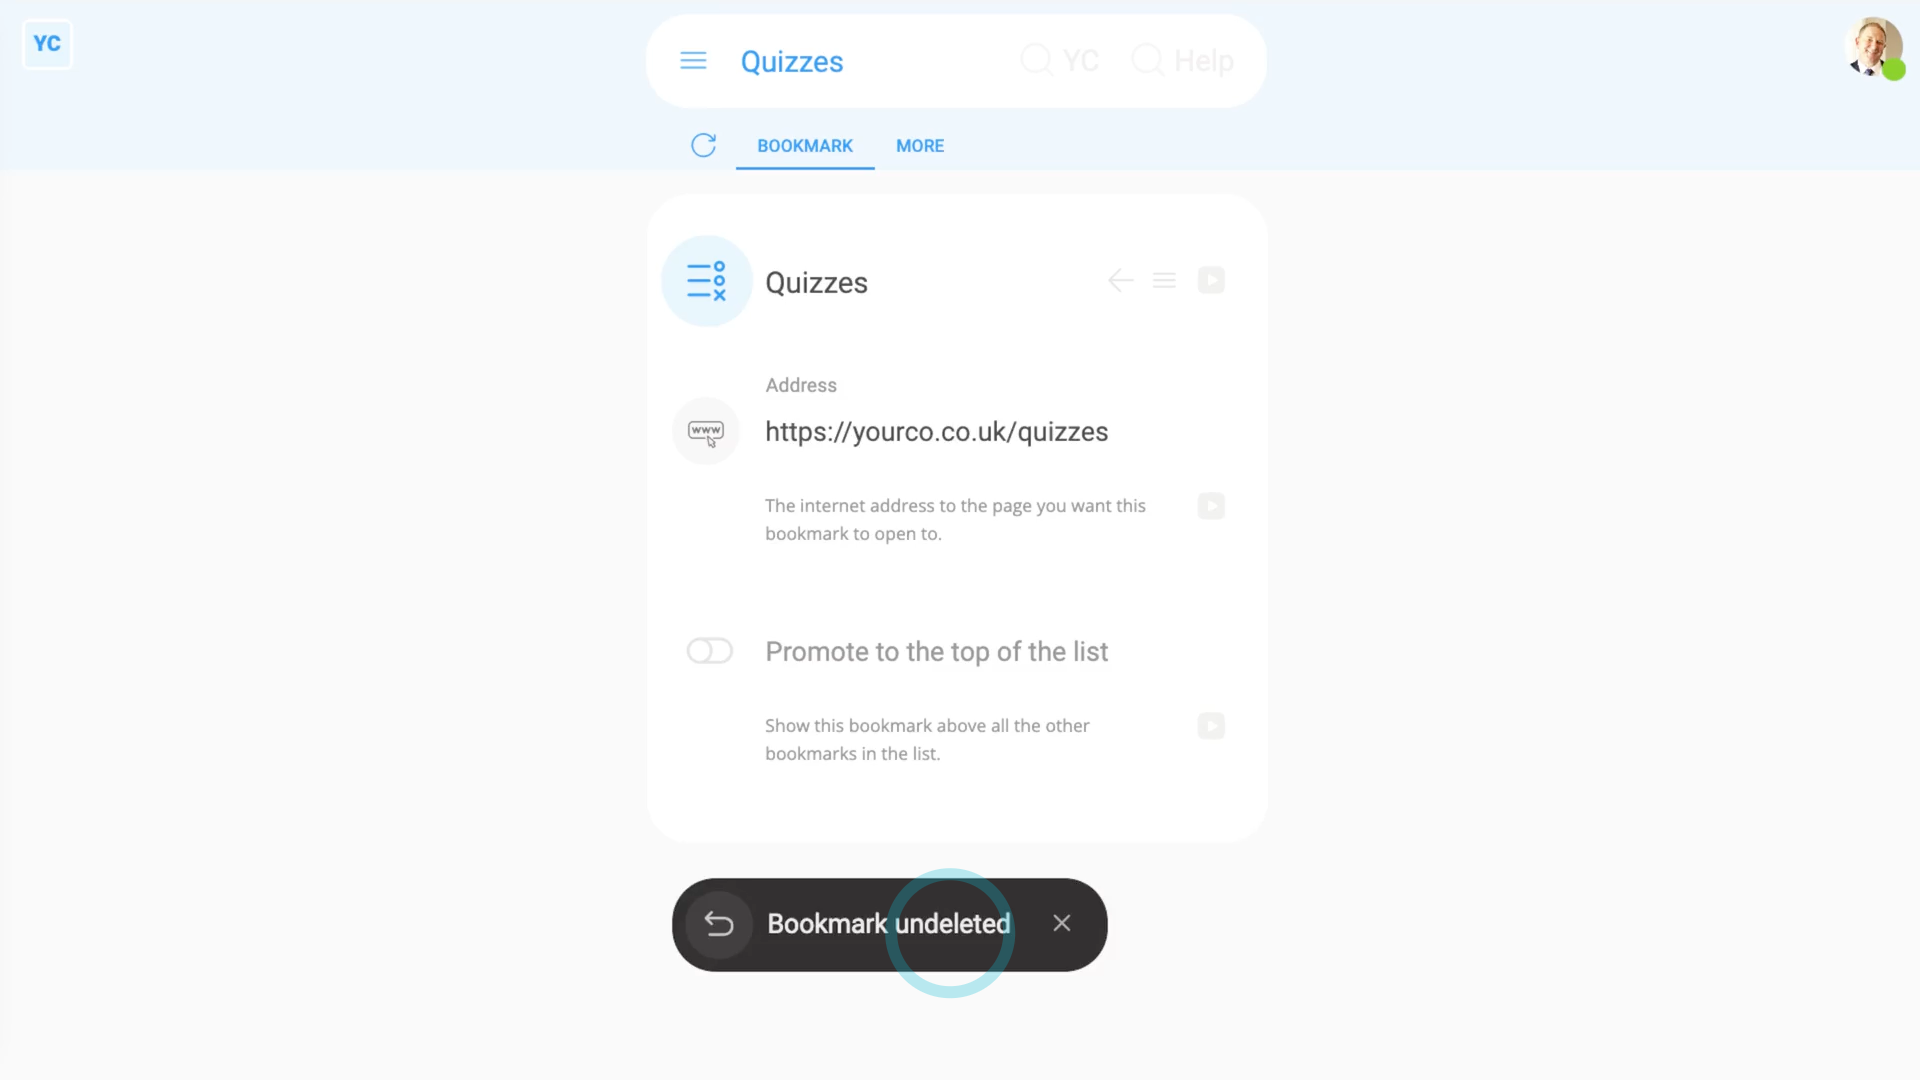
How do I delete or undelete a bookmark?
 1:58
1:58
"How do I delete or undelete a bookmark?"
If you no longer need a bookmark, you're welcome to delete it whenever you like.
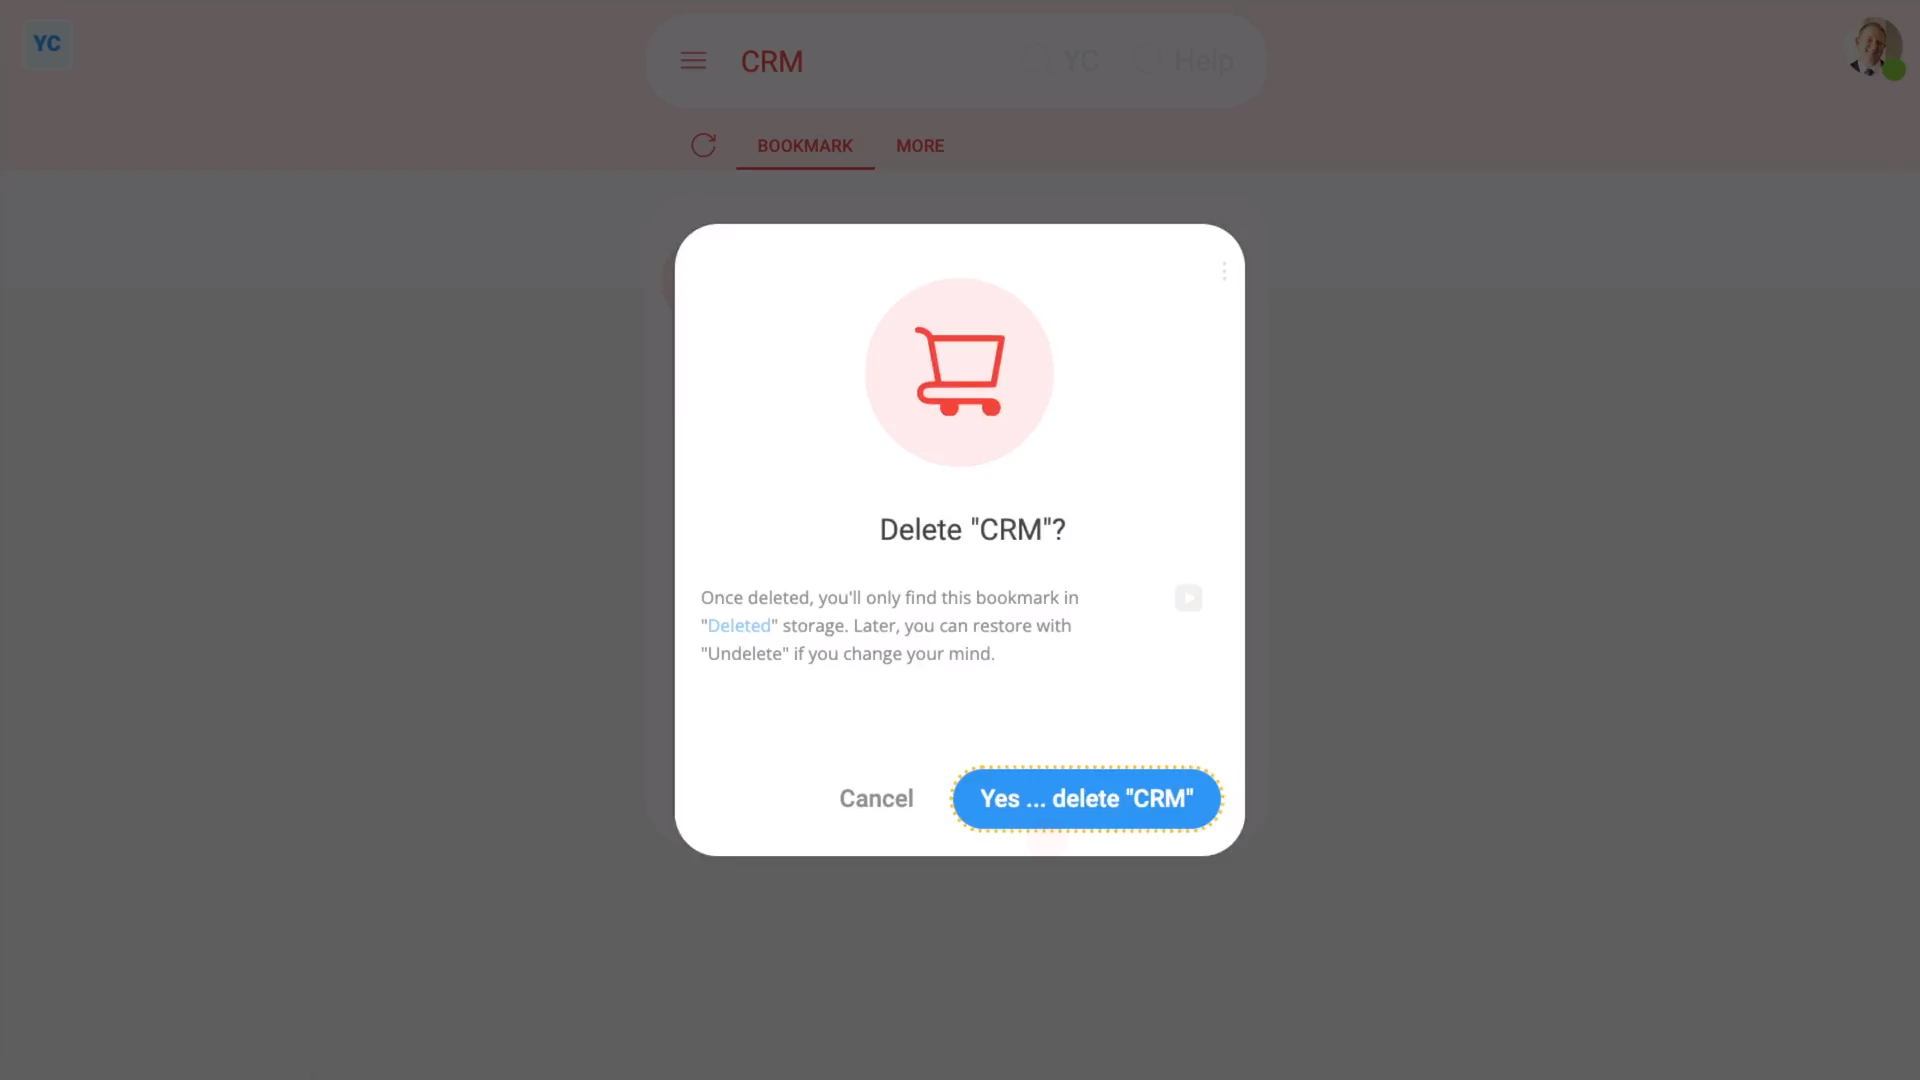
To delete a bookmark:
- First, select the bookmark on: "Menu", then "Bookmarks"
- And tap its "Edit" link to open it.
- Then once the bookmark's open, tap More, then: Delete
- And then tap: Yes ... delete
- Now, the bookmark's deleted.
- The bookmark's also locked, so it can't be changed anymore.
- And finally, if you change your mind and want the bookmark back again, tap Undelete, and it's immediately undeleted.
If it's been a while since you deleted a bookmark, and you want to undelete it, you'll first need to find it in the: "deleted bin"
To undelete a bookmark from your "deleted bin":
- First, tap: "Menu", then "Deleted bin"
- Next, you'll see a category for most of the kinds of items that can be deleted. Tap: Bookmarks
- And then tap the "Edit" link on the bookmark you'd like to undelete.
- Next, tap: Undelete (at the bottom)
- And finally, the previously deleted bookmark is immediately undeleted.
Keep in mind that:
- Only people who've got "Full org admin" permissions can delete or undelete bookmarks.
- Except for personal bookmarks. A person can always delete and undelete their own bookmarks.
- And remember that all deletes and undeletes are always permanently recorded in: "History"
- That means any admin can always look back in time, and see who did any delete, and when the delete was done.
And that's it! That's everything you need to know about deleting or undeleting a bookmark!
How do I use inserts in a bookmark?
 1:46
1:46
"How do I use inserts in a bookmark?"
Inserts are an advanced feature. With inserts, you can add each person's unique email, email prefix, employee ID, and more, into the address of any bookmark.
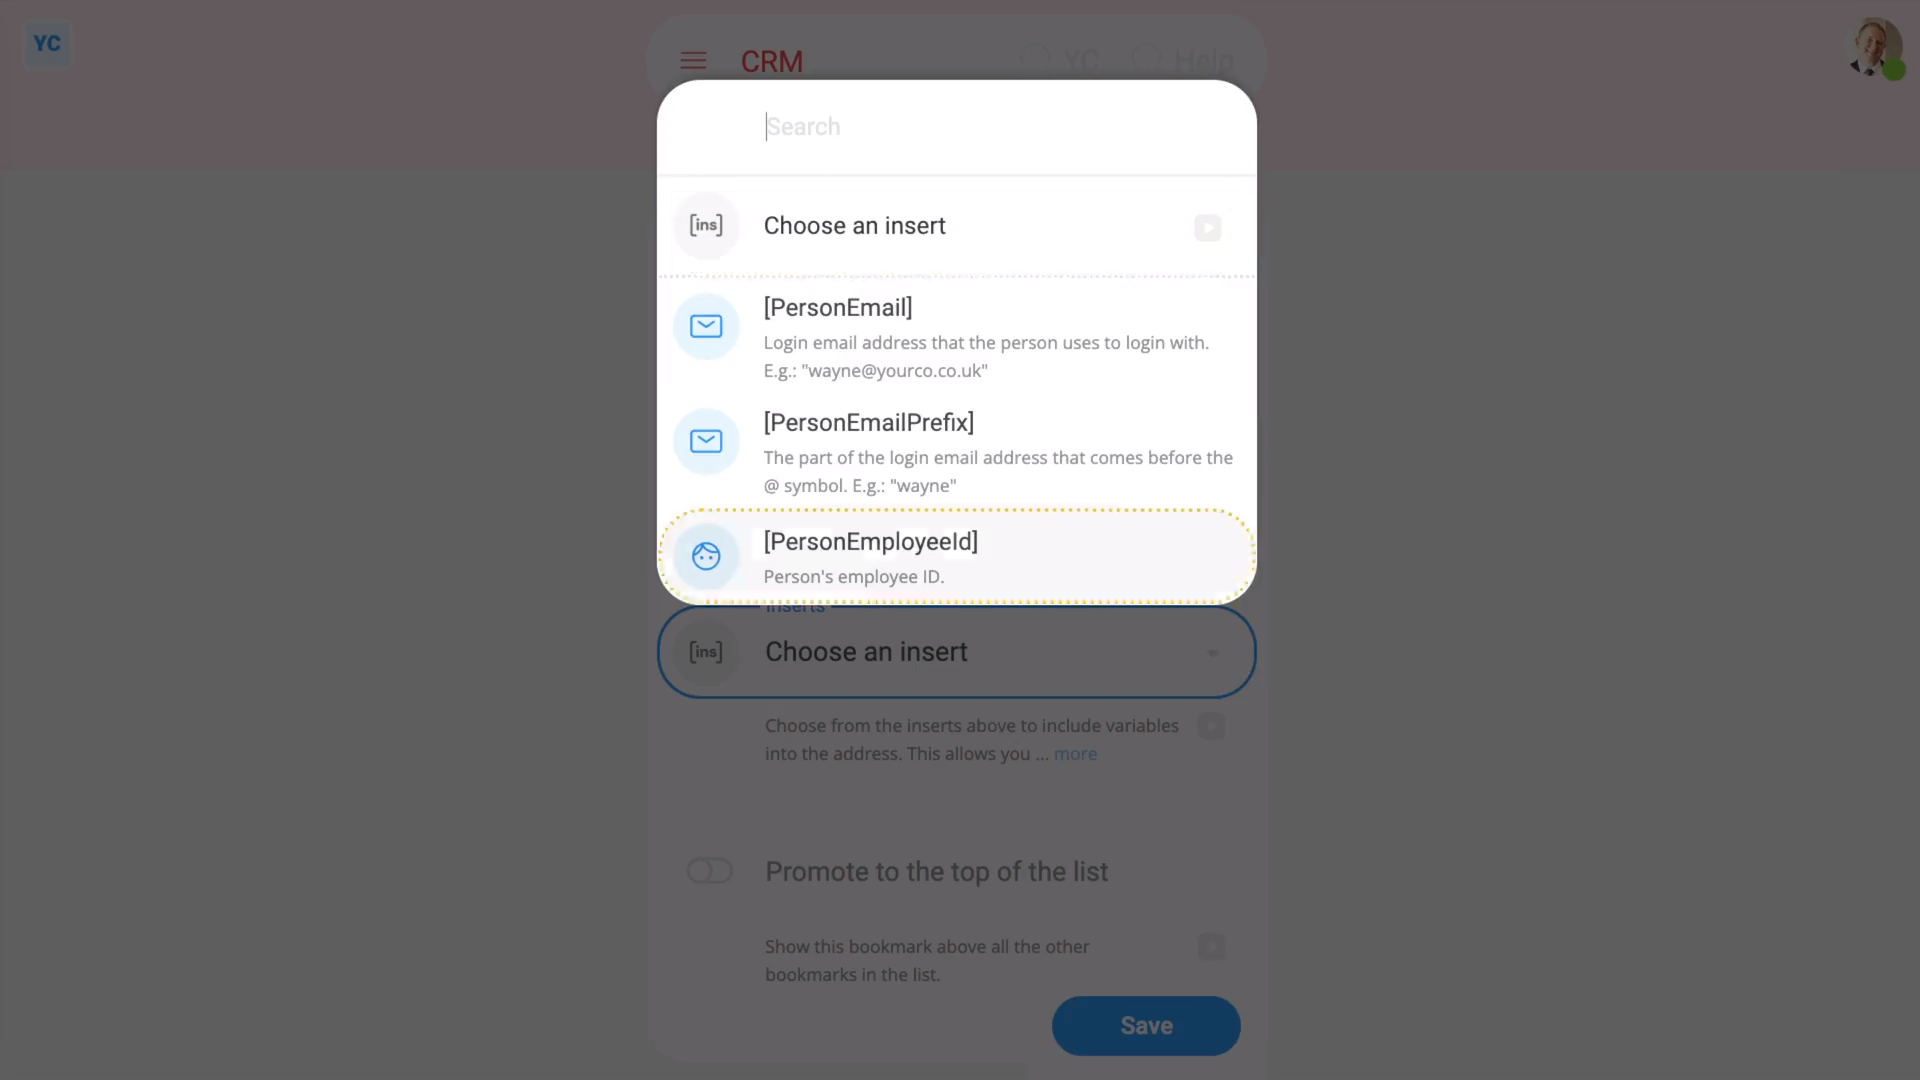
To add an insert into an existing bookmark's address:
- First, select the bookmark on: "Menu", then "Bookmarks"
- Once you've decided on the bookmark you want to change, tap its "Edit" link.
- Once it's open, type in your changes to the "Address" so it's ready for the insert.
- Then tap the "Show inserts" button:
- And you'll now see the "Inserts" box.
- Open the "Inserts" box, and select the insert you want.
- You'll see that it's added the insert text (in square brackets) to the point of the "Address" where you left your cursor.
- Now tap: Save
- And finally, go back and find the bookmark in the menu. You'll see that it's automatically replaced the insert tag with your unique details. For example, your unique email.
Keep in mind that:
- Only inserts that don't include sensitive info can be included into a bookmark address.
- However, if the data you want to append isn't listed, you can always use the "Employee ID" field.
And that's it! That's all you need to do to customise a bookmark with an insert.