
General

 1:59
1:59 1:47
1:47 1:59
1:59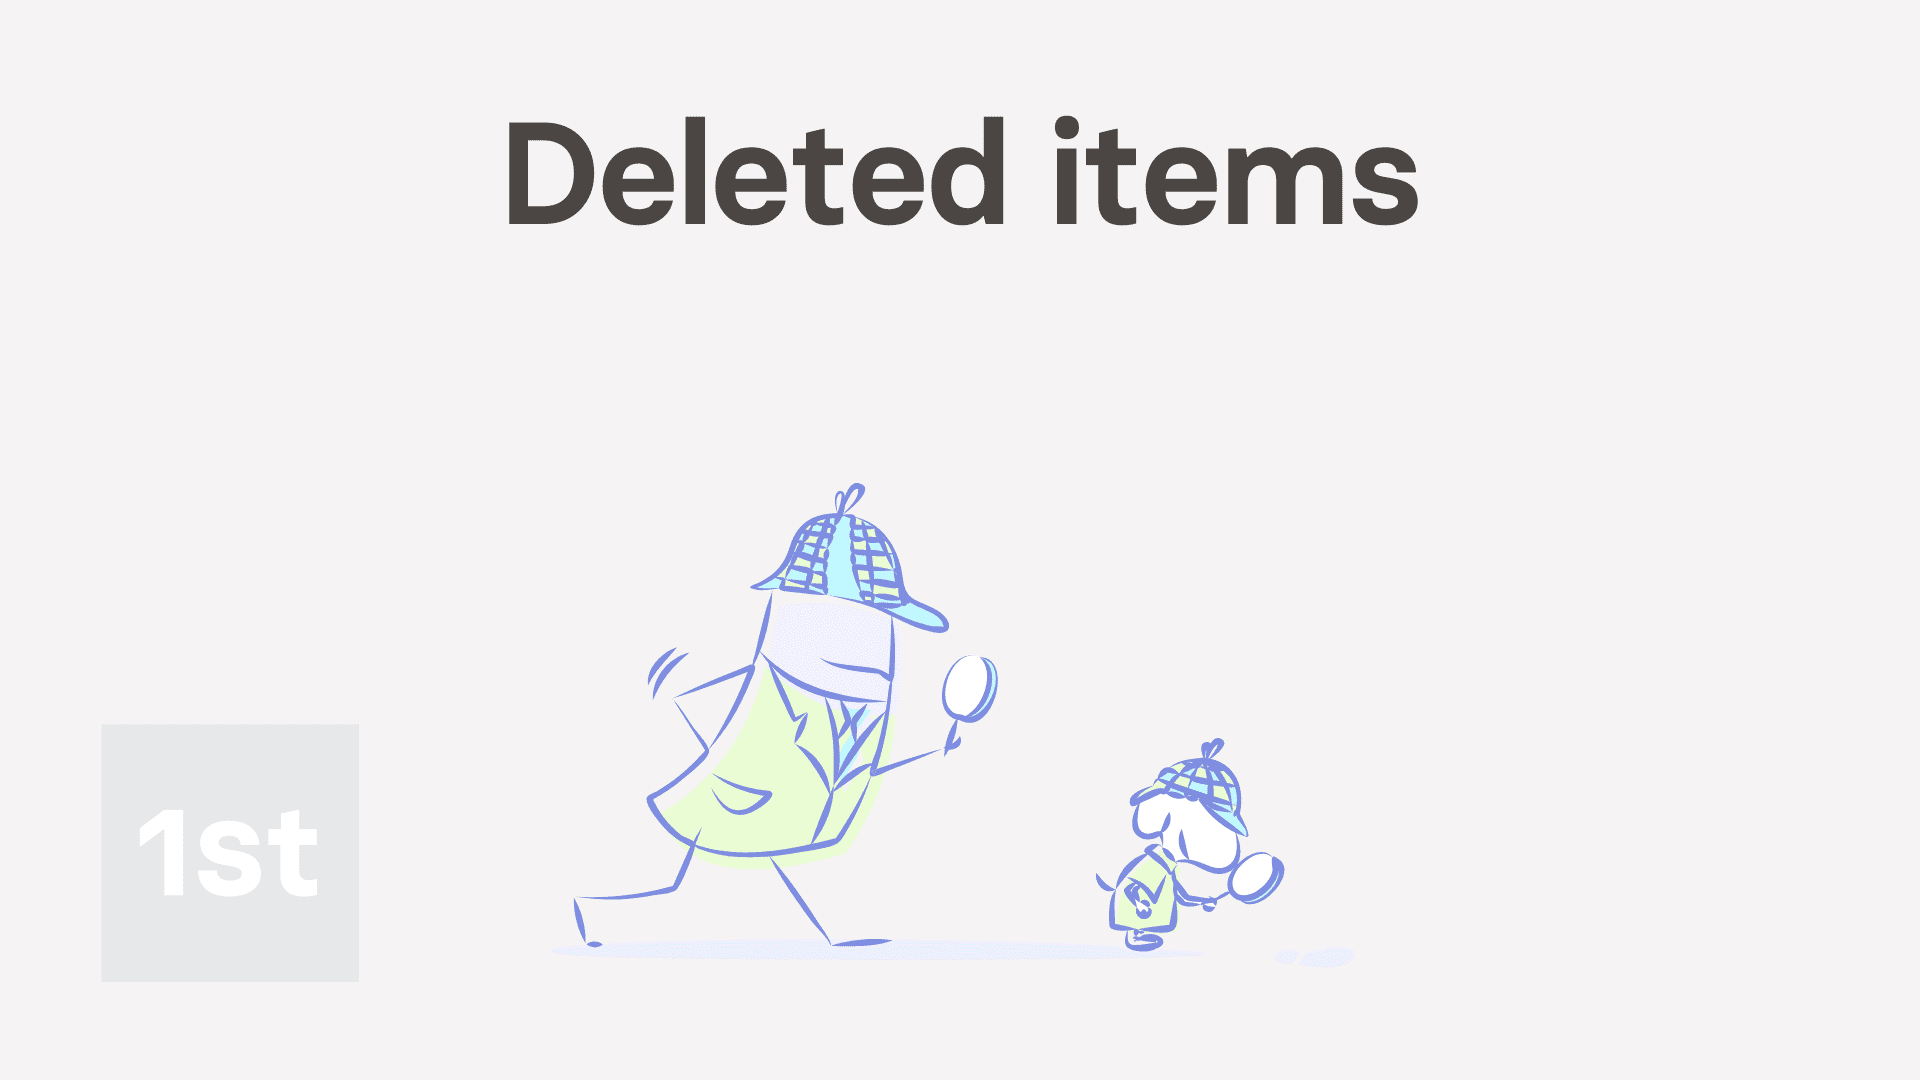 1:54
1:54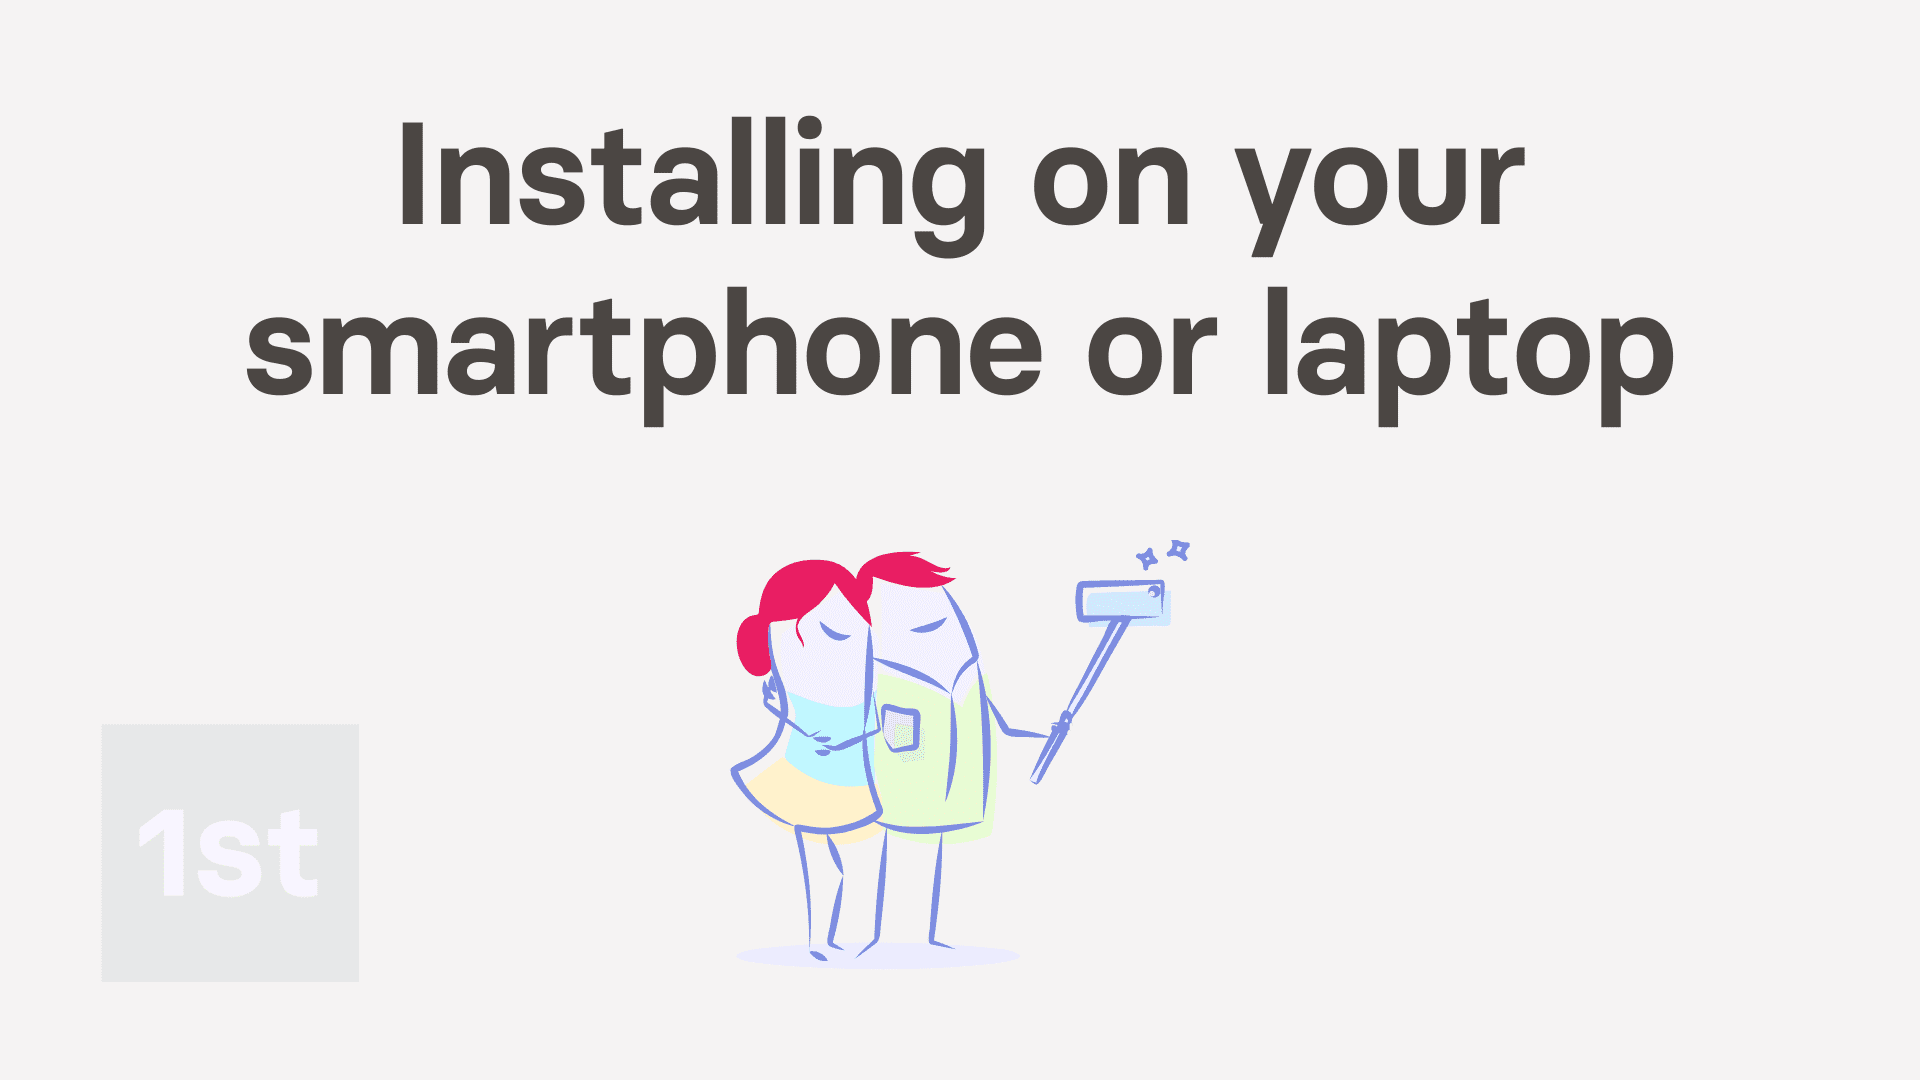 3:58
3:58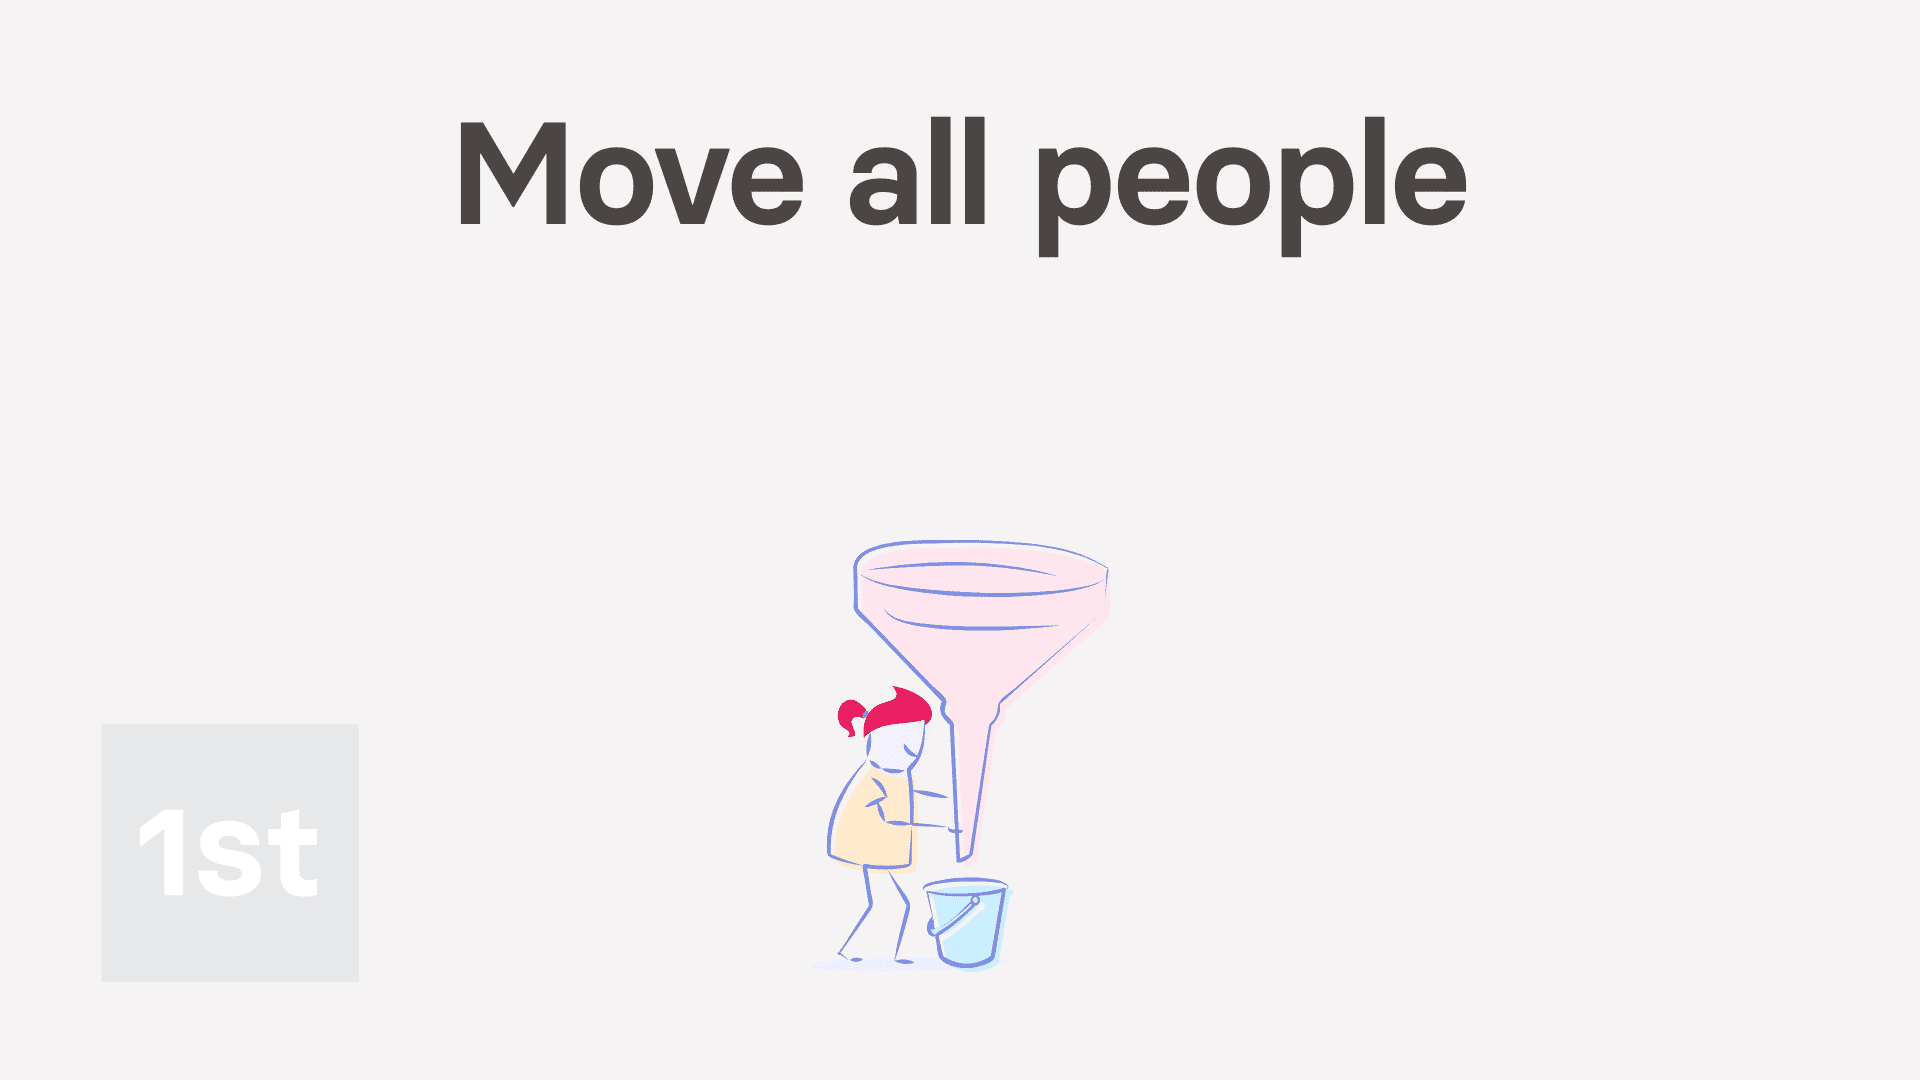 3:12
3:12 1:15
1:15 3:16
3:16 1:29
1:29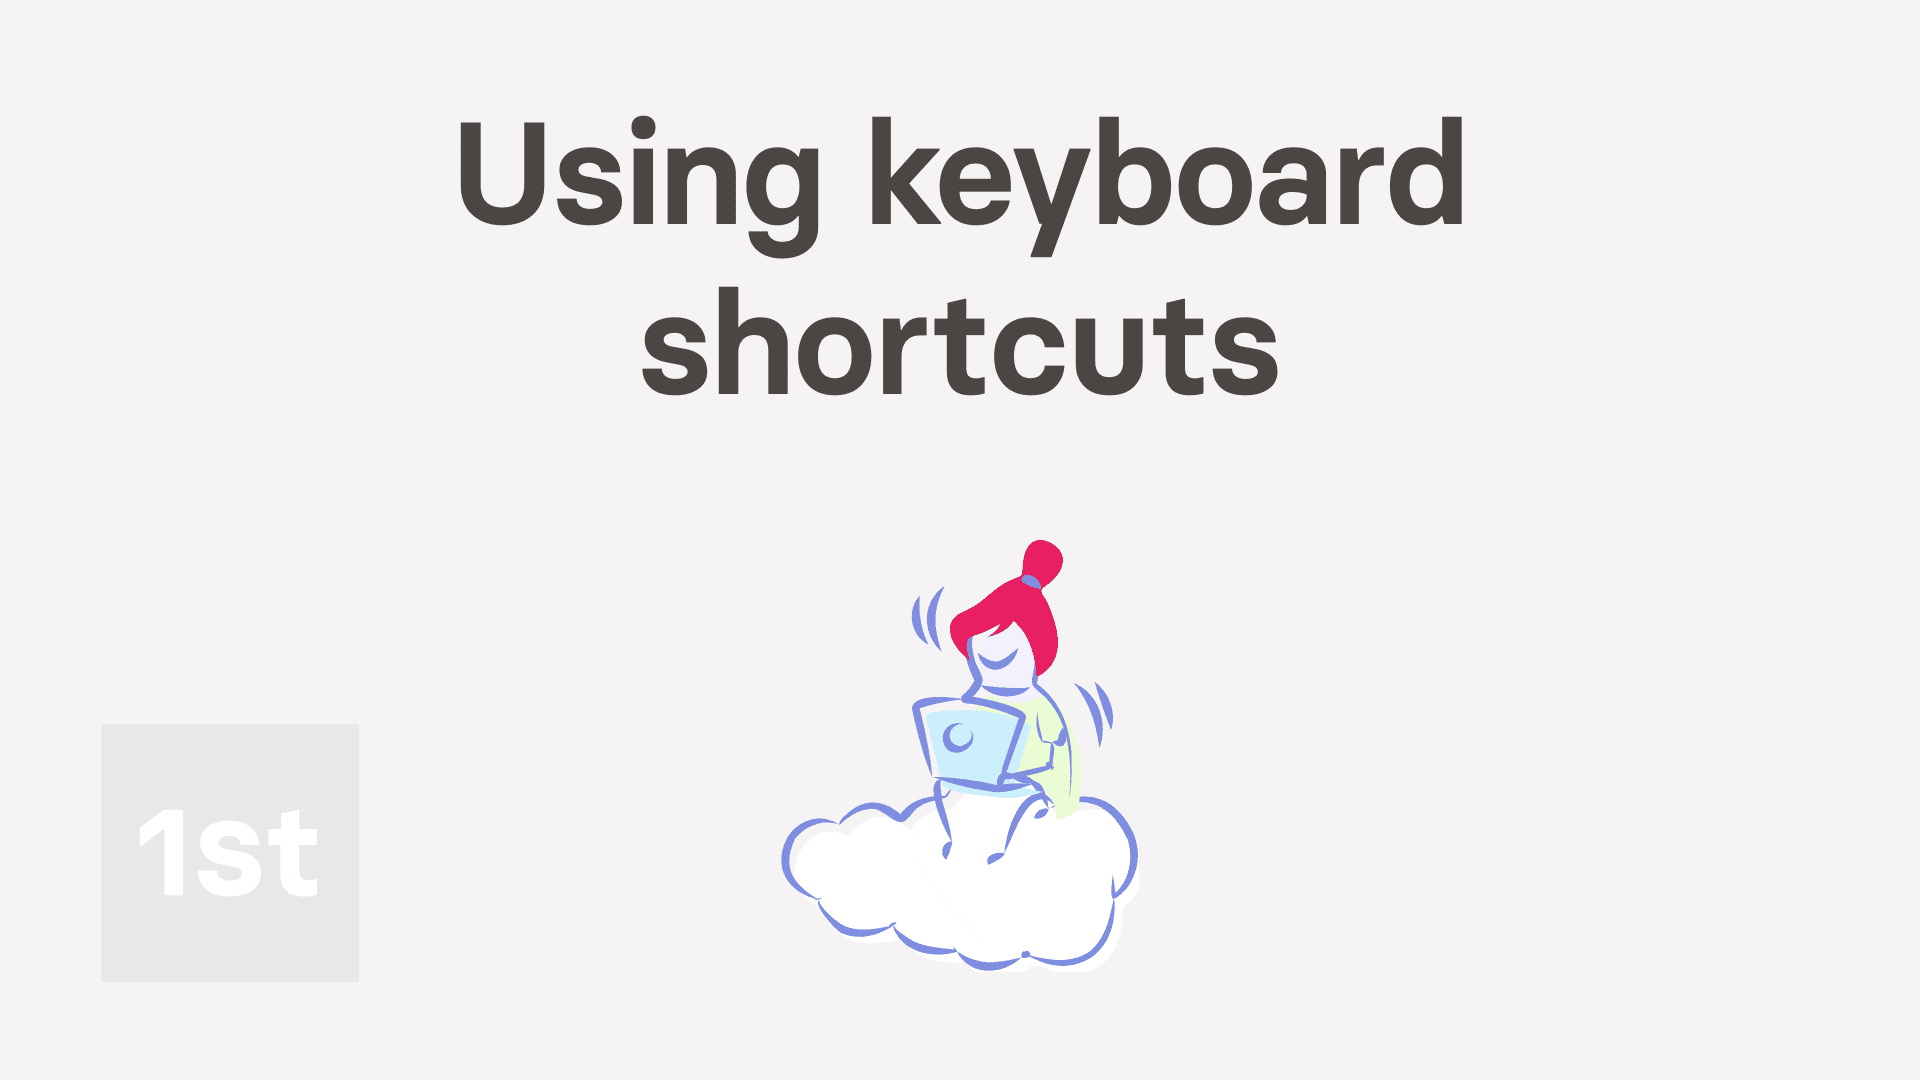 2:48
2:48 2:46
2:46 6:11
6:11 2:29
2:29How do I change my wallpaper and theme?

 1:59
1:59
"How do I change my wallpaper and theme?"
Setting your wallpaper and theme can make your working day a little more enjoyable.
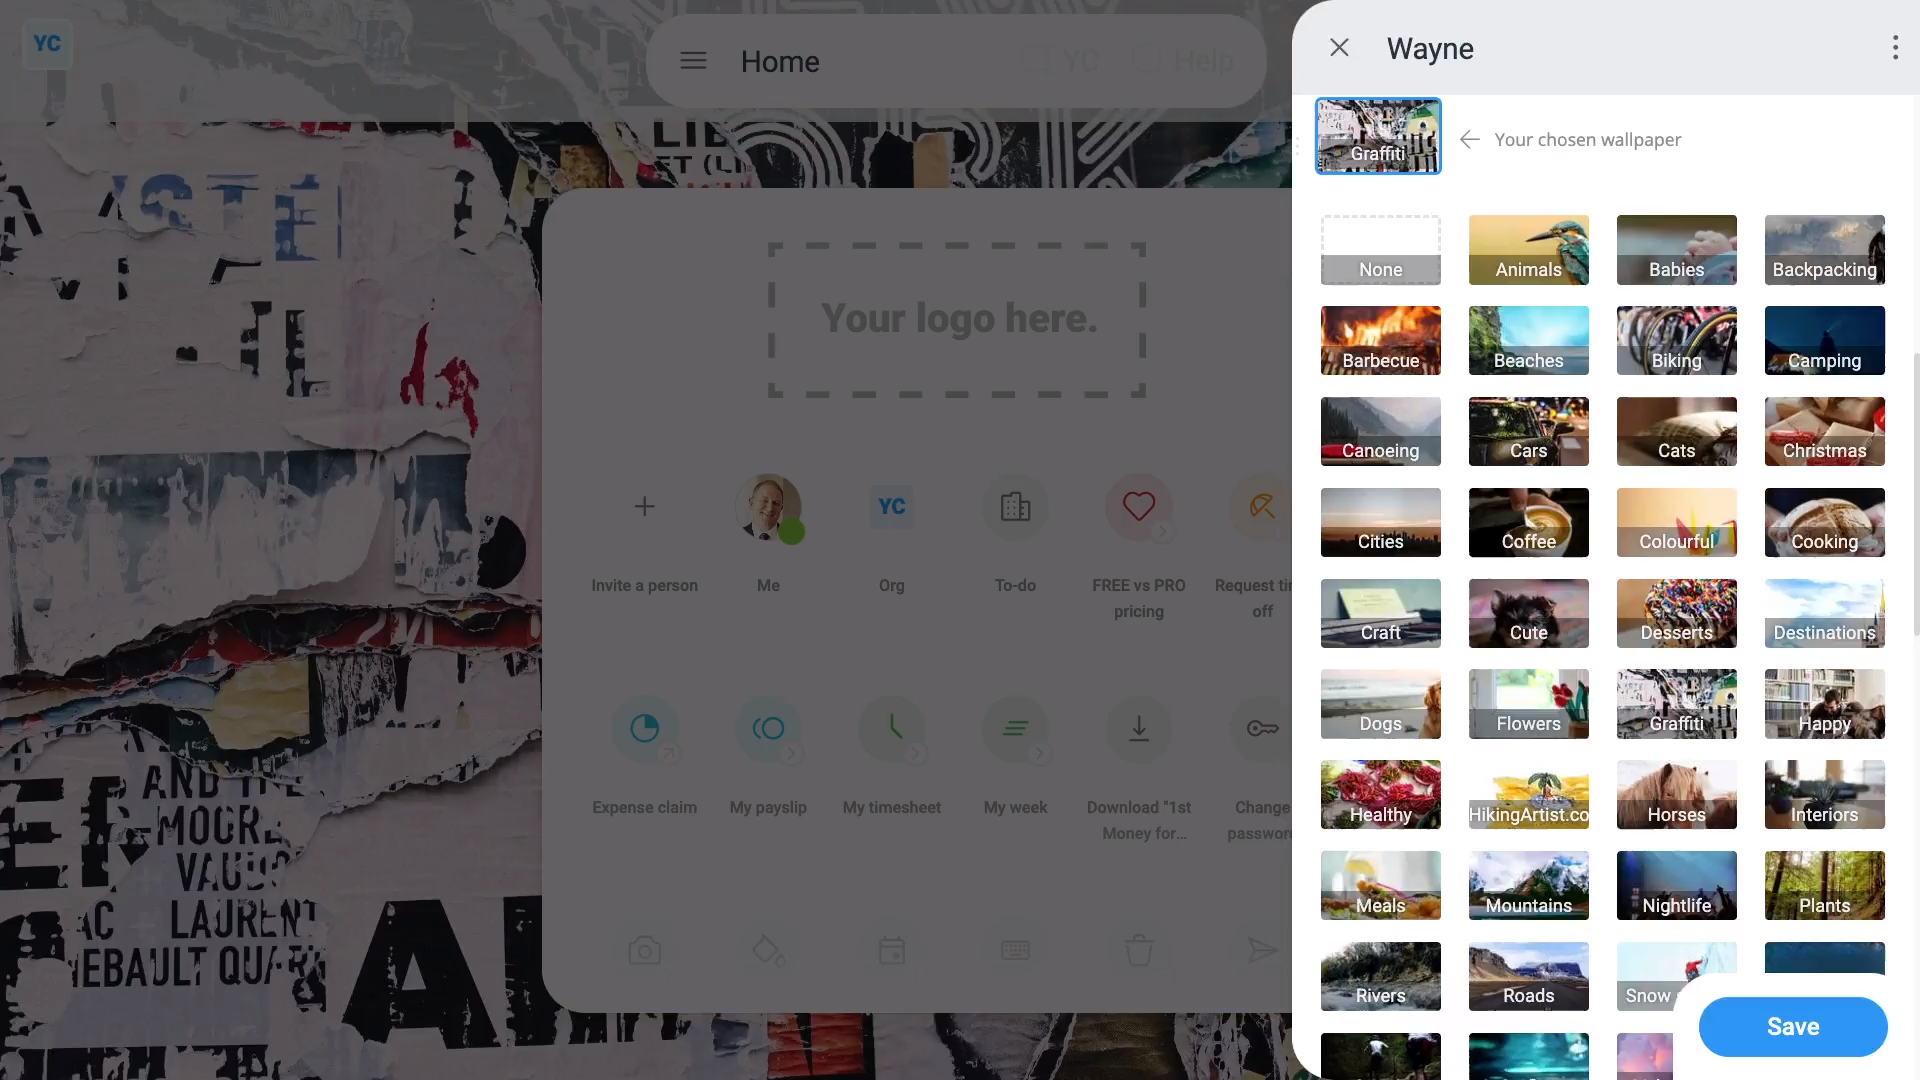
To change your wallpaper:
- First, right-click anywhere on the page, then tap: Theme
- Now, scroll down, and tap between the wallpapers until you find one you like.
- Then tap: Save
- To learn more about any wallpaper image, hover your mouse over the camera image (at the bottom-left corner).
- And finally, to learn more about the wallpaper, tap the thumbnail.

For advanced usage:
- If you want your wallpapers to change every 30 seconds on every page, go back to the "Theme" settings.
- Then change the "Loop wallpapers" option to: Everywhere
To change to a light or dark theme:
- First, right-click anywhere on the page, then tap: Theme
- Find "Always light", and change it to: "Always dark"
- And finally, tap: Save
Keep in mind that:
- If you later decide you don't want any wallpaper, set it to the first wallpaper, that shows as a white box, labelled: "None"
You may notice:
- If you're not seeing the wallpaper settings, it could be because you're on a smartphone or tablet. Wallpapers only work on laptops or desktops.
- By default, your wallpaper changes every 30 seconds, but only on the "Home & break" screens.
- Everywhere else, by default, you'll get a new wallpaper only once a day, so it's less distracting.
And that's it! That's everything you need to know about changing your wallpaper and theme!
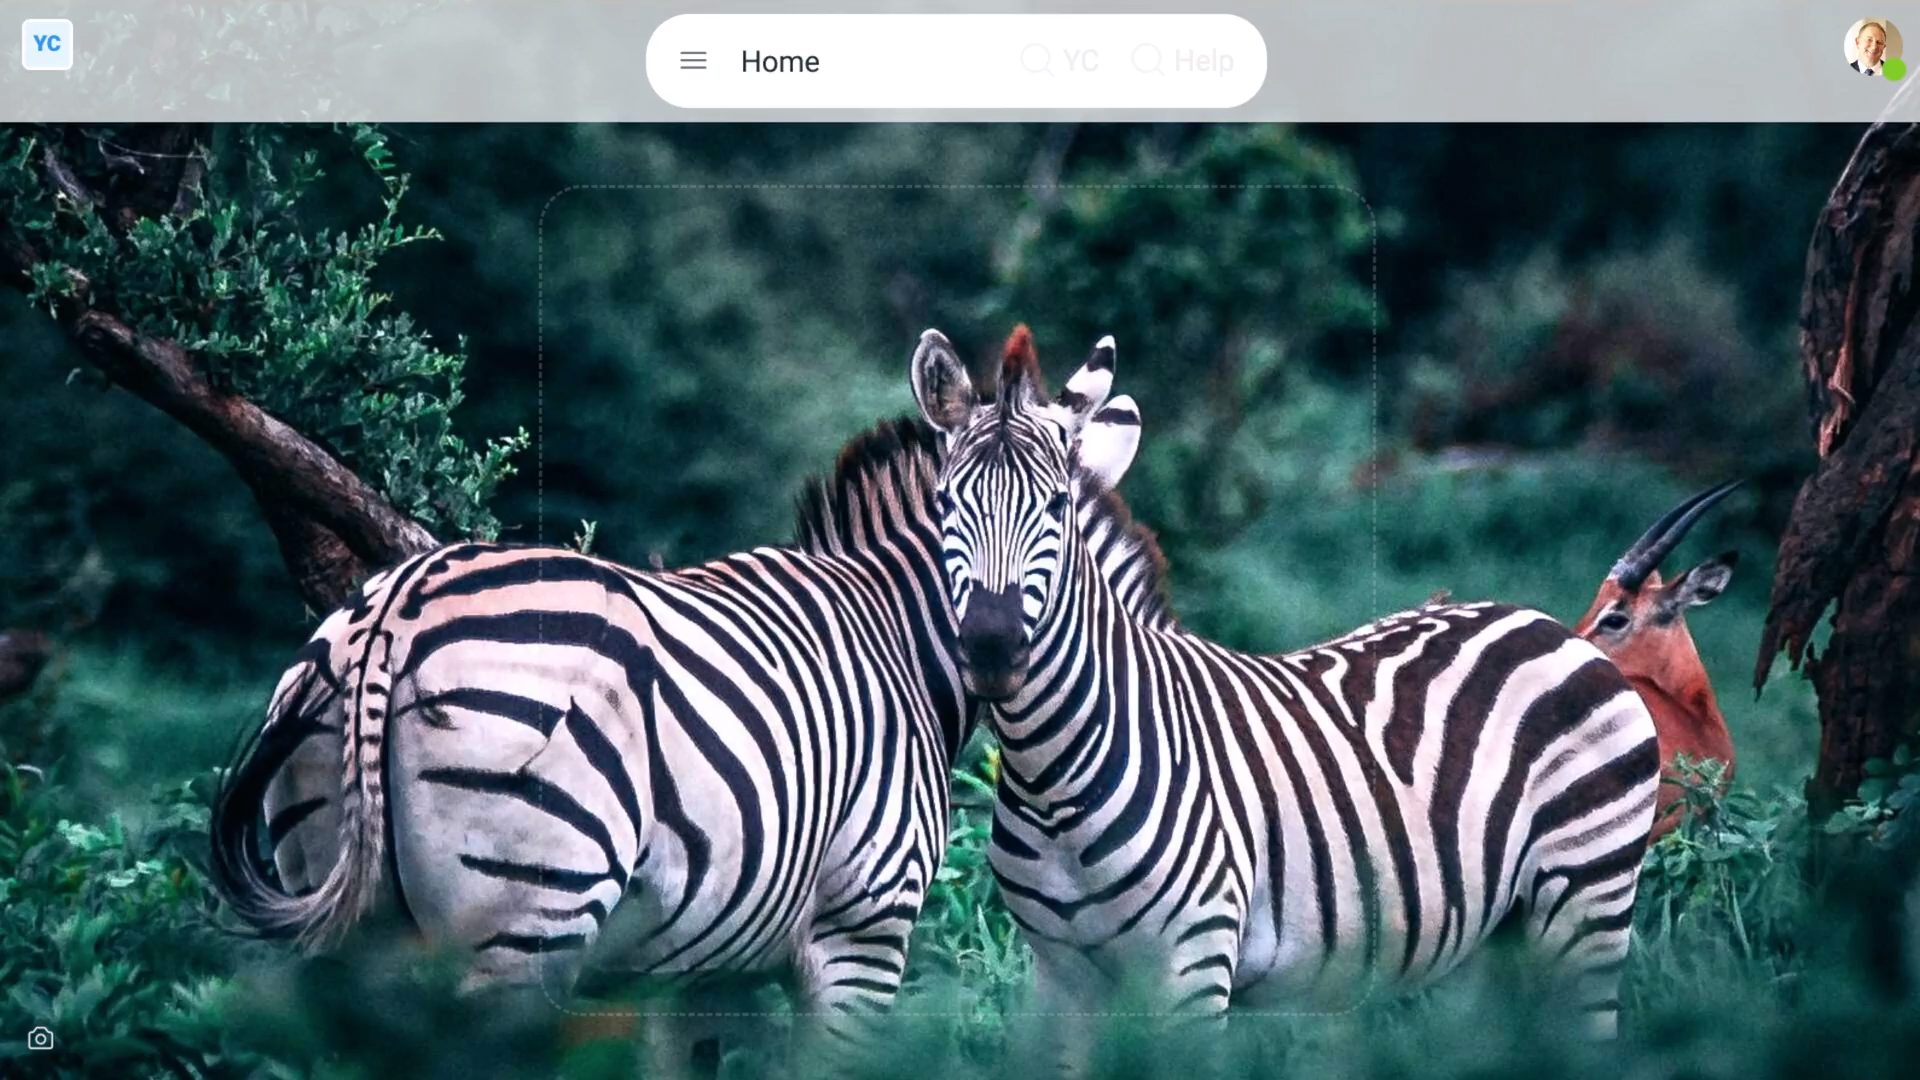
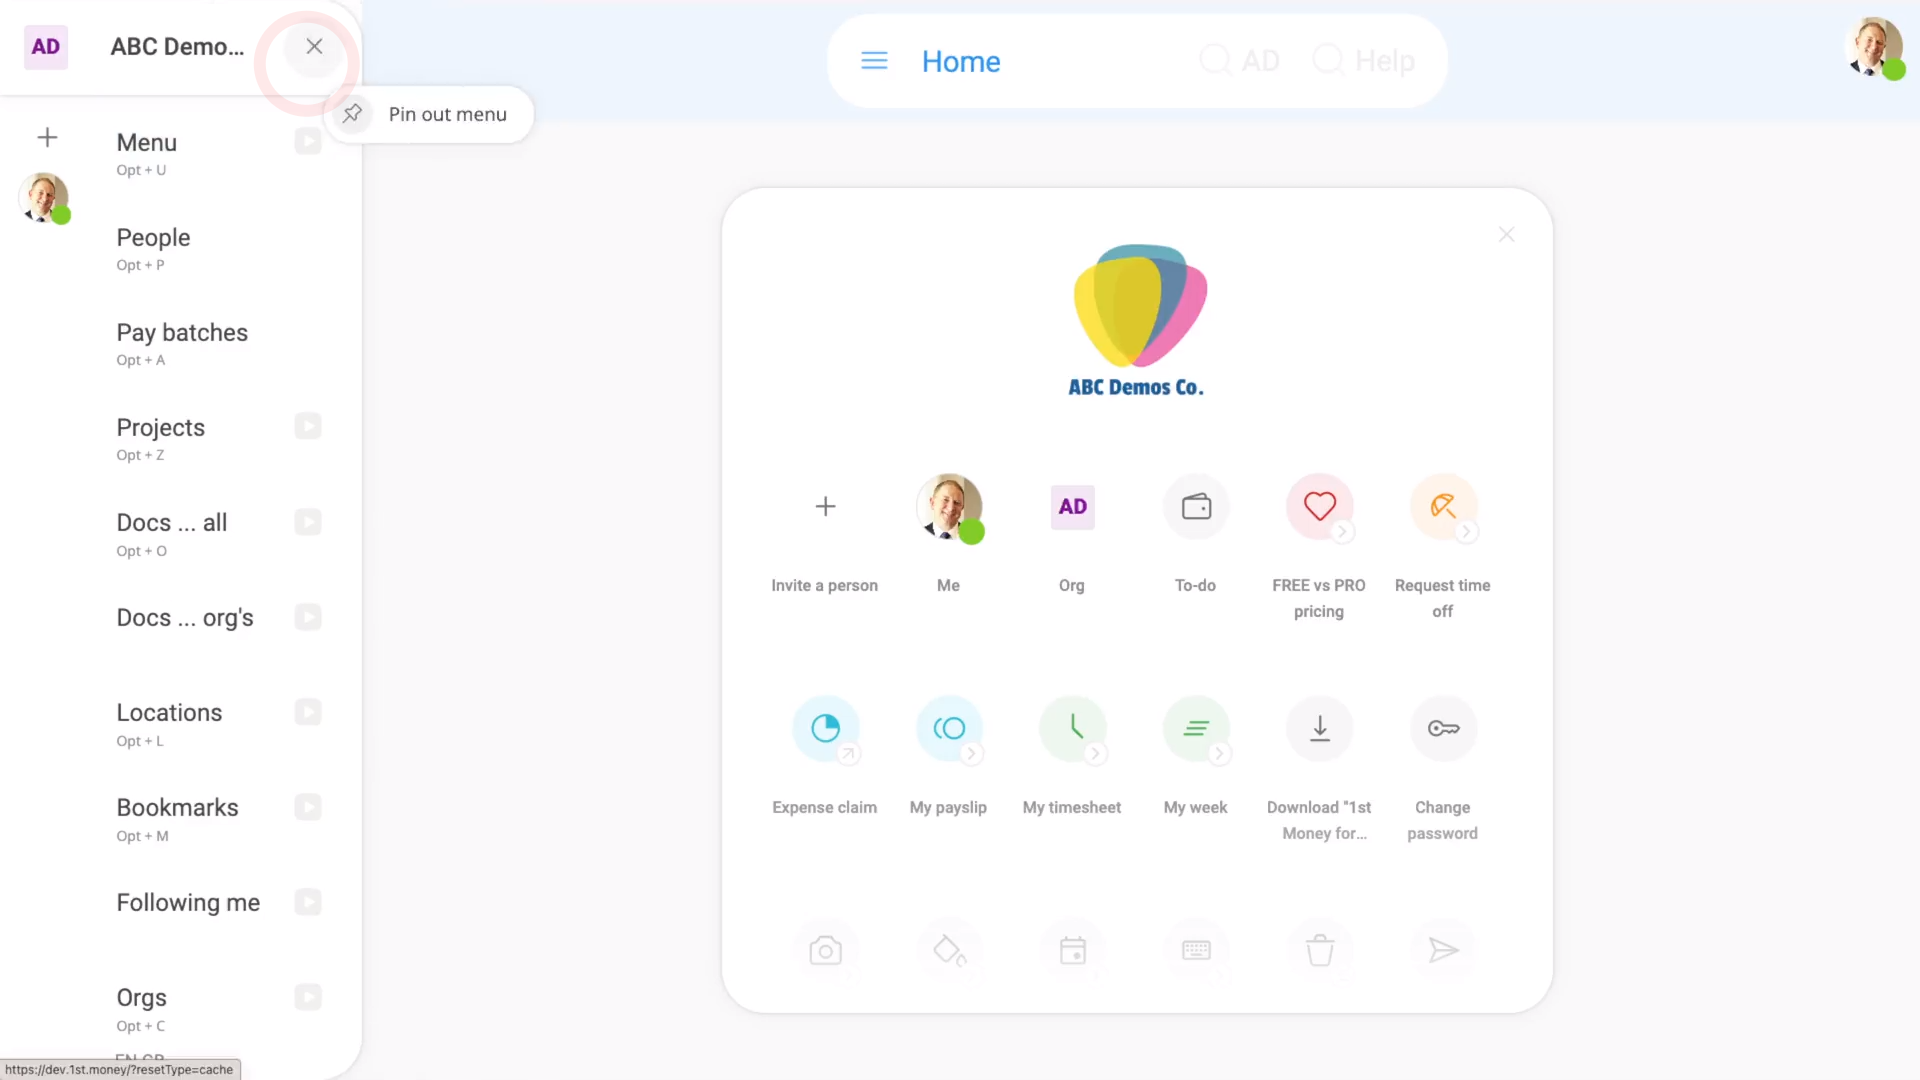
How do I customise my home screen?
 1:46
1:46
"How do I customise my home screen?"
Your home screen is the first page you'll see each time you log in. It's got buttons to the most important features you'll need.
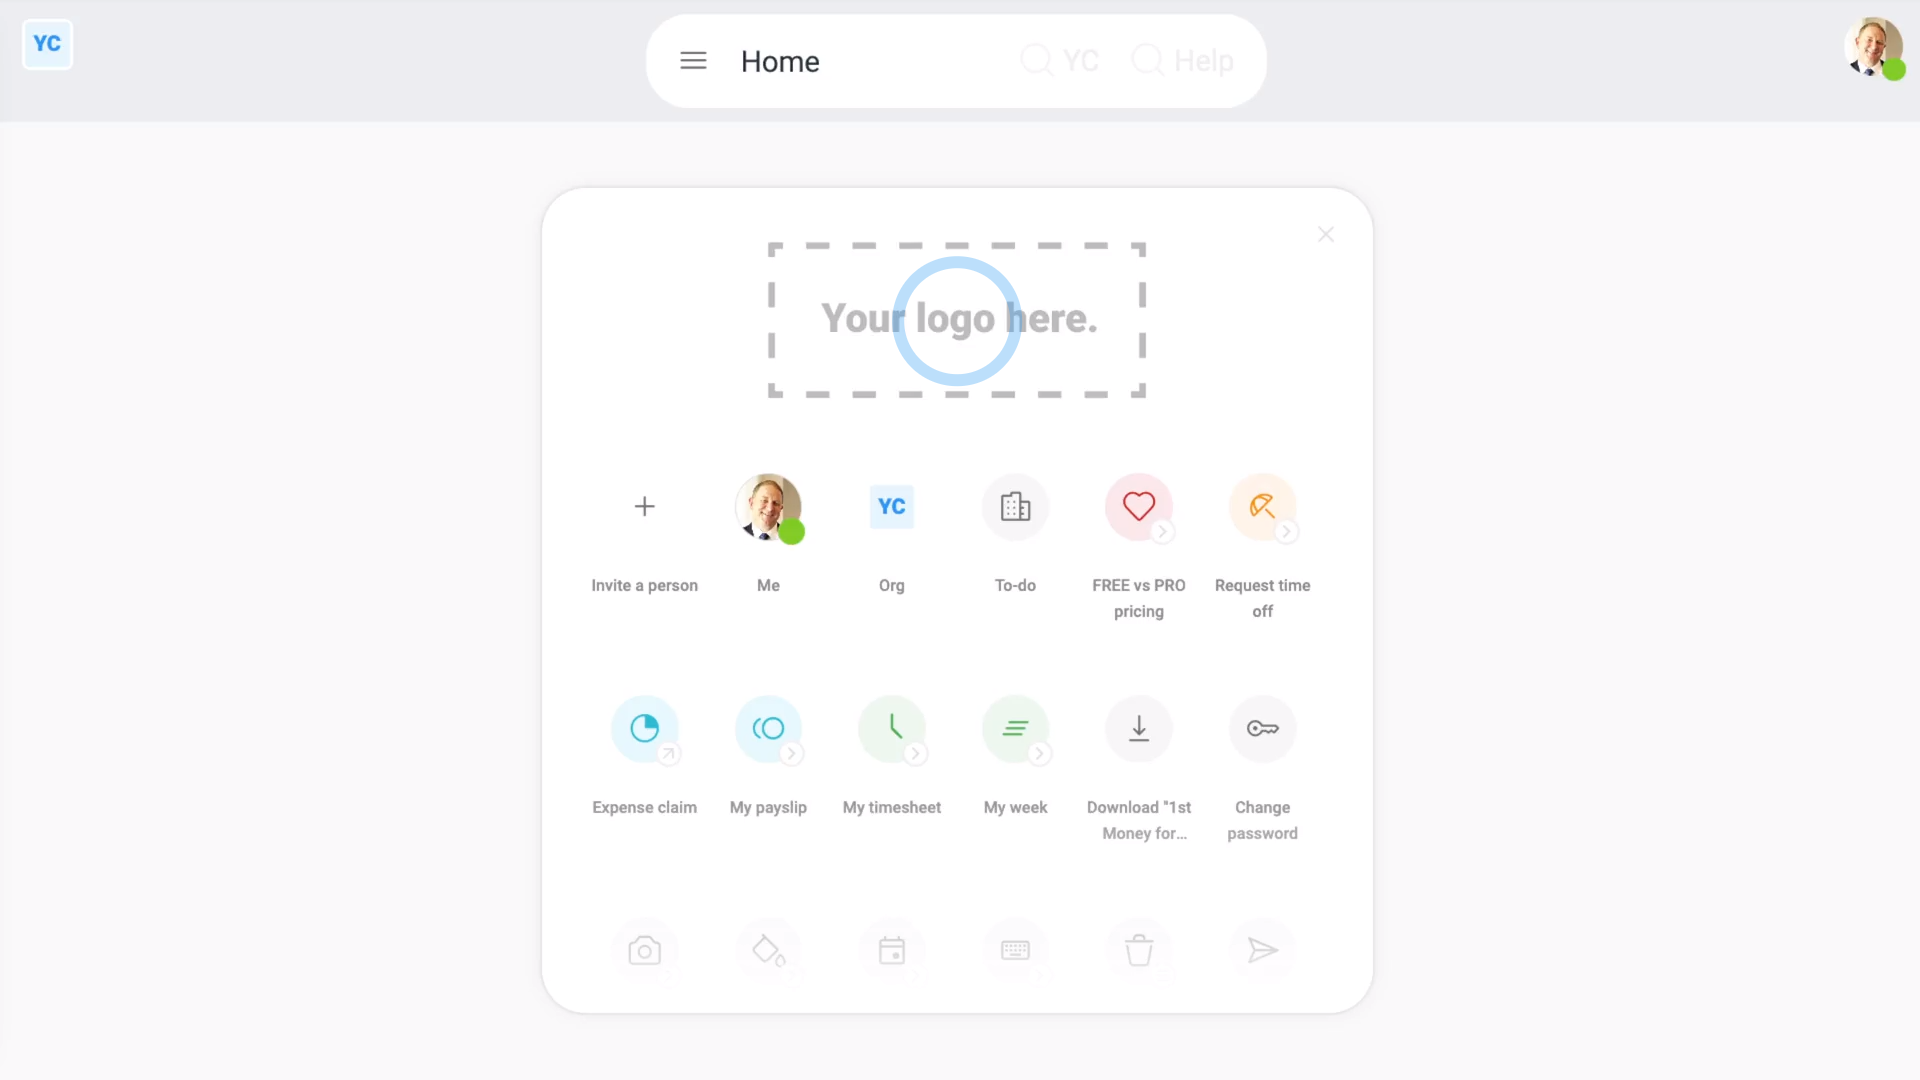
To upload your own org's logo:
- First, tap: "Menu", then "Home"
- Then if you're an org admin, tap the logo, then upload your own org's logo.
- And finally, every time your people log in, your uploaded logo is the first thing your people see.

To set your theme wallpaper:
- First, right-click anywhere on the page, then tap: Theme
- Scroll down, and tap a wallpaper.
- Then tap: Save
- And finally, your home screen now loops through beautiful wallpapers of your choice, changing every 30 seconds.
To hide your home screen buttons:
- First, tap: "Menu", then "Home"
- Then tap the "Close" button: (in the top-right corner of the centre box)
- Now nothing's in the way of you seeing your selected wallpapers.
- Anytime you need to return back to your home screen buttons, move your mouse into the middle of the screen. When your mouse moves to the middle, your home screen buttons reappear.
- And finally, if you want your home screen buttons back permanently, tap the "Pin" button:
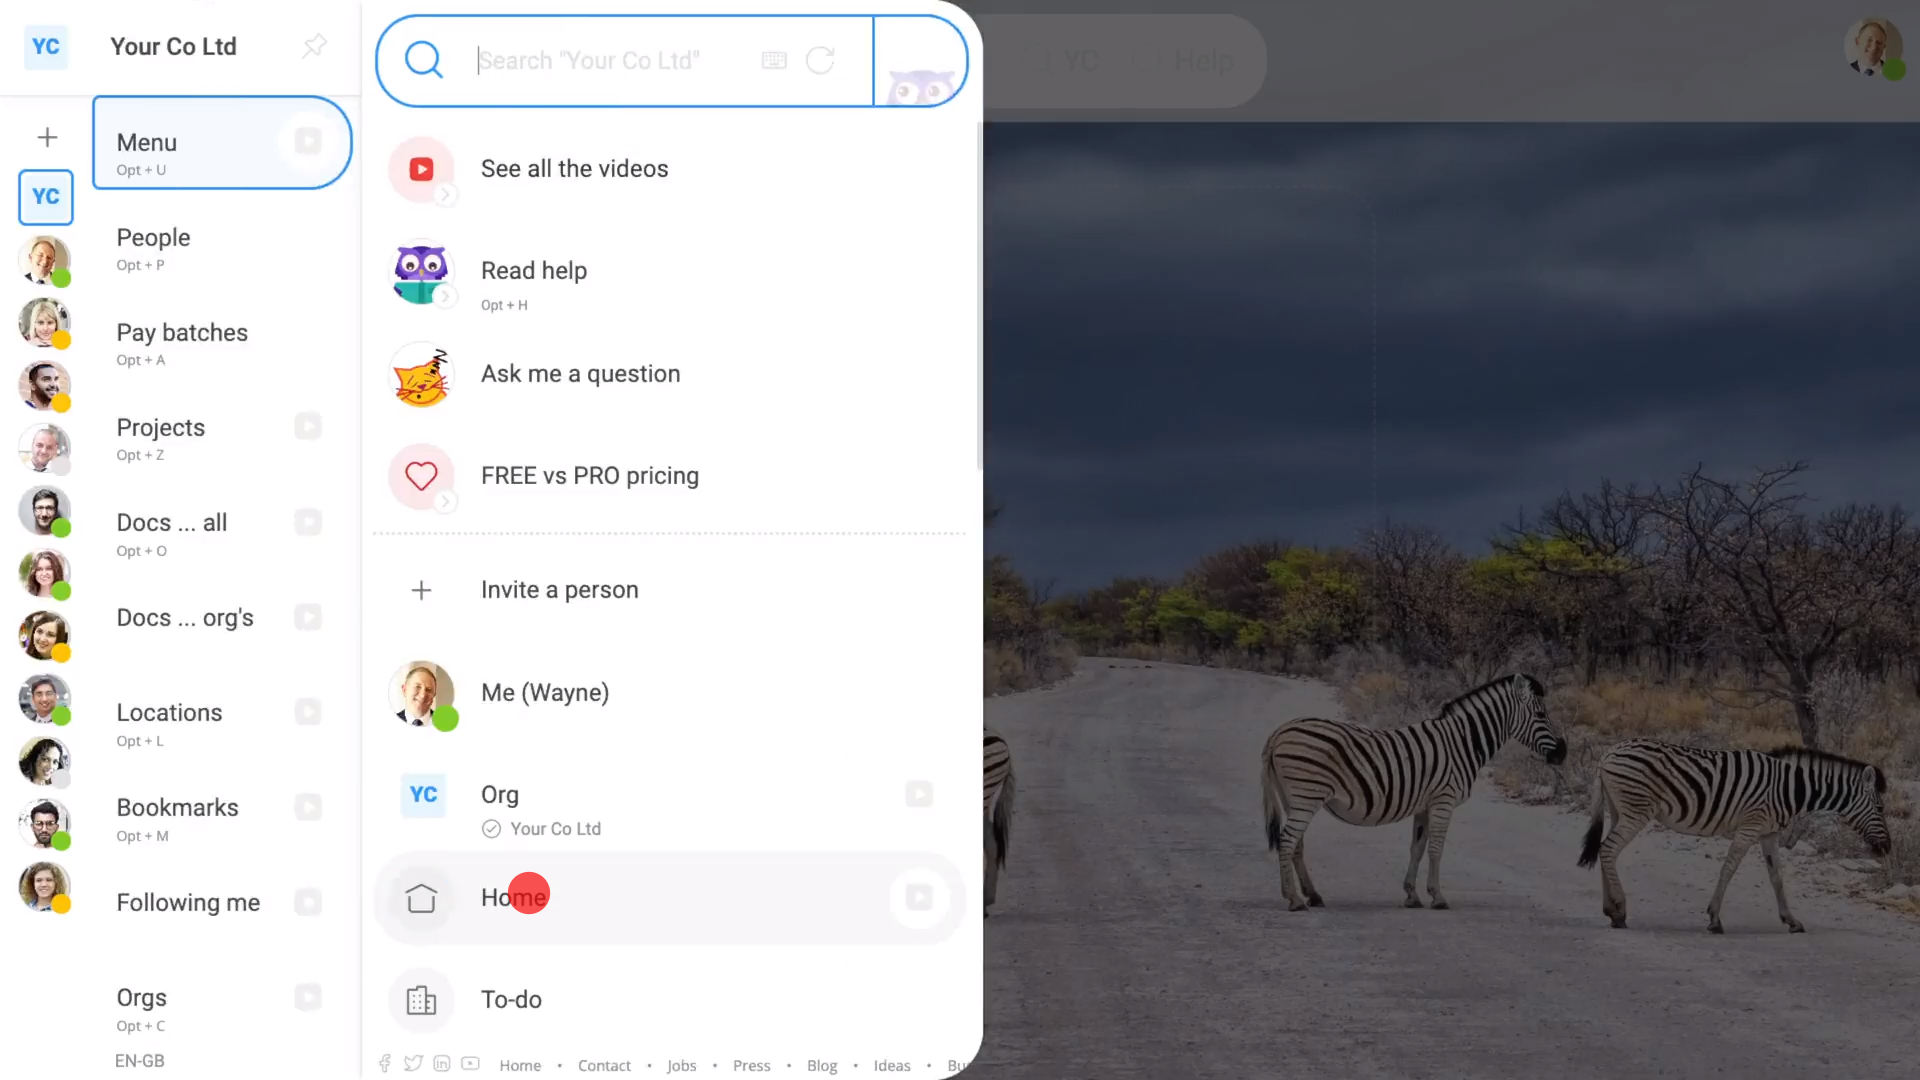
To return back to your home screen from anywhere:
- Tap: "Menu", then "Home"
And that's it! That's everything you need to know about making your home screen even more beautiful!
How do I find a deleted person?
 1:57
1:57
"How do I find a deleted person?"
Once a person ends their employment, you'll usually delete them after you've done their final payslip. Sometimes, however, you may need to come back and open their details, after deleting them.
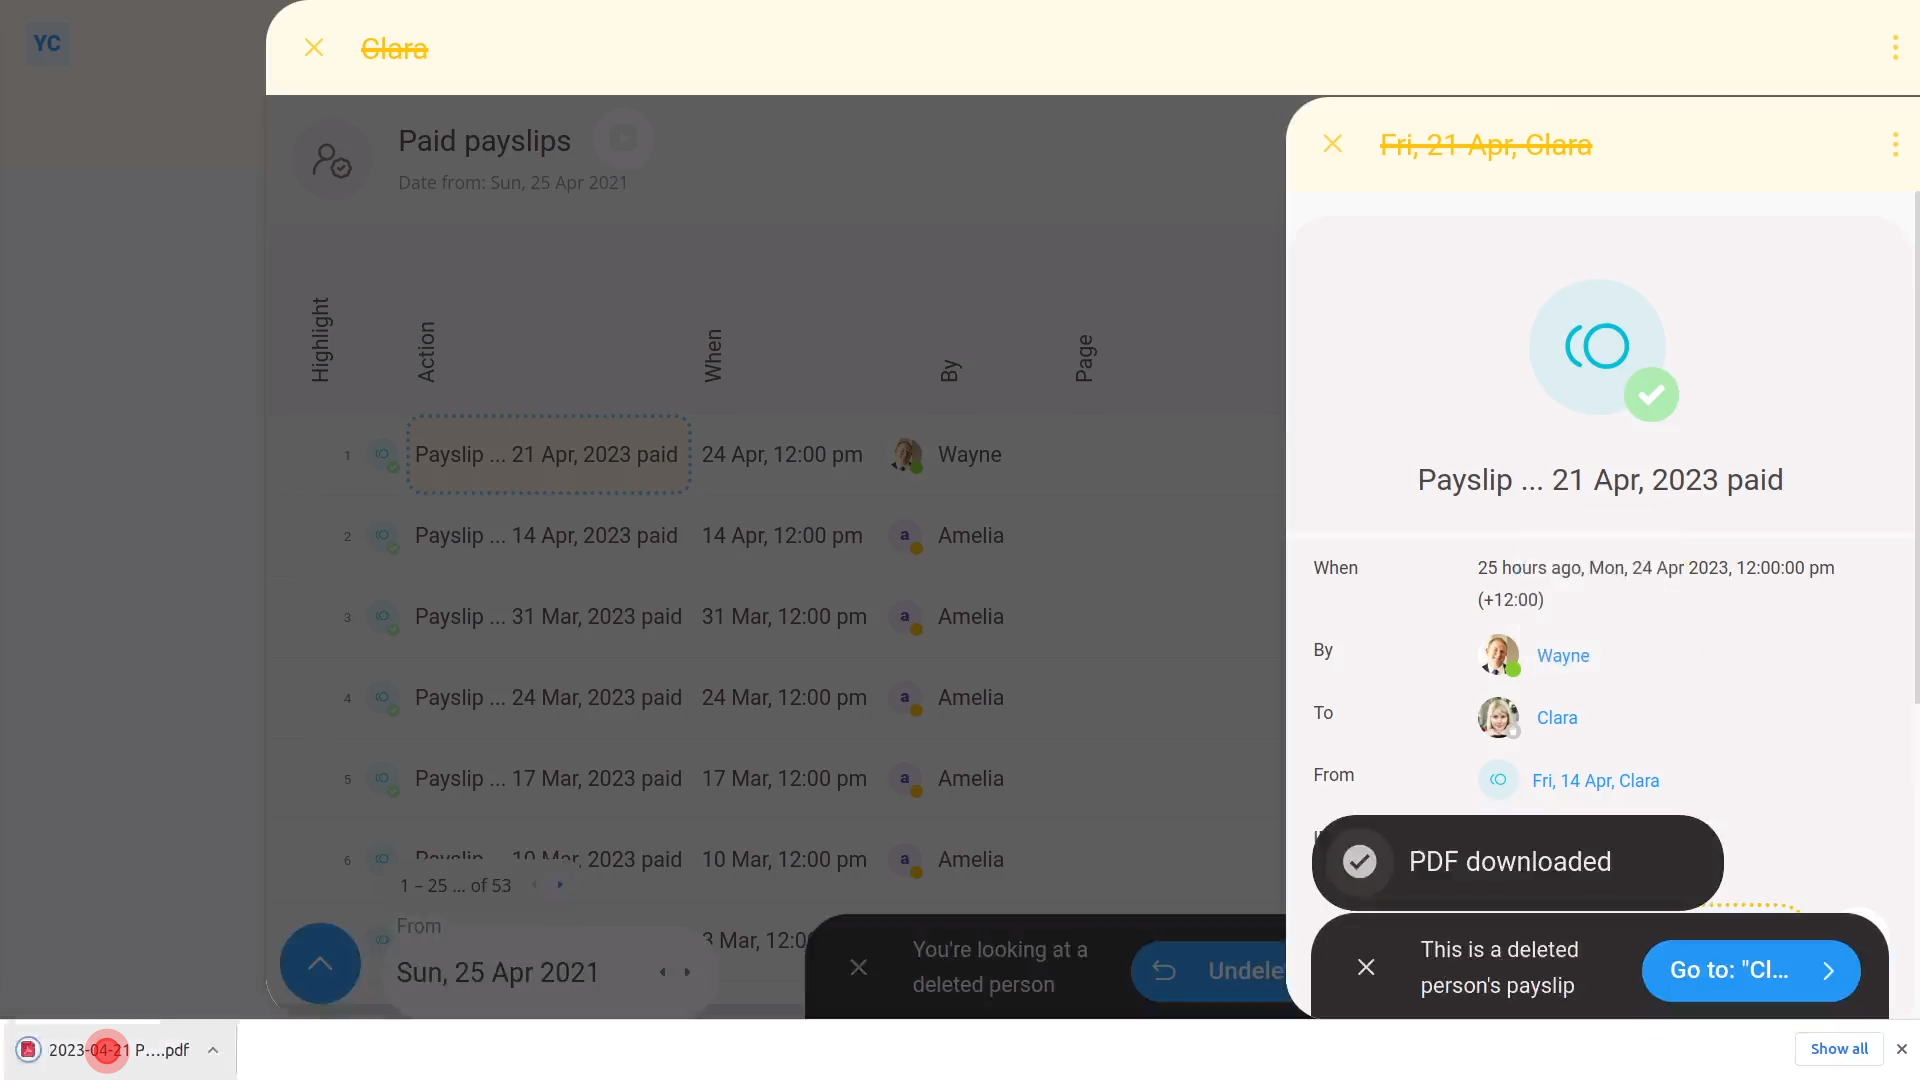
To find a deleted person's details, or download their old payslips and P45s:
- First, tap: "Menu", then "Deleted bin"
- Then tap: People
- And then tap the person you're looking for, to open them.
- There's no need to "Undelete" them. You can still get all their employment info, even while the person remains deleted.
- You can also download all their previously filed payslips from: "Pay", then "Payslips history"
- And finally, you can download all their previously sent tax forms, like P45s, from: "Tax", then "Tax forms history"
You may notice:
- Some of the common reasons to find a deleted person, perhaps even years later, include.
- If a person's come back asking for old employment info, like filed payslips.
- Or, if a person's lost their leaving documents, like their P45.
- Because a deleted person remains in the "Deleted bin", you can retrieve the info anytime.
Keep in mind that:
- The only time you'd need to "Undelete" them is if you've decided to re-hire them.
And that's it! That's all you need to do to find deleted people!
How do I find deleted items and undelete them?
 1:52
1:52
"How do I find deleted items and undelete them?"
When you delete items in 1st Money, the items are moved to the: "Deleted bin"
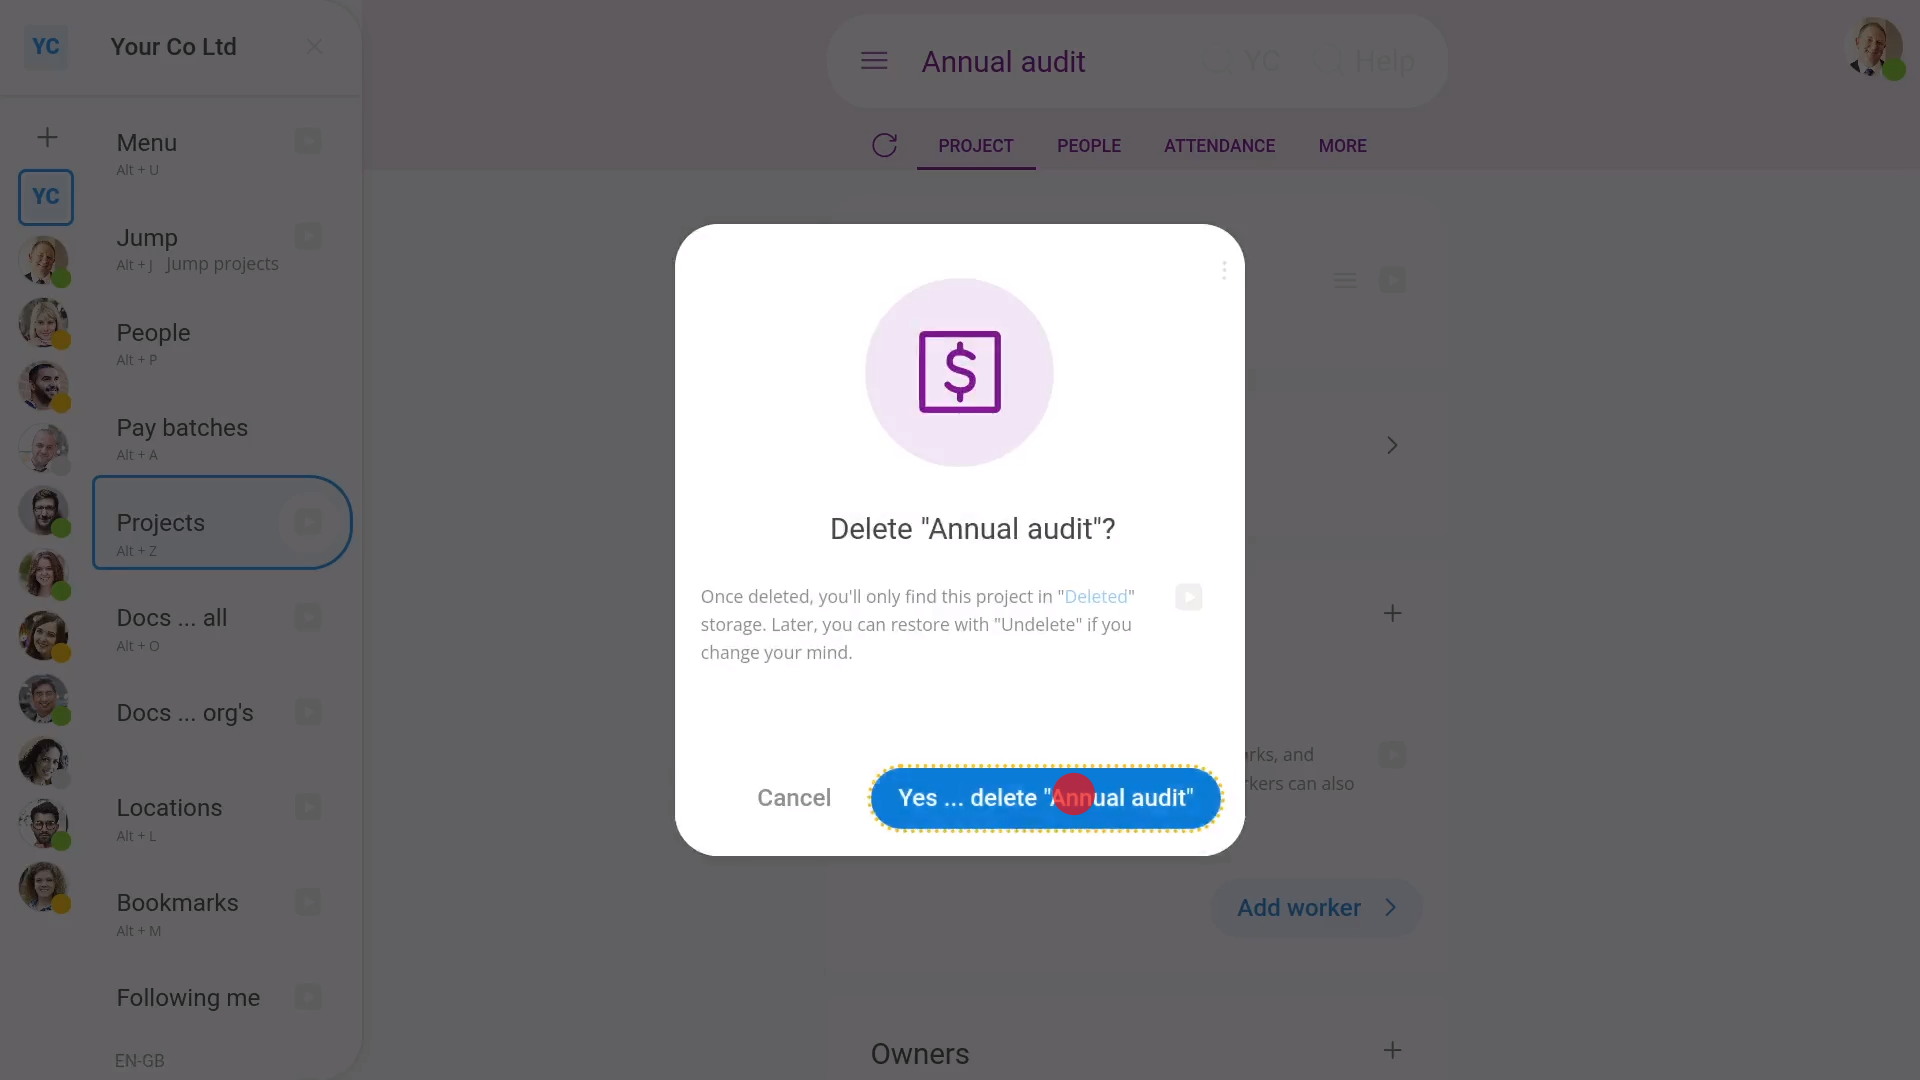
To delete an item:
- First, open the item.
- Then tap: "More", then "Delete"
- Then: Yes ... delete
- And the item's now deleted.
- And finally, when you tap the side menu listing, the deleted item is no longer in the list.
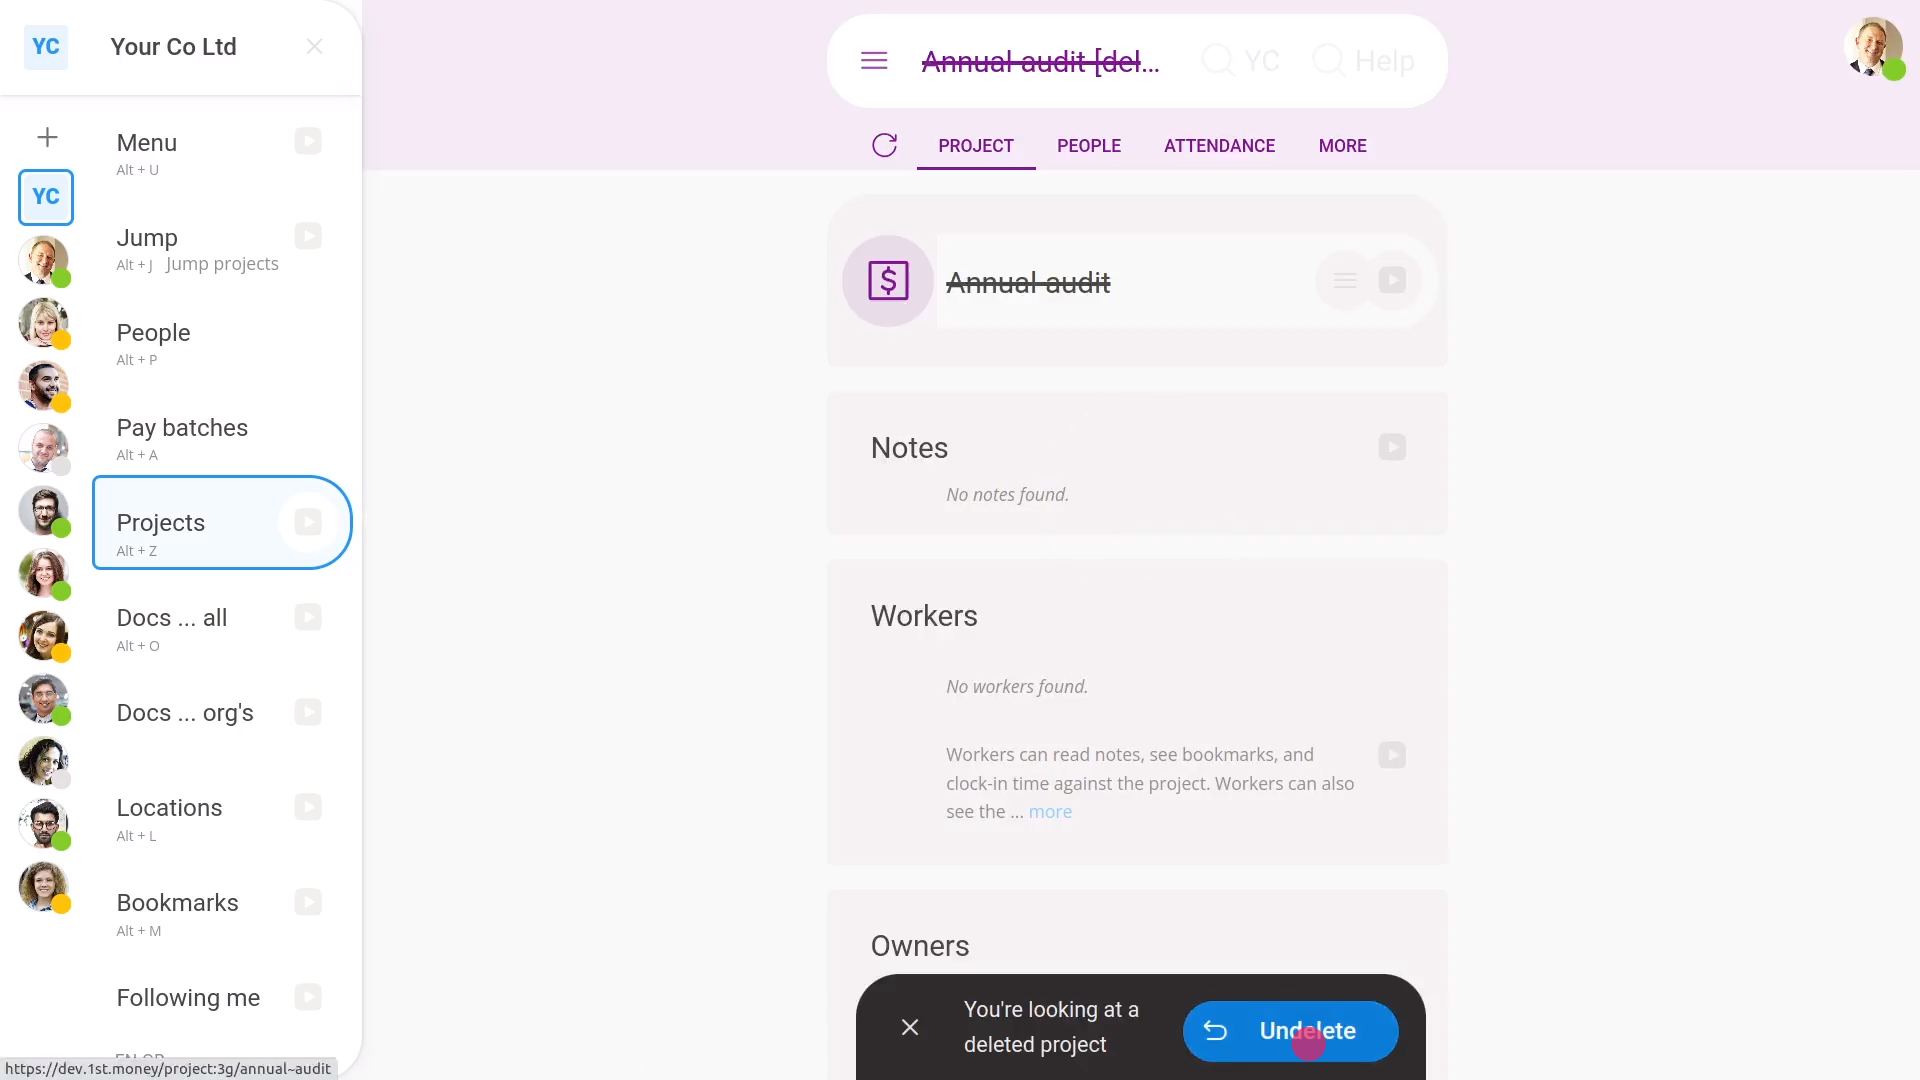
To find and undelete a deleted item:
- First, tap: "Menu", then "Deleted bin"
- Next, you'll see a category for most of the kinds of items that can be deleted.
- Tap the one you want.
- Now you'll see a list of items in the category that've previously been deleted.
- Tap the item that you're looking to undelete, to open it.
- And then tap: Undelete (at the bottom)
- And finally, when you tap the side menu listing, it's back in the list again.
Keep in mind that:
- There's no expiry time period on deleted items. Deleted items stay in the "Deleted bin" for as long as you keep your org.
- Which means that you can come back and undelete things at any time, even years later.
- Also keep in mind that only people who've got "Full org admin" permissions can delete or undelete items.
- And remember that all deletes and undeletes are always permanently recorded in: "History"
- That means any admin can always look back in time and see who did any delete, and when it was done.
And that's it! That's all you need to do to find deleted items and undelete them!
How do I install 1st Money on my smartphone or laptop?
 3:58
3:58
"How do I install 1st Money on my smartphone or laptop?"
1st Money can be installed on most devices. To install 1st Money:
- On Android phones and tablets, get it from the Google Play Store.
- On iPhones and iPads, get it from the Apple App Store.
- On Windows laptops, get it from the Microsoft Windows App Store.
- On MacBooks and iMacs, get it from the Mac App Store.
- And on Linux laptops, including Ubuntu, and Red Hat, get it from the Snapcraft App Store.
To install 1st Money on to your device:
- First, go to the 1st Money home page.
- Then tap Products (at the top), and then: Download
- And tap the blue Get it now button.
- Once your device's App Store page opens, tap the install button, and then the open button.
- You may have to wait for a few seconds while it downloads the software to your device.
- Then once it's installed, for Windows and Linux, the "Open at login" is automatically turned on. But for Mac, you'll need to turn it on yourself.
- And finally, 1st Money now starts automatically, in the background, every time you restart your device.
To log in to 1st Money:
- First, tap the "Have a login" link.
- Then type in your login email, and tap: Continue
- Then tap Password, and type in your password.
- And finally, tap: Log in
To try searching with "Global search":
- First, right-click anywhere in the 1st Money window, and you'll see "Global search" listed (at the top).
- Start typing any search term you'd like. For example, you could type the name of a person in your team.
- Once you see what you're looking for, showing near the top of the list, press the Enter key to go to it.
- Also, "Global search" can be run from anywhere, by pressing its keyboard shortcut, even when you've got other apps open in front.
- If you combine the "Global search" shortcut, with the "Search inside" shortcut, you can search for anything in your org, using only your keyboard.
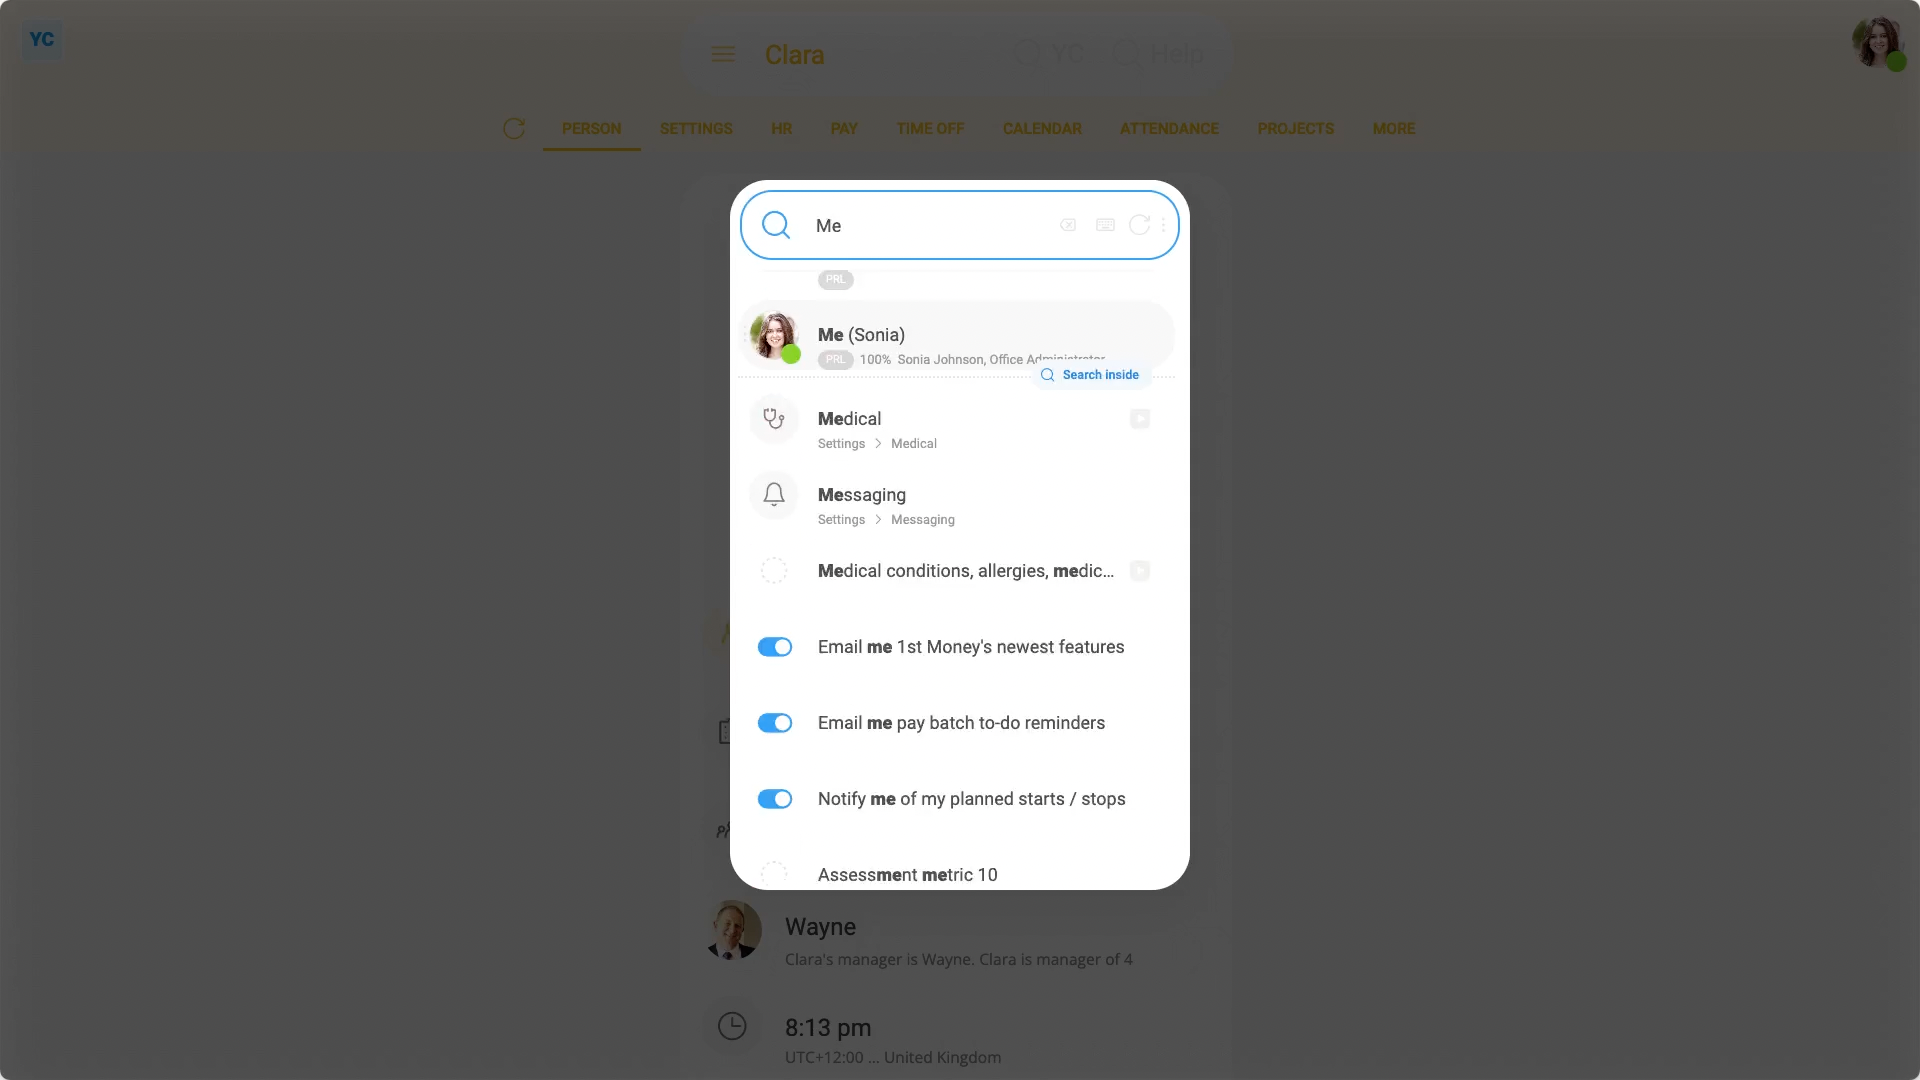
- For example, to find your own tax code, using only your keyboard.
- Press the "Global search" shortcut of: Win+Shift+Z
- Then type "Me", then press the "Search inside" shortcut of: Tab
- Then type "Tax code", and then press the Enter key, to go to it.
- And finally, it takes you right to what you're searching for.
You may notice:
- That regardless of your choice of device, every 1st Money feature is always the same on every device.
- For example, every feature that's available on Windows, Mac, and Linux, is also available on Android and iOS.
- Also, regardless of your choice of device, you'll always get software updates, automatically.
Keep in mind that:
- There's no limit to the number of devices you can log in to (at the same time).
- For example, if you've got a laptop, a tablet, and a smartphone, you can have 1st Money running on all three (at the same time).
- Also, 1st Money supports accessibility features, like "high-contrast" or: "reduced motion"
- If you need an accessibility feature, first set it on your device.
- Once it's set on your device, it's also automatically applied to your install of 1st Money.
And that's it! That's everything you need to know about installing 1st Money on your smartphone or laptop!
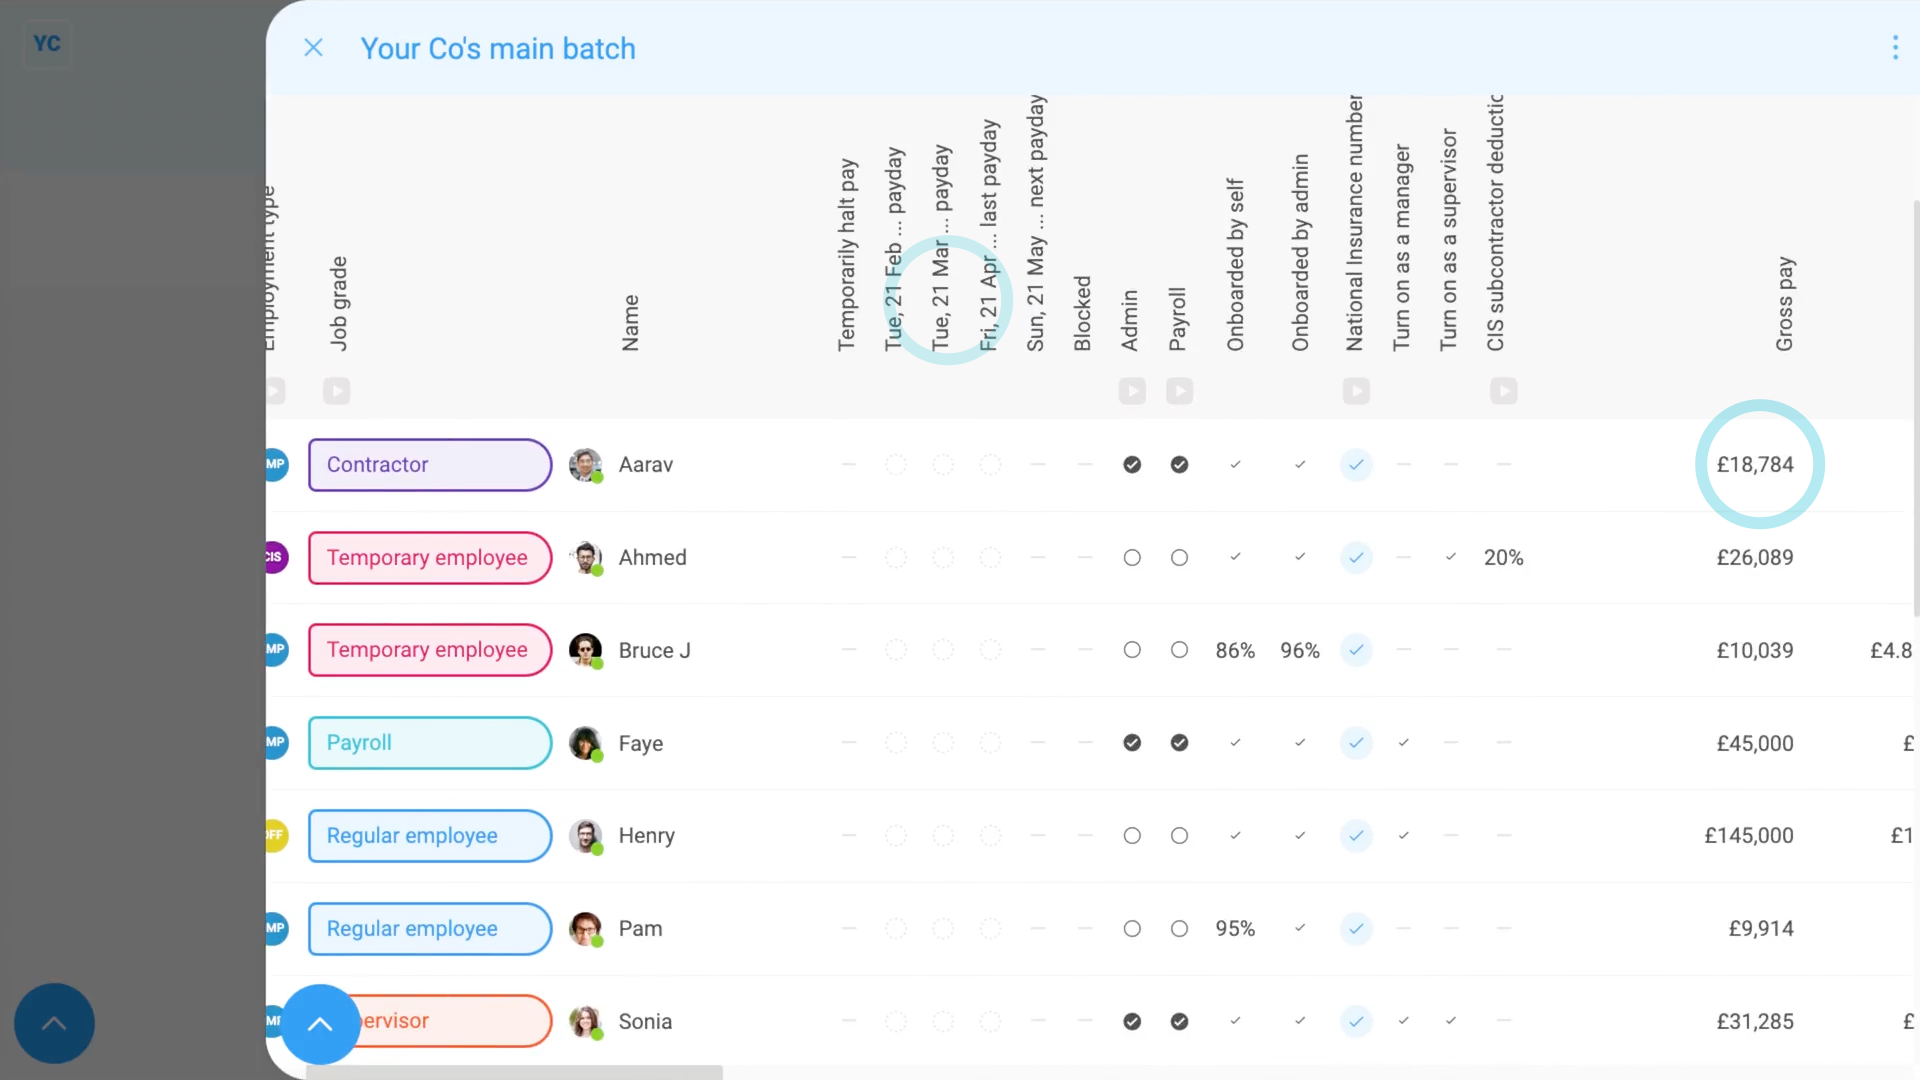
How do I move all the people between pay batches and locations?
 3:10
3:10
"How do I move all the people between pay batches and locations?"
The pay batch or location "move all" button makes it possible to move everyone from one pay batch or location to another.
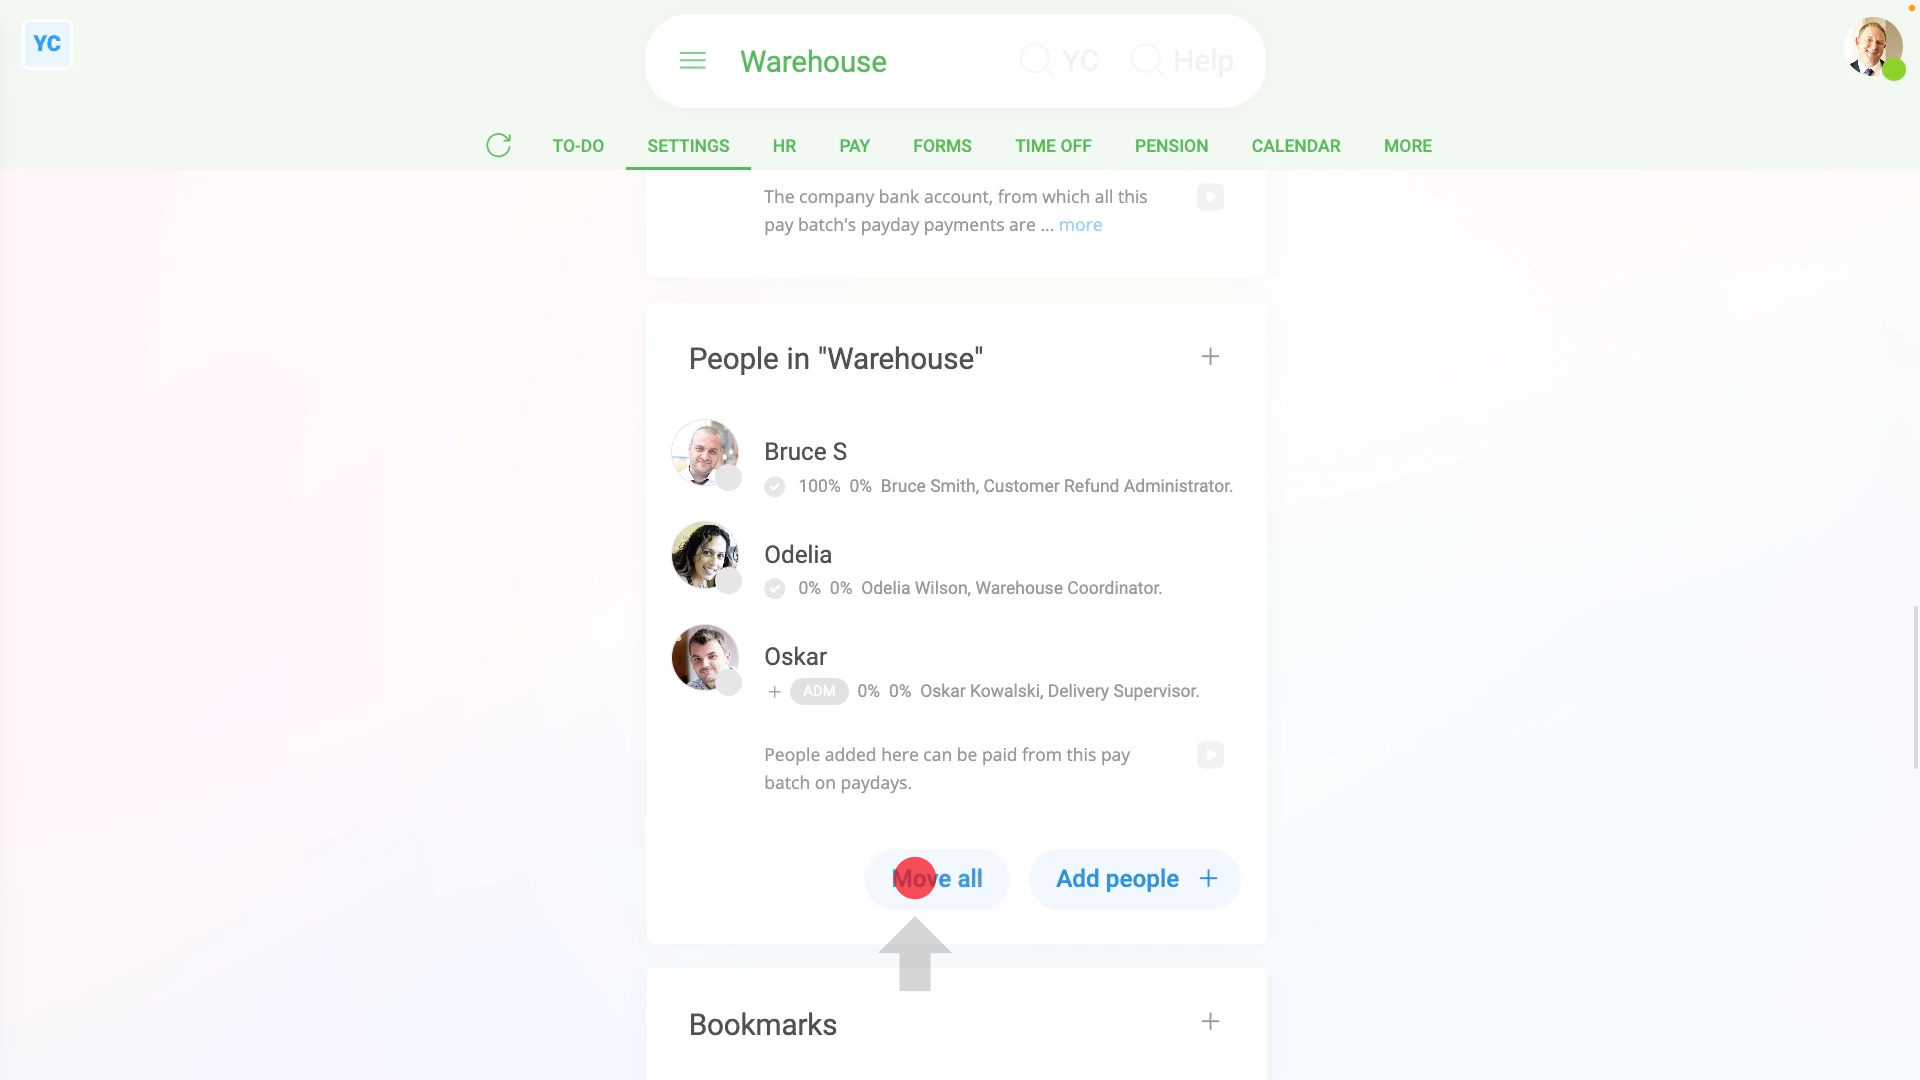
To move everyone from one pay batch to another:
- First, select the pay batch that the people are currently in, on: "Menu", then "Pay batches"
- Then tap: "Settings", then "Pay batch settings"
- And scroll down to the "People in" heading.
- You'll now see a list of all the people in the current pay batch, that you're about to move to a different pay batch.
- Then (at the bottom of the list of people), tap: Move all
- Next, select the pay batch that you'd like them to all be moved to.
- If you're curious to see the pay batch's existing people, before the move, tap the "View" button: (at the end of the row)
- Then once you're ready, tap: Yes ... move all
- The people have now all been moved. To see the moved people, tap the link in the confirmation message.
- Then tap the three dots: (in the top-right corner), and tap: Reload
- And finally, you'll see all the people have been successfully moved to the other pay batch.
To move everyone from one location to another:
- First, select the location that the people are currently in, on: "Menu", then "Locations"
- And scroll down to the "People in" heading.
- You'll now see a list of all the people in the current location, that you're about to move to a different location.
- Then (at the bottom of the list of people), tap: Move all
- Next, select the location that you'd like them to all be moved to.
- If you're curious to see the location's existing people, before the move, tap the "View" button: (at the end of the row)
- Then once you're ready, tap: Yes ... move all
- The people have now all been moved. To see the moved people, tap the link in the confirmation message.
- Then tap the three dots: (in the top-right corner), and tap: Reload
- And finally, you'll see all the people have been successfully moved to the other location.
Keep in mind that:
- You can always move them back again, if you change your mind.
- However, if you keep them there, the moved people instantly get all the new pay batch's or location's settings.
- Including all of the pay batch's holiday dates, tax settings, and more.
- If the new pay batch has different payday settings, watch out for unintended consequences. Like them getting double paid for time already paid in the previous pay batch.
- If you only want to move a few people, instead of all the people, use Add people instead.
And that's it! That's everything you need to know about how to move everyone from one pay batch or location to another!
How do I set an email reminder to check back on something later?
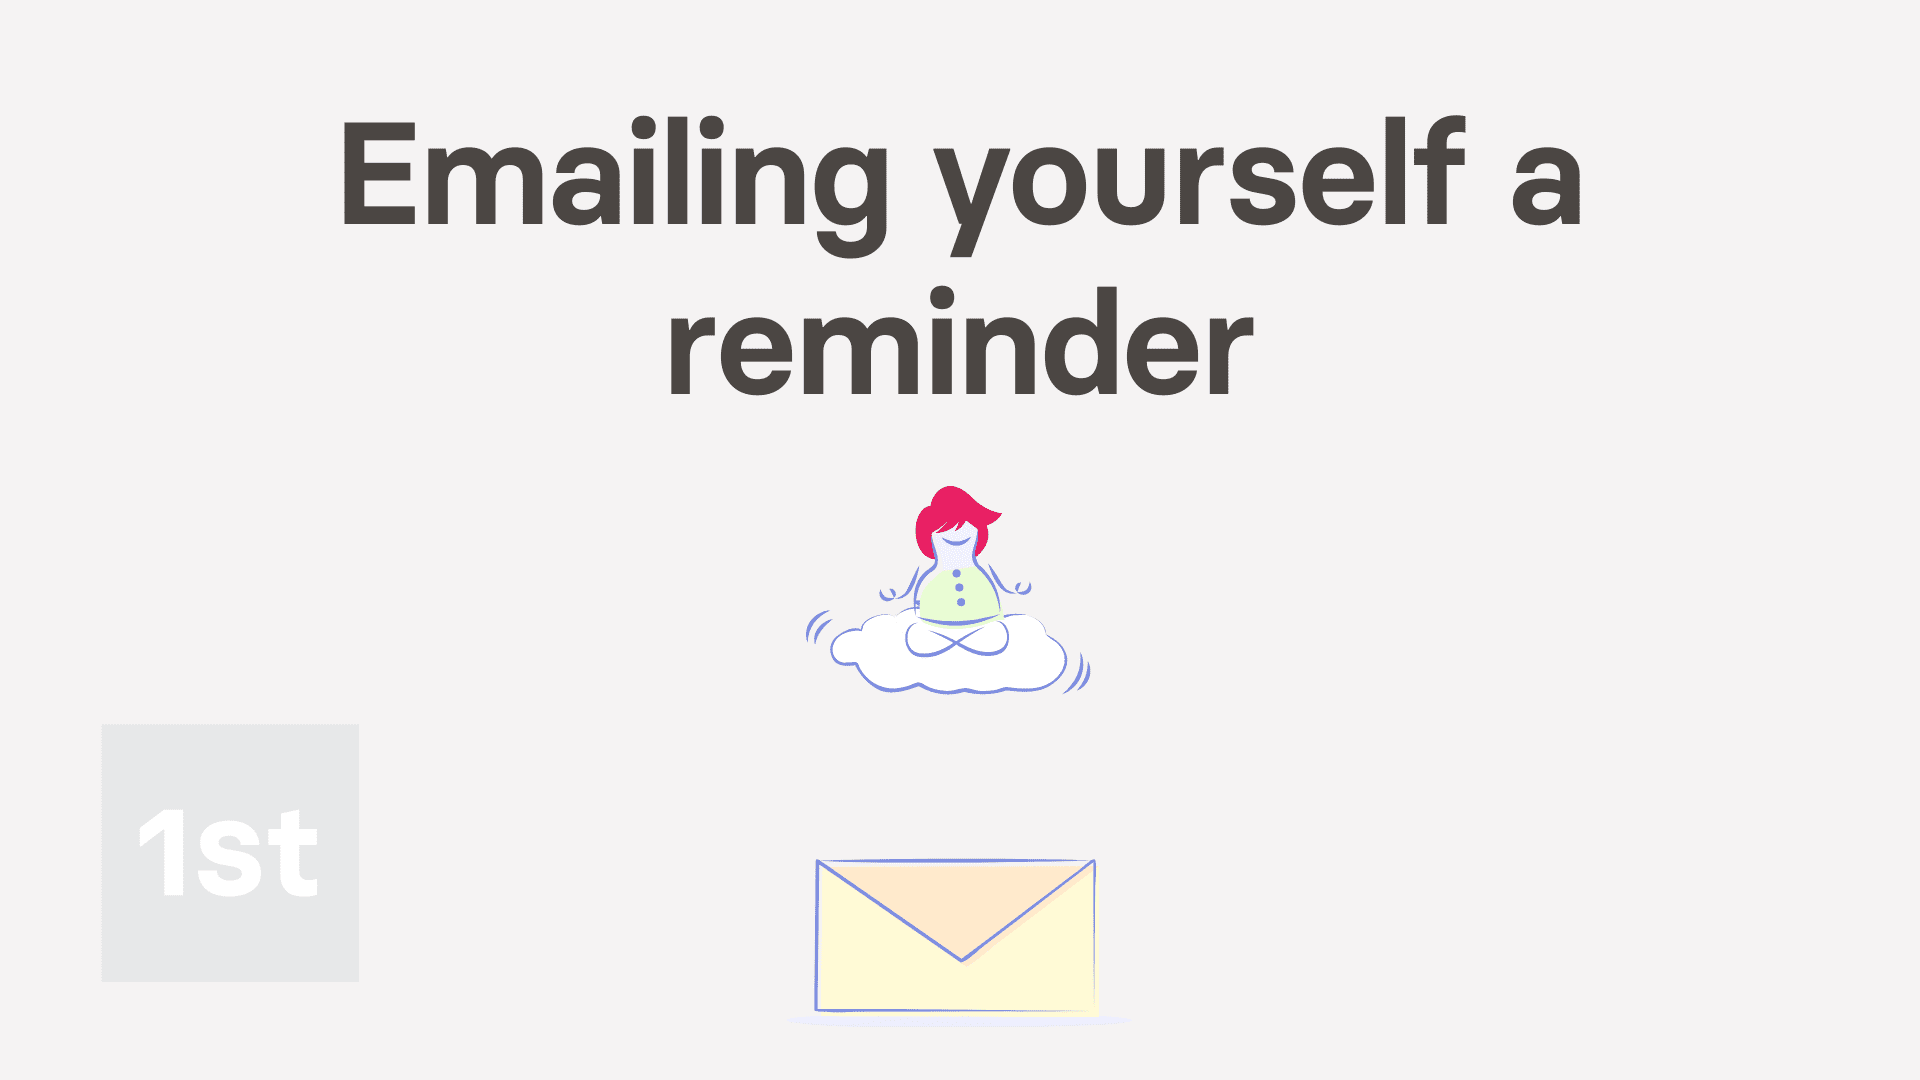 1:14
1:14
"How do I set an email reminder to check back on something later?"
Setting up an email reminder is a convenient way to remind you to come back and check on something later.
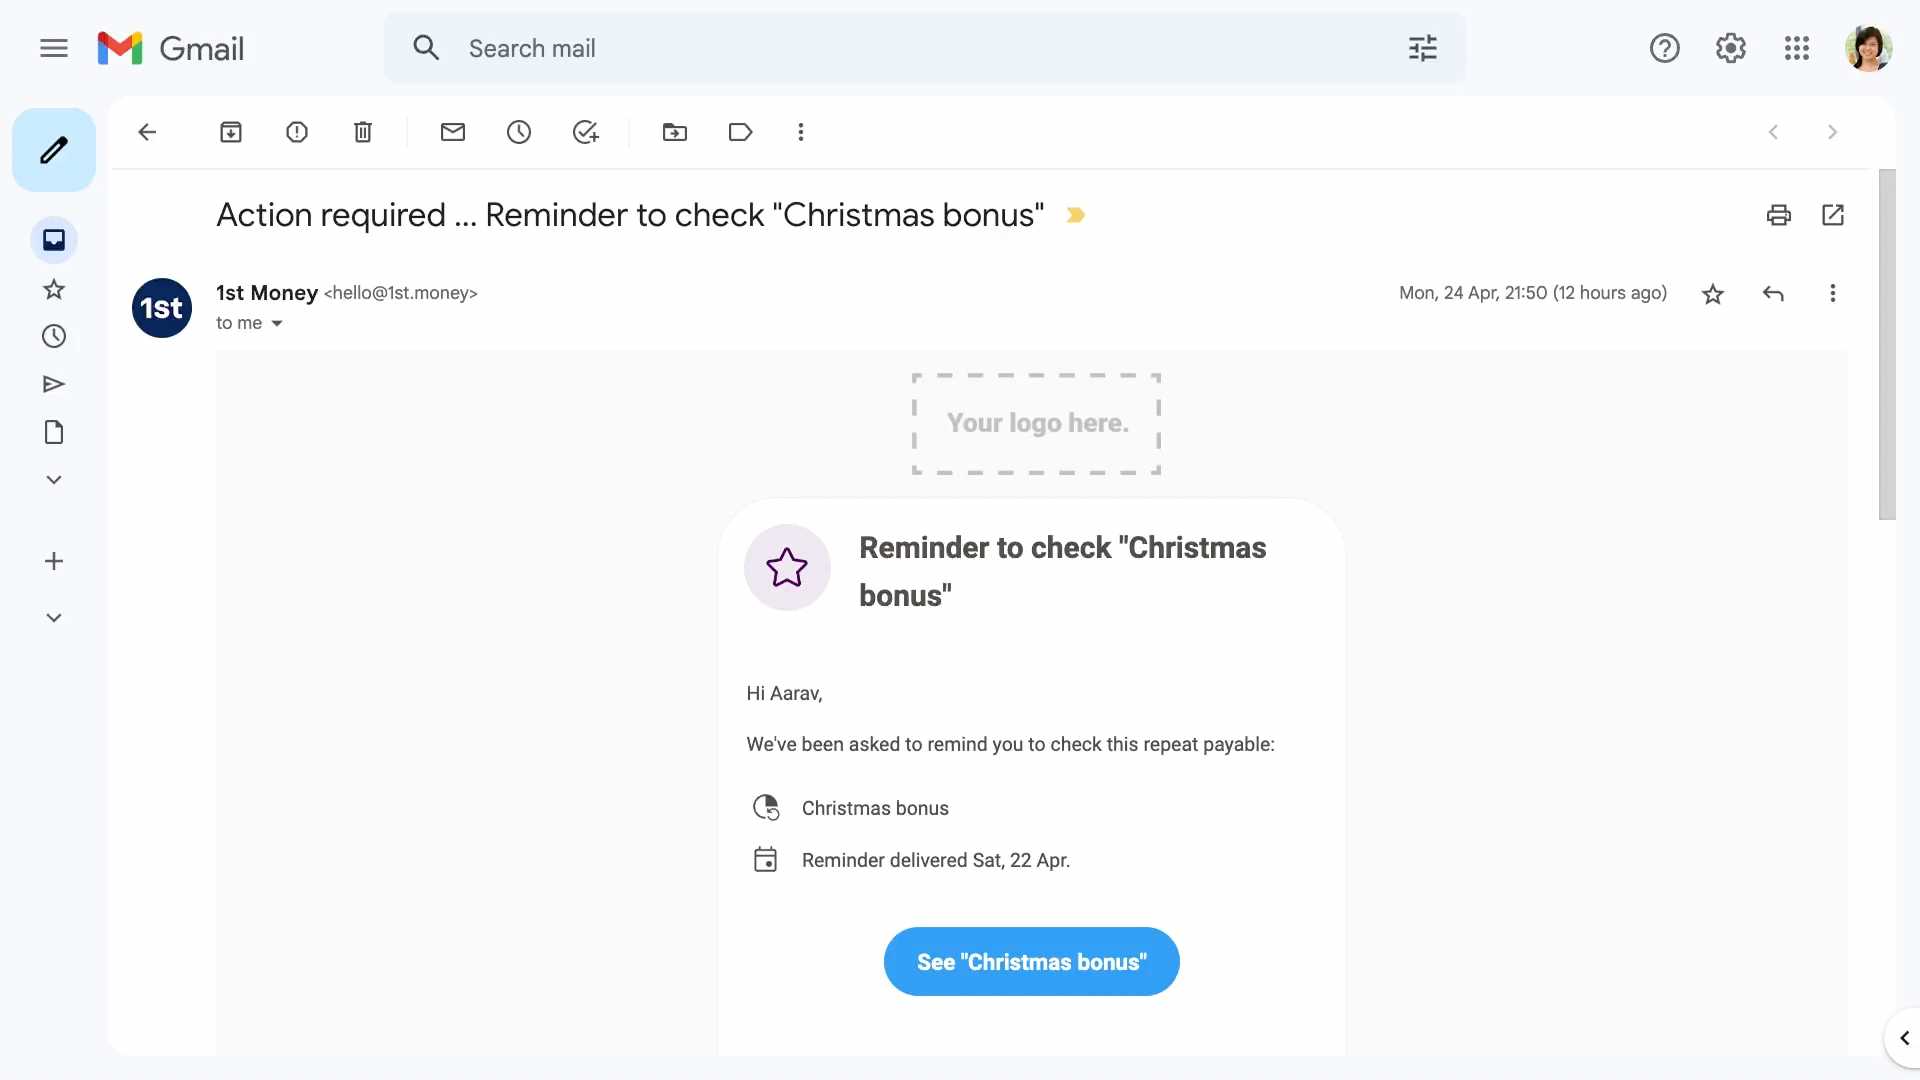
To turn on an email reminder:
- First, tap: Remind me to check this
- Then pick the date you'd like to be emailed the reminder.
- Then tap: Save
- And now, the email reminder's all set up.
- Later, on the date that you chose, you'll be emailed a reminder.
- Open the reminder email, and tap the blue button.
- And finally, you'll be taken right back to the field that you asked to be reminded about.
You may notice:
- Once you return back, that the reminder's now been automatically turned off. It's turned off because the reminder's already been sent.
- Once set, reminders are only ever sent once, and always sent to the email of the person who turned it on.
- If you need another reminder, you can always turn on the reminder again.
And that's it! That's all you need to do to set up an email reminder.
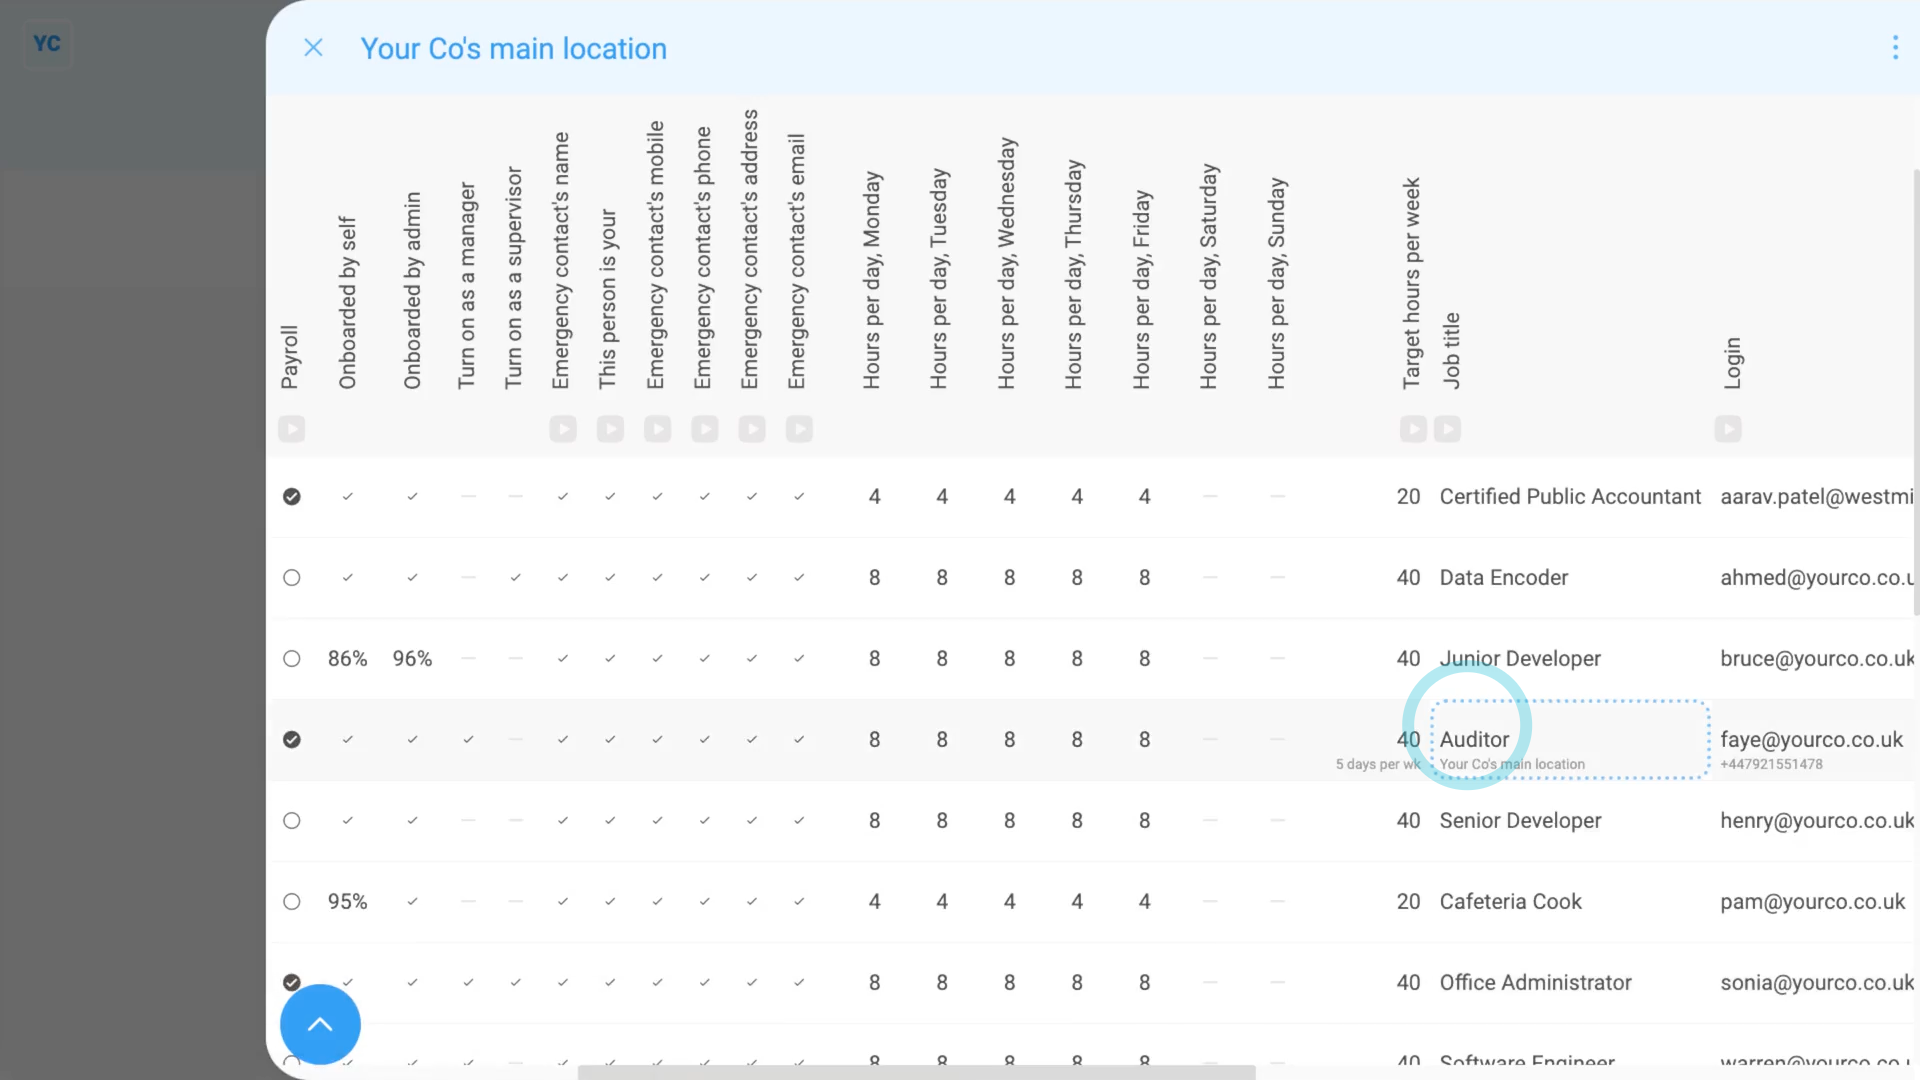
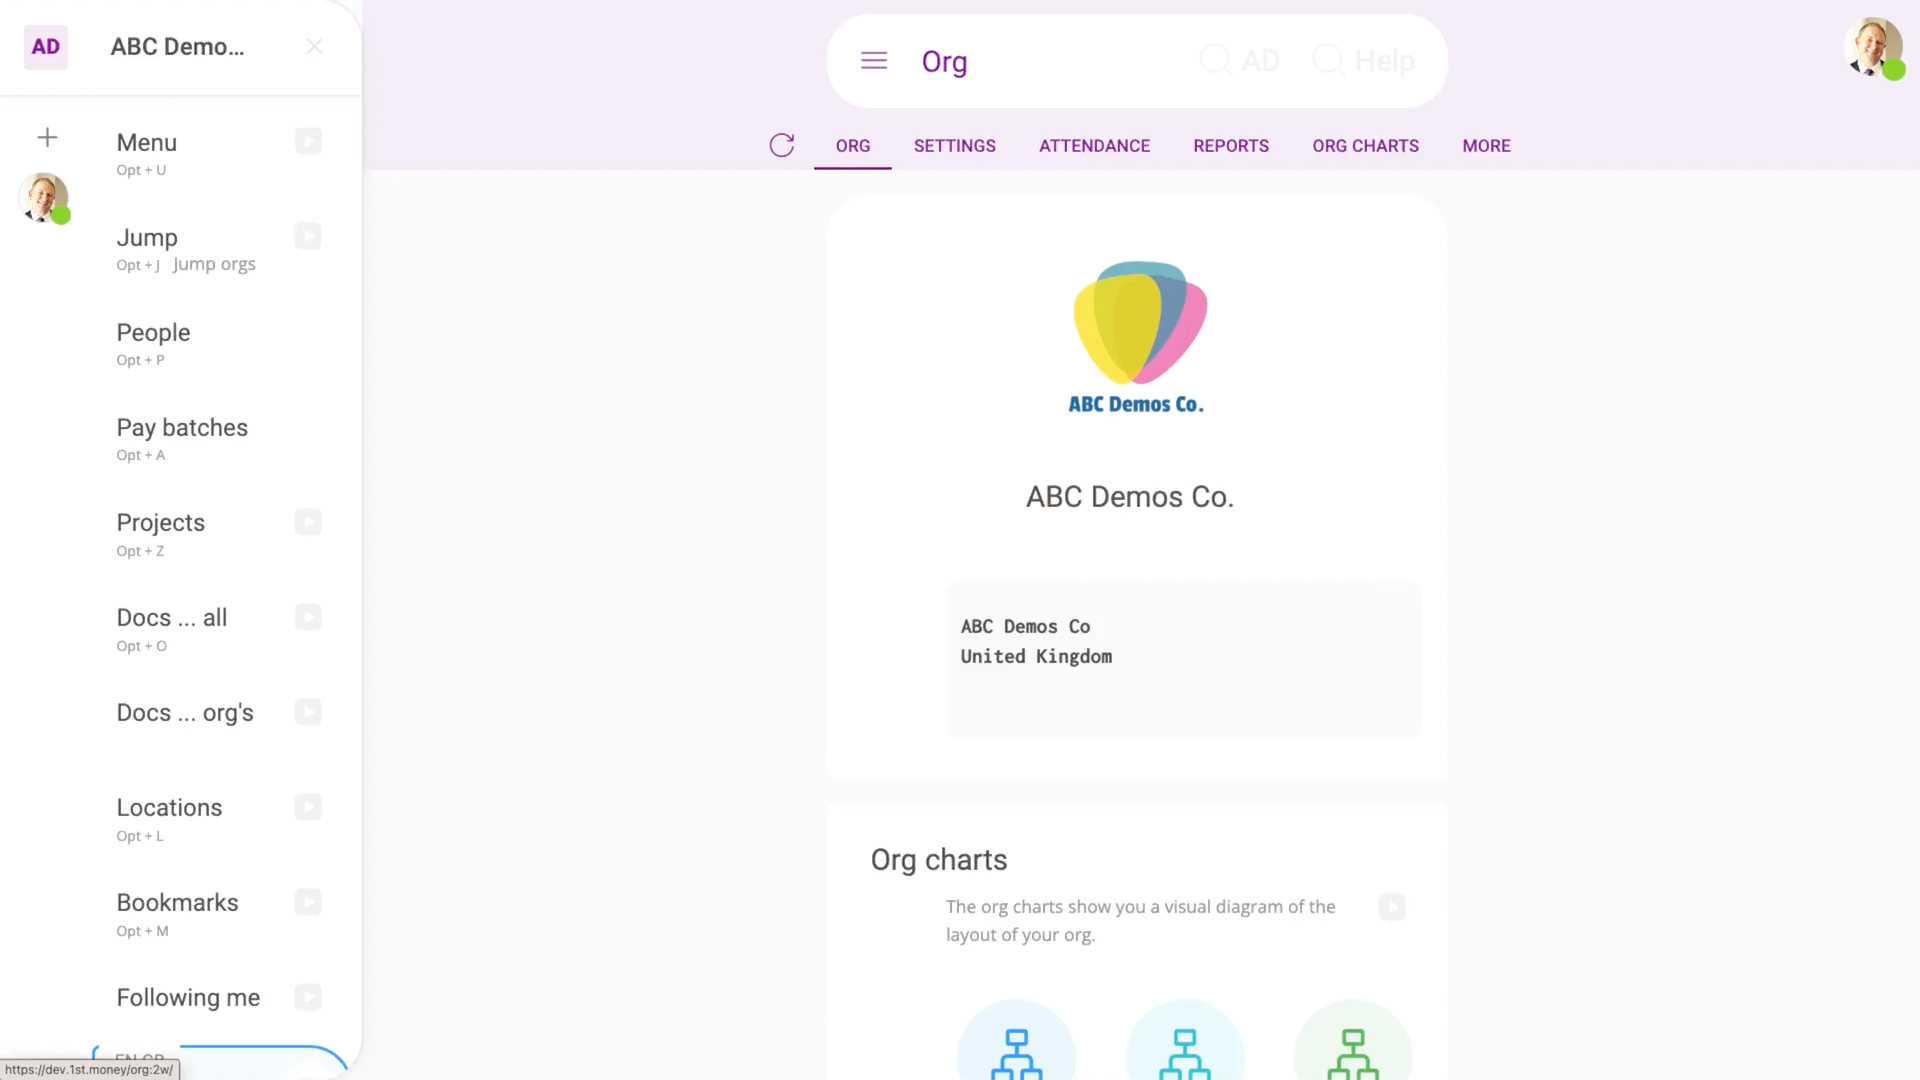
How do I use the 'People' report?
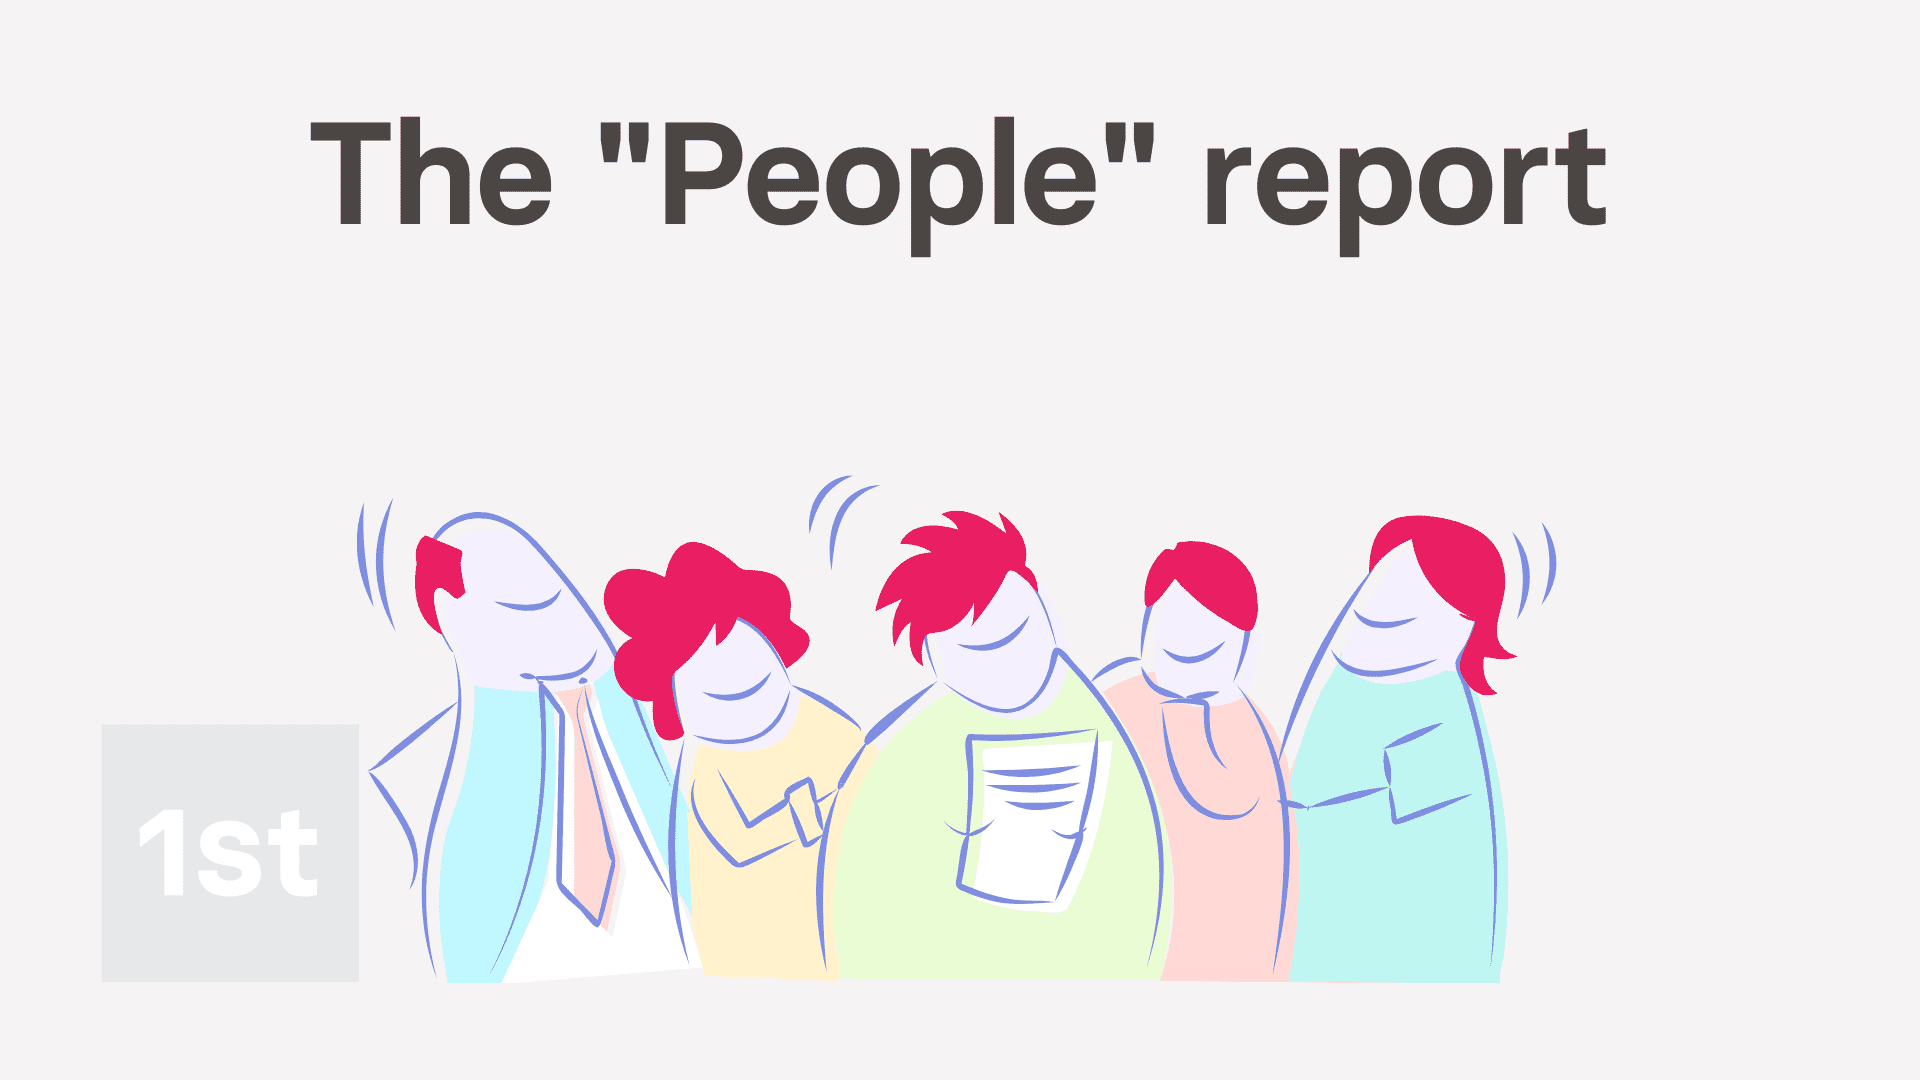 3:12
3:12
"How do I use the "People" report?"
The "People" report shows you a one page summary of all your people in a location, a pay batch, or even your whole org.
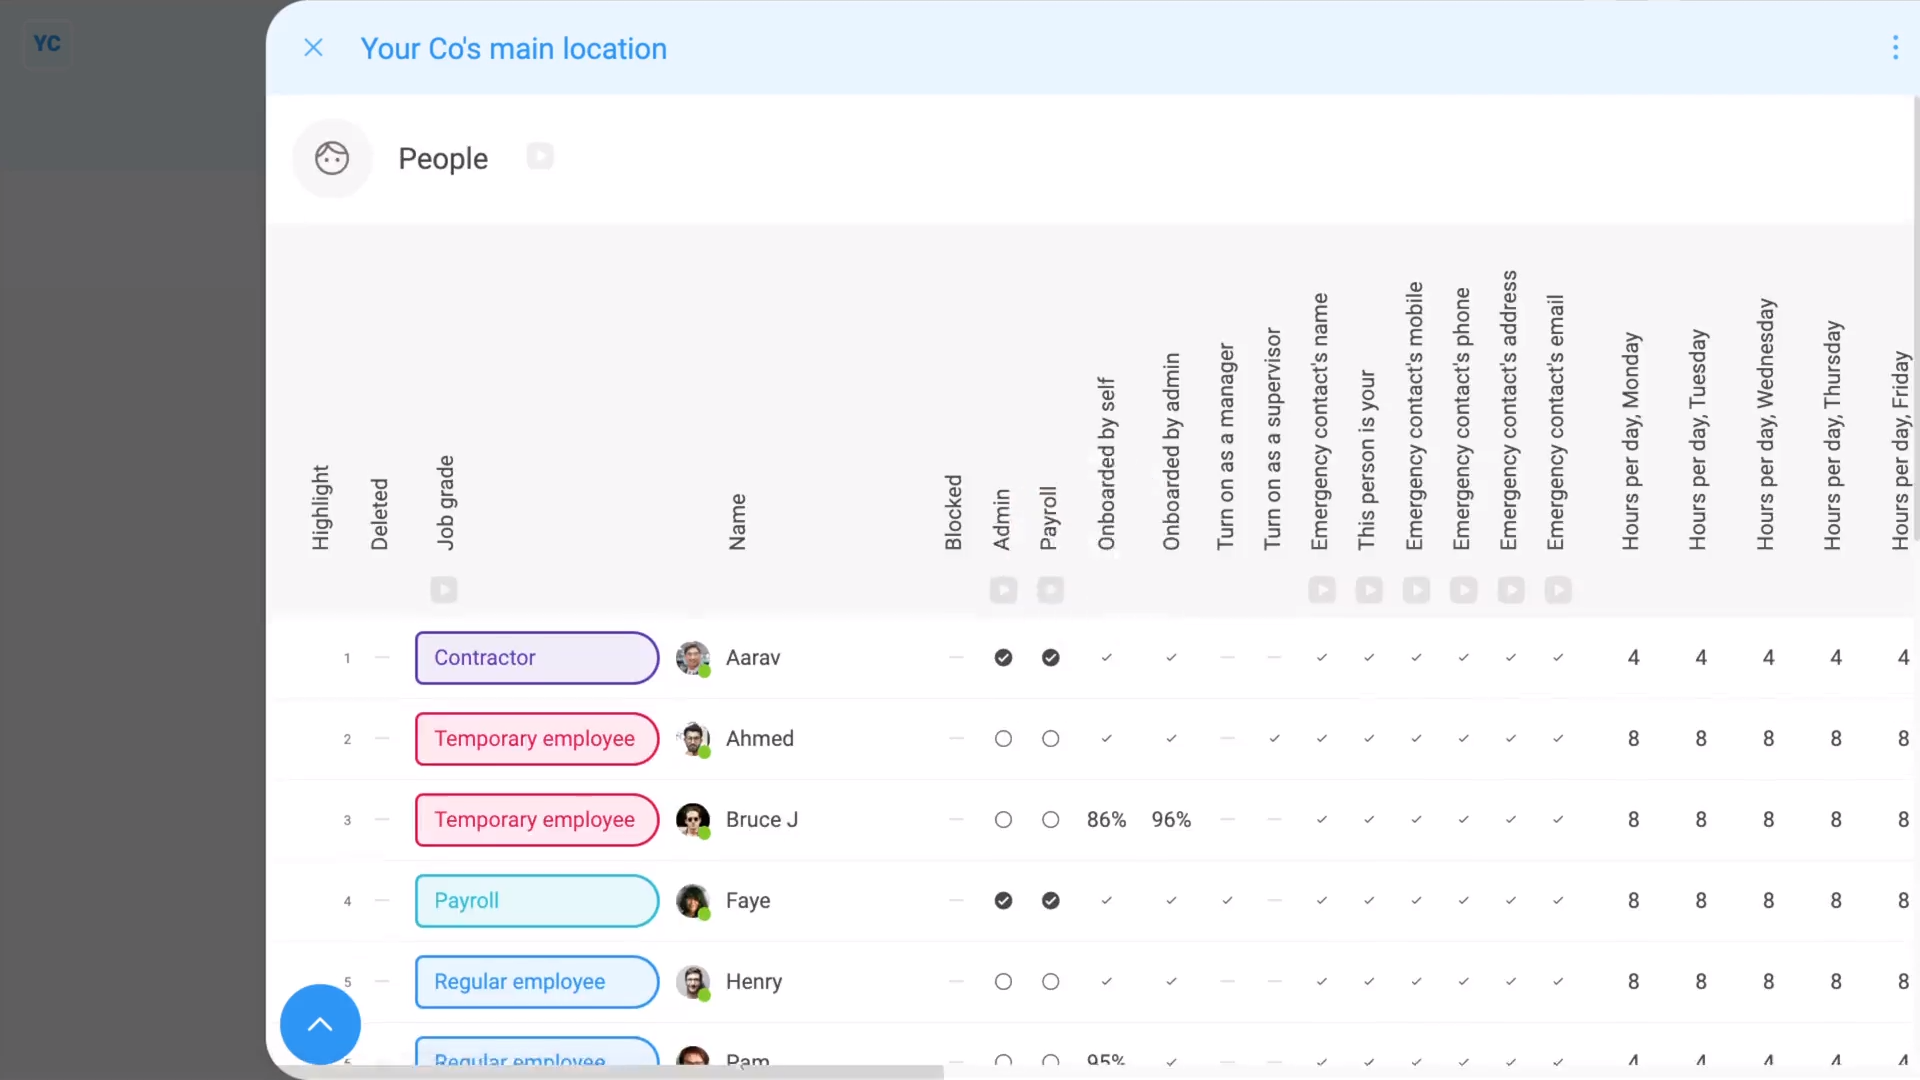
To see a "People" report:
- First, go to a location, a pay batch, or to your org.
- Then tap: "Reports", then "People"
- Once it's open, you'll see a list of people.
- You may prefer to tap the tick boxes (at the start of any row).
- With the highlight turned on, it's easier to keep track of rows as you scroll across.
- And finally, as you scroll across the "People" report, you'll see info about each person, like their permissions, working hours, job title, and employment dates.
To update something about a person from a "People" report:
- First, go to a location, a pay batch, or to your org.
- Then tap: "Reports", then "People"
- Next, tap the cell you want to change.
- Once it slides out on the right, make your change.
- Then tap: Save
- And finally, you'll now see that the "People" report's automatically updated, as you save each change.
To only list people under a specific manager or supervisor on a "People" report:
- First, go to a pay batch, or to your org.
- Then tap: "HR", then "People"
- And select a manager or supervisor on:
" Show settings", then "Manager" - Now you'll only see the people under the manager or supervisor.
- And finally, to return back to listing all of a pay batch's people, tap:
" Show settings", "Manager", then "All managers"
To see some additional payroll columns on a pay batch's "People" report:
- First, select the pay batch on: "Menu", then "Pay batches"
- Then tap: "Pay", then "People"
- And finally, in the pay batch version of the "People" report you'll see even more info. You'll see the status of recent payslips, their pay rate, their employment agreement, and more.
Keep in mind that:
- Org and location "People" reports are only available to people with at least "View org admin" permissions.
- The pay batch "People" report is only available to people with at least "View payroll admin" permissions.
And that's it! That's everything you need to know about using "People" reports!
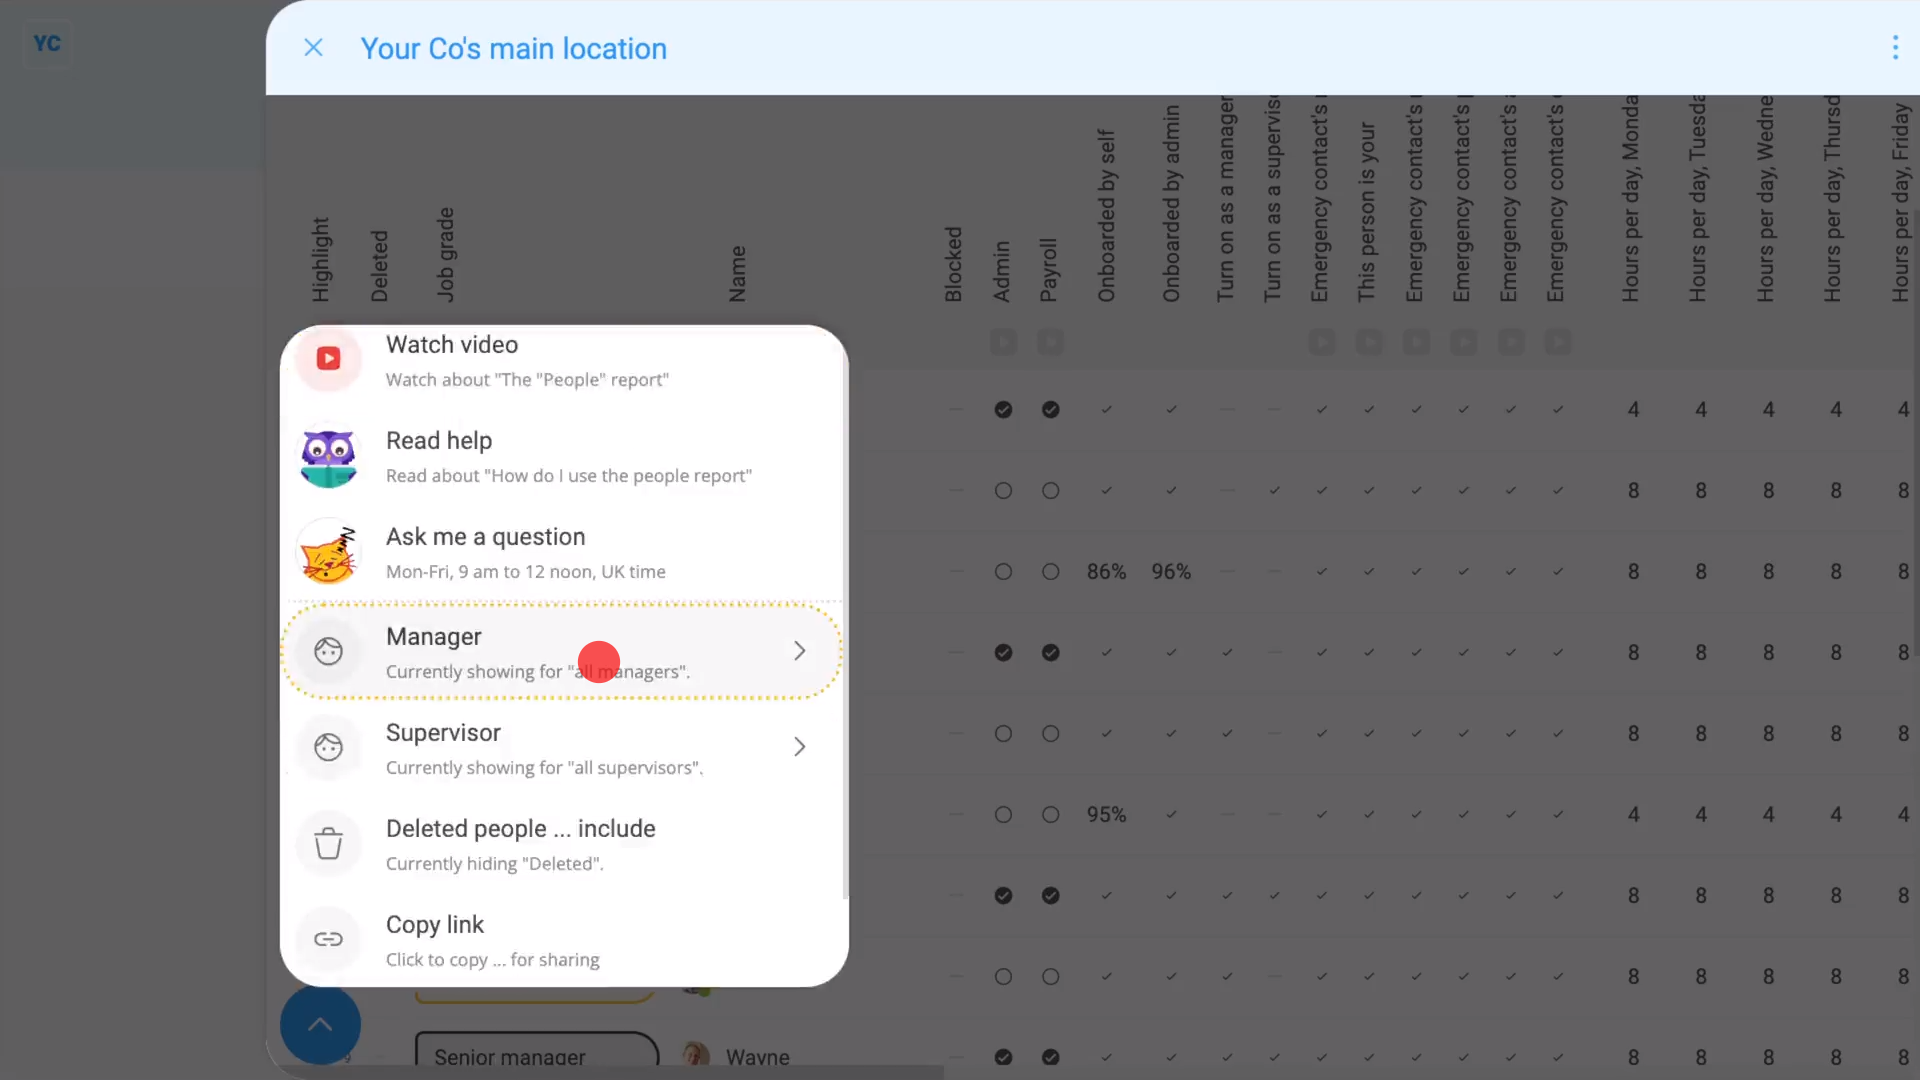
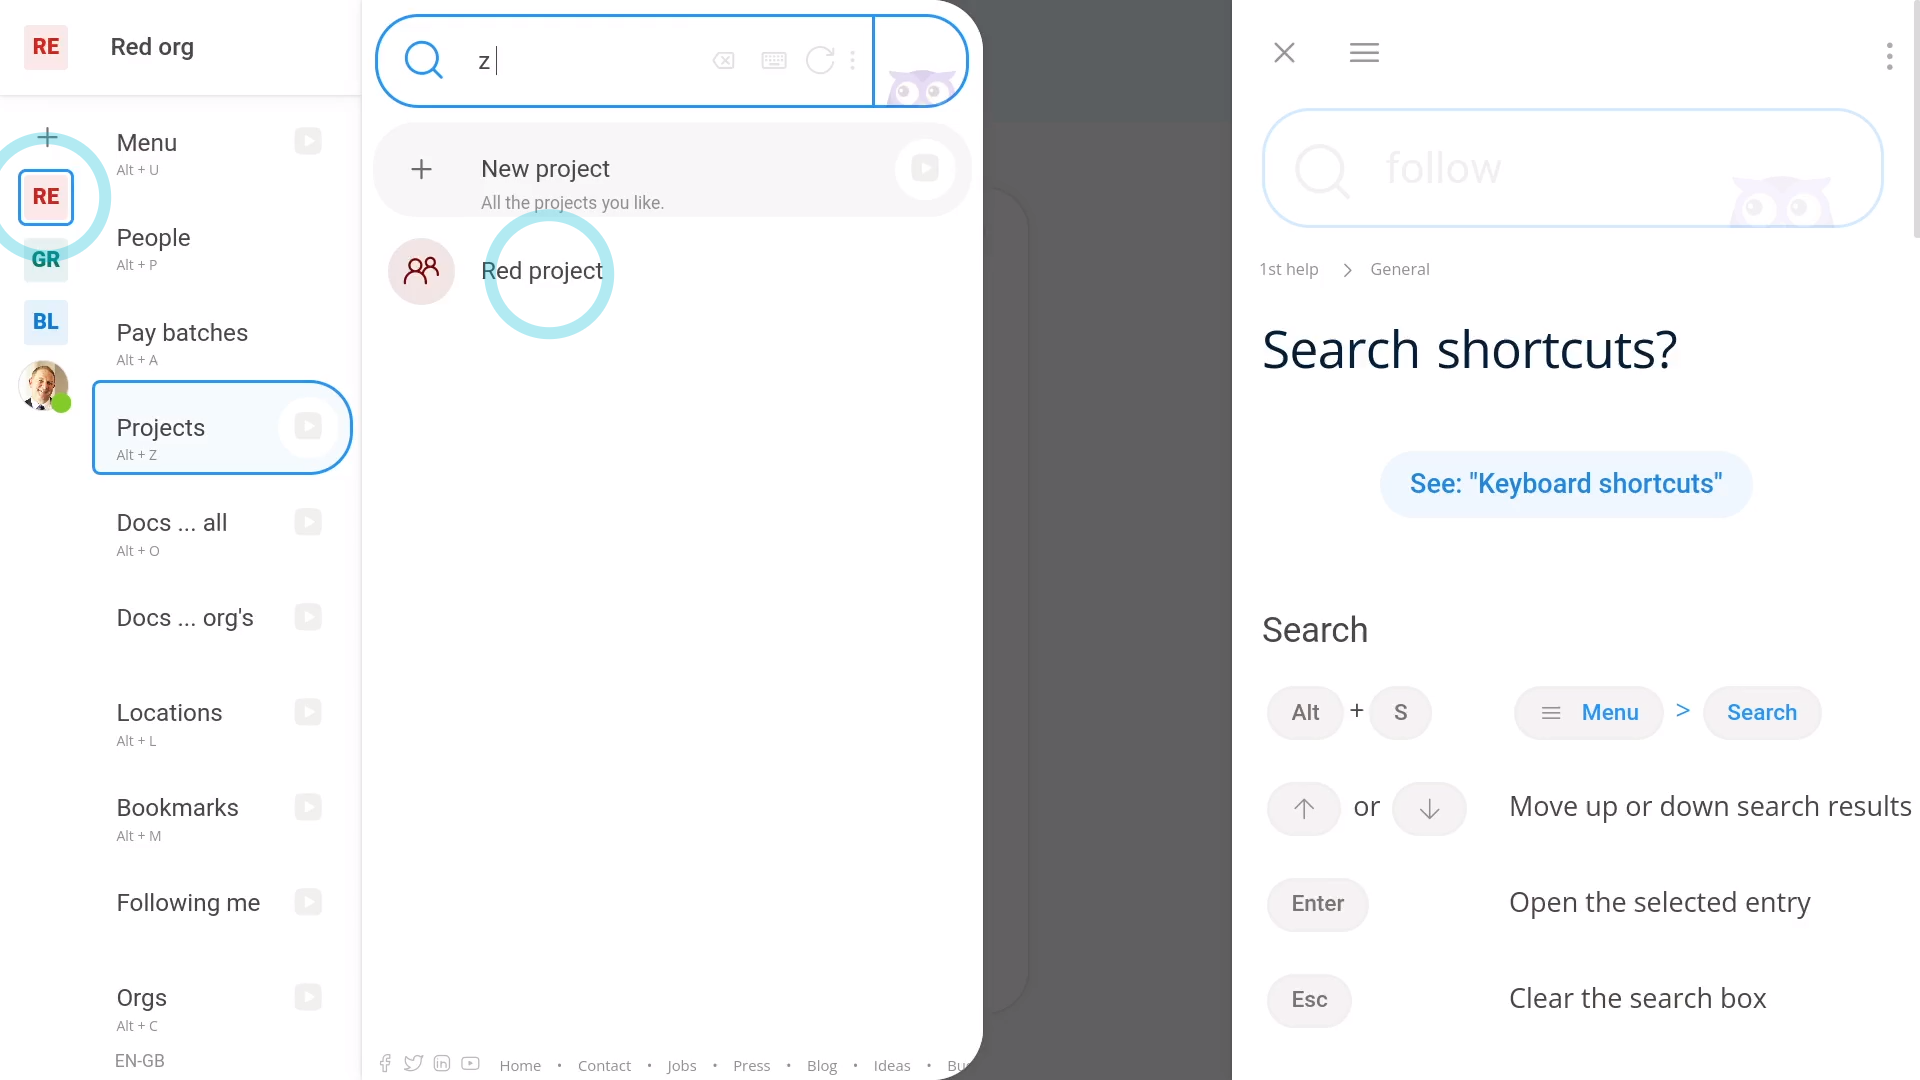
How do I use the jump menu?
 1:28
1:28
"How do I use the jump menu?"
The "Jump" menu is a fast way to go from one item to another, whilst keeping you on the same tab, as you jump between each.
You may notice:
- The "Jump" menu remains hidden while you're on your home screen. But once you go to a person, pay batch, project, or location, the "Jump" menu appears.
- To demonstrate how the "Jump" menu remembers the tab you're on, first tap through to any tab.
To go to a different item, using your "Jump" menu:
- First, while you've got a person, pay batch, project, or location open to a specific tab.
- Tap Jump, and then select the person to jump to.
- And finally, when the item opens, you can see it's taken you directly to the specific tab, with no extra taps.
Keep in mind that:
- "Jump" is particularly useful when you're repeatedly making the same change to each person on your team. For example, you're changing everyone's target hours.
- So if you ever find yourself doing a repeated change, tap Jump to go from person to person.
For advanced usage:
- Alternatively, you could also try using the "People" report, as an even faster way to do a repeated change.
And that's it! That's everything you need to know about using your "Jump" menu!
How do I use the keyboard shortcuts?
 2:45
2:45
"How do I use the keyboard shortcuts?"
Keyboard shortcuts are available for most features in 1st Money, including both in the browser, and when you install 1st Money.

To see a few common keyboard shortcuts:
- First, tap: "Menu"
- You'll see the keyboard shortcuts written in light grey.
- And finally, you can also see the keyboard shortcuts on the: "Work-time menu" (top-right)
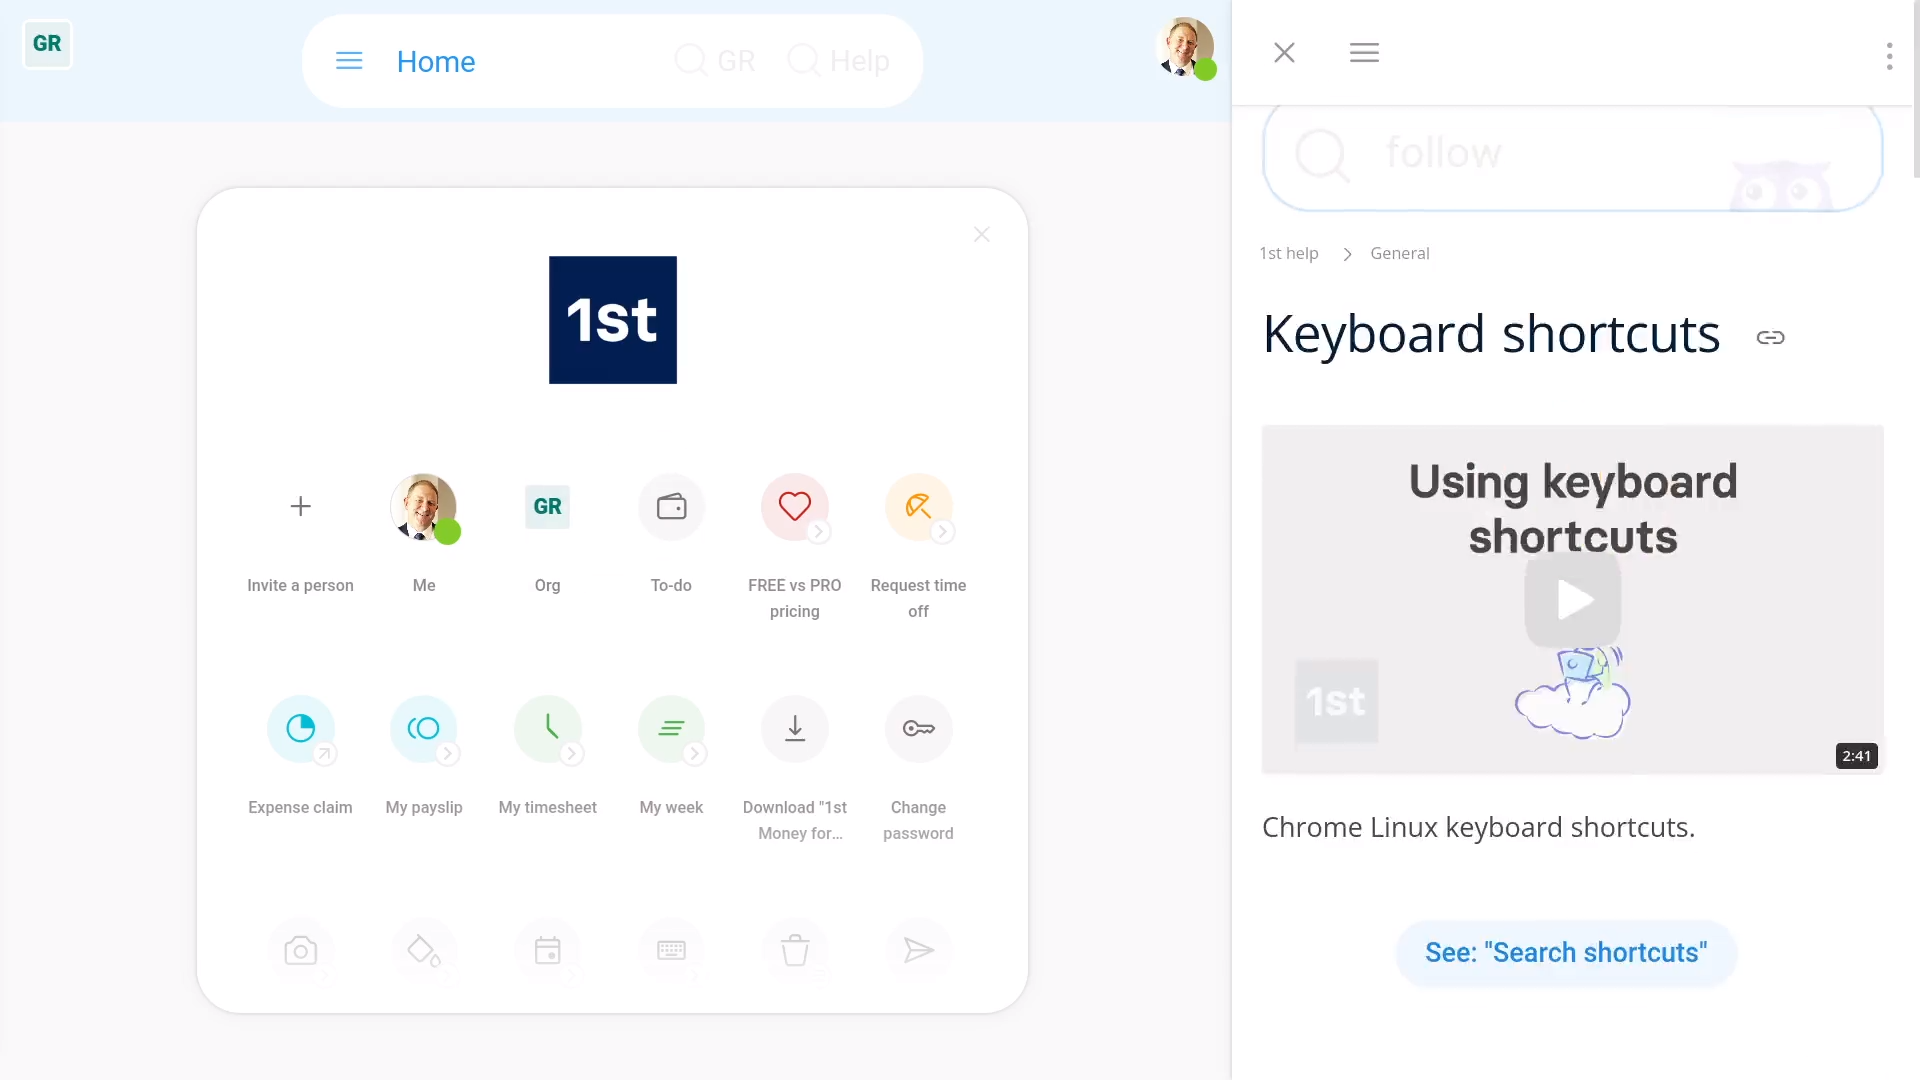
To see a full list of keyboard shortcuts:
- First, tap: "Menu", then "Keyboard shortcuts"
- It shows you the full listing of all keyboard shortcuts that're available to you right now, as a help page on the right.
- You can also get to the page by pressing the keyboard shortcut: alt/
- And finally, to see the additional shortcuts that only work in search, in the search box, tap the "Keyboard" button:
To jump between orgs using org shortcuts:
- First, hover your mouse over each org in your follow list. You'll see that each org has a keyboard shortcut.
- The first org is always: controlshift1
- And the second is always controlshift2, and so on.
- Also keep in mind that you can always drag the orgs to change their order.
- And finally, for whatever org is listed first, its shortcut is always: controlshift1
To combine shortcuts when jumping orgs:
- First, to show you a list of projects, press: altZ
- Then press: controlshift1
- Then press: controlshift2
- Then press: controlshift3
- And finally, on each keypress it shows you each org's projects, as you jump between the orgs with shortcuts.
Keep in mind that:
- You'll see different shortcuts depending on whether you're on Windows, Mac, or Linux.
- Or, in other words, you'll always see the shortcuts for whatever operating system you're currently on.
You may notice:
- That you'll only see keyboard shortcuts when you're working on a laptop or desktop.
- You won't see keyboard shortcuts when you're using 1st Money on a smartphone or tablet.
For advanced usage:
- For people managing more than one org, like accountants and bookkeepers, the shortcuts to jump orgs may be especially useful.
- It helps speed up jumping between each of an accountant's or bookkeeper's client orgs.
And that's it! That's everything you need to know about using keyboard shortcuts!
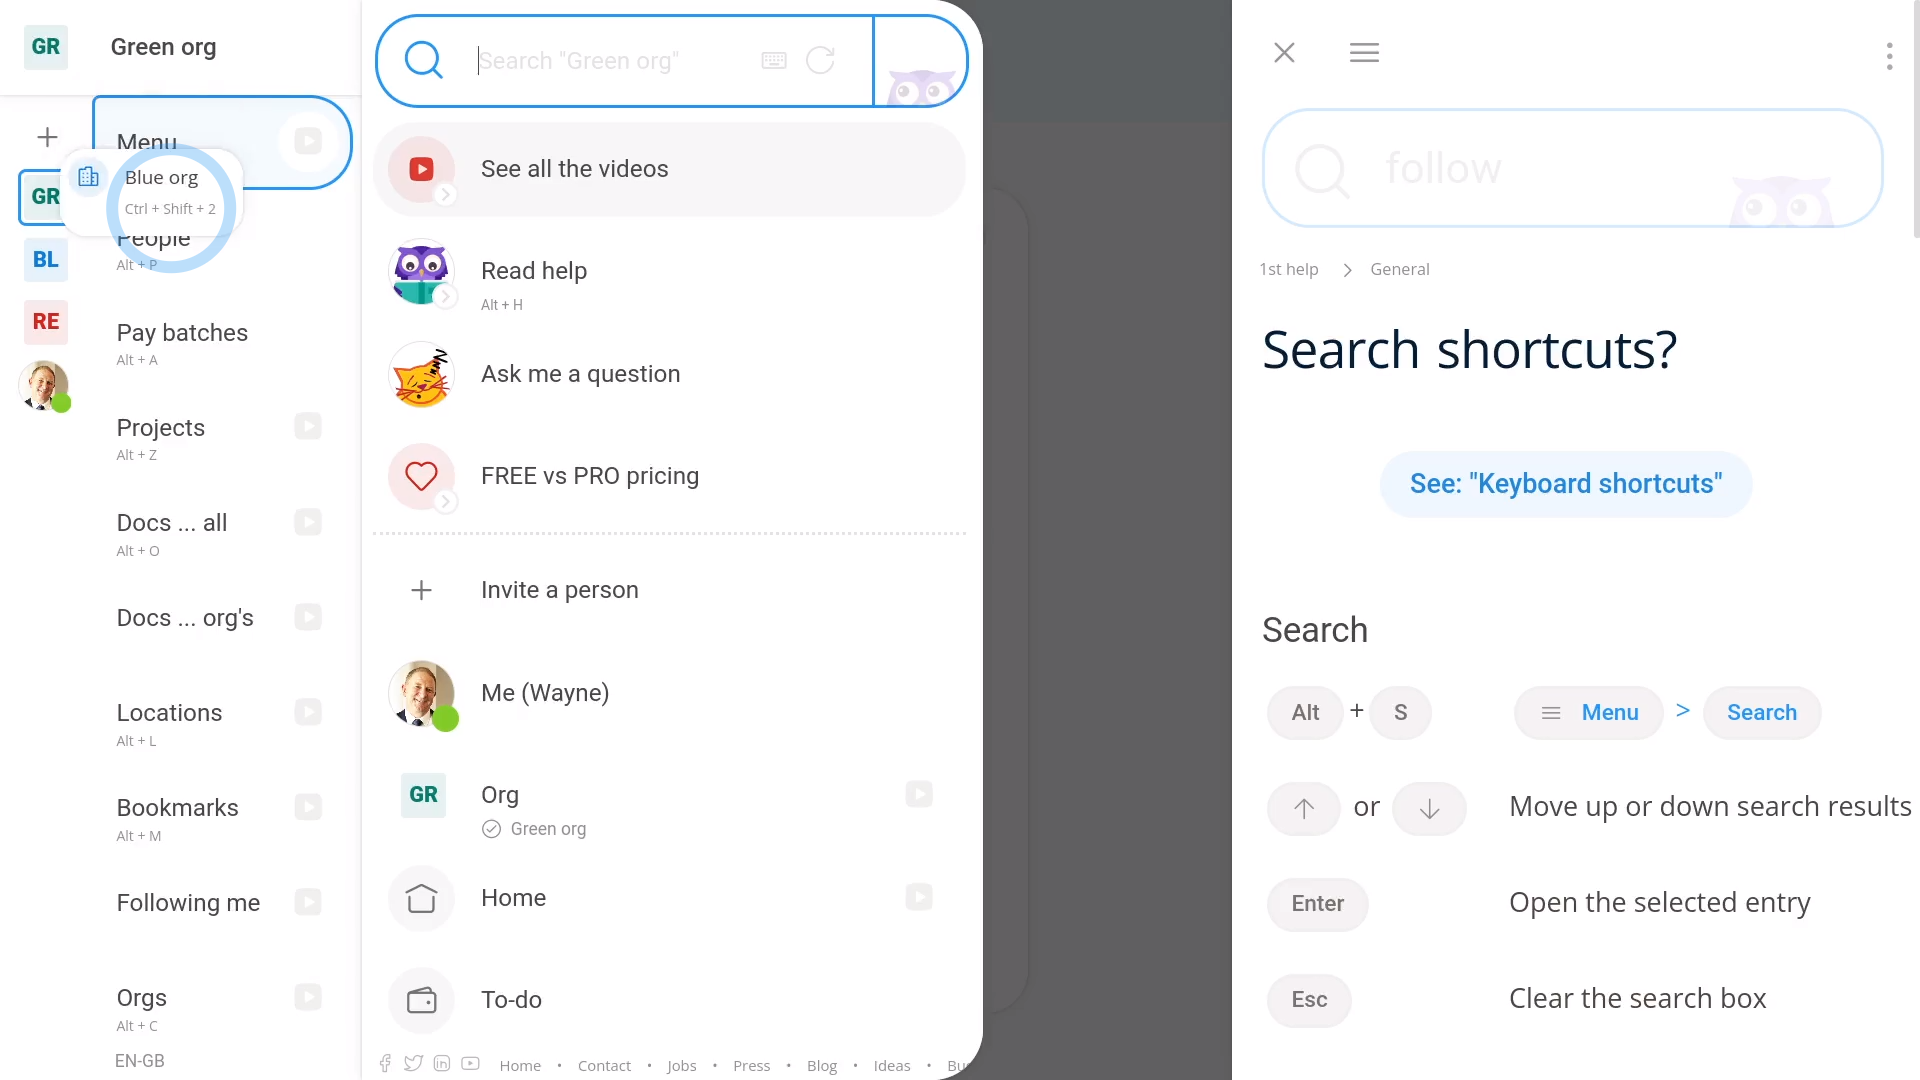
How do I use the side menu?
 2:42
2:42
"How do I use the side menu?"
The side menu is your main way to jump around all the different places in 1st Money.
To permanently pin out your side menu:
- First, tap: "Menu"
- Then tap the "Pin" button: (at the top)
- Now the side menu is always pinned out, making it easier to tap.
- And finally, when you want to hide the side menu again, tap the "Close" button:
To open your org's settings from your menu:
- First, when you hover your mouse over your org's name (at the top), you'll see it turn into a blue button.
- And finally, if you tap it, you'll be taken to your org's settings.
To see your "Menu" links:
- First, tap: "Menu"
- On the menu, you'll see a list of all the main places you may want to go in 1st Money.
- And finally, you may also notice that the list is the same listing as the one you'll see on your home screen.
To add org shortcuts to your follow list:
- First, the follow list is the column on the left edge of the menu.
- To add some orgs to it, tap the "Add" button: (at the top)
- Then tap: Follow more orgs
- Then beside the orgs you want to add, tap the highlighted "Add" buttons:
- Instantly, your orgs now show up on the follow list.
- And finally, to switch orgs, tap the new org shortcuts that you've put on your follow list.
To add people shortcuts to your follow list:
- First, tap the "Add" button: (at the top)
- And then tap: Follow more people
- Then beside the people you want to add, tap the highlighted "Add" buttons:
- And finally, to go to each person's settings, tap the new person shortcuts that you've put on your follow list.
You may notice:
- By adding people to your follow list, you can see their work-time status goes green when the person starts.
- And goes yellow when the person goes on break.
For advanced usage:
- To re-order shortcuts in your follow list, drag your org and people shortcuts to put them into the order you prefer.
- To remove org or person shortcuts from your follow list, find them in the menu, and tap the "Tick" to remove them.
And that's it! That's everything you need to know about your side menu!
How do you keep your software reliable?
 6:17
6:17
"How do you keep your software reliable?"
Software reliability
Ever wondered how we, at 1st Money, keep our software so reliable? In short, we do it by every day:
- Exactly matching all 10,000 of HMRC's model tax calculations,
- Publishing 310 product videos,
- Running over 6,000 click-navs,
- Checking over 36,000 asserts,
- And running over 2,000 delves.
The video's numbers are up-to-date as of the 25th of July, 2024. Keep watching, to see how it all works.
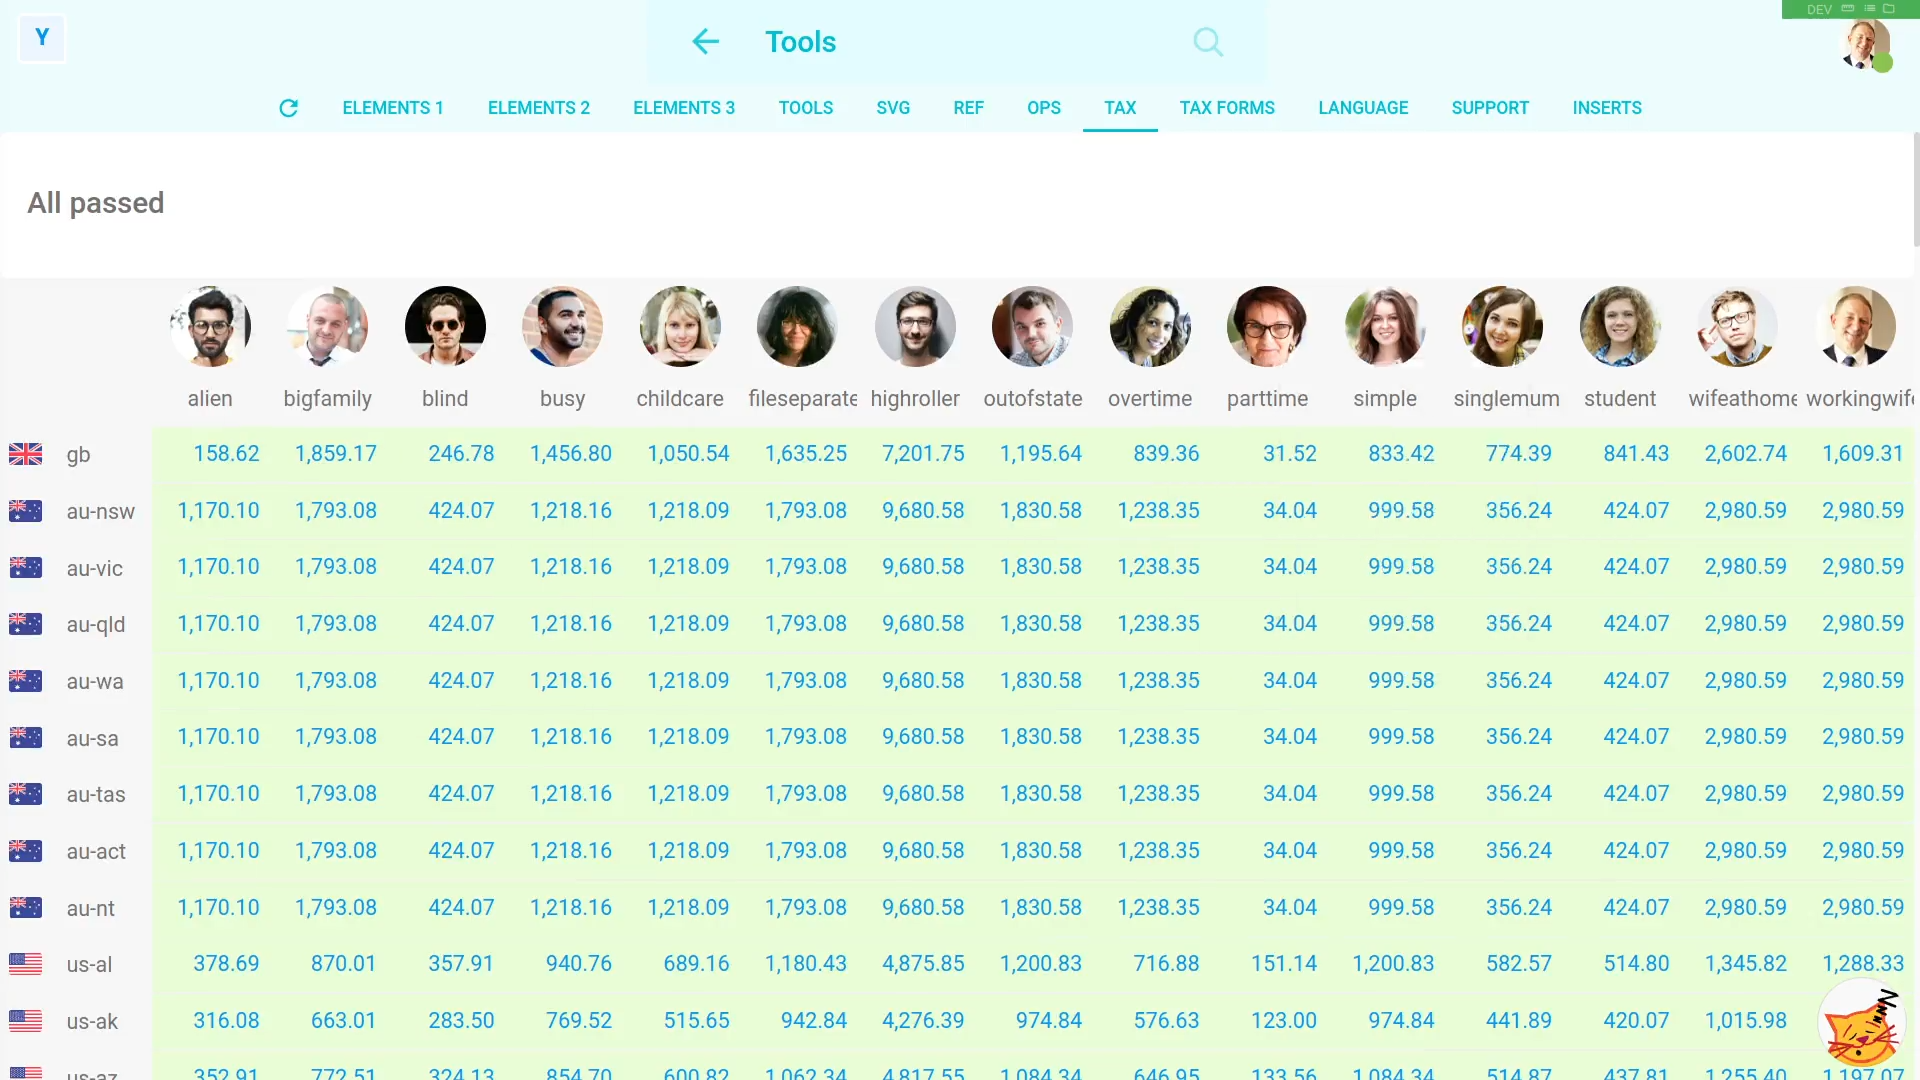
Tax scenarios
We test our tax calculations by inventing 15 different imaginary taxpayers, shown (at the top of the screen).
Each one has different settings. For example, how many hours the imaginary taxpayer works, how much is paid, whether the imaginary taxpayer's married, whether there's children, and much more. We use our 15 different imaginary taxpayers to exactly match all 10,000 of HMRC's model tax calculations.
Each tax calculation is matched to the penny, giving us recognition from HMRC that our tax software is 100% correct. And, of course, we sit down and re-verify them all with HMRC every year.
Product videos
So far, we've made 310 tutorial videos, explaining every part of the 1st Money product.
Everywhere in the 1st Money product, you'll find video buttons . When you tap one, a video pops out from the side. In our help pages, almost every sentence can be tapped on to show a video explaining that step.
To make it all work perfectly, we've built our own video player, and video creation software. The videos mean that any customer that wants help can immediately find answers.
Questions and answers
We've written 2,800 questions and answers, explaining even more parts of the 1st Money product.
The questions and answers are searchable through an AI powered search box. When you type a question, the AI interprets your question's meaning, and then shows you the best matching answers.
It's fast, and it's accurate, and we're always adding more answers.
Elements
To make our software look beautiful on both laptops and smartphones, we've built our own library of 40 software widgets. Each widget has its own testing page, showing the different ways it can be used. The testing pages help us spot if any of the elements has any errors.
Click tests
Every night, we use robots to do 10,000 taps through the 1st Money product on 6,000 pathways. The taps push our test server's 8-core CPU to 100% for over 12 hours straight.
On each pathway, a tiny robot taps a different path through the 1st Money product as fast as the CPU allows. It's like you're seeing on-screen right now. If the robot spots anything wrong, it takes some screenshots and writes some notes about the error. Using the error notes, our software engineers then make fixes.
By using click tests, bugs are usually spotted by us first, and not by our customers.
Engineering tools
At 1st Money, all our software engineers use specialised engineering tools for their day-to-day programming.
Every time a software engineer finishes making changes to the software, the software engineer tools analyse the code the software engineer's written. The analysis warns the software engineer about errors like missing functions, unused variables, and much more.
TypeScript
Every software engineer, twice a day, runs a script that compiles all 200 of our TypeScript files, and then scans them with ESLint. We use TypeScript to make sure any JavaScript errors get caught by us first, and not by our customers.
Unit tests
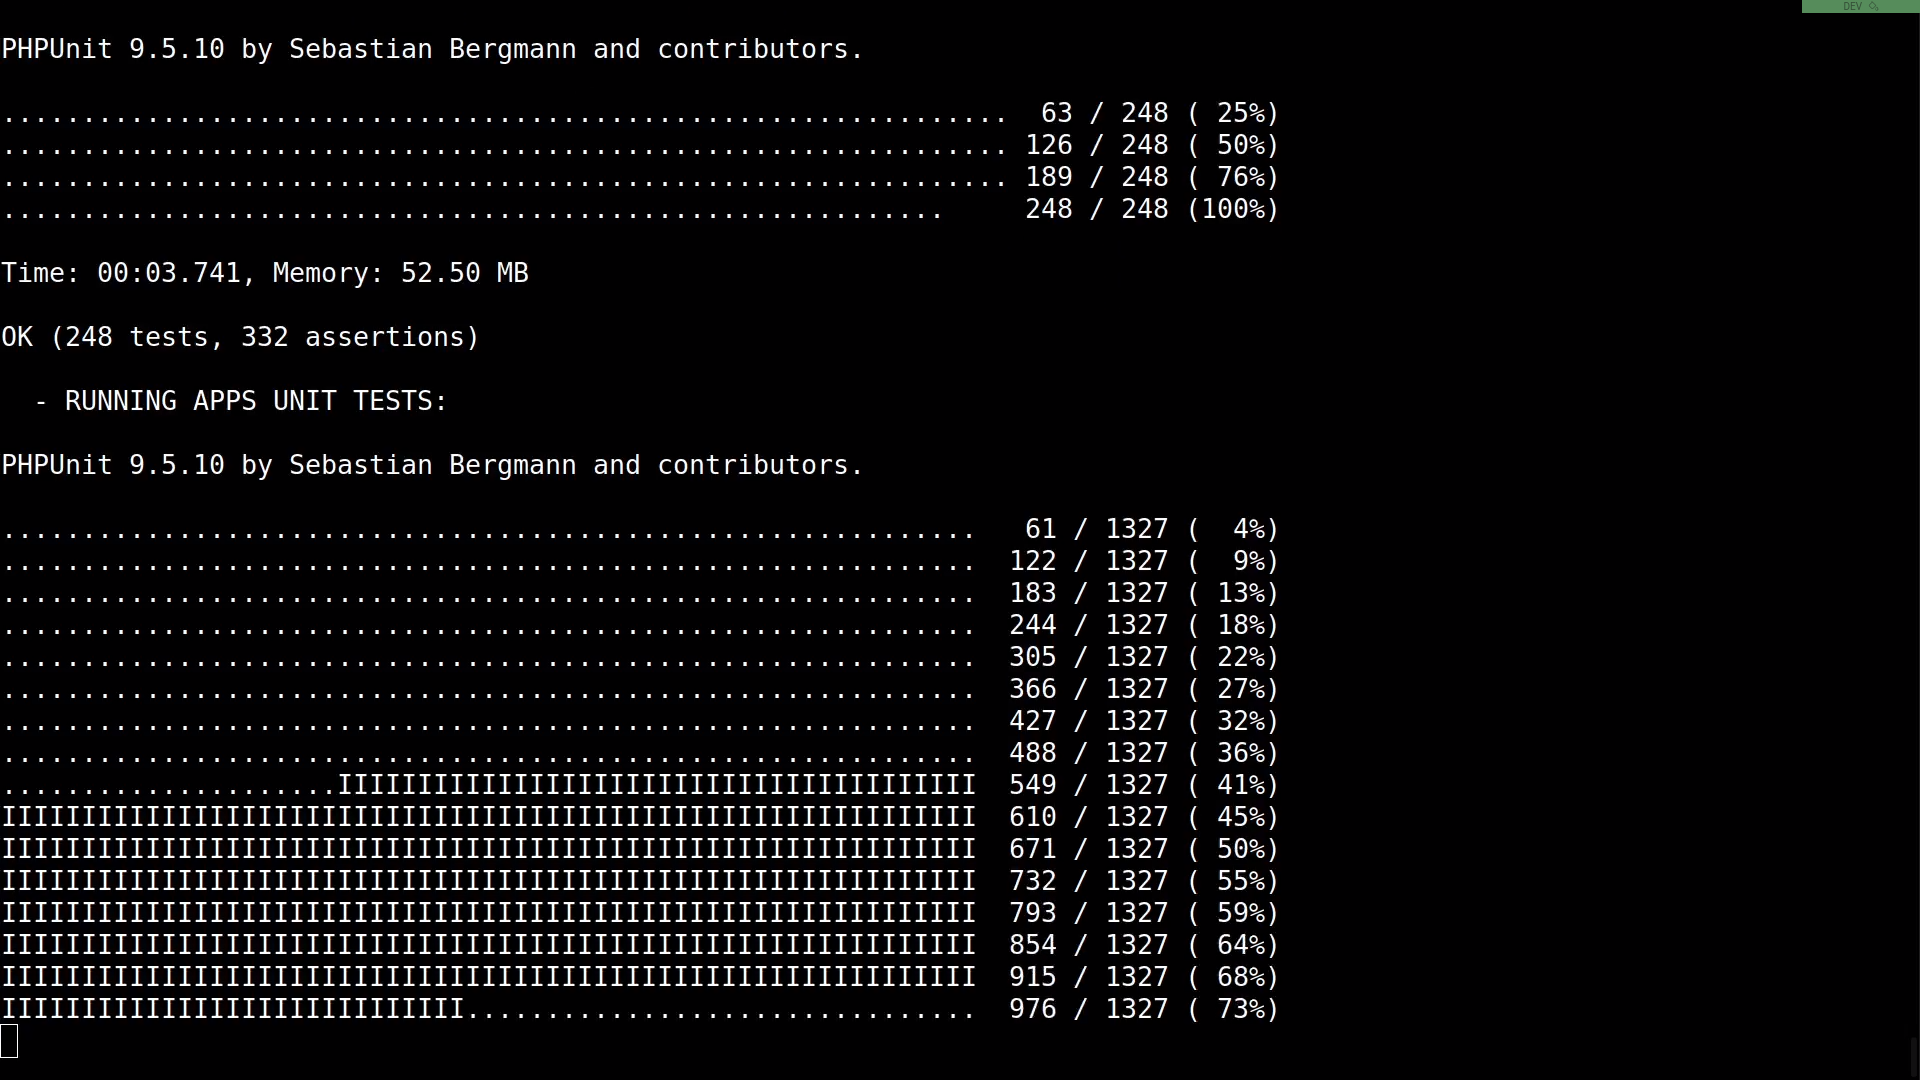
Every software engineer, twice a day, runs thousands of asserts to test our software. The asserts include 10,000 tax asserts, and 23,000 system asserts.
Each dot you can see on the screen represents about twenty asserts. Altogether, the 36,000 asserts take about 1 minute to run. The asserts make sure that day-to-day software changes don't accidentally break our existing code.
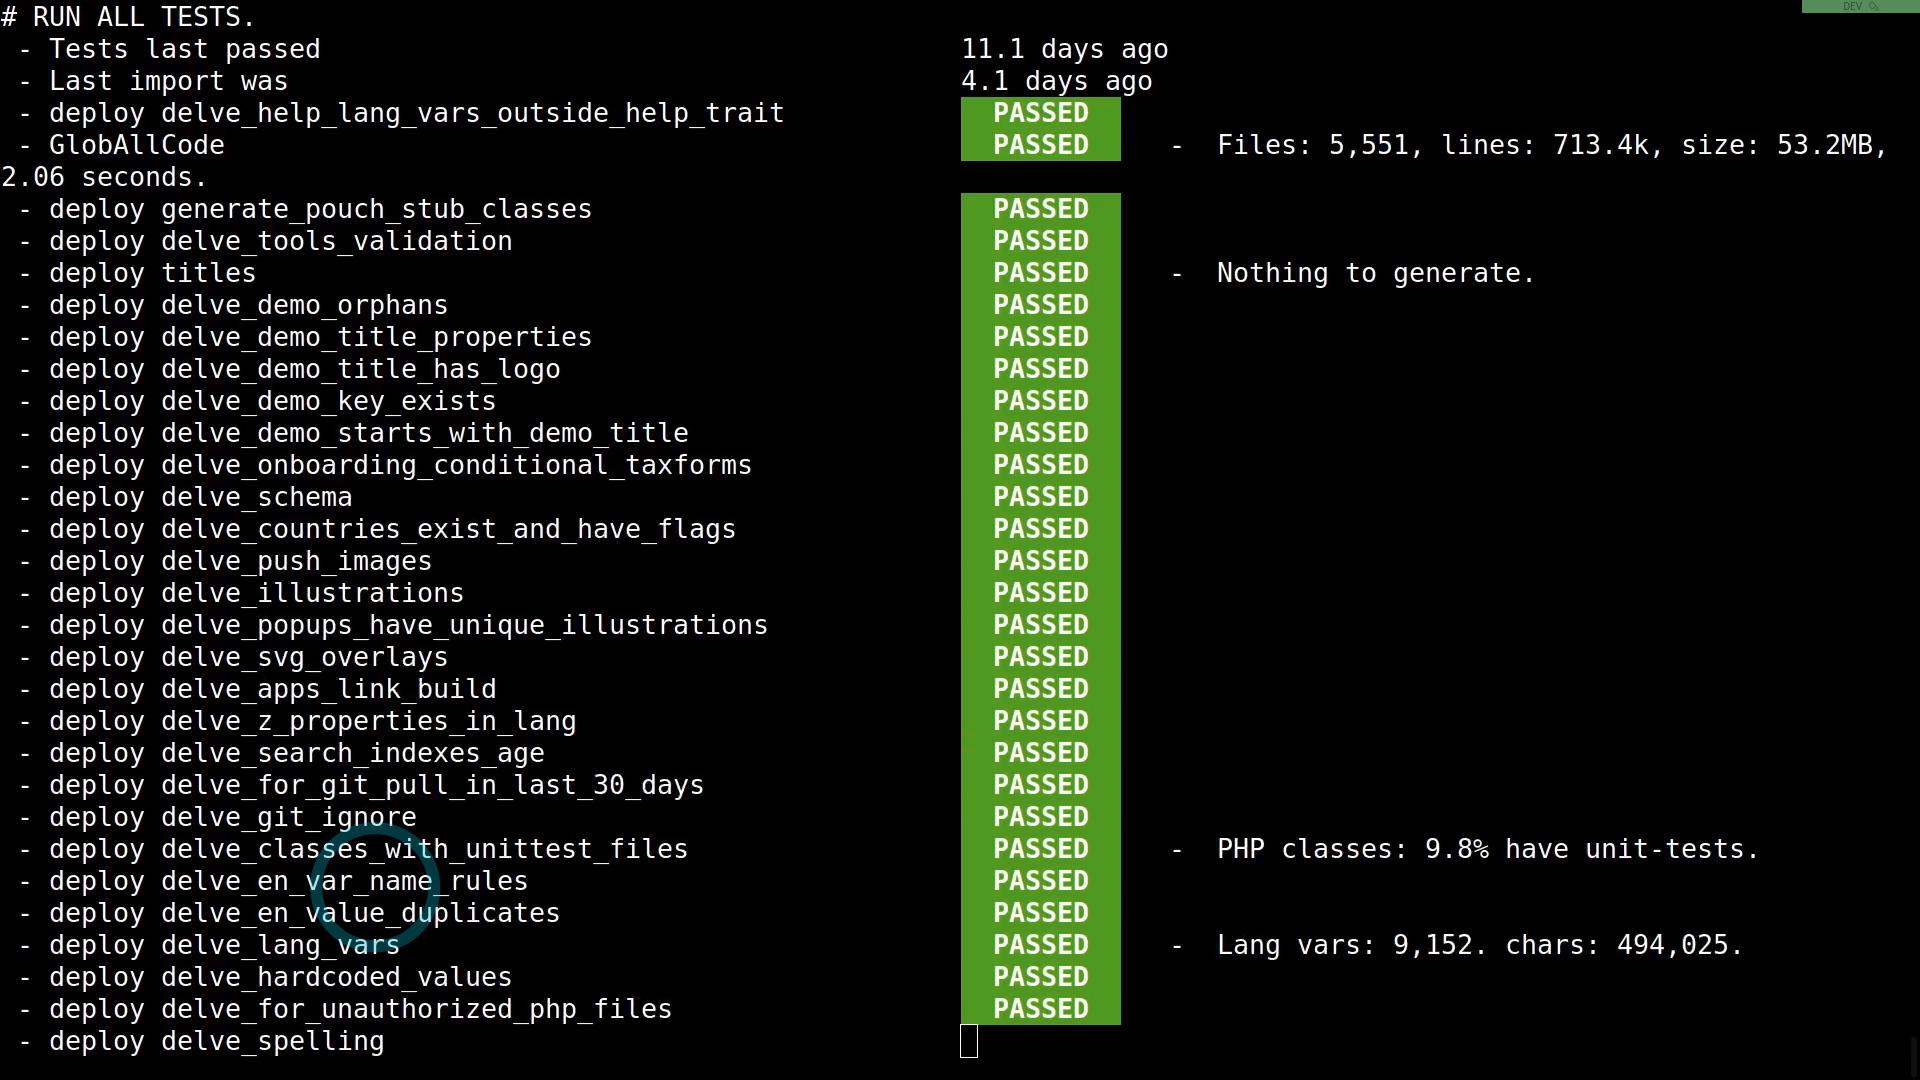
Delves
Every software engineer, twice a day, runs 2,000 code checks, taking about 1 minute for the entire set. The code checks scan the 7,000 files in our codebase, looking for things to improve in the code, including:
- Code that's too complicated,
- Things that need to be named more clearly,
- And much more.
The delves mean that each day's changes are continuously scrubbed clean.
Confirm URLs
Every software engineer, twice a day, runs a spider that automatically opens and tests a sample of over 500 pages, spread across 1st Money's entire system. It takes about 0 minutes each time, to test them all.
The spider helps make sure that obvious problems like dead links or page-load errors are caught by us first, and not by our customers.
Documentation quality
Every software engineer, twice a day, runs a script that scans all our documentation and help, searching for sentences that can be improved. We check for things like:
- Spelling,
- Abbreviations,
- Sentences that're too long,
- And much more.
We hope you love it!
And that's it! That's everything you need to know about how we keep our software reliable at 1st Money. We've loved building it, and hope you love it too!
What's search inside, and how do I use it?
 2:26
2:26
"What's search inside, and how do I use it?"
Sometimes it's hard to remember where a setting's found. Search inside lets you use the search box to find any setting inside any item. For example, you could use it to quickly find the join date of a person, if you'd forgotten which tab it was on.
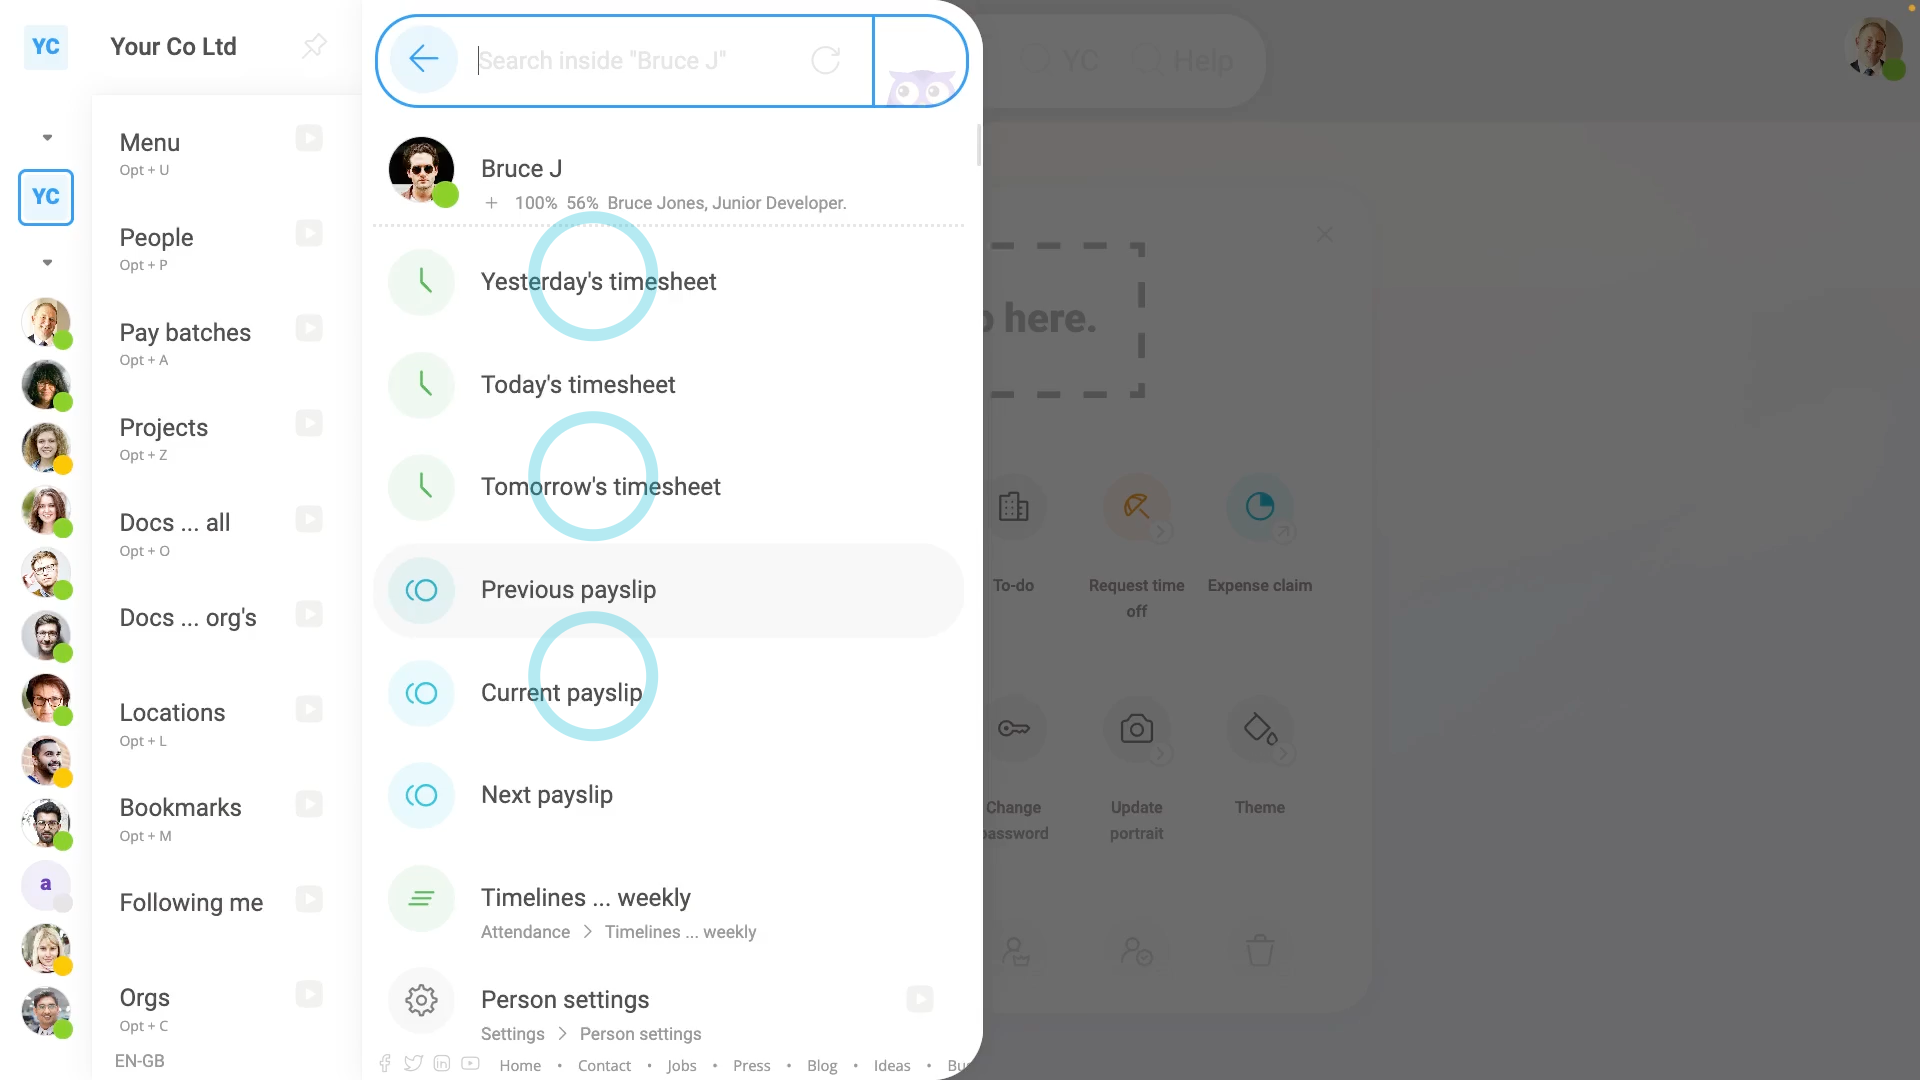
To find a setting inside a person, pay batch, project, or location, using "Search inside":
- First, open the menu to the item you want to search inside of, on: "Menu", then "People"
- While hovering over the item, for example, a person, tap: Search inside
- Now that you're in "Search inside" mode, you'll see a list of all the info found inside the item.
- Next, using your keyboard, type the name of the info you're looking for.
- Which filters the list down to a few matching rows.
- Then use your arrow keys to go down to the exact row you want, and press: Enter
- And finally, you'll see that you've been taken to exactly the place in the software, for the item, without having to remember how to navigate there.
Keep in mind that:
- In most cases, it's a person that you'll want to search inside of.
- The person "Search inside" can also be done from the person tab.
- To find it, go to the person tab, and you'll see the "Search inside" box directly below their portrait.
- Doing "Search inside" from the person tab works exactly the same as doing it from anywhere else.
For advanced usage:
- If you hover your mouse over the "Search inside" button, you'll see that it's shortcut is the Tab key.
- If you combine the "Search inside" shortcut, with other shortcuts, like your arrow keys and Enter, you can search for anything in your org, using only your keyboard.
- Also, to go back up a level, and out of "Search inside", press the Backspace key.
- Give "Search inside" a try. It makes navigating around 1st Money really fast, especially if you combine it with: "Global search"
 Installing on your smartphone or laptop
And that's it! That's everything you need to know about "Search inside", and how to search with it!
Bookmarks
1. How do I create a bookmark?
 2:31
2:31
"How do I create a bookmark?"
Bookmarks are a convenient way to share internet links with the people in your company.
To create a personal bookmark:
- First, tap: "Menu", "Bookmarks", then "New bookmark"
- Once it's open, enter the bookmark's name. Which is the name that'll show on the bookmarks menu.
- Then enter the bookmark's address. Which is the link that the bookmark opens to.
- And finally, tap: Save
To see your new bookmark:
- First, go to: "Menu", then "Bookmarks"
- And finally, you'll now see it in the list.
Keep in mind that:
- When you tap New bookmark from the menu, it creates a "Personal" bookmark that can only be seen by yourself.
- If instead, you make the bookmark from your org, pay batch, project, or location, then your bookmark is shared, and can be seen by others.
- Pay batch, project, and location bookmarks are automatically shared with people. The bookmarks are shared as soon as the person is added to a pay batch, a project, or a location.
- Org bookmarks are automatically shared with all your org's people, as soon as the people are added to your org.
Examples of org bookmarks, include:
- A link to the company handbook.
- Links to company policies.
- Or a link to the company CRM login, or other online tools.
For pay batch bookmarks, you could bookmark:
- A link to the guidelines for expense claims.
- Or links to answers about common pay related questions.
For projects, you could bookmark:
- A link to the project guidelines.
- Or links to project training videos, and other materials.
And for locations, your bookmarks could include:
- A link to the fire safety guidelines.
- Or links to instructions about connecting to printers, or wi-fi, etc.
And that's it! That's all you need to do to create a personal bookmark!
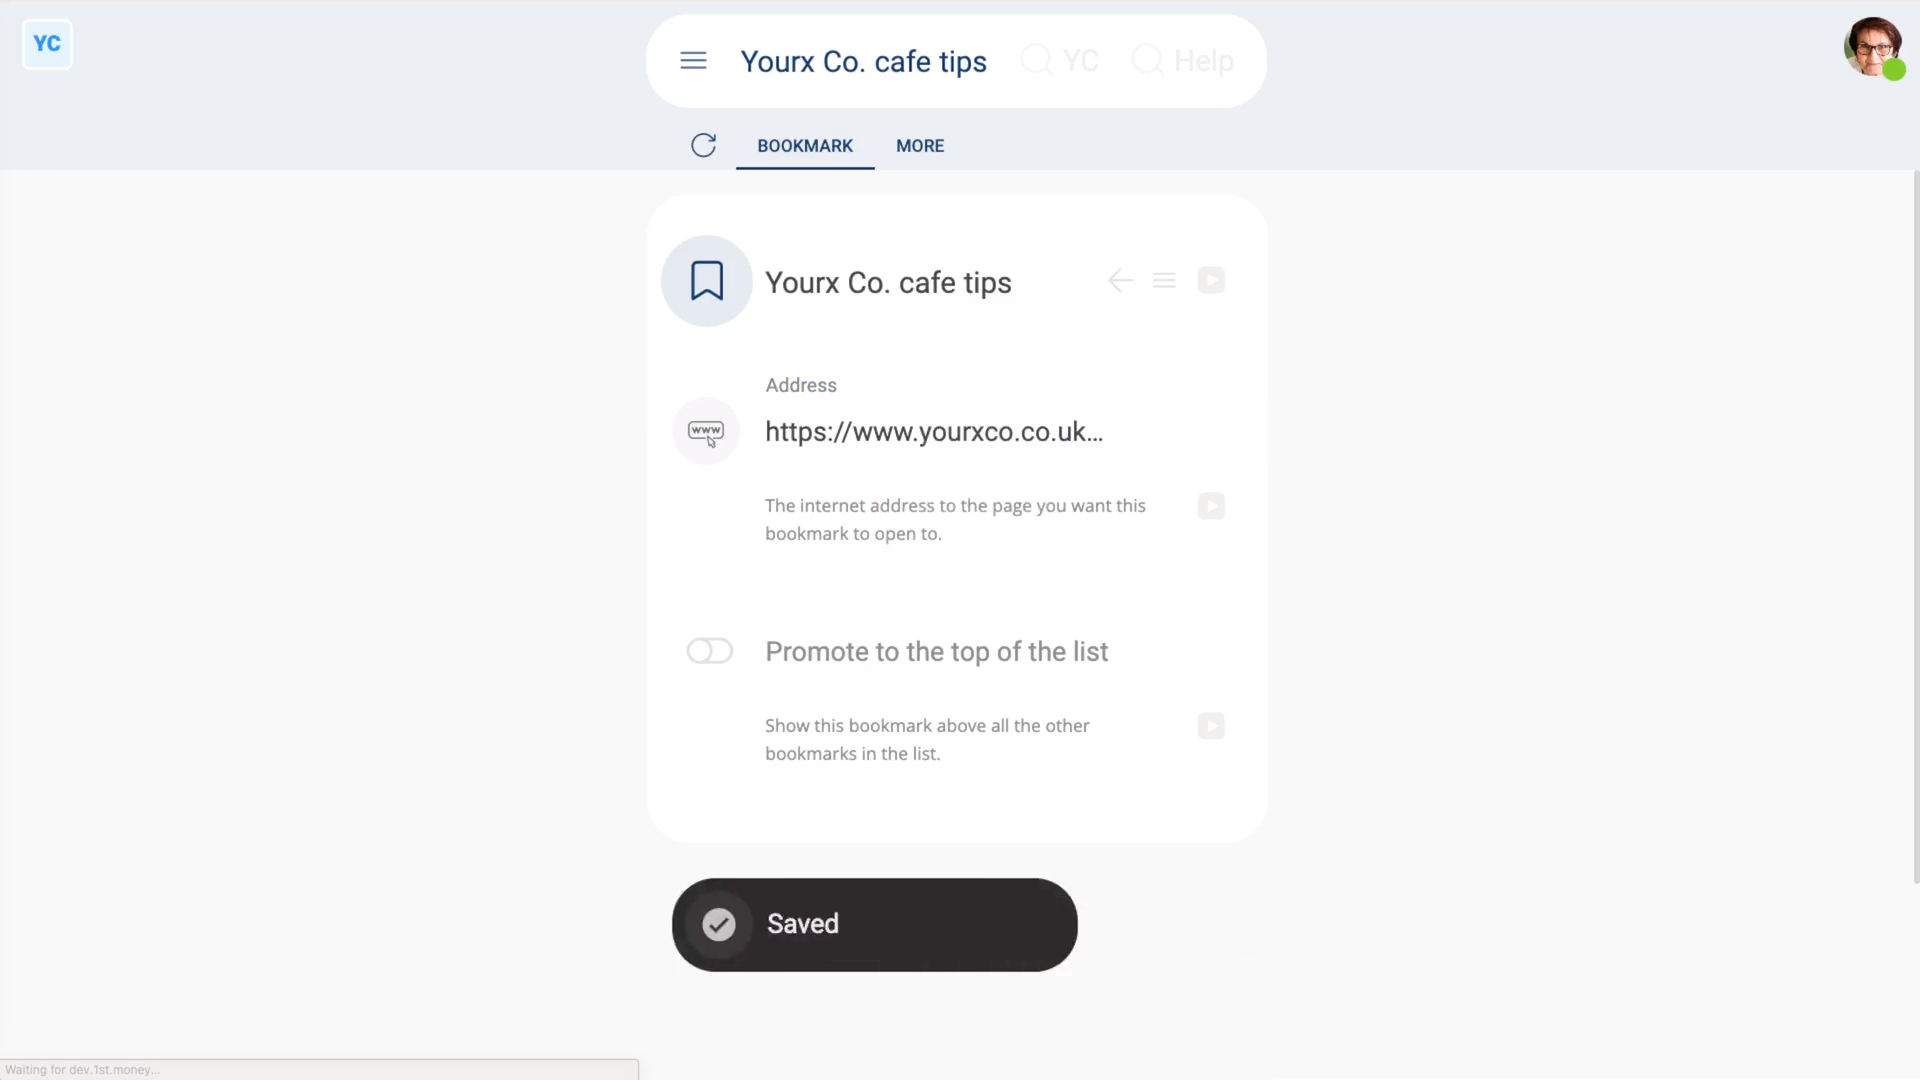
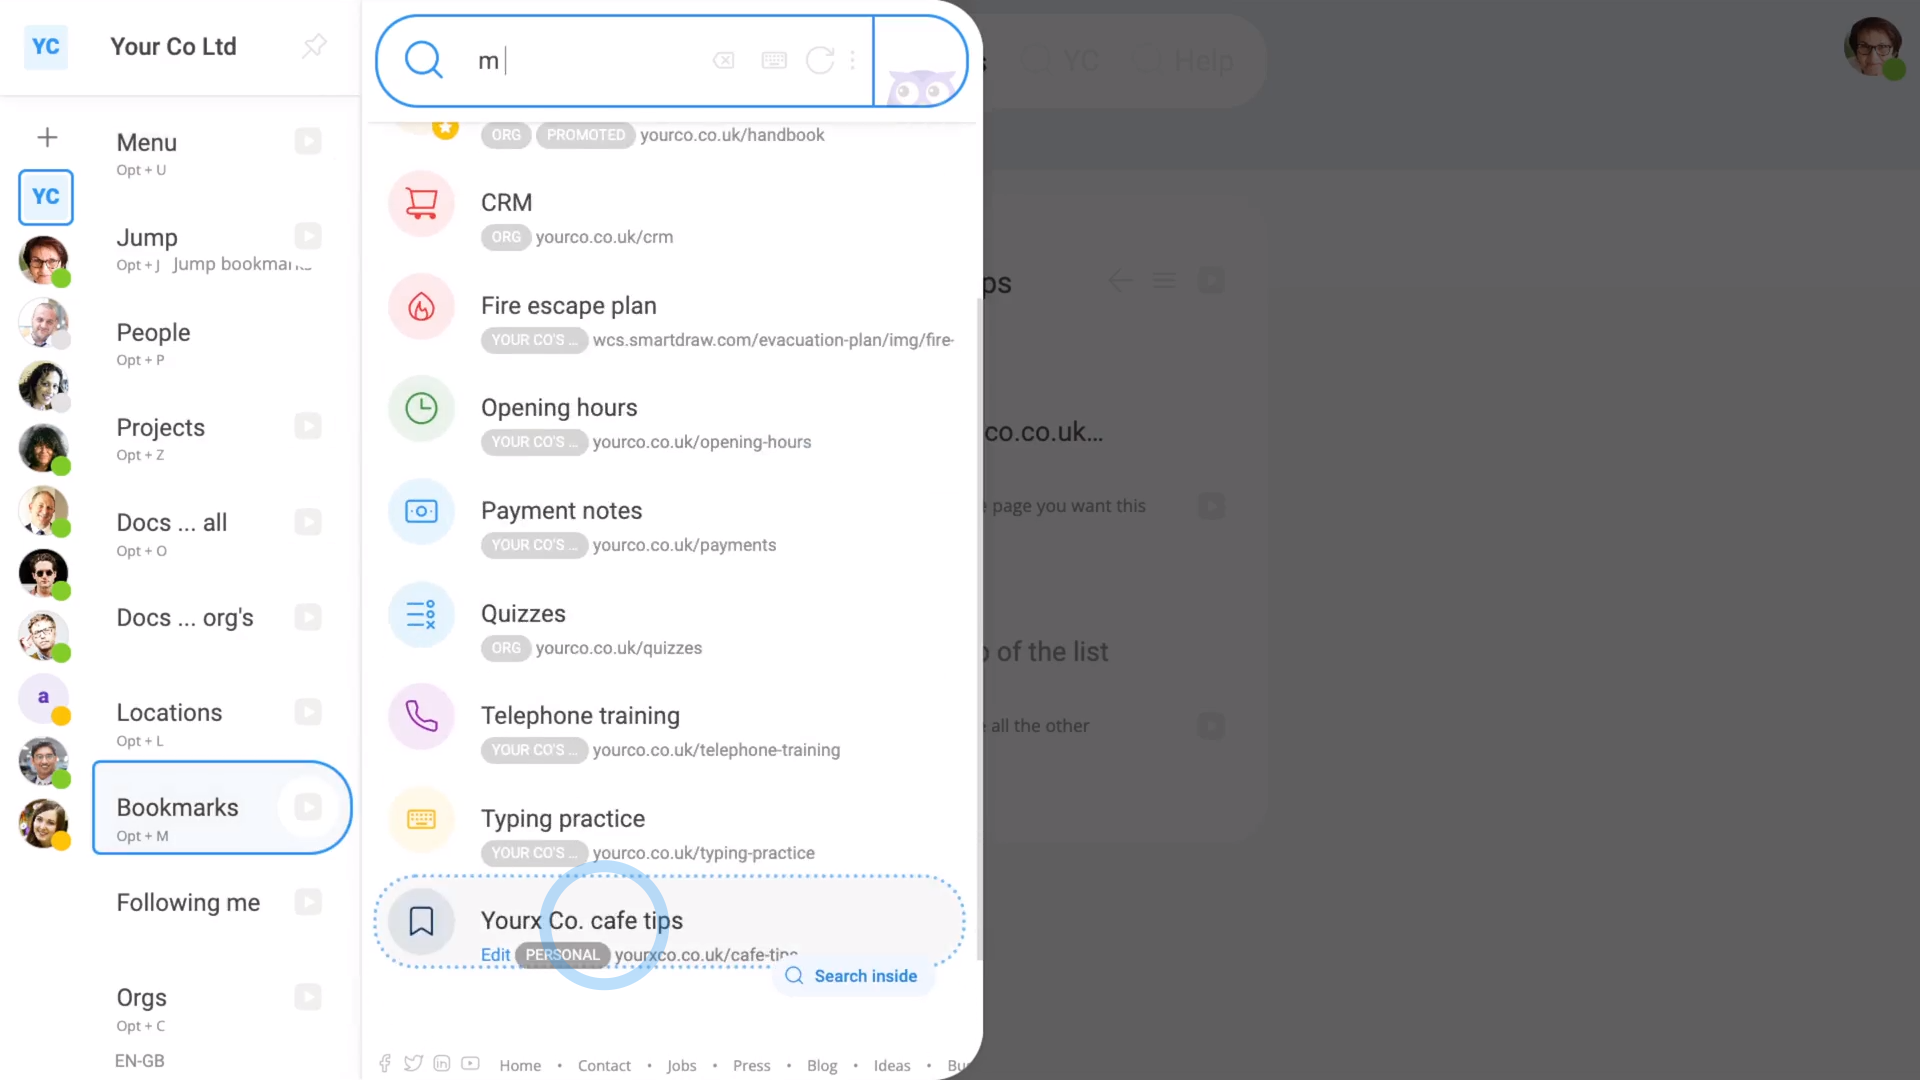
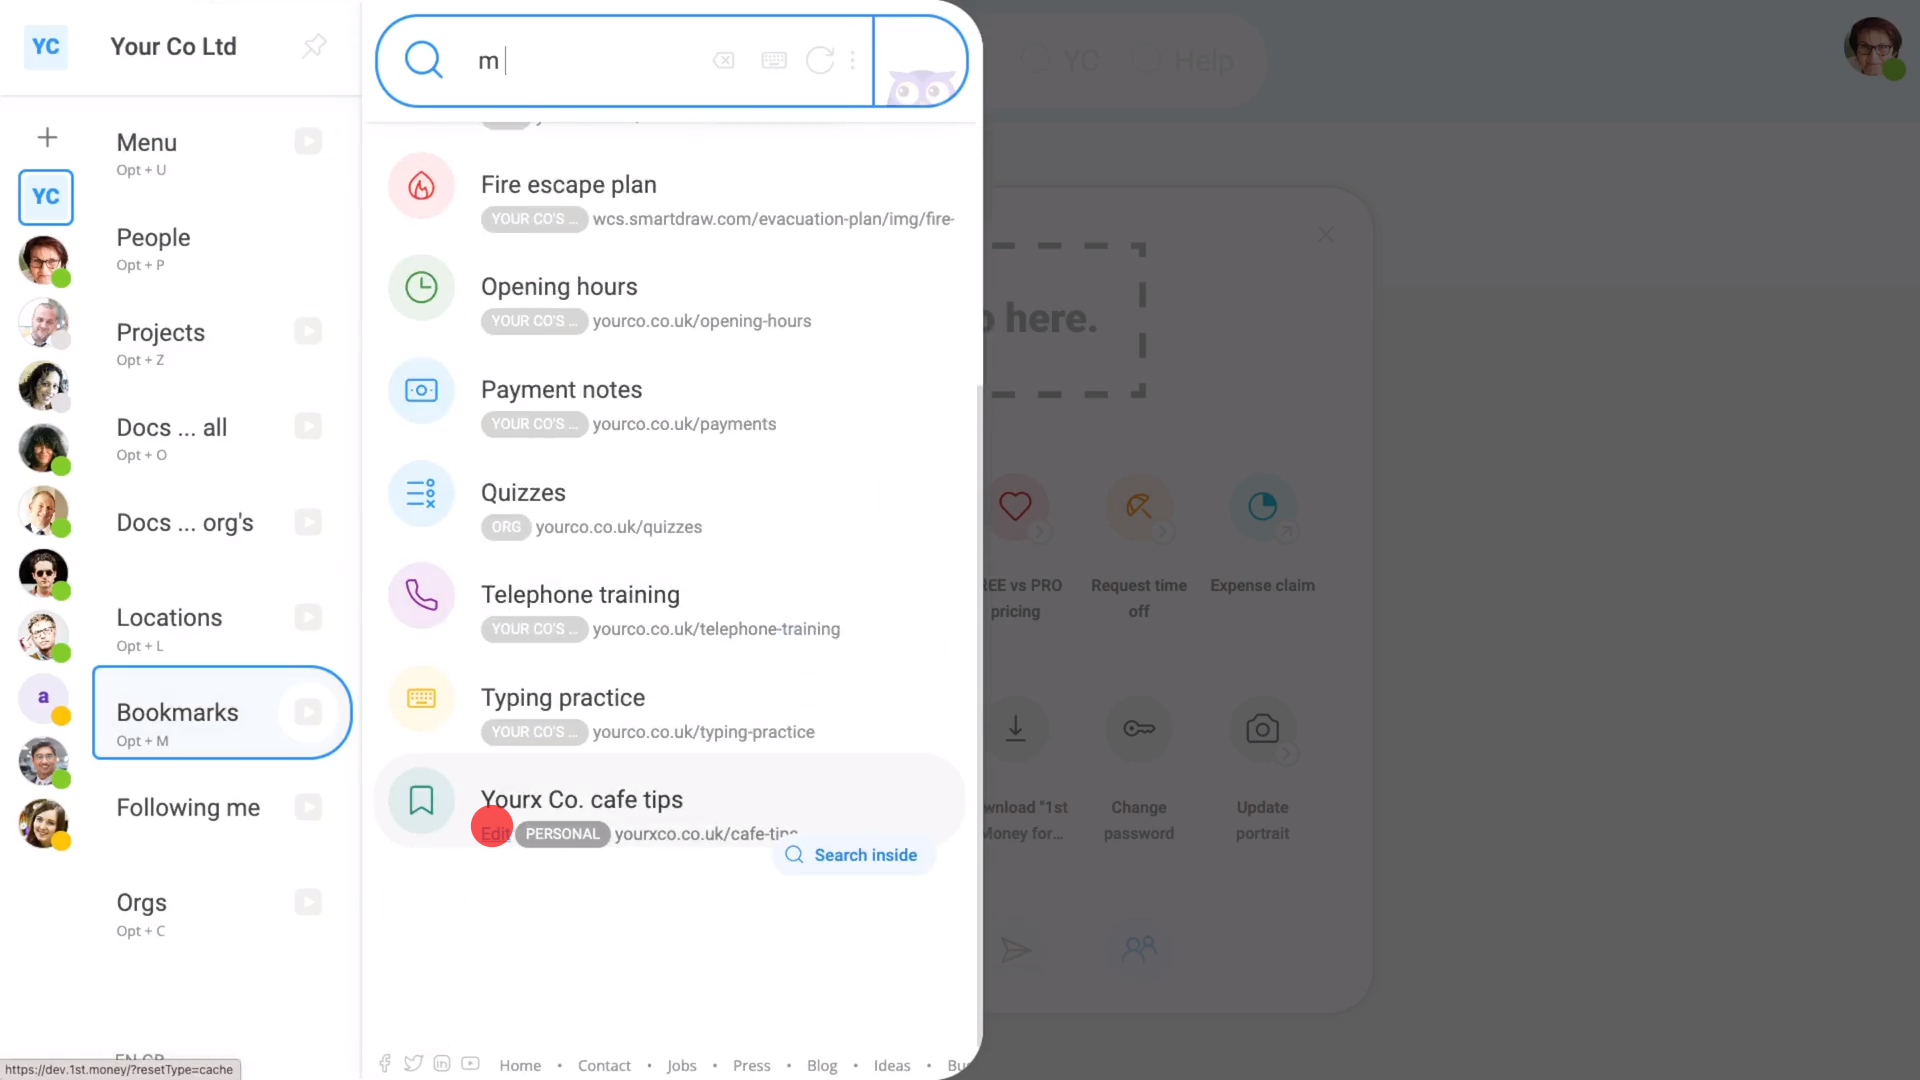
2. How do I change or promote a bookmark?
 1:43
1:43
"How do I change or promote a bookmark?"
You can change or promote a bookmark at any time. Including changing its name, updating the address, and changing its list colour and image.
To change or update a bookmark:
- First, select the bookmark on: "Menu", then "Bookmarks"
- You'll see an "Edit" link on the bookmarks you've got permissions to change.
- Once you've decided on the bookmark you want to change, tap its "Edit" link.
- Once it's open, make your changes.
- Optionally, you can also tap the circle and set the list colour and image.
- And finally, tap: Save
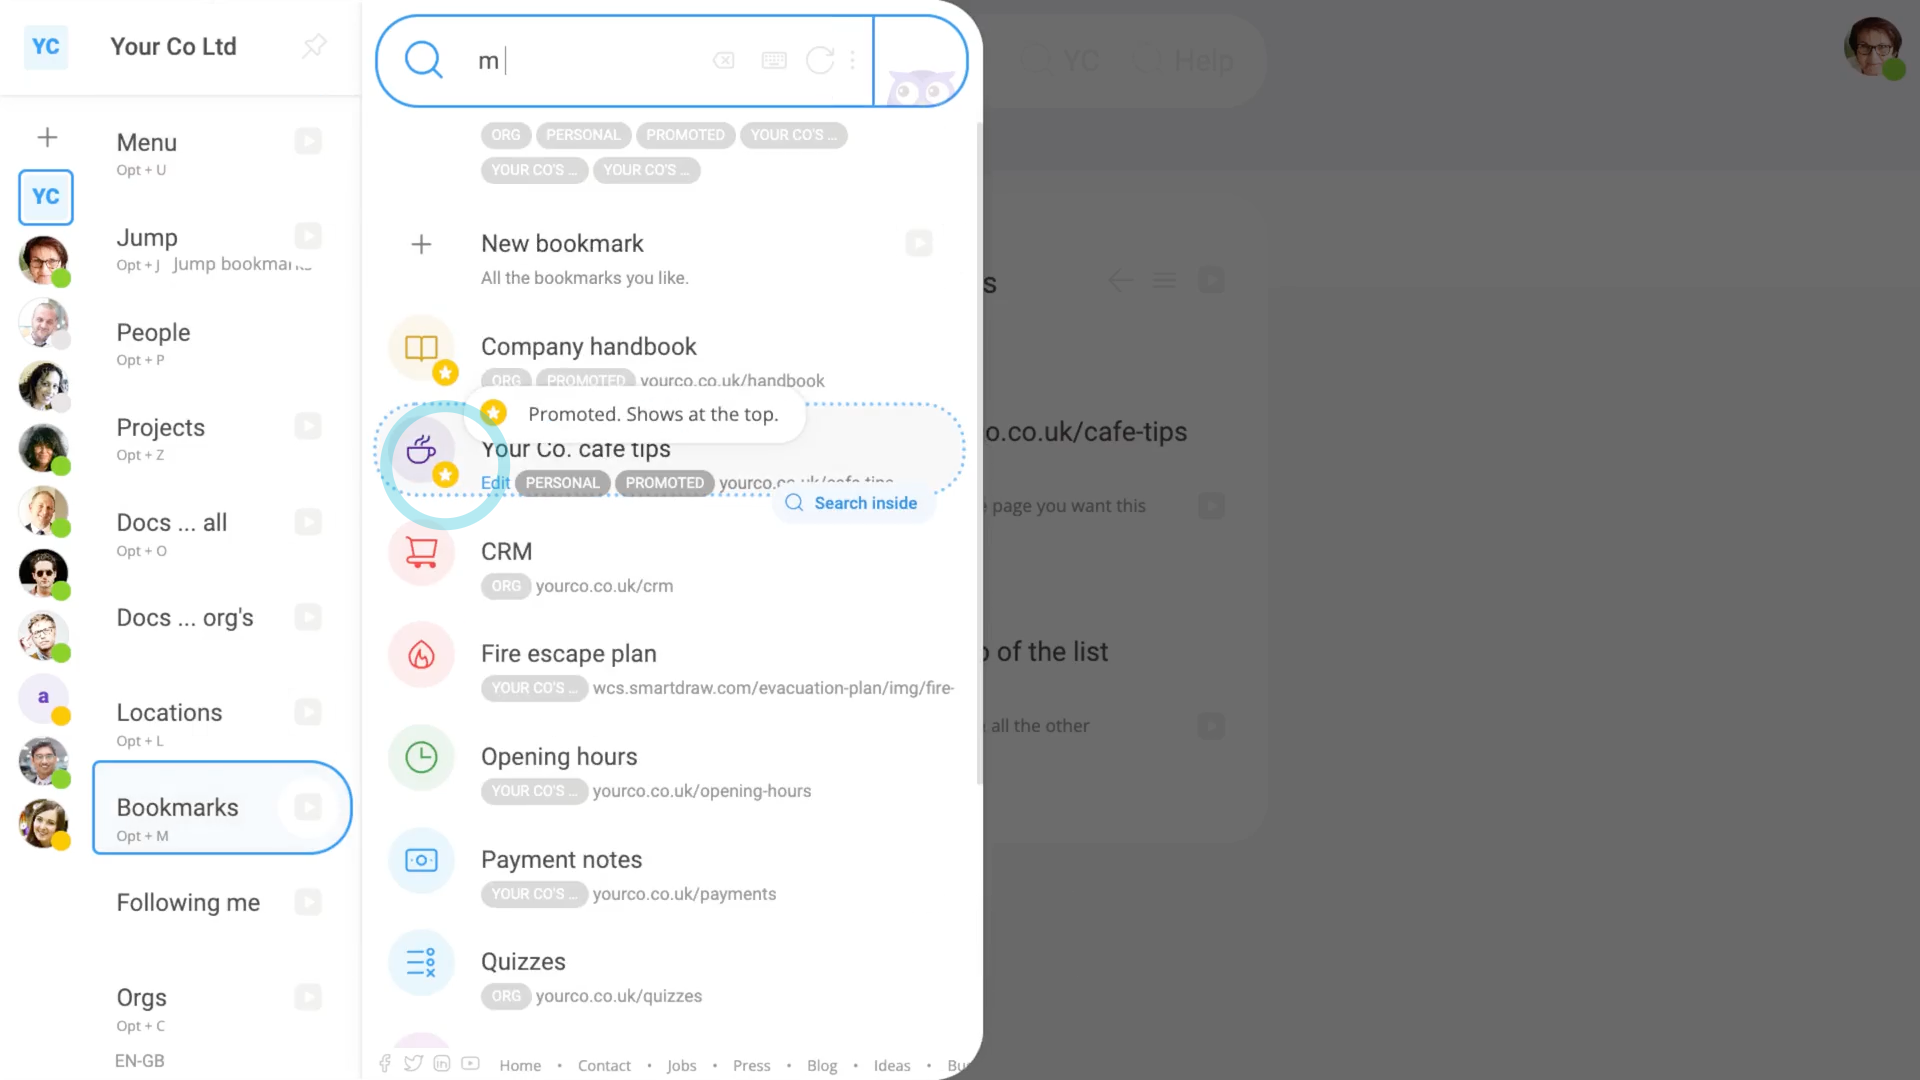
Promoting a bookmark moves the bookmark's position to the top of the bookmarks list.
To promote a bookmark:
- First, select the bookmark on: "Menu", then "Bookmarks"
- Then tap the "Edit" link on the bookmark you want to promote.
- Once it's open, turn on: "Promote to the top of the list"
- Then tap: Save
- And finally, the bookmark now shows (at the top of the bookmarks list), with the yellow "promoted" star.
Keep in mind that:
- People who've got "Full org admin" permissions can add or update all org, project, location, and personal bookmarks.
- But only payroll admins can add or update pay batch bookmarks.
And that's it! That's all you need to do to change or promote a bookmark!
3. How do I share bookmarks to people in my org, or pay batch, etc?
 1:17
1:17
"How do I share bookmarks to people in my org, or pay batch, etc?"
A bookmark's sharing is automatically set based on where you created the bookmark.
To share a bookmark with all people in your org, pay batch, project, or location:
- First, open your org, pay batch, project, or location that you'd like to share a bookmark from.
- Once it's open, go to: "More", then "Bookmarks"
- Then tap: "New bookmark"
- Once it's open, enter the bookmark's details.
- Then tap: Save
- And finally, the bookmark is now shared to all the people in whatever org, pay batch, project, or location that you created the bookmark from.
Keep in mind that:
- People who've got "Full org admin" permissions can add or update all org, project, location, and personal bookmarks.
- But only payroll admins can add or update pay batch bookmarks.
And that's it! That's all you need to do to share a bookmark with whatever groups of people you've got in your org!
4. How do I show bookmarks when a person ends their working day?
 1:31
1:31
"How do I show bookmarks when a person ends their working day?"
Bookmarks can be used as a helpful reminder of websites that your people may need to visit when ending their working day.
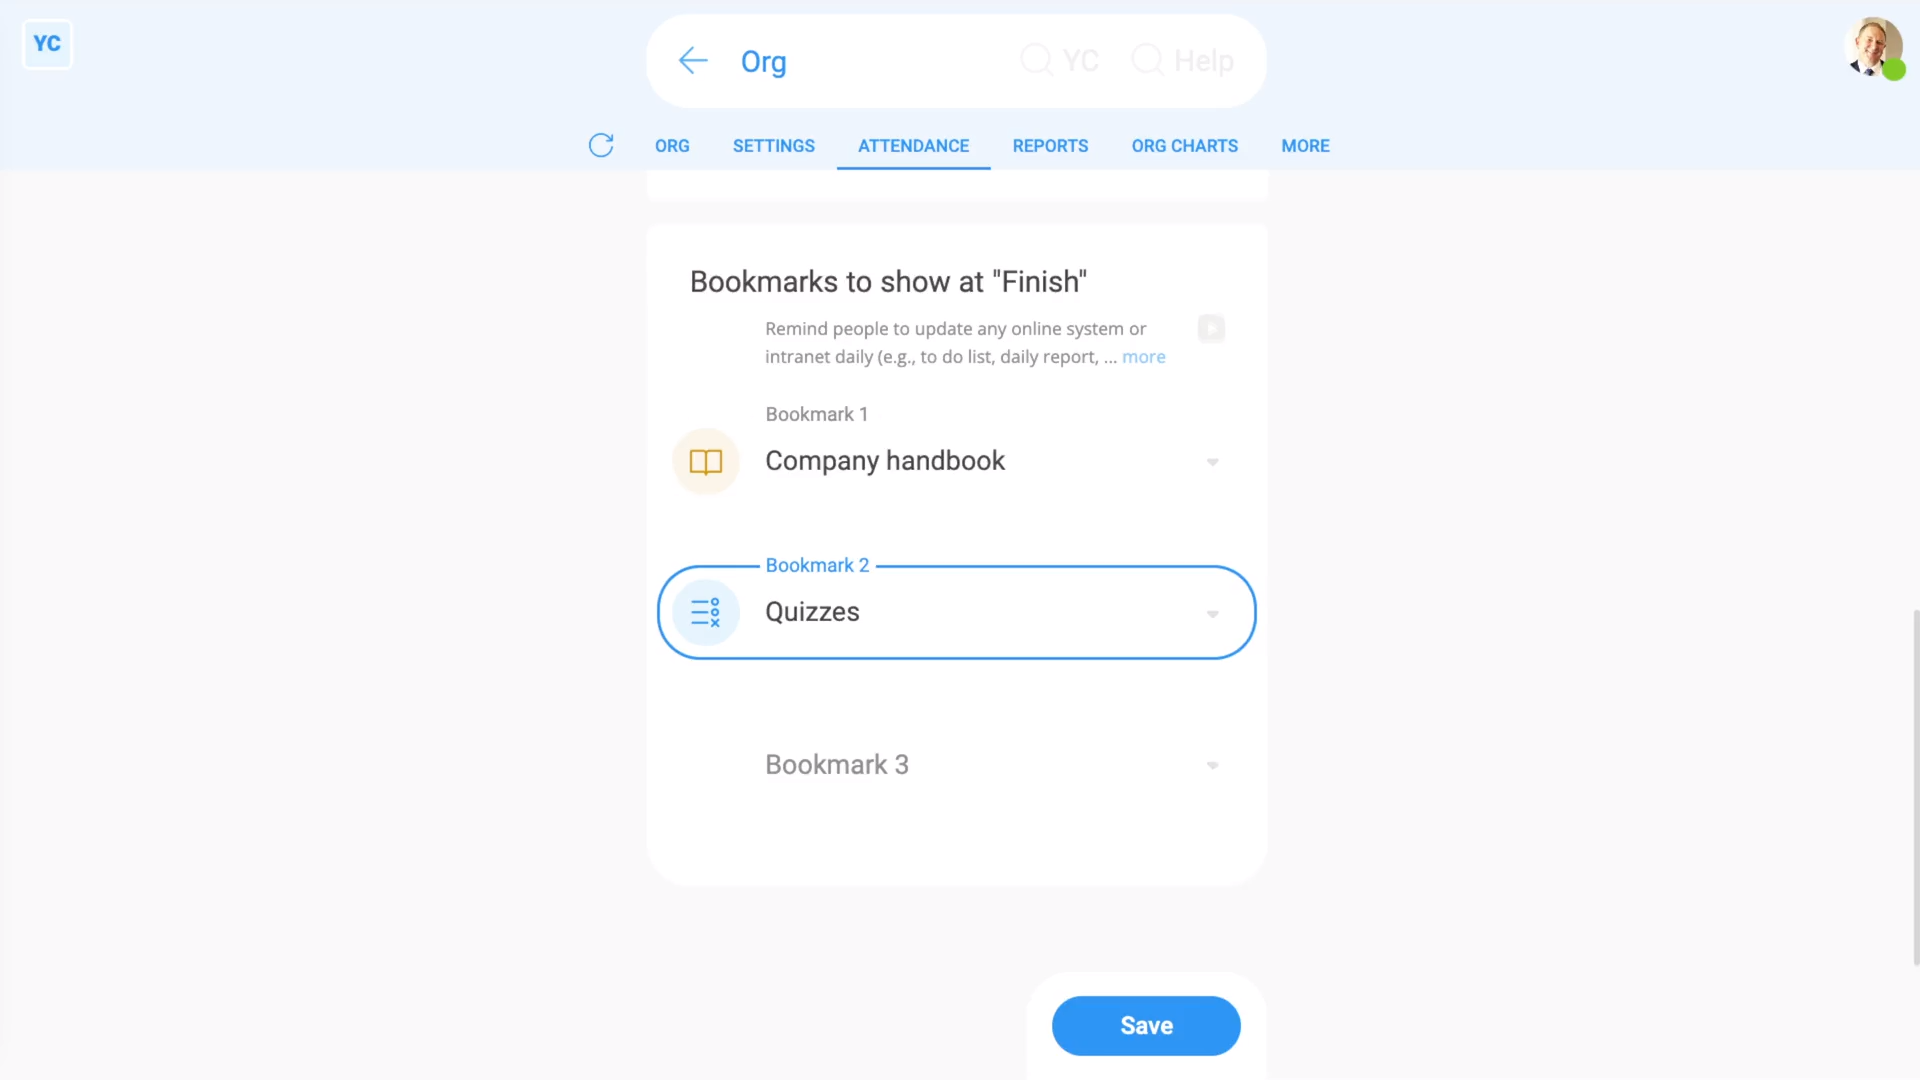
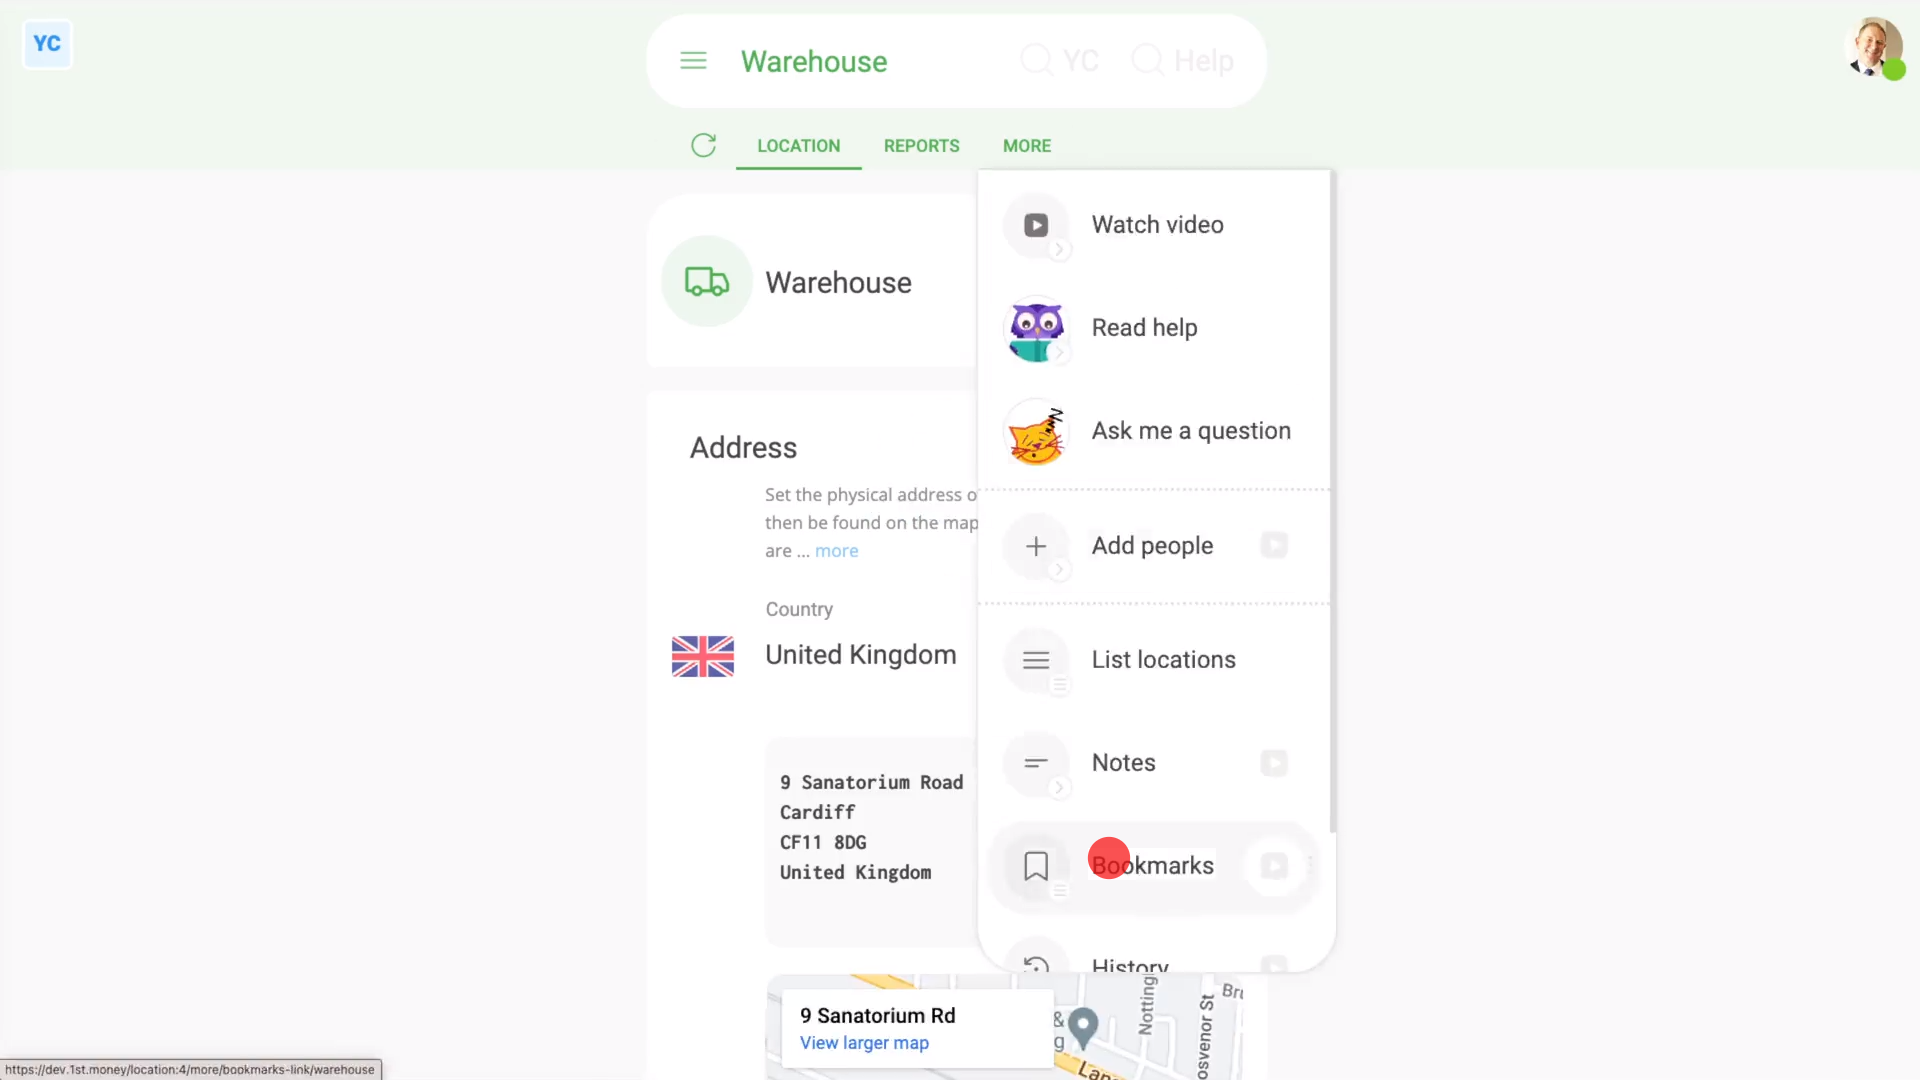
To set which org bookmarks are shown when a person ends their working day:
- First, open your org on: "Menu", then "Orgs"
- Then tap: "Attendance", then "Attendance settings"
- Then scroll down to the empty bookmark slots (at the bottom).
- And select the bookmarks you want to add. You can set a maximum of three.
- If the bookmark you're after hasn't been added yet, tap New, to make the missing bookmark.
- After you've selected your bookmarks, tap: Save
- And finally, everyone in your org can now see the bookmarks when your people finish their working day!
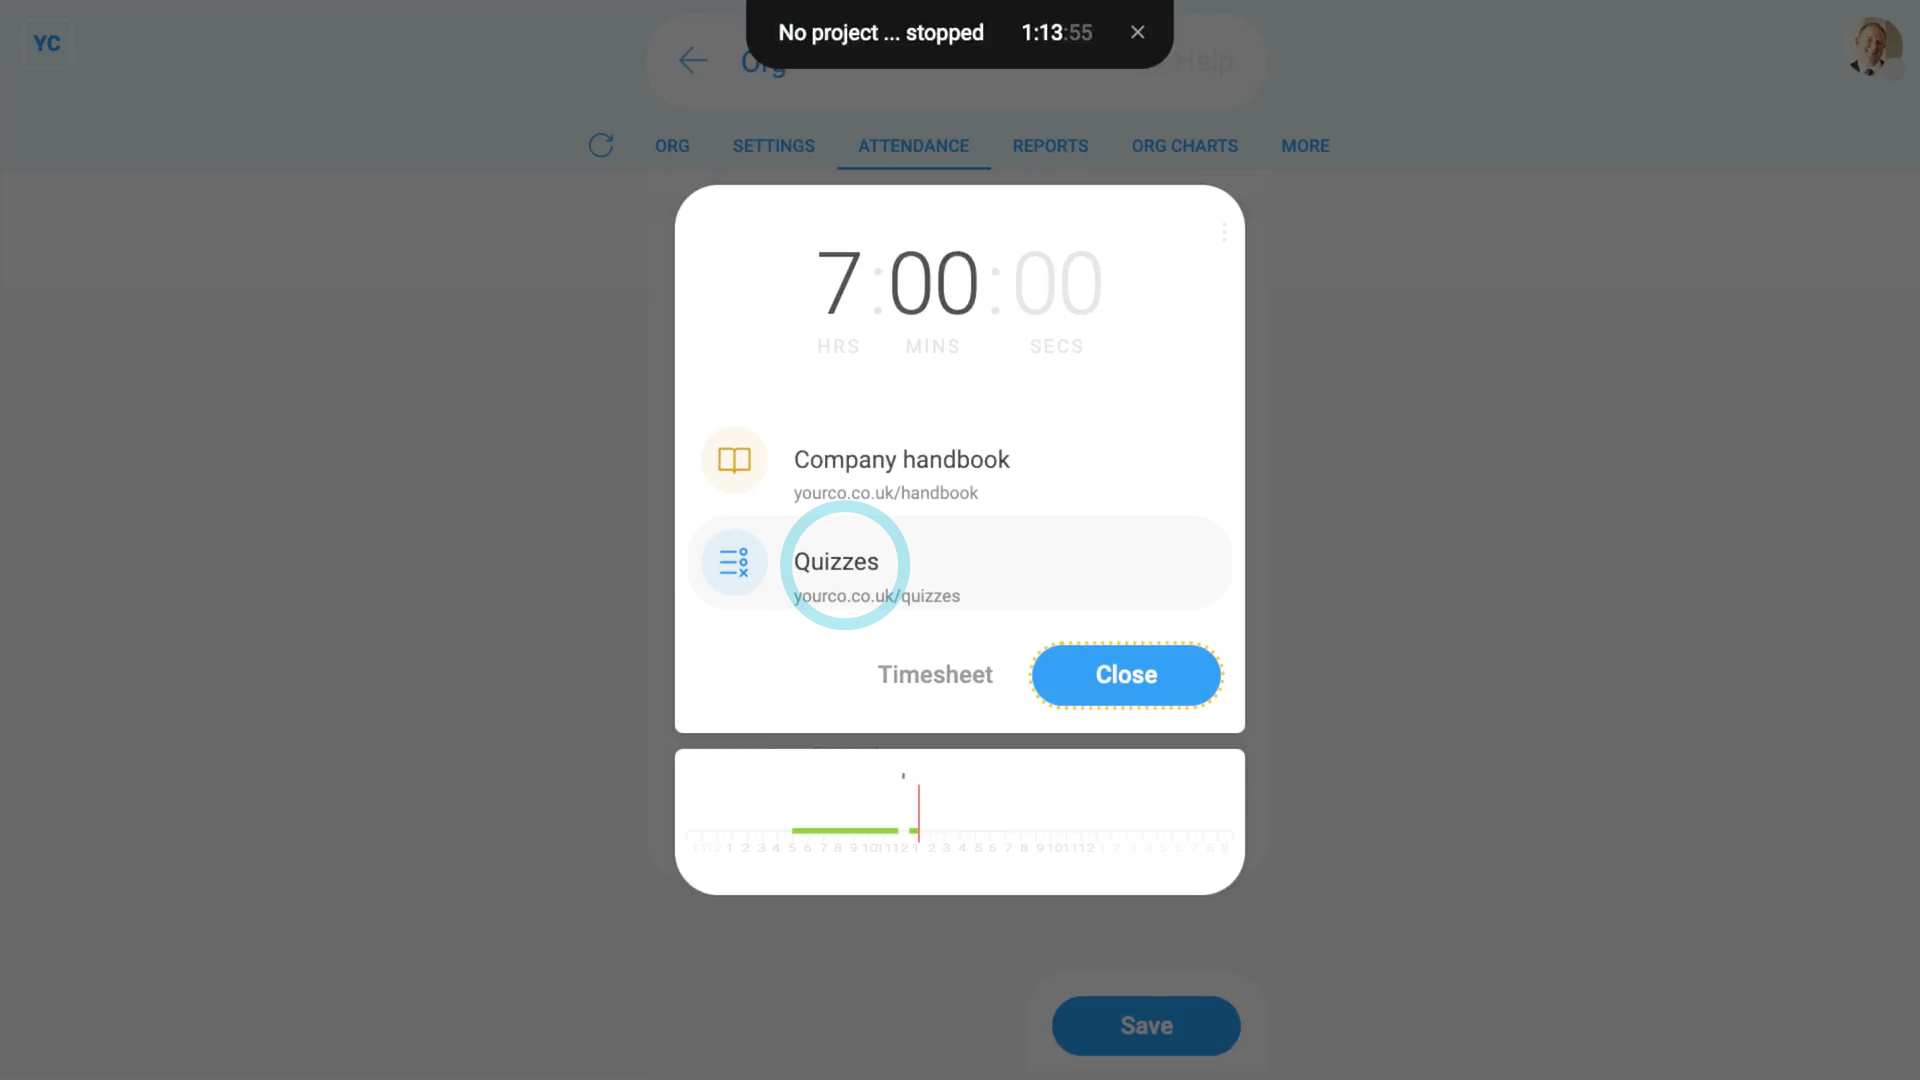
To see your org's bookmarks at "Finish":
- First, tap: "Work-time menu", then "Finish"
- Then enter any notes and your feeling.
- And finally, you'll see the bookmarks that are shown at: "Finish"
Keep in mind that:
- Only bookmarks created in your org can be selected to show at "Finish", because only org bookmarks can be seen by everyone in your org.
And that's it! That's everything you need to know about how to show bookmarks when a person ends their working day!
How do I delete or undelete a bookmark?
 1:58
1:58
"How do I delete or undelete a bookmark?"
If you no longer need a bookmark, you're welcome to delete it whenever you like.
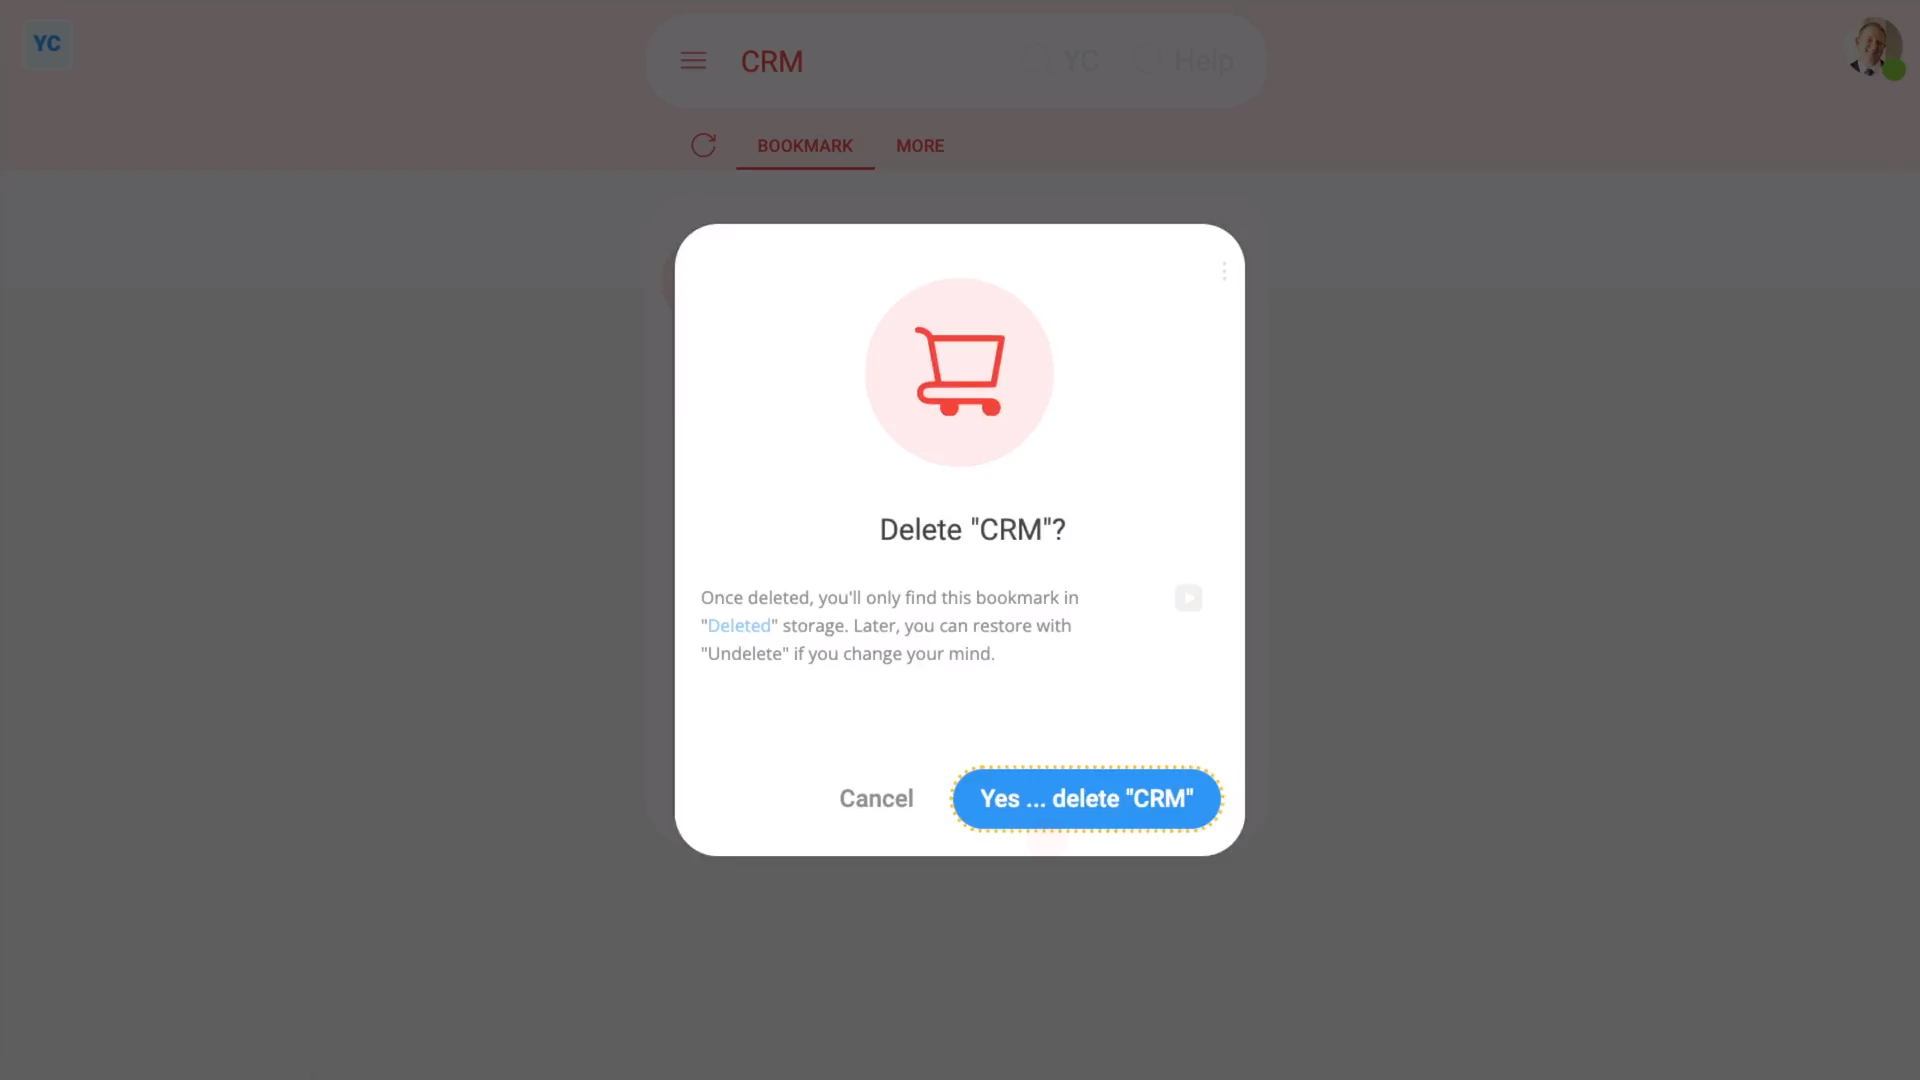
To delete a bookmark:
- First, select the bookmark on: "Menu", then "Bookmarks"
- And tap its "Edit" link to open it.
- Then once the bookmark's open, tap More, then: Delete
- And then tap: Yes ... delete
- Now, the bookmark's deleted.
- The bookmark's also locked, so it can't be changed anymore.
- And finally, if you change your mind and want the bookmark back again, tap Undelete, and it's immediately undeleted.
If it's been a while since you deleted a bookmark, and you want to undelete it, you'll first need to find it in the: "deleted bin"
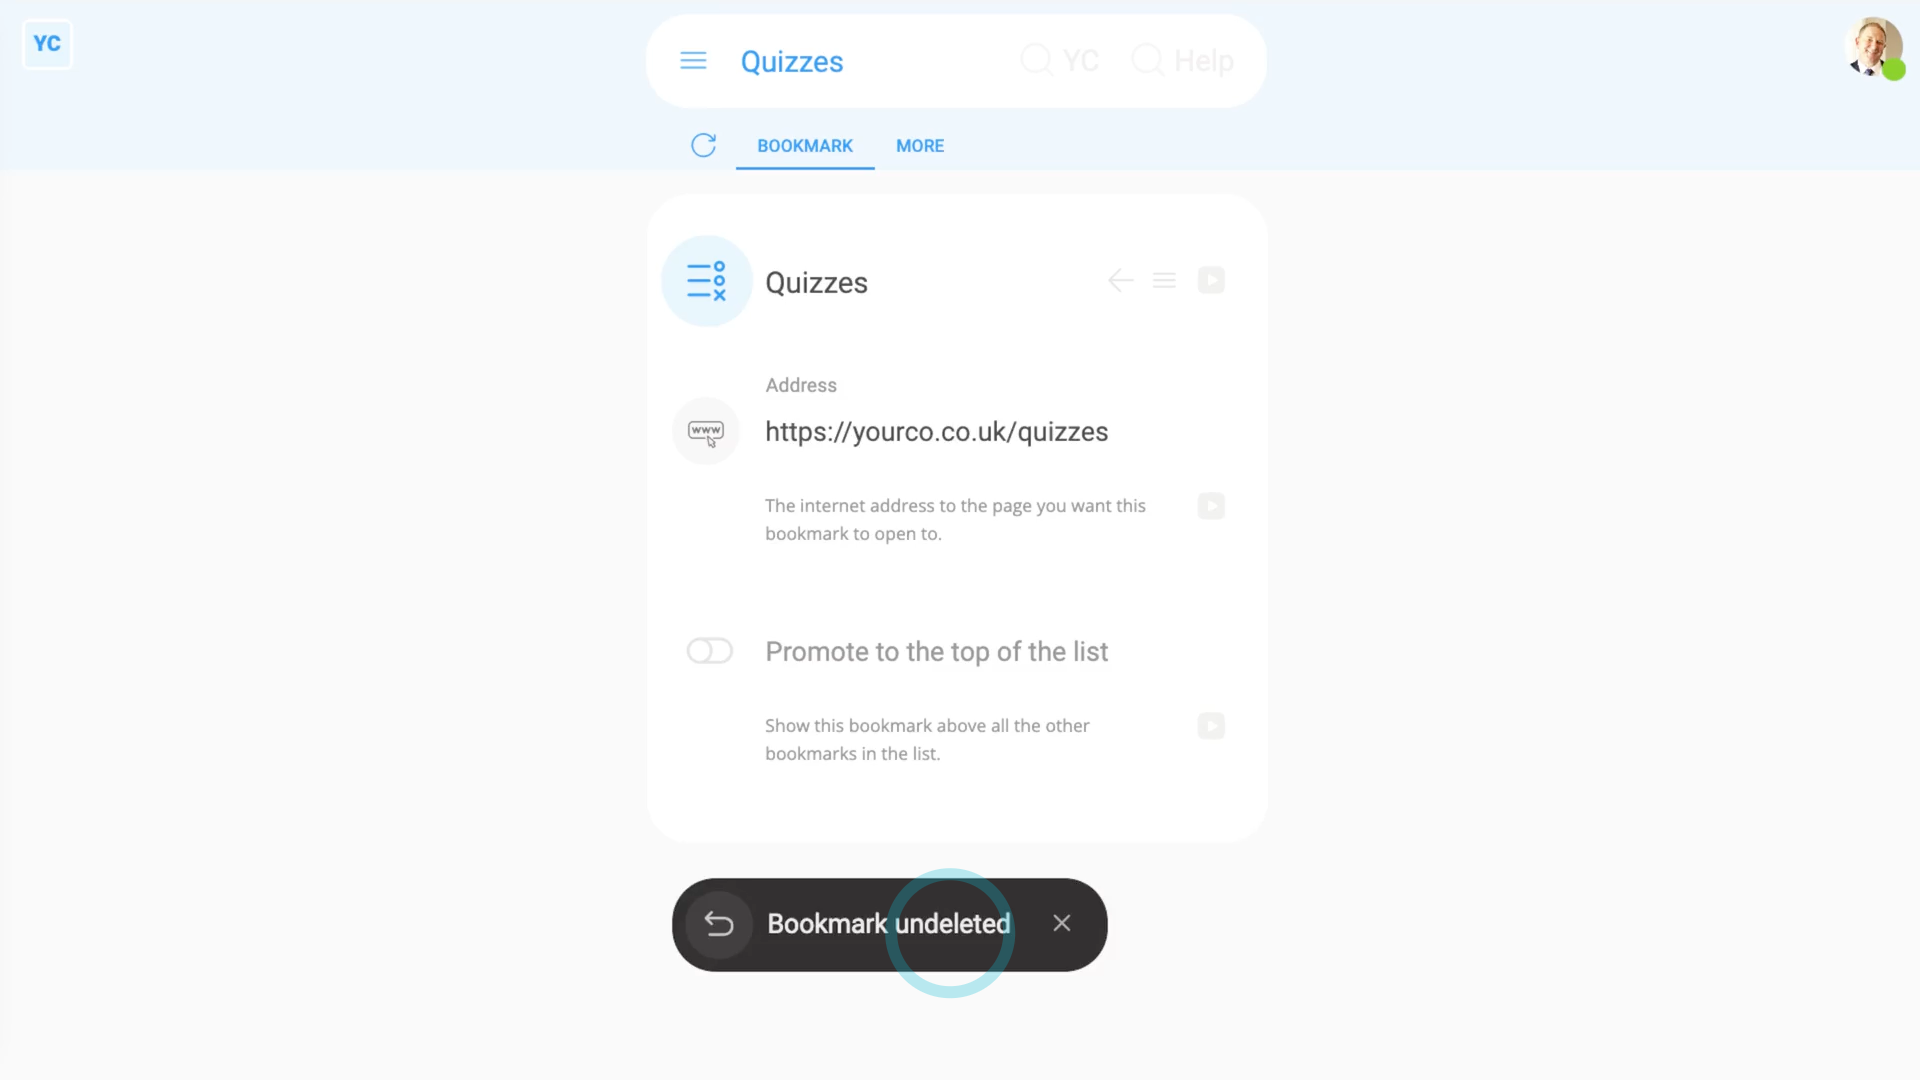
To undelete a bookmark from your "deleted bin":
- First, tap: "Menu", then "Deleted bin"
- Next, you'll see a category for most of the kinds of items that can be deleted. Tap: Bookmarks
- And then tap the "Edit" link on the bookmark you'd like to undelete.
- Next, tap: Undelete (at the bottom)
- And finally, the previously deleted bookmark is immediately undeleted.
Keep in mind that:
- Only people who've got "Full org admin" permissions can delete or undelete bookmarks.
- Except for personal bookmarks. A person can always delete and undelete their own bookmarks.
- And remember that all deletes and undeletes are always permanently recorded in: "History"
- That means any admin can always look back in time, and see who did any delete, and when the delete was done.
And that's it! That's everything you need to know about deleting or undeleting a bookmark!
How do I use inserts in a bookmark?
 1:46
1:46
"How do I use inserts in a bookmark?"
Inserts are an advanced feature. With inserts, you can add each person's unique email, email prefix, employee ID, and more, into the address of any bookmark.
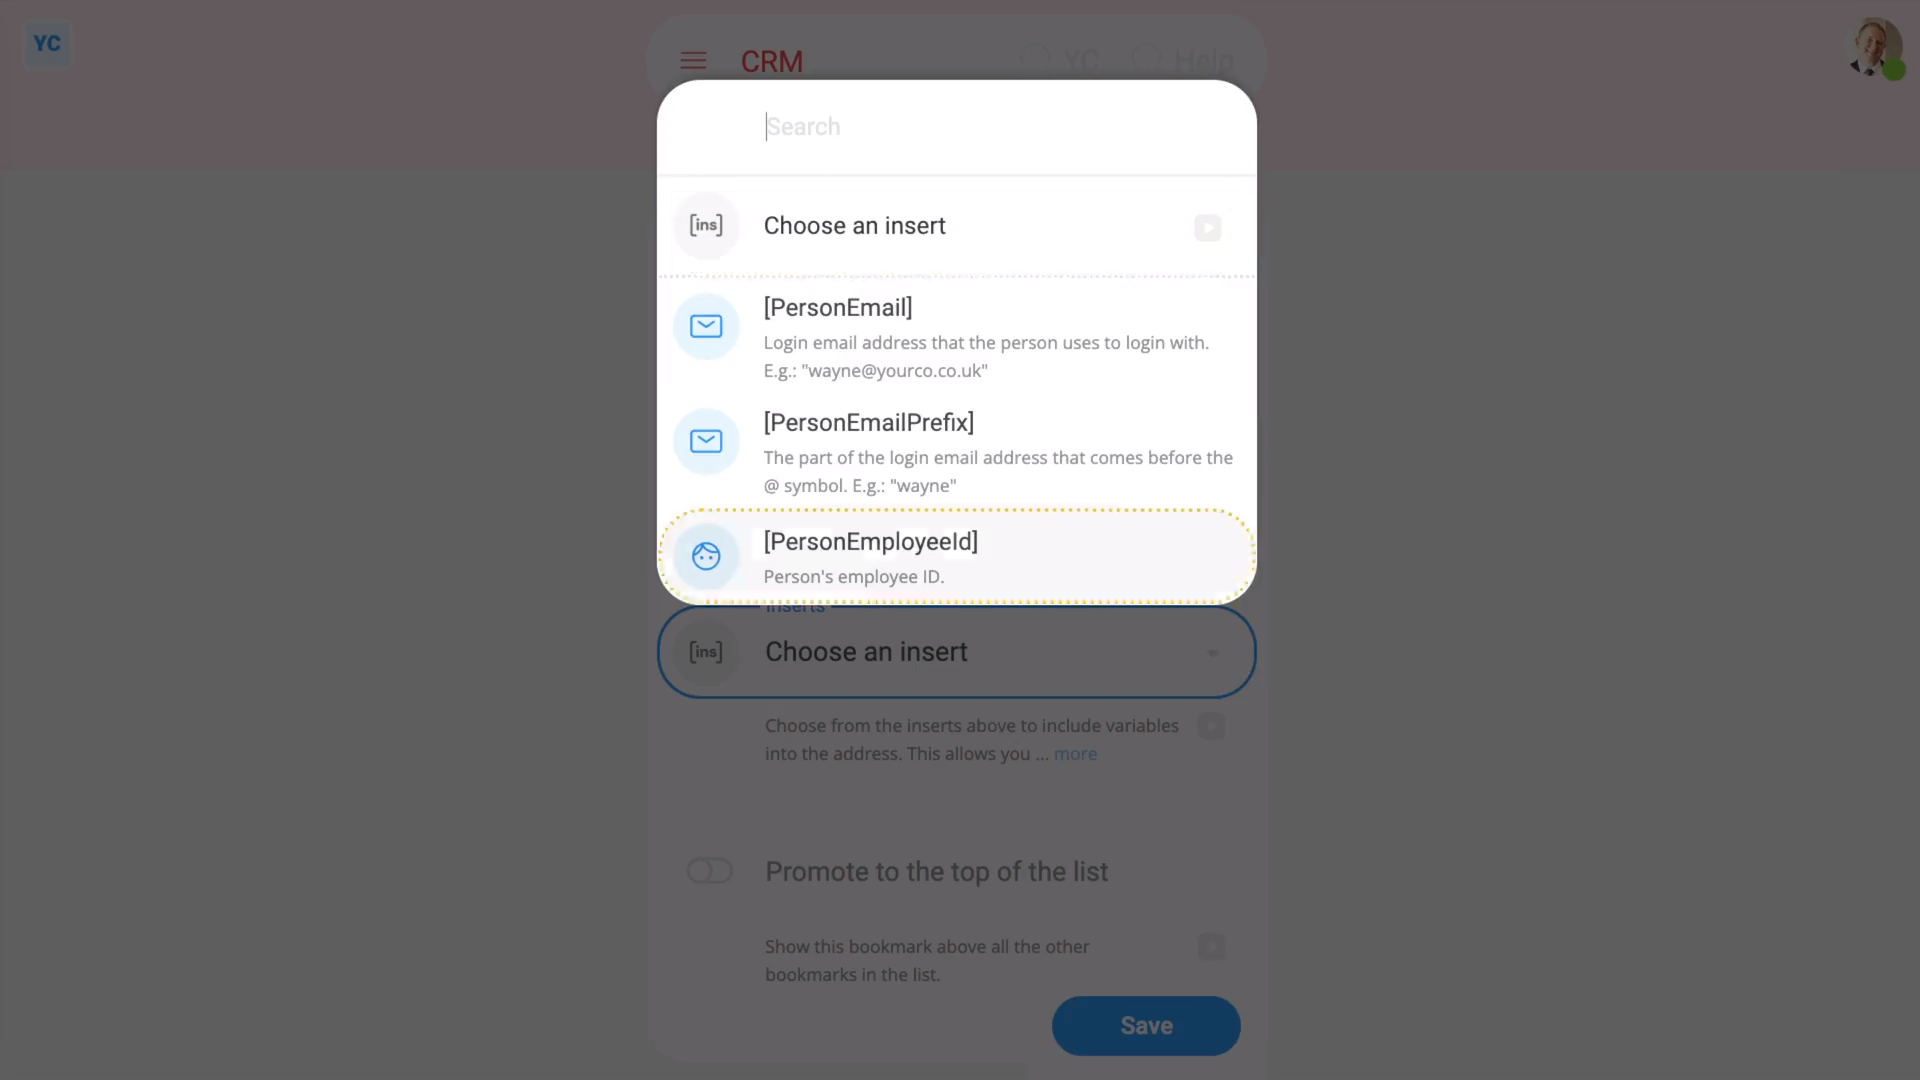
To add an insert into an existing bookmark's address:
- First, select the bookmark on: "Menu", then "Bookmarks"
- Once you've decided on the bookmark you want to change, tap its "Edit" link.
- Once it's open, type in your changes to the "Address" so it's ready for the insert.
- Then tap the "Show inserts" button:
- And you'll now see the "Inserts" box.
- Open the "Inserts" box, and select the insert you want.
- You'll see that it's added the insert text (in square brackets) to the point of the "Address" where you left your cursor.
- Now tap: Save
- And finally, go back and find the bookmark in the menu. You'll see that it's automatically replaced the insert tag with your unique details. For example, your unique email.
Keep in mind that:
- Only inserts that don't include sensitive info can be included into a bookmark address.
- However, if the data you want to append isn't listed, you can always use the "Employee ID" field.
And that's it! That's all you need to do to customise a bookmark with an insert.
Email signature
1. How do I use email signatures?
 2:05
2:05
"How do I use email signatures?"
Setting your email signature gives you a consistent public appearance when you communicate by email, including all your up-to-date contact info.
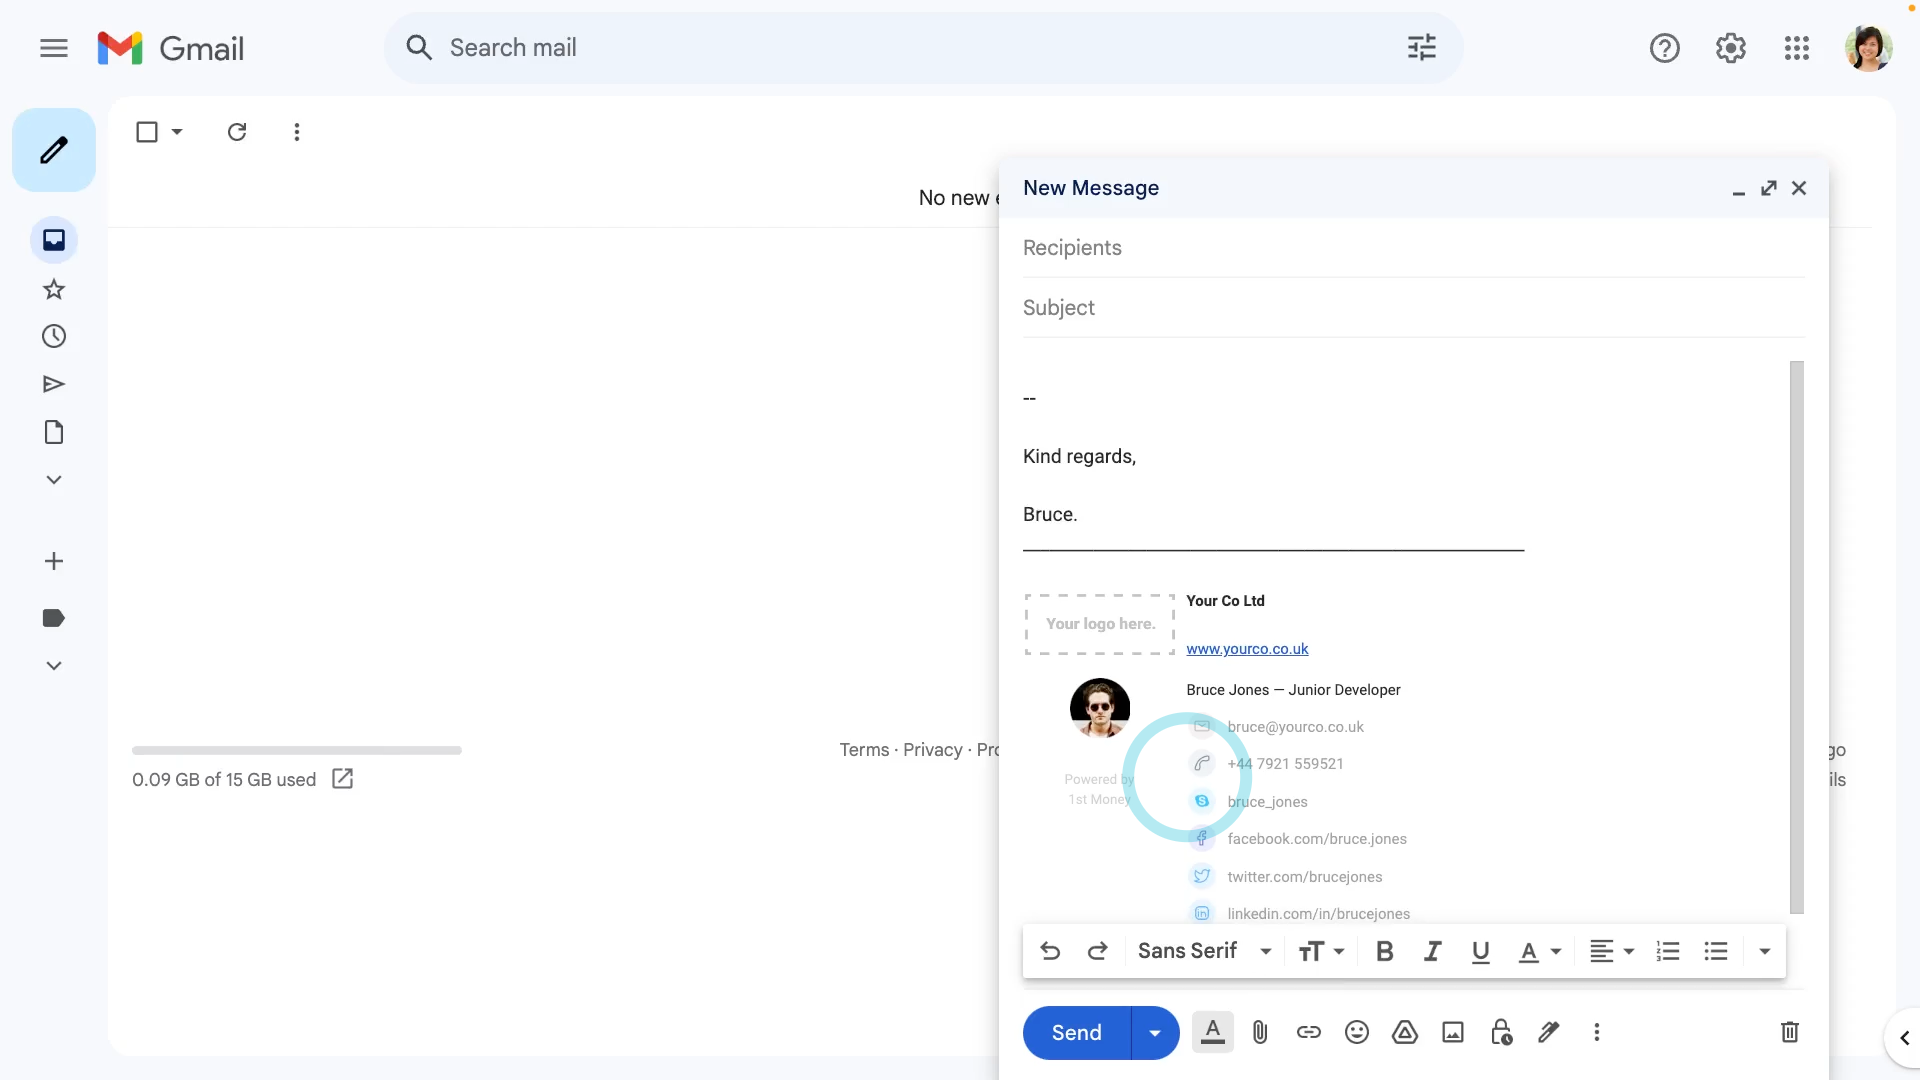
To add your org's email signature to your emails using Gmail:
- First, open yourself on: "Menu", then "Me"
- Then tap: "More", then "Email signature"
- And then tap Copy email signature to copy your signature.
- Next, in your browser, log in to Gmail and tap the settings cog: (at the top)
- Then tap: See all settings
- Once in settings, scroll down to "Signature" and tap: Create new
- Now give your new signature a name, and tap: Create
- Now you'll see the signature box. Paste your signature into the box.
- Then select your signature name under: "Signature defaults"
- Next, scroll down and tap: Save changes (at the bottom)
- And finally, when you compose a new email, your email signature now shows (at the bottom of the email).
Keep in mind that:
- To prevent your email signature from getting too large, only the first 8 contact details are ever shown.
For advanced usage:
- If you want to preview how it looks in your email inbox, tap: Send test email
- The button sends you your email signature in a test email to your own email inbox.
- Alternatively, to see the HTML used for your email signature, scroll to the bottom, and tap: Show HTML
To learn more:
- About how to set customise your org's email signature template, watch the video on: Customising the default email signature
And that's it! That's all you need to do when setting your email signature!
2. How do I customise the format of my org's email signature?
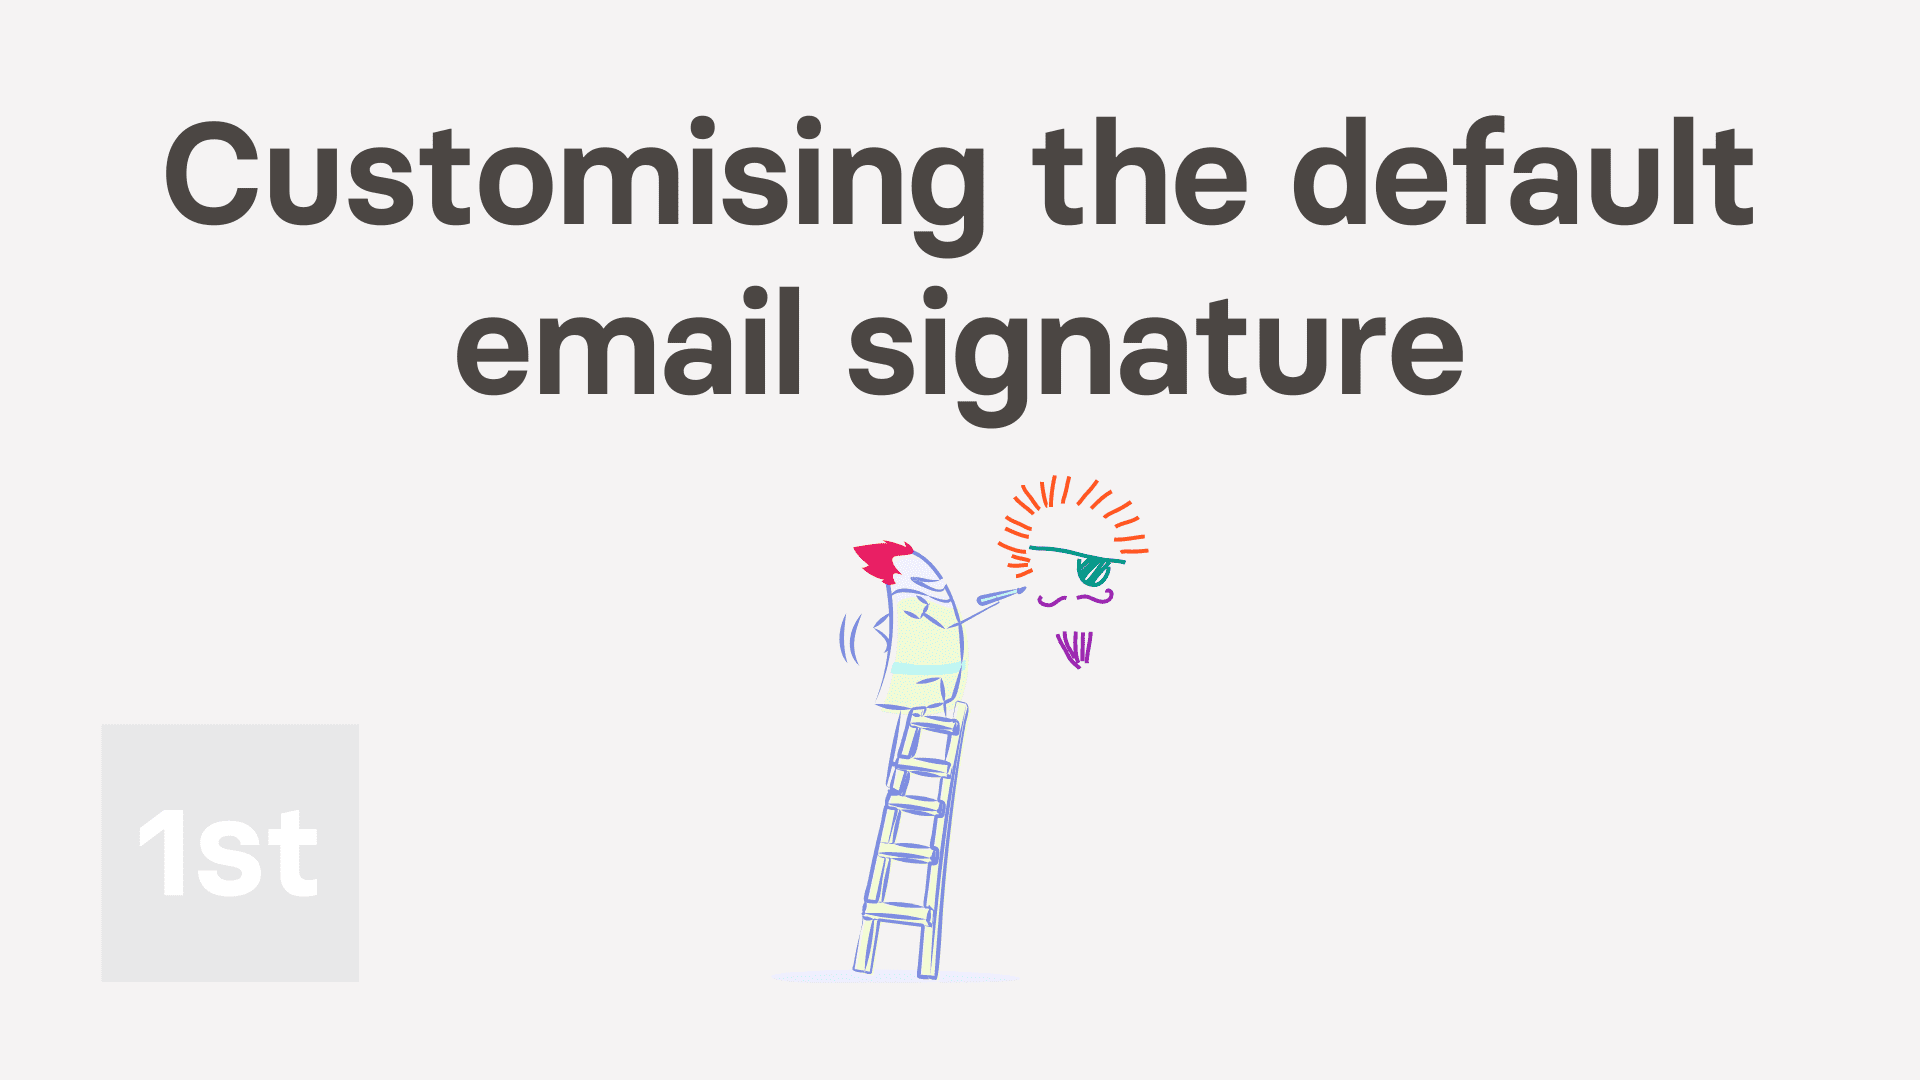 1:34
1:34
"How do I customise the format of my org's email signature?"
Email signatures give the people in your org a way to have a consistent email signature, with their up-to-date contact info.

To customise your org's default email signature:
- First, open your org on: "Menu", then "Orgs"
- Then tap: "Settings", then "Default email signature"
- To see how it looks before you make any changes, tap: See your sig
- Now go ahead and make any changes you'd like to your org's default email signature.
- Then when you're ready to see your changes, tap See your sig again.
- And finally, if you want to preview how it looks in your email inbox, tap Send test email. Which sends you your email signature in a test email to your own email inbox.
For advanced usage:
- Tap the "Inserts" button , to select from the additional inserts that are available.
To learn more:
- About how to set your email signature in Gmail, watch the video on: Using email signatures
- To learn more about how to try inserts in your org's email signature, watch the video on: Email signature inserts
And that's it! That's everything you need to know about customising your org's default email signature!
3. How do I use inserts in my org's default email signature?
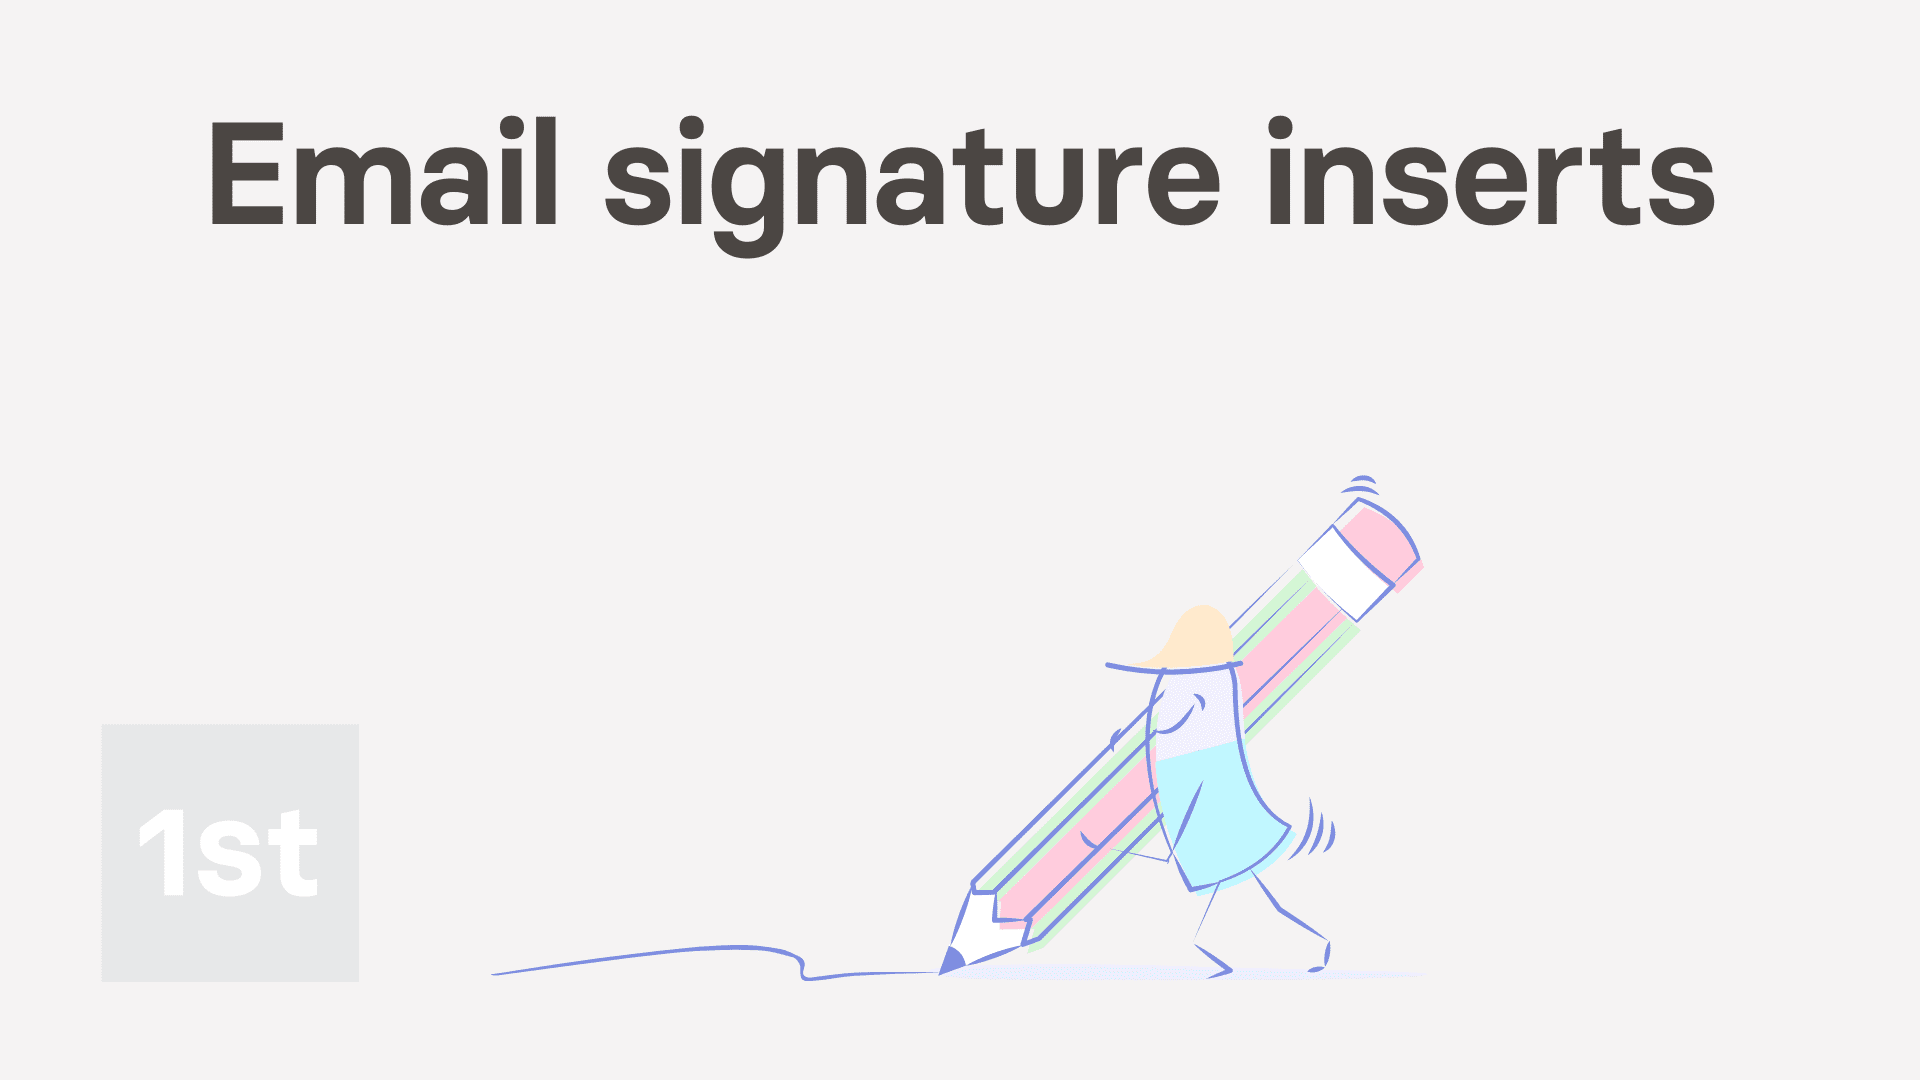 1:46
1:46
"How do I use inserts in my org's default email signature?"
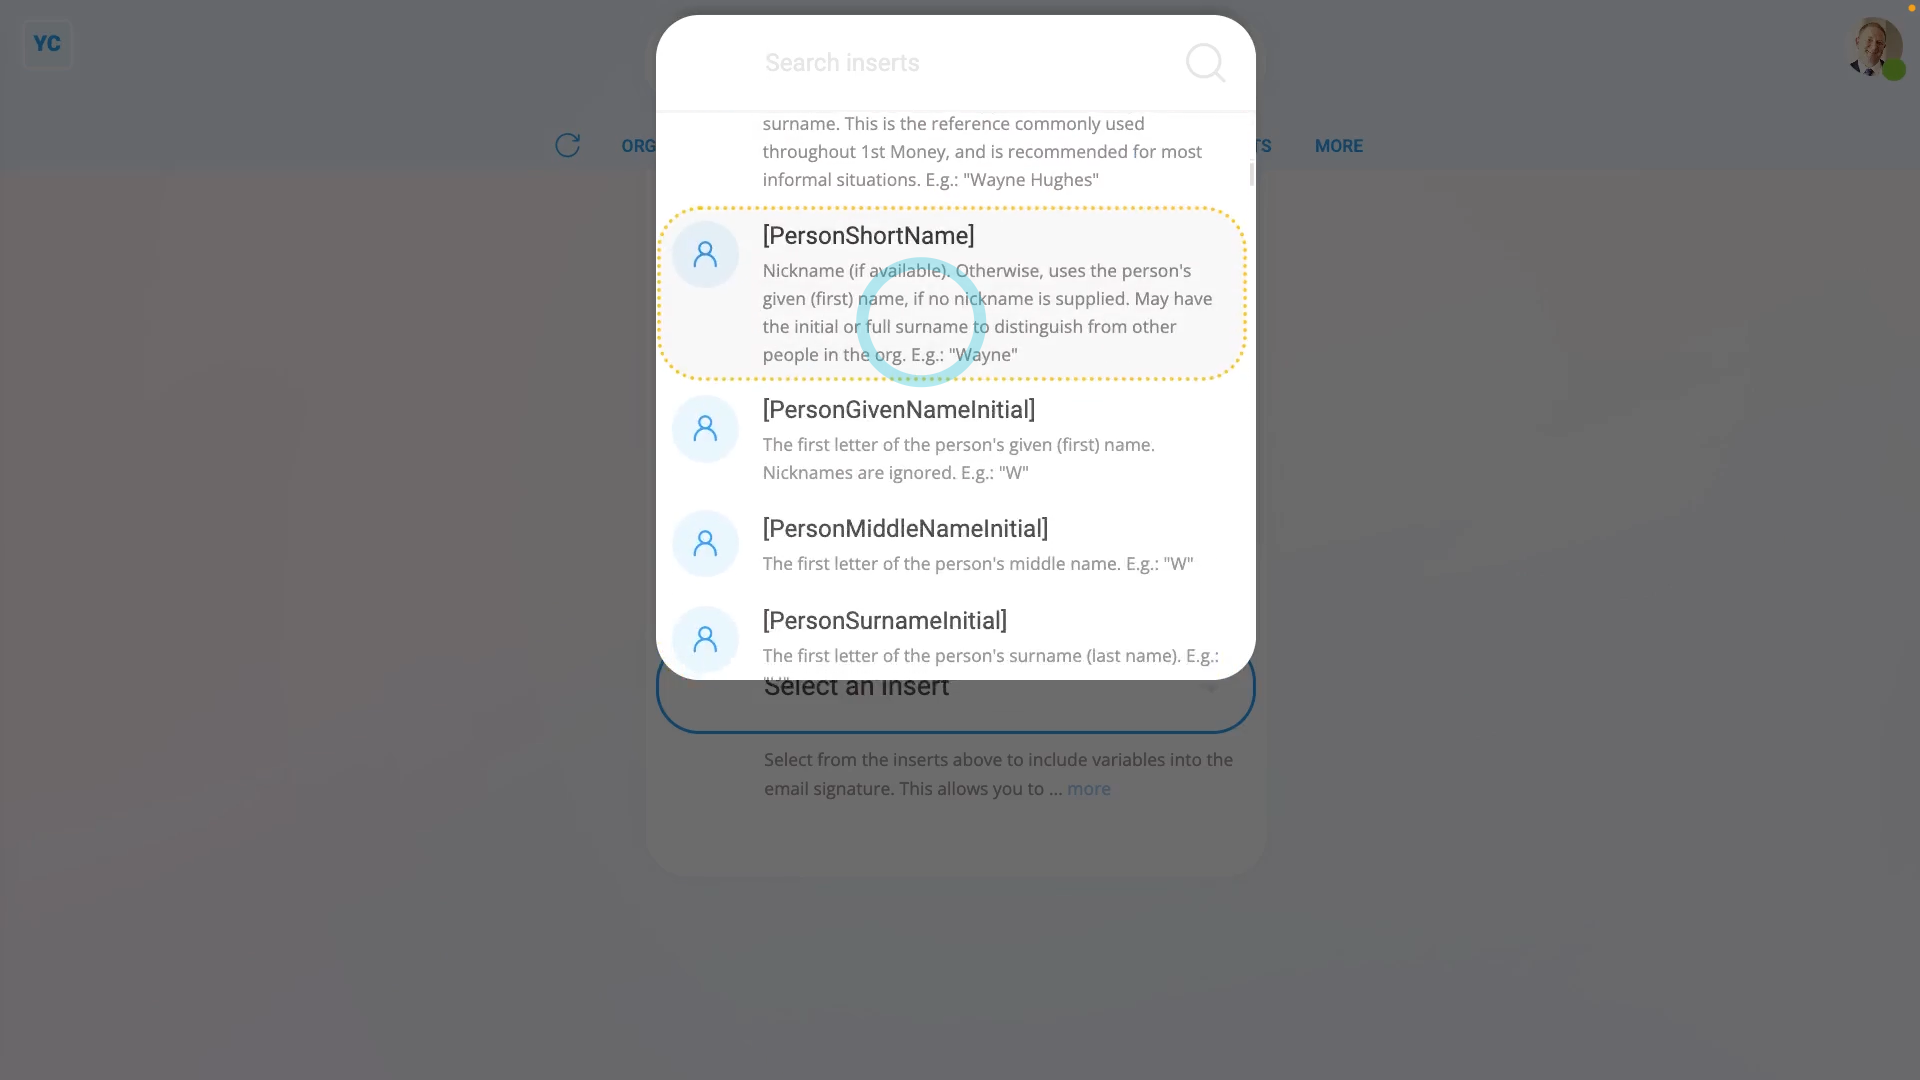
With inserts, you can add each person's contact details, department, and more, into your org's default email signature.
To try inserts in your org's default email signature:
- First, open your org on: "Menu", then "Orgs"
- Then tap: "Settings", then "Default email signature"
- Then to open the inserts list, tap the "Inserts" button , and you'll see a list of all the available inserts.
- There's lots to pick from, and each one has an example of the text it inserts.
- You may find it easier to try the search box to find the one you're looking for.
- To try an insert, tap into your org's default email signature (at the point where you want to put it).
- Then tap back on the inserts list, and tap the insert you want to try.
- You'll see that it's added the insert text (in square brackets) to the point of the email signature where you left your cursor.
- Then when you're ready to see your changes, tap: See your sig
- And finally, you'll notice that the email signature has substituted the inserts with the selected person's text.
To learn more:
- About how to set your email signature in Gmail, watch the video on: Using email signatures
And that's it! That's everything you need to know about using inserts in your org's default email signature!
History
1. How do I see changes made to a person, project, or anything else?
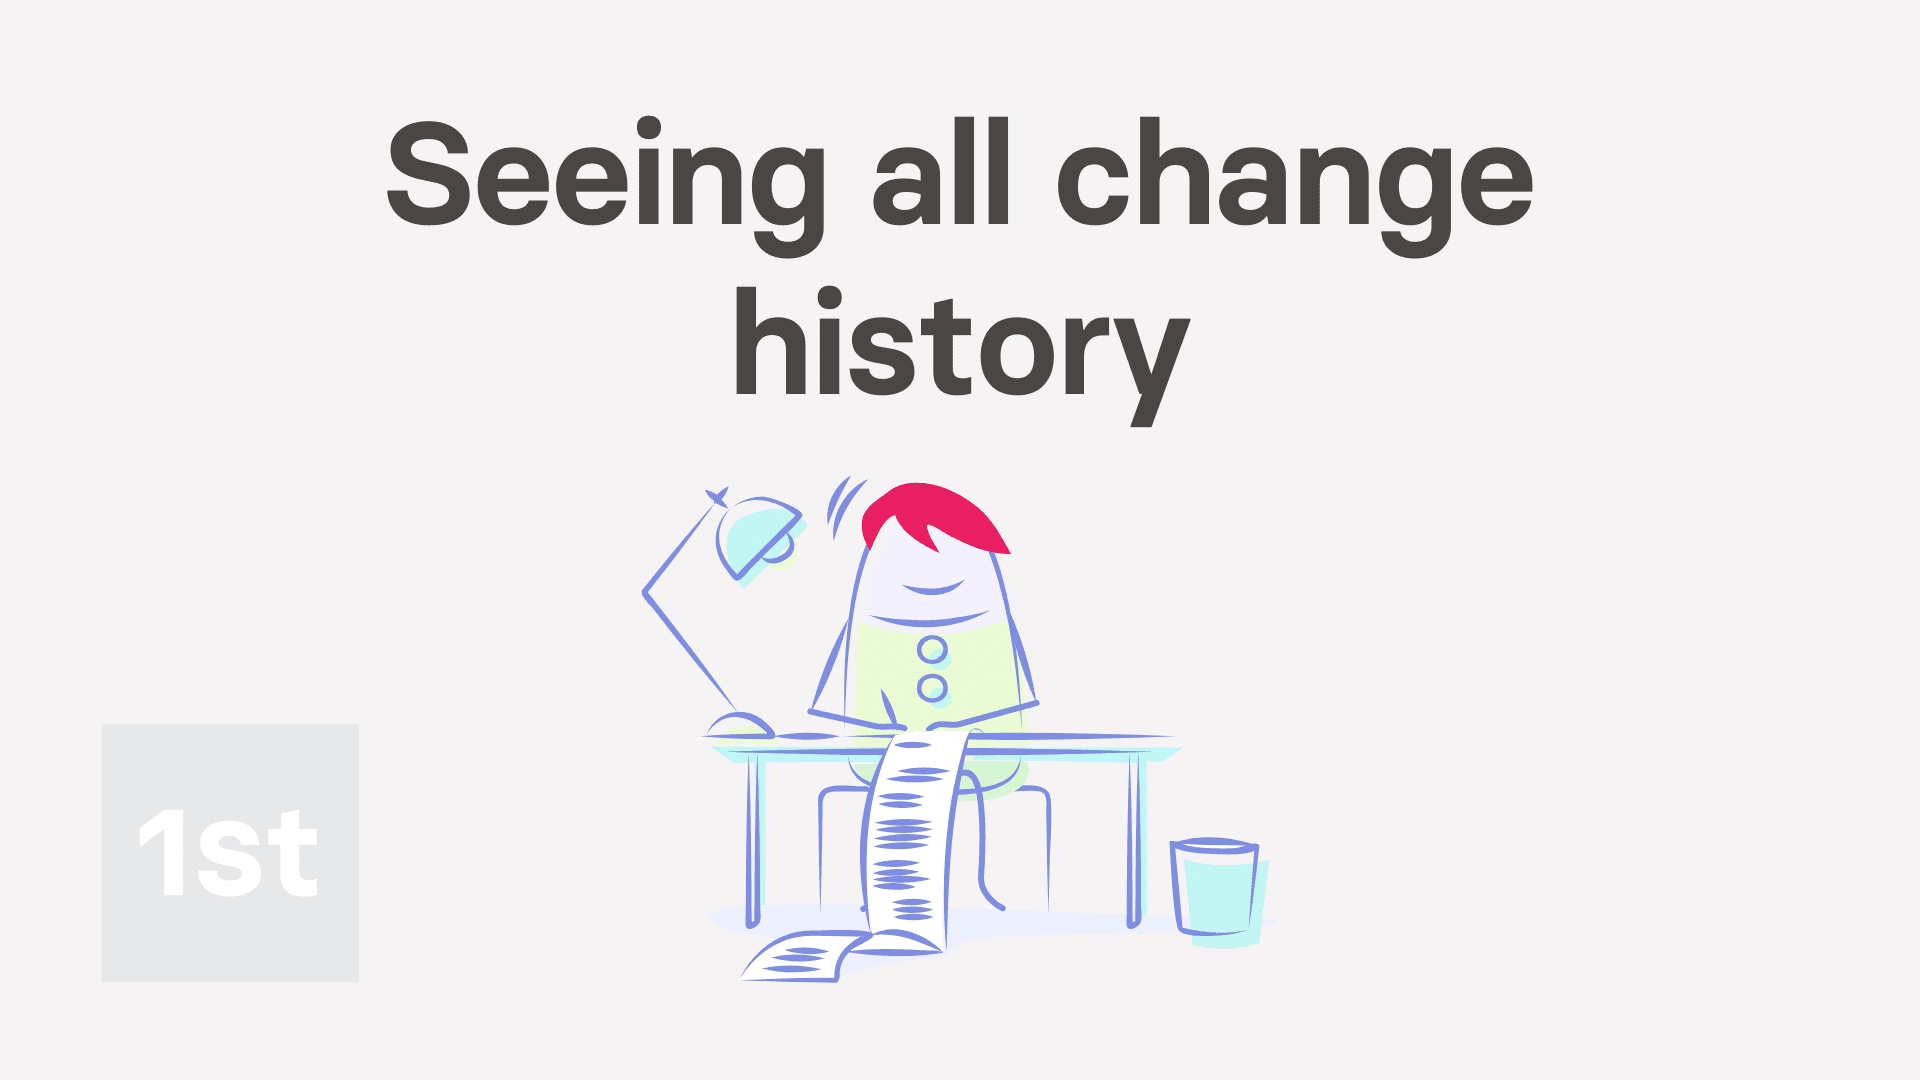 2:37
2:37
"How do I see changes made to a person, project, or anything else?"
History stores all the changes made in 1st Money over time. It shows you what's changed, who changed it, and when it was changed.
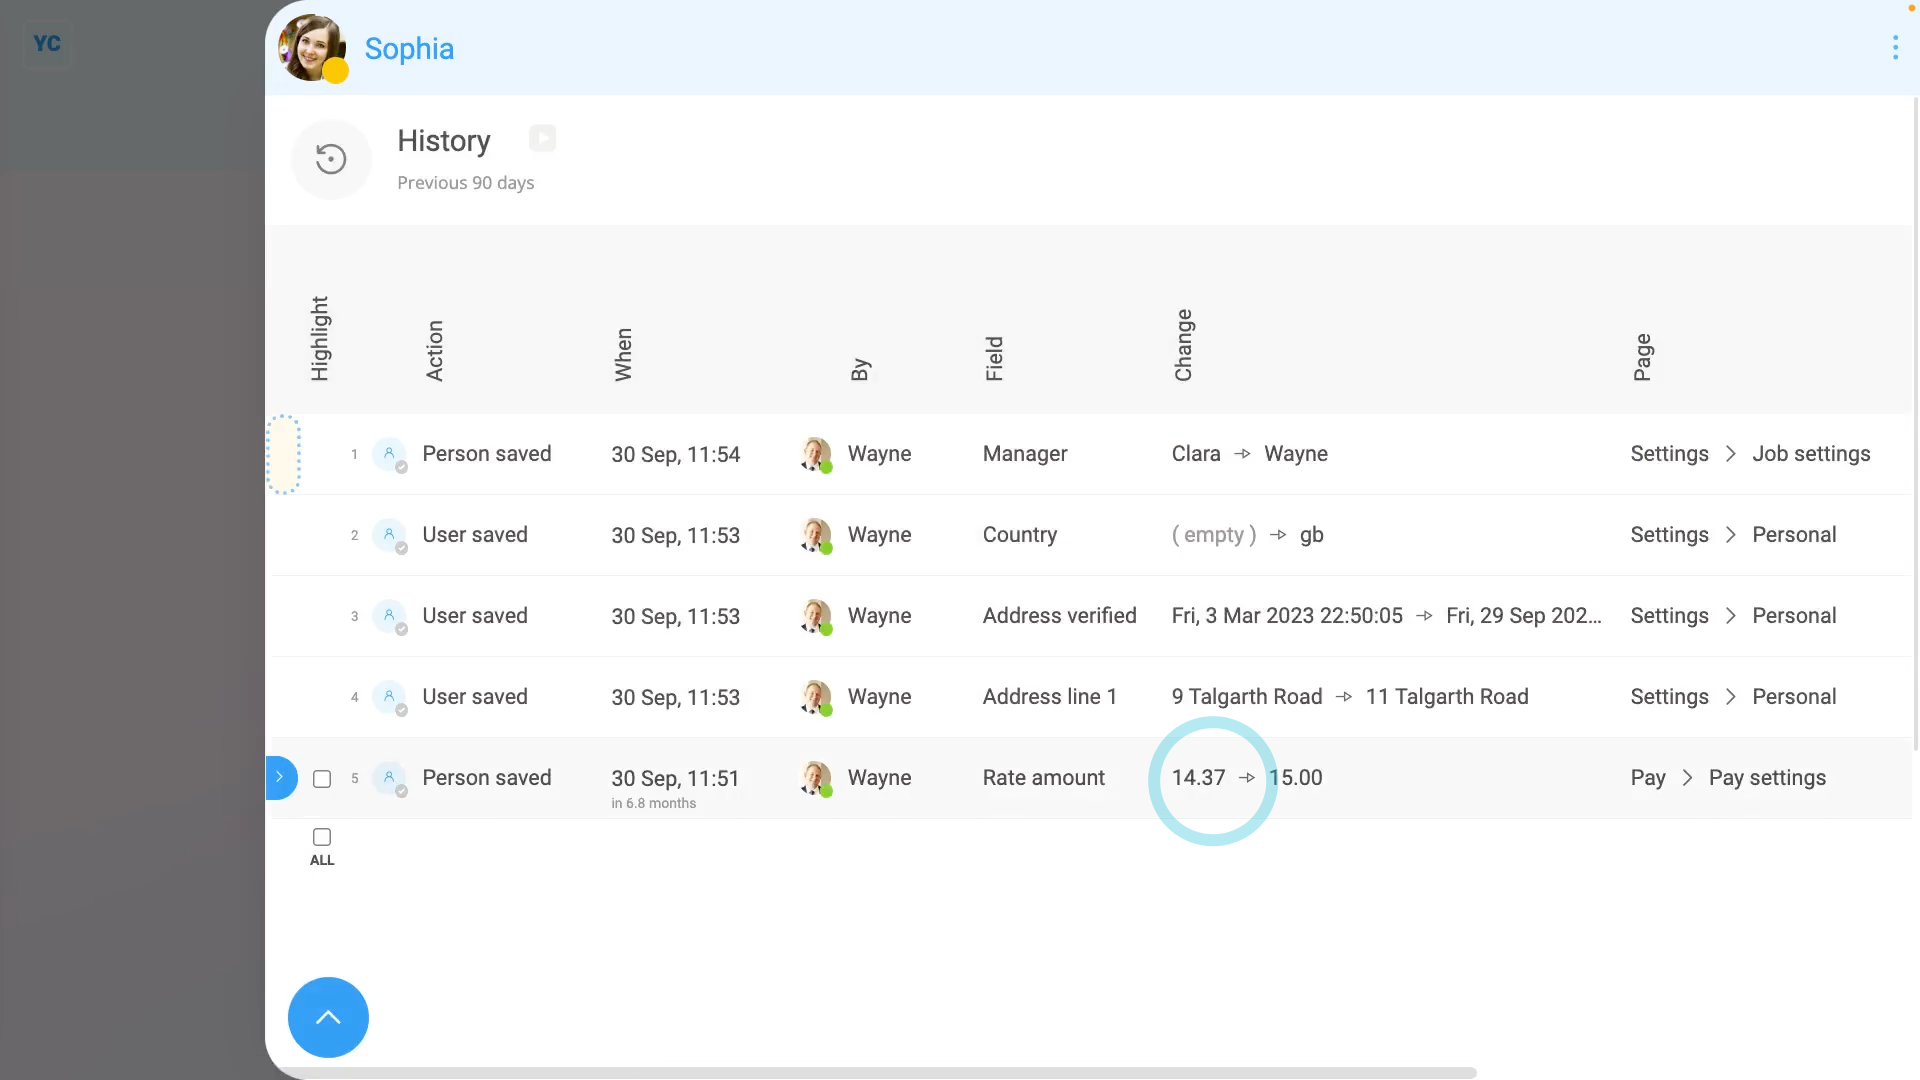
To see all changes to a person, project, location, or anything else:
- First, select the person, or location, etc on: "Menu", then "People"
- Then tap: "More", then "History"
- By default, you'll see all changes made over the last 30 days.
- To show history changes going back 90 days, tap:
" Show settings", "Dates", then "Previous 90 days" - If you want to see more details about any change, tap the row.
- And you'll see further details about the change appear on the right.
- To see even more details, tap the blue "more" link.
- As you'd expect, some change history, like people's pay rates, is considered private.
- Because you're logged in as a payroll admin, you can see all changes, including private changes, like a change in a person's pay rate.
- Now, switching person. You're now logged in as a person who's only got "Full org admin" permissions, and not even "View payroll admin" permissions.
- As an org admin, you can still see most of the change history.
- However, without "View payroll admin" permissions, you can't see private changes, like what a person's pay was changed to.
- Even if your org admin taps on the row, to see further details, or taps the blue "more" link, private details remain hidden.
- And finally, org admins can see everything else about the change. Including who changed it, and when, but not the actual content of the private change itself.
For advanced usage:
- To copy a link to an item in change history, tap the three dots: (in the top-right corner), then tap: Copy link
- To find out who your payroll admins are, tap "Menu", then tap: List payroll admins
Keep in mind that:
- Any payroll admin can see the pay rate of every person in your org, as well as all of its change history.
- Generally, your org only needs one or two people with "Full payroll admin" permissions.
And that's it! That's all you need to do to look up any change in 1st Money ... even going back years!
2. How do I see who's made changes to a field?
 1:45
1:45
"How do I see who's made changes to a field?"
It's sometimes useful to see what changes were made, who changed it, and when it was changed. 1st Money has full change history built-in, for almost every field.
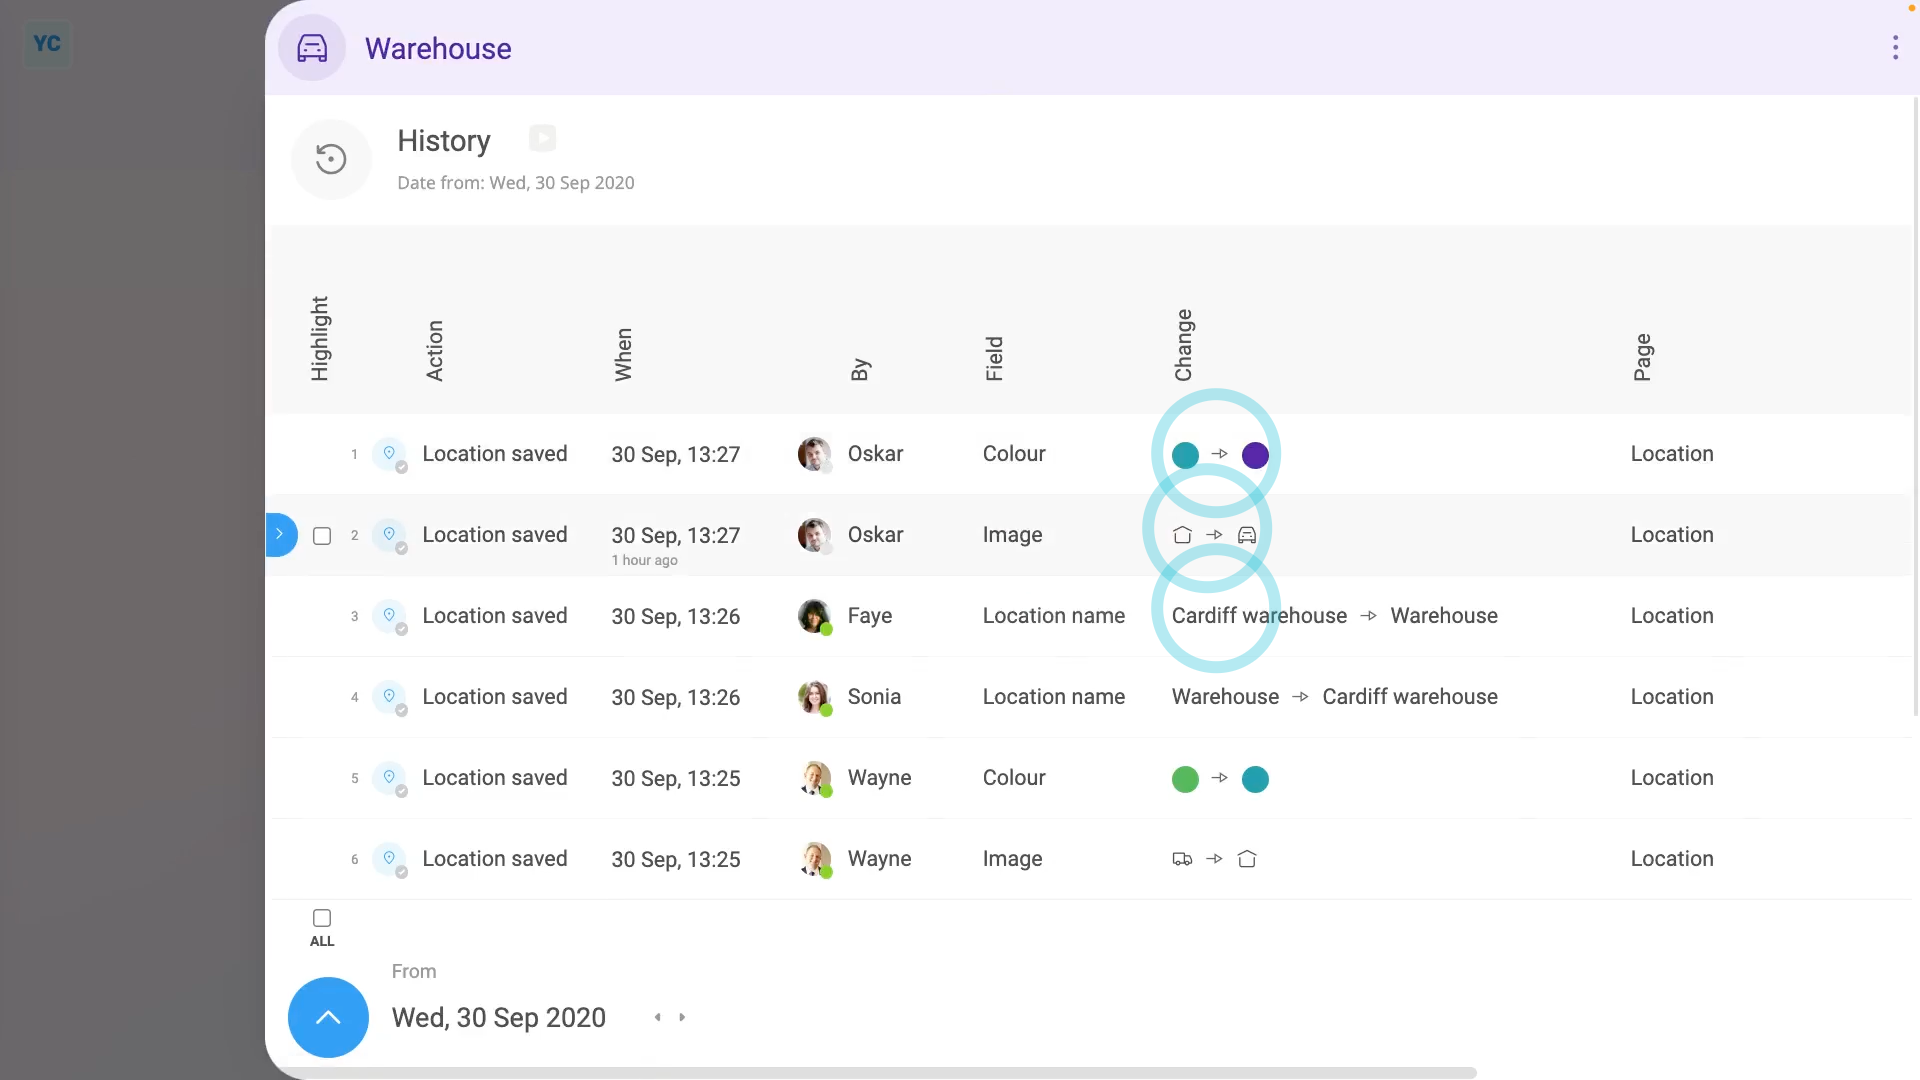
To see history of who's made changes to a field:
- First, you'll need to open an example of a field that's had some changes.
- As an example, select a location on: "Menu", then "Locations"
- To see a row's history of changes, hover your mouse over the row where the field is.
- Revealing three dots: (on the far left), which when you tap, a menu opens.
- Then tap History, and it slides out on the right, listing the change history for the row.
- In the history, you'll see a list of changes that's been made in the past.
- You'll also see who made the changes.
- The listing, by default, shows any changes that've happened to the selected fields over the last 36 months.
- To lengthen or shorten a date range, tap:
" Show settings", then "Dates" - And pick a new date range.
- To see details about any single change, tap a row.
- You'll now see further details about the change appear on the right.
- And finally, to see even more details, tap the blue "more" link.
To learn more:
- About seeing all the changes to a person, project, location, or anything else, watch the video on: Seeing all change history
And that's it! That's everything you need to know about seeing change history for any field, even going back years!
Locations
1. How do I create a location?
 2:25
2:25
"How do I create a location?"
A location groups people together based on where the people physically work. Once people are grouped into a location, you can share bookmarks and notes with each of those people.
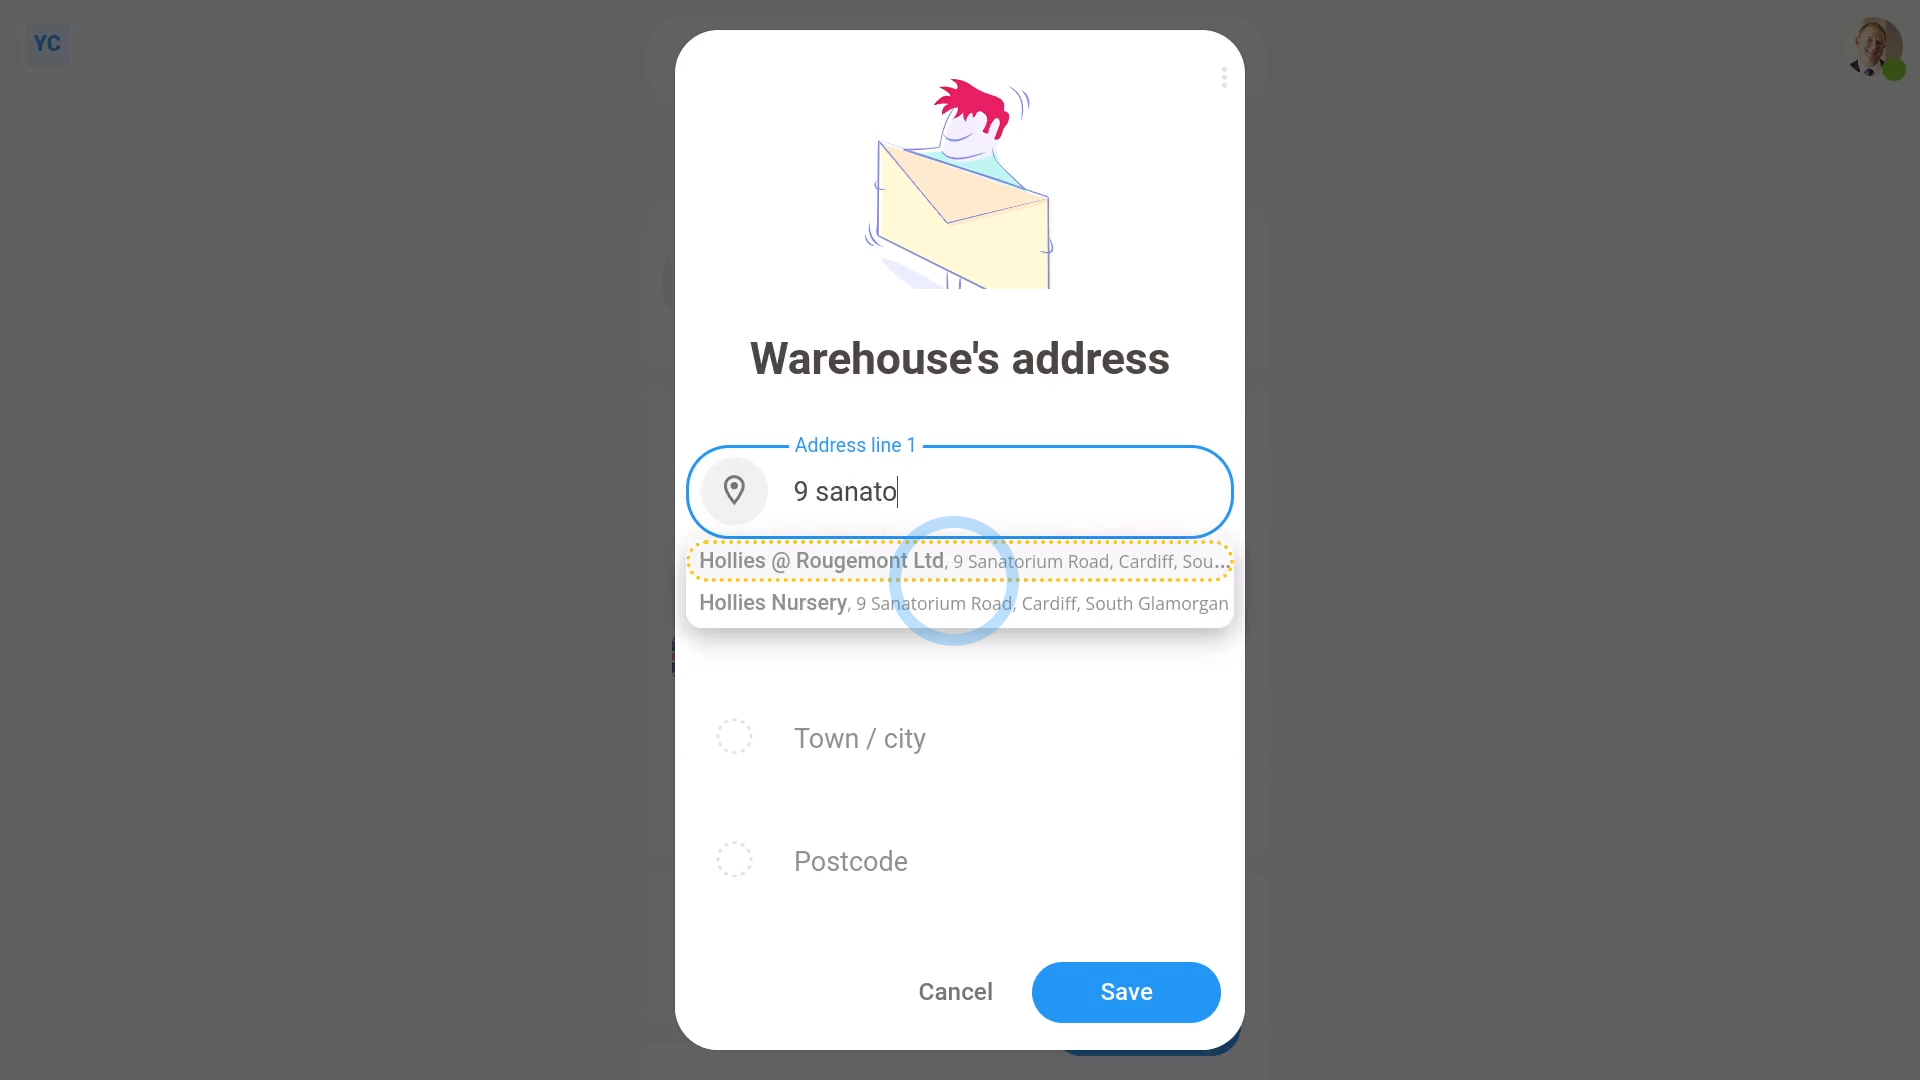
To create a new location:
- First, tap: "Menu", "Locations", then "New location"
- Once it's open, type in the name of your new location.
- Optionally, you can also tap the circle and set the list colour and image.
- Next, tap: Set address
- And type your location's address. As soon as you start typing, it automatically suggests similar addresses.
- Once you've tapped on your address, it fills everything else in for you, but you can still type in your own changes.
- Once you're ready, tap: Save
- Once it's saved, you'll see the full address with a matching map preview.
- And finally, optionally, you can also add notes to your location. For example, notes on Wi-Fi or fire exits.
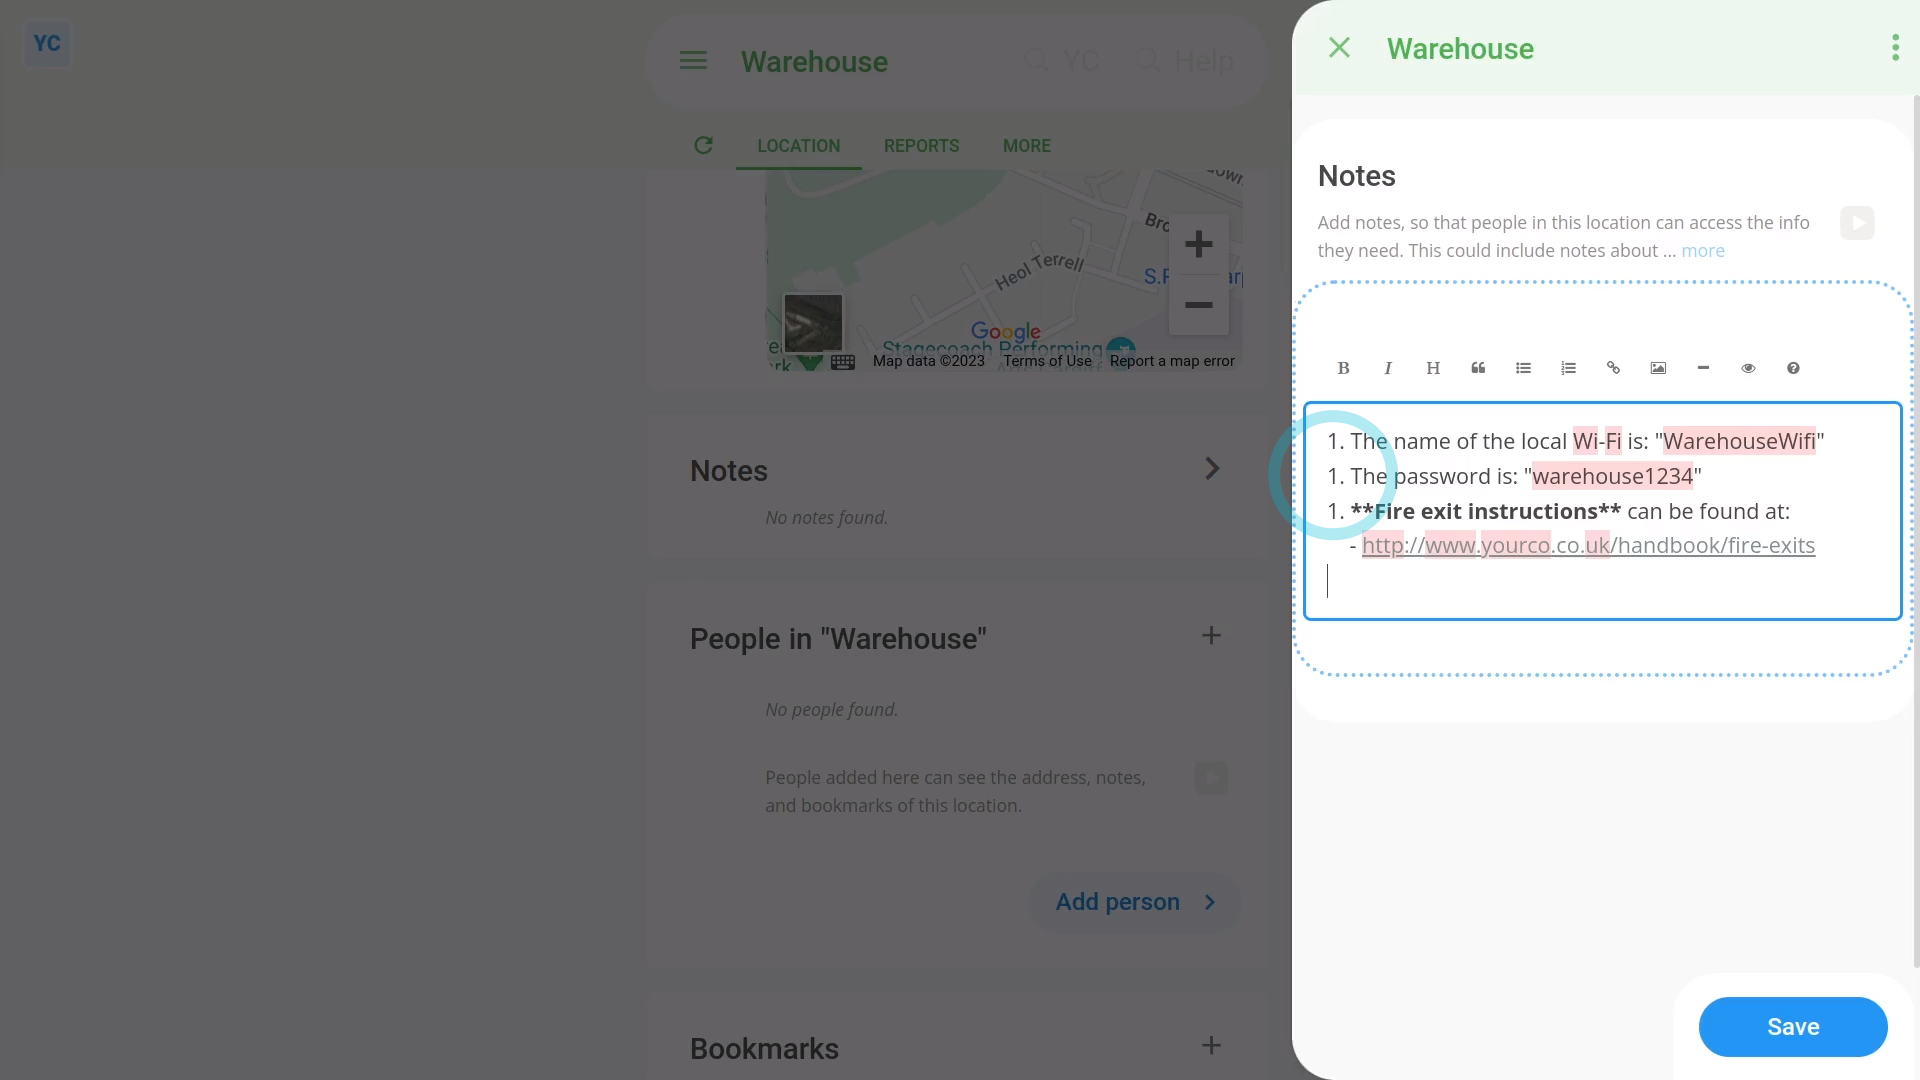
To add notes to a location:
- First, select the location on: "Menu", then "Locations"
- Then scroll down to the "Notes" heading, and tap the "Edit" button:
- Once it slides out on the right, type out the notes you'd like to share with the location's people.
- You can format your notes using Markdown, including: bold text, and bullet lists.
- To learn more about formatting with Markdown, tap the question mark button:
- You can type in as many notes as you want. Even pages of notes is fine. Once you've finished typing your notes, tap: Save
- And finally, once it's saved, you'll now see your notes shown on the main page for your new location.
Keep in mind that:
- Anyone who's added to a location can see all the notes and bookmarks of that location.
- Only people who've got "Full org admin" permissions can create, make changes, or add people to a location.
To learn more:
- About how to add people to a location, watch the video on: Adding people to a location
And that's it! That's everything you need to know about creating a location!
2. How do I add people to a location or set a person's location?
 2:05
2:05
"How do I add people to a location or set a person's location?"
There's three ways to add people to a location.

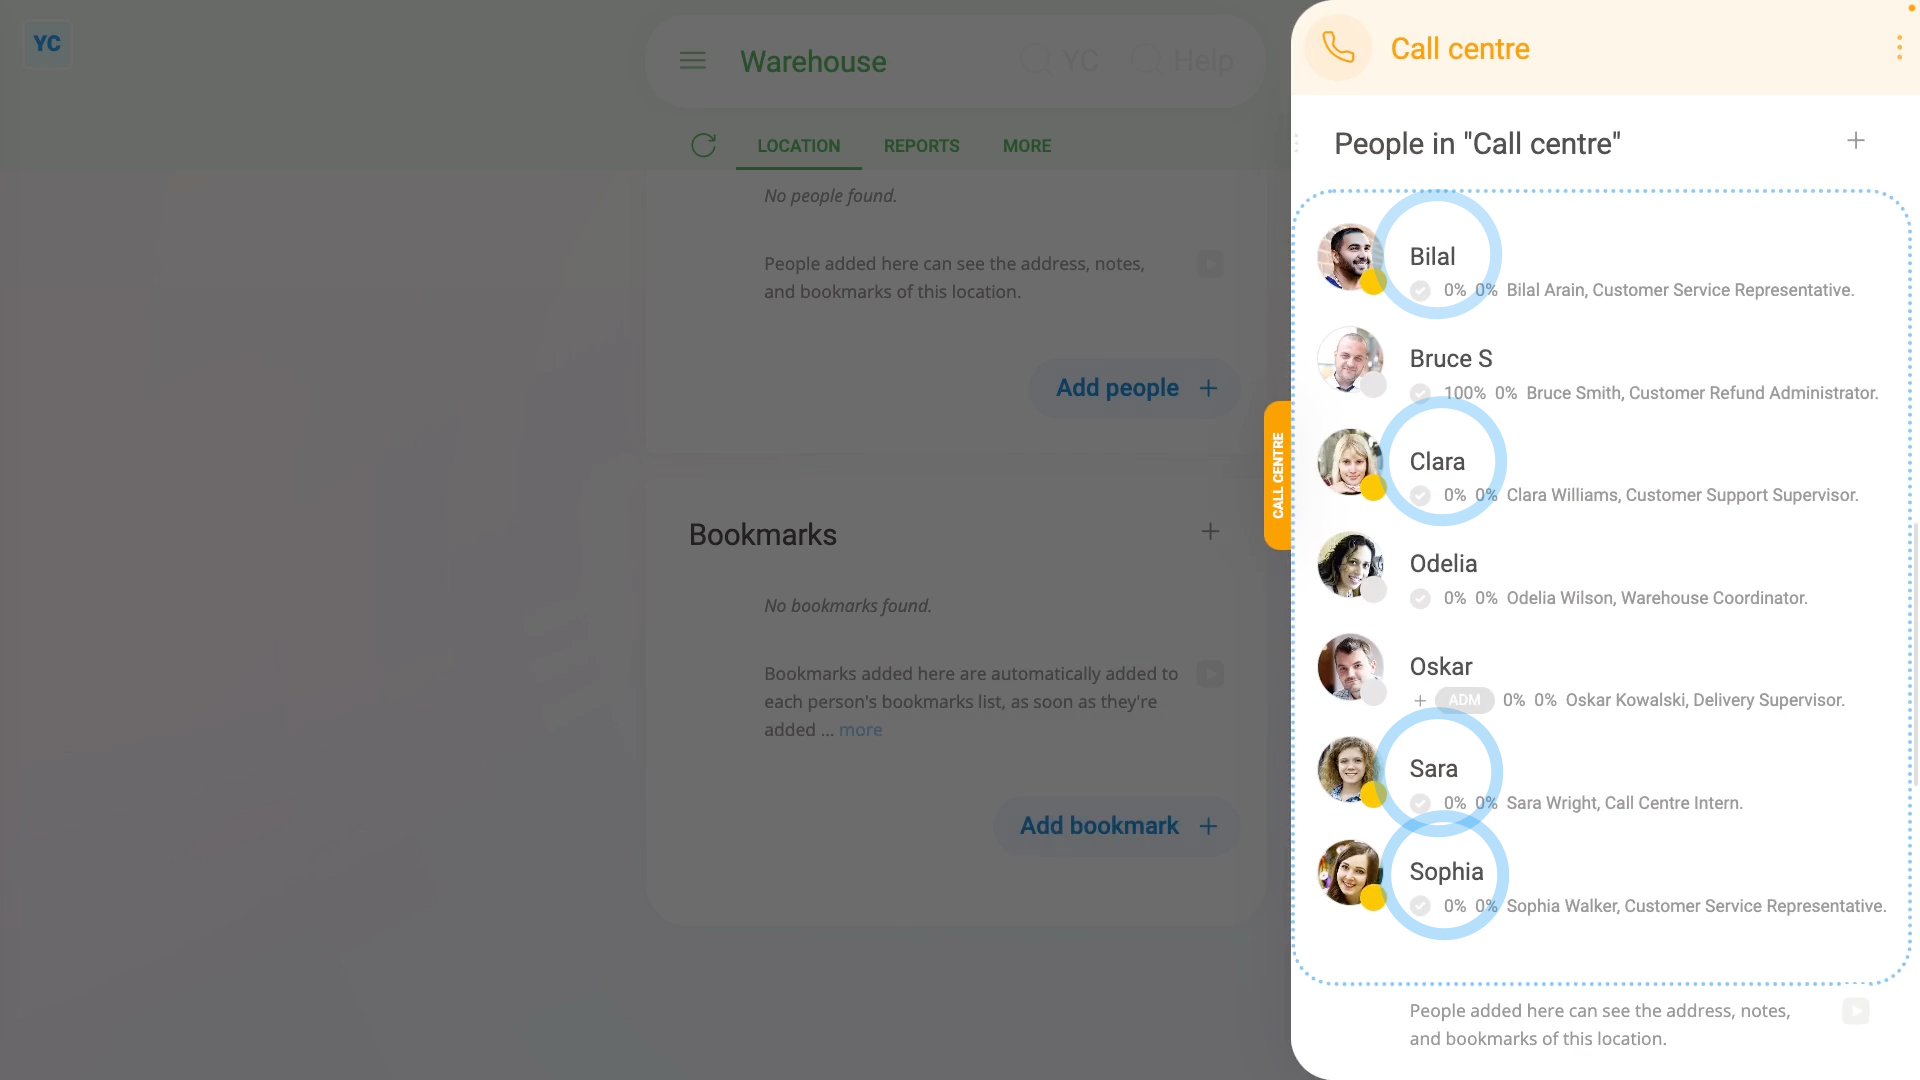
To add lots of people to a location, all in one go:
- First, select the location on: "Menu", then "Locations"
- Once it's open, scroll down and tap: Add people
- Once it slides out on the right, tap each person you want to add.
- Then tap: Save
- And finally, now you'll see the people you selected are all added to the location.
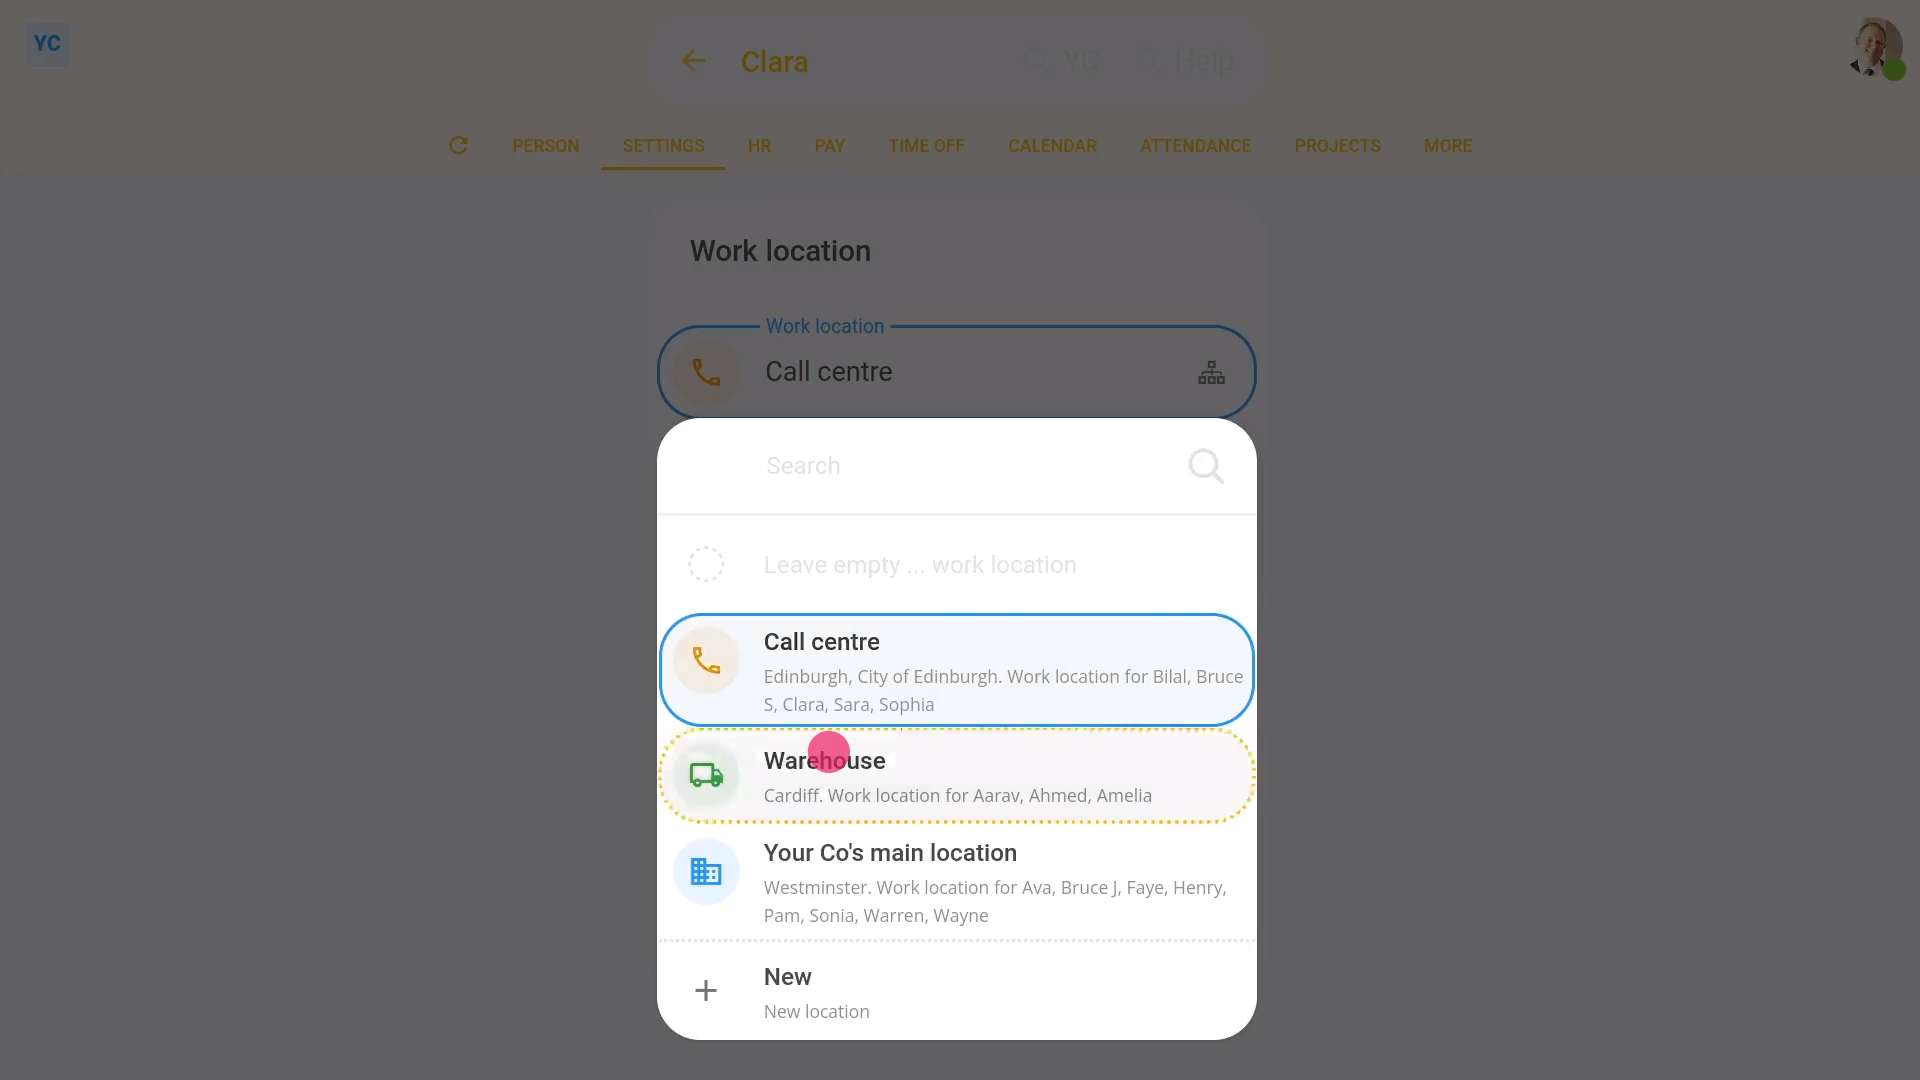
To set only one person's location:
- First, select the person on: "Menu", then "People"
- Then tap: "Settings", then "Location"
- Next, select the location you'd like to set for the person.
- Then tap: Save
- And finally, the location for the person is now set.
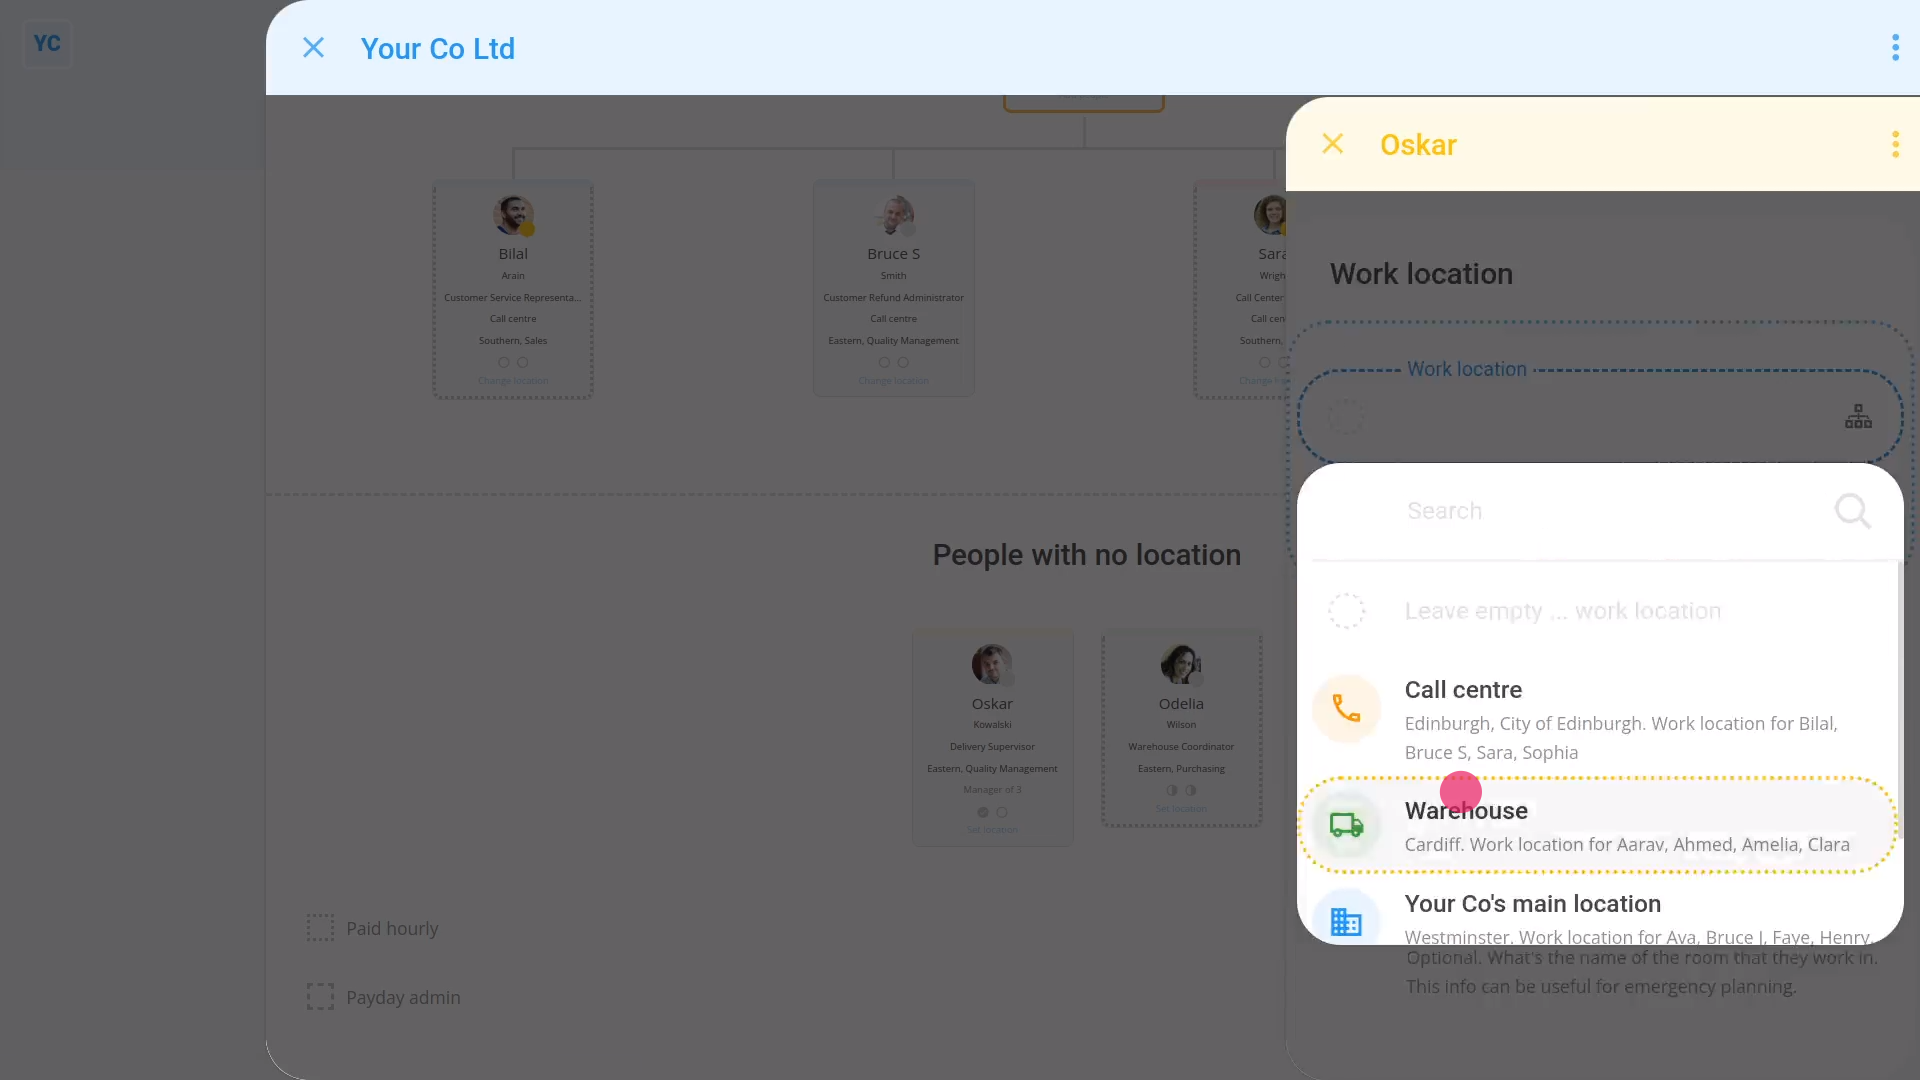
To set a person's location from an org chart:
- First, open your org on: "Menu", then "Orgs"
- Then tap: "Org charts", then "Location"
- Once it slides out on the right, you'll see a visual map of everybody grouped by their location.
- On each person, you'll see a "Change location" link. Tap the link to change location for an existing person.
- Alternatively, when you scroll to the bottom, you may see the heading: "People with no location"
- If you tap the "Set location" link on one of the people, you can select a location for them.
- Now, once it's saved, you'll see that the person's been moved out of the "People with no location" list.
- And finally, the person's been moved under the location you selected.
Keep in mind that:
- Only people who've got "Full org admin" permissions can add or move people between locations.
And that's it! That's everything you need to know about adding a person to a location!
How do I delete or undelete a location?
 2:04
2:04
"How do I delete or undelete a location?"
If you no longer need a location, you're welcome to delete it whenever you like.
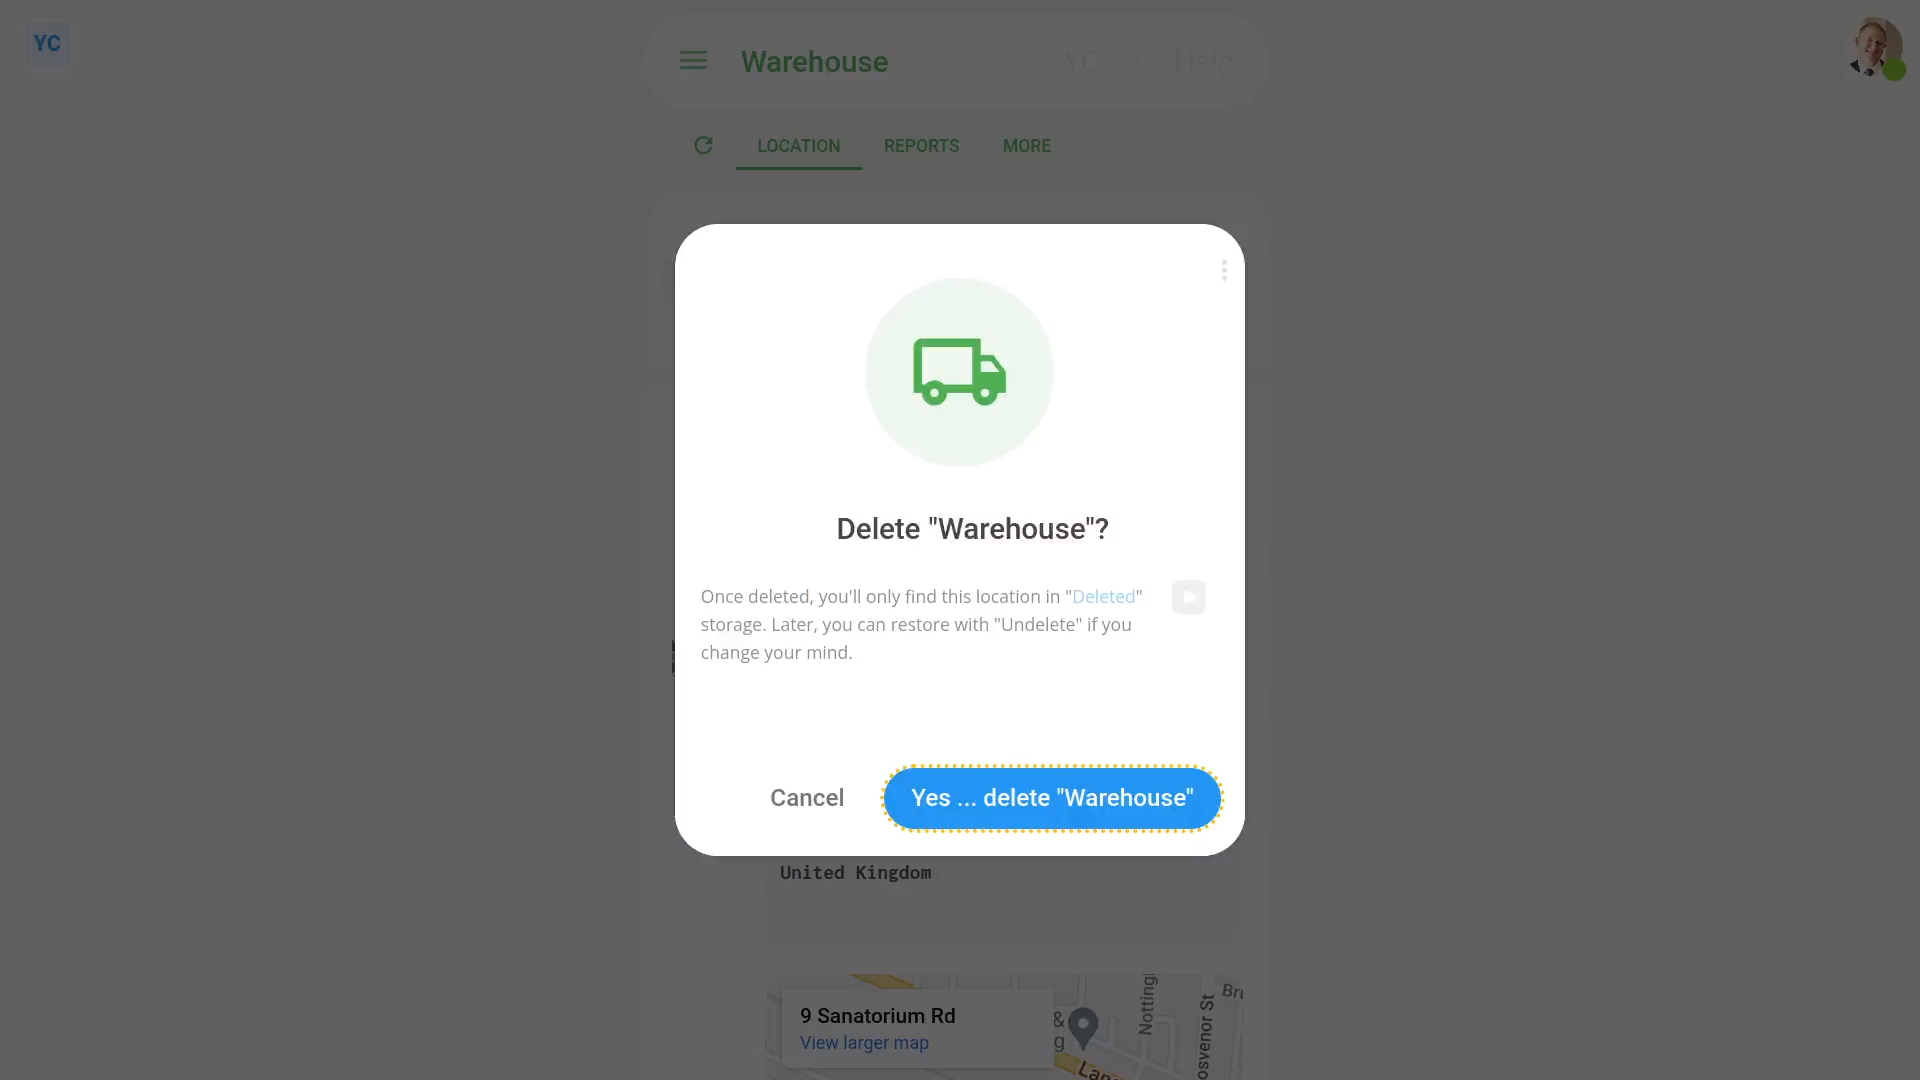
To delete a location:
- First, select the location on: "Menu", then "Locations"
- Then once the location's open, tap More, then: Delete
- And then tap: Yes ... delete
- Before deleting, if there's still people in the location, you'll be asked to move people out.
- To move everyone over to another location, tap: See "Move all"
- Then select the location to move everyone over to.
- And then tap: Yes ... move all
- Now, the people have all been moved, and the location's now deleted.
- The location's also locked, so it can't be changed anymore.
- And finally, if you change your mind and want the location back again, tap Undelete, and it's immediately undeleted.
If it's been a while since you deleted a location, and you want to undelete it, you'll first need to find it in the: "deleted bin"
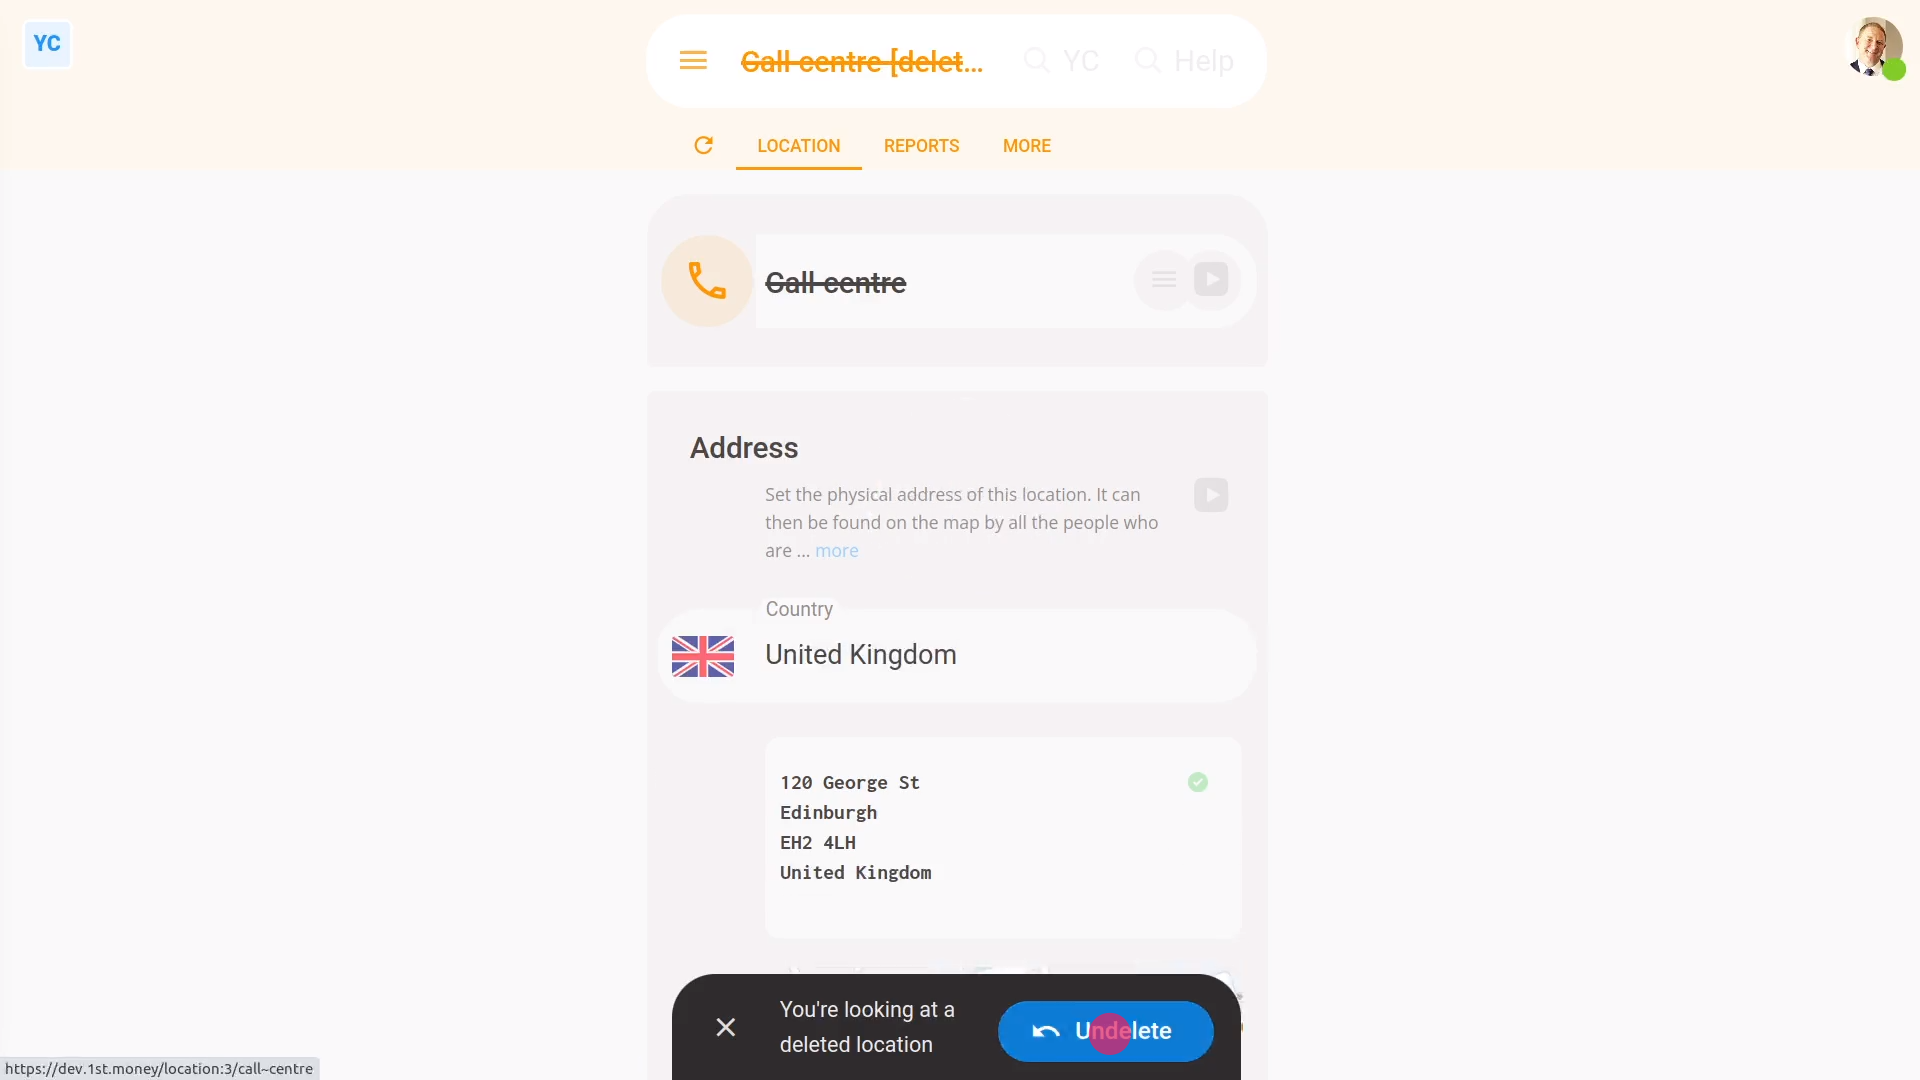
To undelete a location from your "deleted bin":
- First, tap: "Menu", then "Deleted bin"
- Next, you'll see a category for most of the kinds of items that can be deleted. Tap: Locations
- And then tap the location you'd like to undelete.
- Next, tap: Undelete (at the bottom)
- And finally, the previously deleted location is immediately undeleted.
Keep in mind that:
- Whenever you undelete a location, you'll still have to add the people back in again after it's undeleted.
- Also keep in mind that only people who've got "Full org admin" permissions can delete or undelete locations.
- And remember that all deletes and undeletes are always permanently recorded in: "History"
- That means any admin can always look back in time, and see who did any delete, and when the delete was done.
And that's it! That's everything you need to know about deleting or undeleting a location!
Login
1. How do I log in and log out with 1st Money?
 1:41
1:41
"How do I log in and log out with 1st Money?"
The log in and log out process is the same regardless of whether you're using a browser, or you've installed 1st Money.

To login to 1st Money:
- First, go to the homepage and tap: Log in
- Then type in your email and password.
- Then turn on: Keep me logged in
- Turning on "Keep me logged in" means you won't be asked to log in again for 30 days.
- And then tap: Log in
- And finally, you're now logged in.

To end your session and log out:
- First, tap: "Work-time menu", then "Log out"
- You may have to scroll down to see the "Log out" button.
- You'll now be logged out.
- And finally, you'll be taken back to the login page.
Keep in mind that:
- You must never turn on "Keep me logged in" on a public or shared device.
- Once you've logged in with "Keep me logged in", if you close your browser or restart your device, you can still get straight back in by typing "1st.money" into your browser, on your device.
- However, if you log in on a different browser, or on a different device, you'll be asked to log in again.
- Also, if you want to end your 30 days session early, you can log out anytime.
For advanced usage:
- You can always be logged in to more than one device (at the same time).
And that's it! That's everything you need to know about logging in and logging out of 1st Money!
2. How do I change my password?
 1:11
1:11
"How do I change my password?"
It's a good idea to change your password once-in-a-while. Changing your password helps to protect your payroll and salary settings, and improves your account's safety.

To change your existing password:
- First, tap: "Menu", then "Change password"
- Now, type your new password.
- Then tap: Save new password
- If the password you entered is too short, you'll see a warning.
- You'll need to enter a password that's at least 8 characters long.
- Then tap: Save new password
- And finally, once your password change has been successful, you'll see a confirmation message.
Keep in mind that:
- Your new password must always be 8 characters, or longer.
- And your password must have at least one uppercase letter, one lowercase letter, and one number.
And that's it! That's everything you need to know about changing your password!
3. How do I reset my own login password, if I've forgotten it?
 2:25
2:25
"How do I reset my own login password, if I've forgotten it?"
Sometimes you may find that you've forgotten your own login password, and can't log in.

To reset your own login password, if you've forgotten it:
- First, from the home page, tap: Login (at the top)
- Then tap: Forgot? (at the bottom)
- Next, type in your login email.
- And tap: Send password reset
- And you'll see a confirmation that a password reset email's been sent.
- Now, look in your email inbox, and open the password reset email once it arrives.
- Before you tap the Set new password button, there's a few things in the email to take note of.
- First, you've got 10 minutes from receiving the email, to tap the button. The 10-minute time limit is for your own security.
- Next, if you didn't request the password change, you can safely ignore the email. Your password hasn't been changed, and never tap the button if you weren't expecting the email.
- And also, never forward the email to anyone else. The "never forward" warning is also for your own security.
- Now, when you're ready, tap: Set new password
- And once the "Set new password" page opens, type in your new password.
- Then tap: Save new password
- And you'll be logged back in to 1st Money, and you'll see a confirmation that your new password's been saved.
- And finally, if you ever want to change your password again, tap: "Menu", then "Change password"
Keep in mind that:
- Your new password must always be 8 characters, or longer.
- And your password must have at least one uppercase letter, one lowercase letter, and one number.
- Also, if you've sent more than one, only the most recently sent password reset email works.
- The most recently requested email automatically cancels all the previous requests, so those emails no longer work.
And that's it! That's everything you need to know about how to reset your own login password, if you've forgotten it!
How do I resend a login invite, if the original's lost?
 1:56
1:56
"How do I resend a login invite, if the original's lost?"
Sometimes you may find that one of your people can't find their original login invite, and can't log in.

To resend a login invite email to one of your people:
- First, select the person who can't find their original login invite on: "Menu", then "People"
- Then scroll down to their "Login" heading.
- And tap: Resend invite
- And then tap: Yes ... resend it
- You'll now get an "Invited" confirmation.
- And finally, you can get back in touch with the person who can't find their original login invite, and ask them to check their email.
You may notice:
- That the Resend invite only shows while the person's "Login status" is set to: "Waiting ... to be confirmed"
- If you switch to a person who's already confirmed their login invite.
- Their "Login status" changes to: "Confirmed"
- And now that their Resend invite no longer shows, instead it shows: Send password reset
Keep in mind that:
- If the person still doesn't get the login invite, ask them to look in their "Spam" folder.
- Also, make sure that you've spelt their email correctly.
- If all else fails, try sending the invite to a different email.
- Also, if you've sent more than one login invite email, only the most recently sent email works.
- The most recently sent login invite email automatically cancels all the previous requests. So the previous login invite emails won't work anymore.
And that's it! That's everything you need to know about how to resend a login invite email!
How do I send a reset email if a person's forgotten their password?
 1:36
1:36
"How do I send a reset email if a person's forgotten their password?"
Sometimes you may find that one of your people has forgotten their own login password, and can't log in.

To send a login password reset email to one of your people:
- First, select the person who's forgotten their password on: "Menu", then "People"
- Then scroll down to their "Login" heading.
- And tap: Send password reset
- And then tap: Yes ... send it
- You'll now get an "Email sent" confirmation.
- And finally, you can get back in touch with the person who's forgotten their password, and ask them to check their email.
Keep in mind that:
- There's no way for an admin to see or change another person's password.
- The best you can do is to tap the "Send password reset" button so the person can reset it for themself.
- Also, if you've sent more than one password reset email, only the most recently sent email works.
- The most recently sent password reset email automatically cancels all the previous requests. So the previous password reset emails won't work anymore.
To learn more:
- About how a person resets their own password, once the email arrives, watch the video on: Resetting your login password
And that's it! That's everything you need to know about how to send a password reset email!
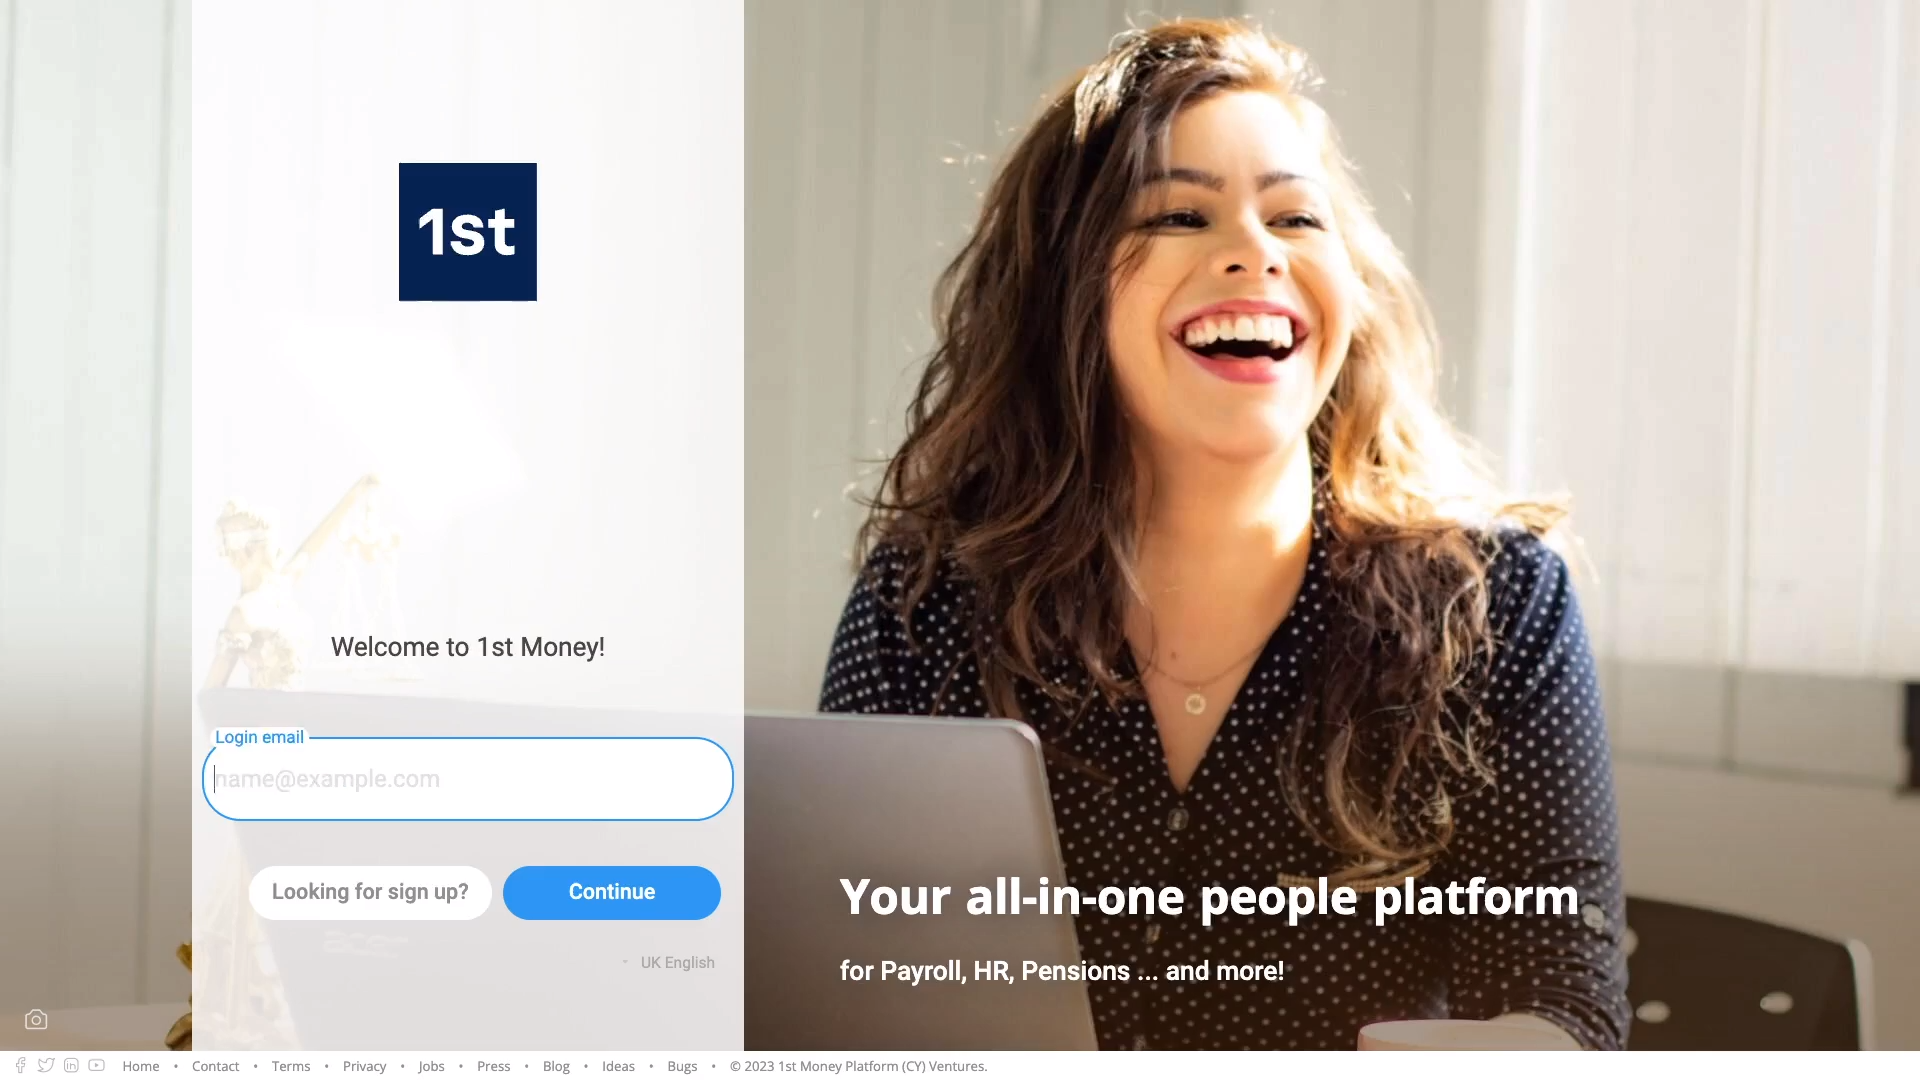
How do I sign up for my own org account?
 3:41
3:41
"How do I sign up for my own org account?"
When you sign up to 1st Money, you'll instantly get your own org account as a full admin.

To sign up for your own org account in 1st Money:
- First, open your browser, and type in the website address: "1st.money"
- Next, scroll down the page a bit, and tap into the signup box next to the big blue Try it now! button.
- Type in your email.
- And then tap: Try it now!
- And you'll see a prompt asking you to: "Go check your email"
- In your email inbox, you'll immediately get a signup confirmation email.
- Next, tap: Confirm sign up
- And fill in the three pieces of signup info, including your first name.
- Last name.
- And the name of your company or org.
- Then tap: Next
- And now, you're all done! You've now instantly got your own org account on 1st Money.
- Next, tap the setup video to learn what to do next.
- And finally, the setup video shows you how, with six setup steps, you can be all ready for your next payday in only 5 minutes.
You may notice:
- That if you want to skip watching, and explore 1st Money on your own, you can always tap: Maybe later
- You'll see a reminder, in the bottom corner, showing you how to continue the six setup steps later, at any time.
- And now you're free to explore 1st Money however you like.
- And later, when you're ready, tap Continue setup, in the bottom corner, and you're instantly back to the six setup steps.

You may also notice:
- That you've not set your login password yet.
- To set your login password after signing up for an org account, check your email, and look for the "Welcome to 1st Money!" email.
- And tap: Set password
- You'll see a note reminding you that your password needs to be at least 8 characters.
- And include a lower case letter, an upper case letter, and a digit.
- Once you've typed in your new password, tap Save password, and you'll get a confirmation that your new password's saved.
Keep in mind that:
- You can sign up to 1st Money using any browser, and on any device. Including your laptop, your smartphone, or your tablet.
- 1st Money is 100% supported by most browsers, including Chrome, Edge, Firefox, and others.
For advanced usage:
- If you don't immediately get your signup confirmation email, try checking your "Spam" folder.
- The email usually arrives in seconds.
- Alternatively, if it still doesn't arrive, try signing up with a different email. You can always change the email later.
To learn more:
- About how you can be all ready for your next payday in only 5 minutes, watch the video on: Continue setup
- To learn how to create additional orgs, watch the video on: Creating a new org
And that's it! That's everything you need to know about signing up for your own org account!