
People

 1:28
1:28 1:20
1:20 3:39
3:39 1:19
1:19 1:17
1:17 1:31
1:31 2:00
2:00 1:45
1:45 3:12
3:12 1:45
1:45 1:15
1:15 1:04
1:04 1:14
1:14 1:00
1:00 3:18
3:18 2:47
2:47 2:09
2:09 1:04
1:04 2:03
2:03 3:40
3:40 1:45
1:45 2:40
2:40 1:49
1:49 2:08
2:08 1:45
1:451. How do I set my contact details?
 1:33
1:33
"How do I set my contact details?"
Adding your contact details makes it easier for people in your team to contact you.
To add your contact details:
- First, open yourself on: "Menu", then "Me"
- Then tap: "Settings", then "Person settings"
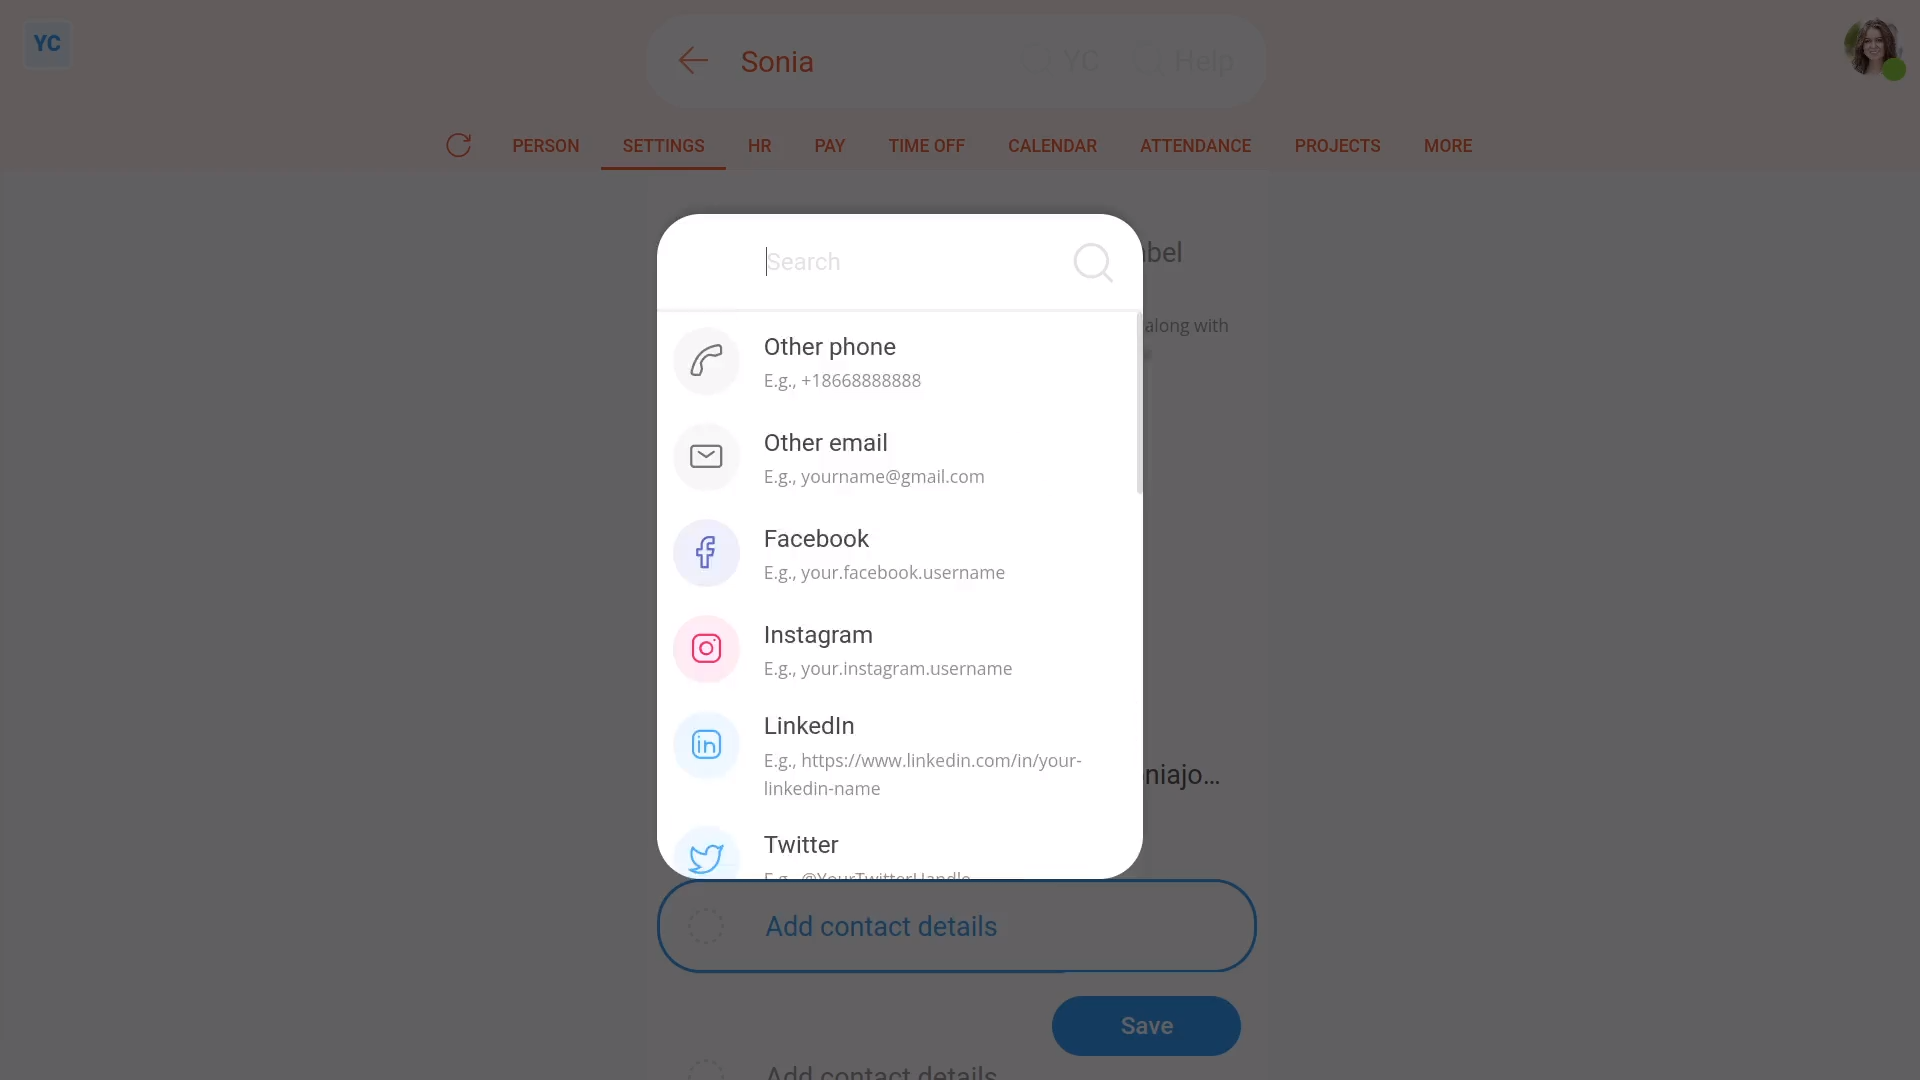
- You'll see that in addition to your mobile number, there's other spaces for you to add more contact details.
- Each time you add a contact detail, first set the type of contact, then add the detail.
- Each type of contact has a different format, so you'll see hints on how to enter them.
- Only enter contact details that you don't mind being shared with nearby people in your org. Such as your manager, the admins, or with people you manage.
- And take care to enter them correctly.
- And finally, when you're finished, tap: Save

You may notice:
- When you tap back to the Person tab, and tap the "Reload tab" button: (at the top)
- You'll see all your newly saved contact details.
For advanced usage:
- Adding contact details also allows you to have your contact details show on your email signature.
- To learn more, watch the video on: Using email signatures
 Using email signatures
And that's it! That's everything you need to know about setting your contact details!
2. How do I set a person's date of birth?
 1:23
1:23
"How do I set a person's date of birth?"
Your date of birth is an essential piece of info for both payroll and government submissions.

To set a person's date of birth:
- First, select the person on: "Menu", then "People"
- Then tap: "Settings", then "Person settings"
- A calendar pops open when you tap into: "Date of birth"
- Set the year first.
- Then set the month, and day.
- And finally, tap: Save
You may notice:
- That, after saving, and after you tap the "Reload tab" button: (at the top)
- Then when you hover your mouse over the "Date of birth" box, you can see the person's exact age.
Keep in mind that:
- For younger people, whose pay is set to "Tracking minimum wage", an accurate date of birth is essential.
- Their age affects how much a younger person's paid.
To learn more:
- About how setting the date of birth affects minimum wage, watch the video on: Tracking minimum wage
And that's it! That's everything you need to know about setting a person's date of birth!
3. How do I set managers and supervisors?
 3:43
3:43
"How do I set managers and supervisors?"
A person's manager can never be set to empty, but you can change it anytime.
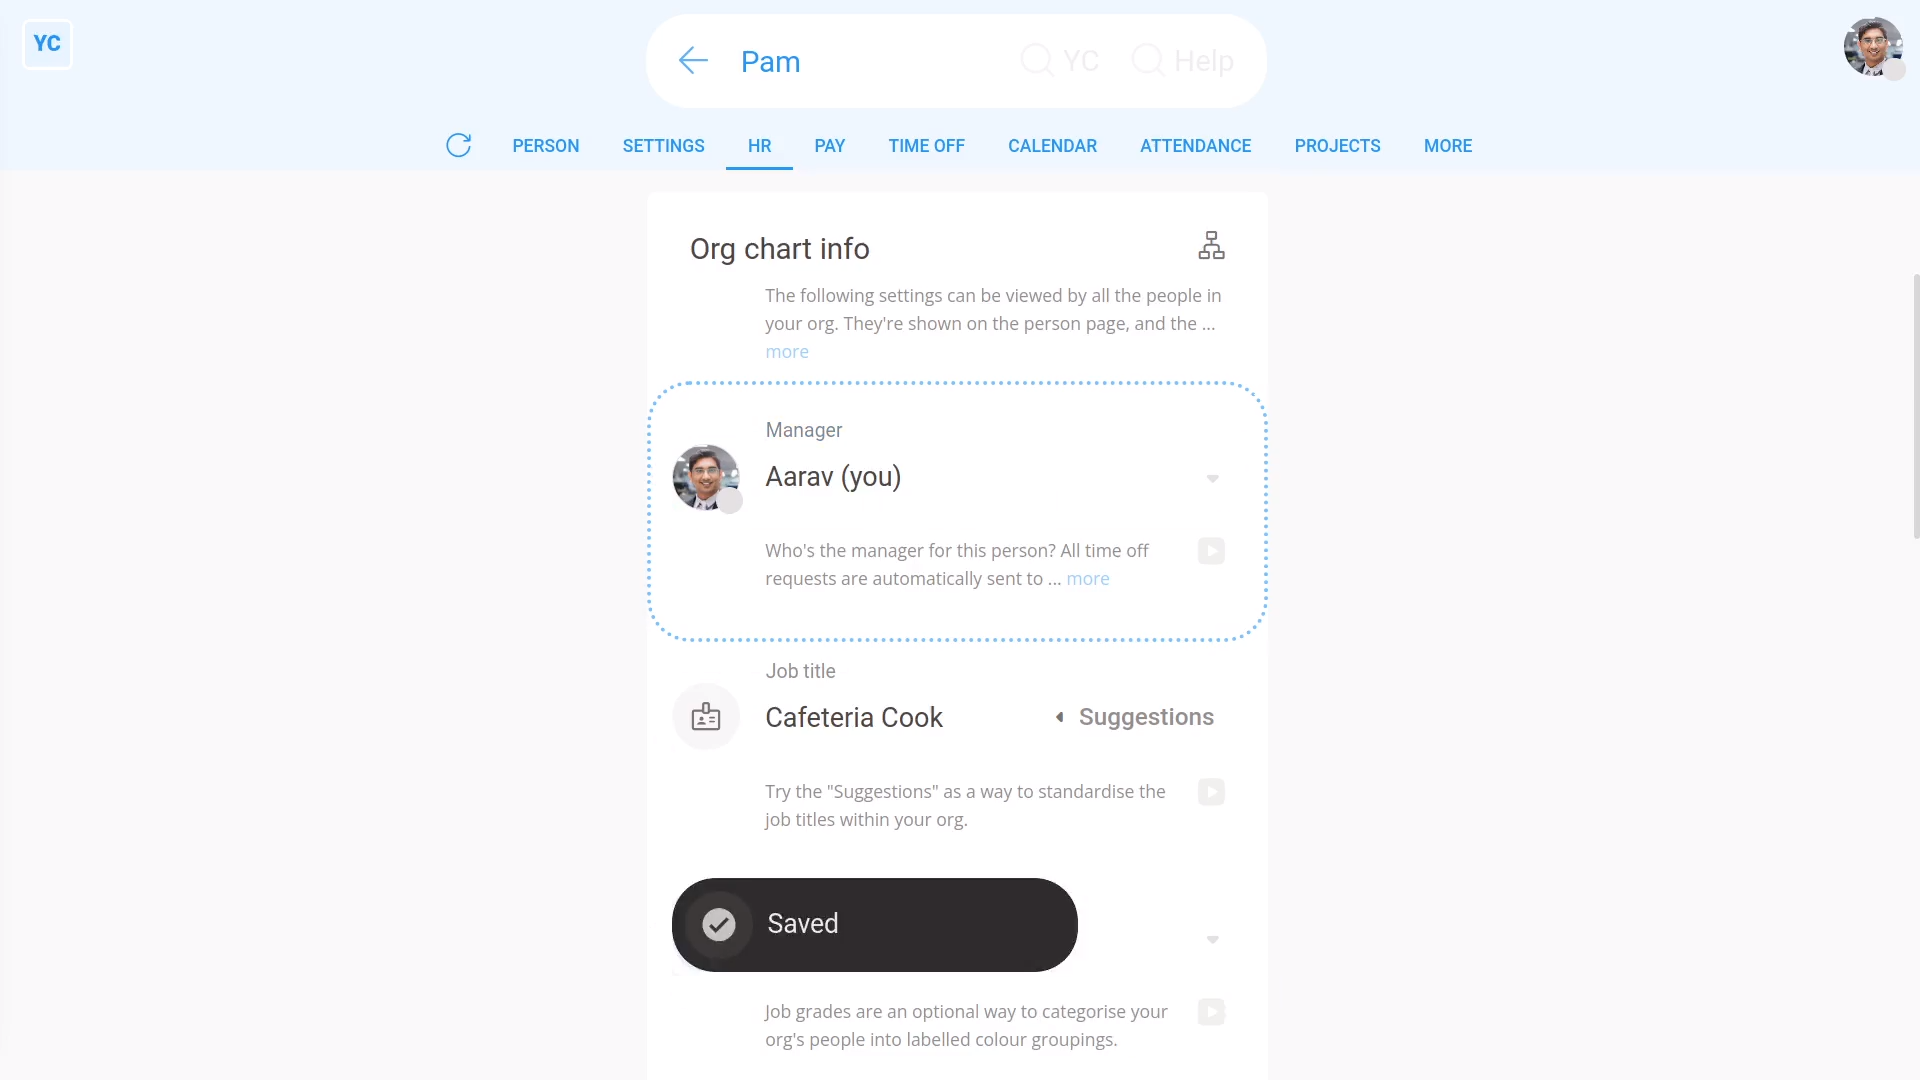
To change a person's manager:
- First, select the person on: "Menu", then "People"
- Then tap: "Settings", then "Job settings"
- Then select the new manager.
- And tap: Save
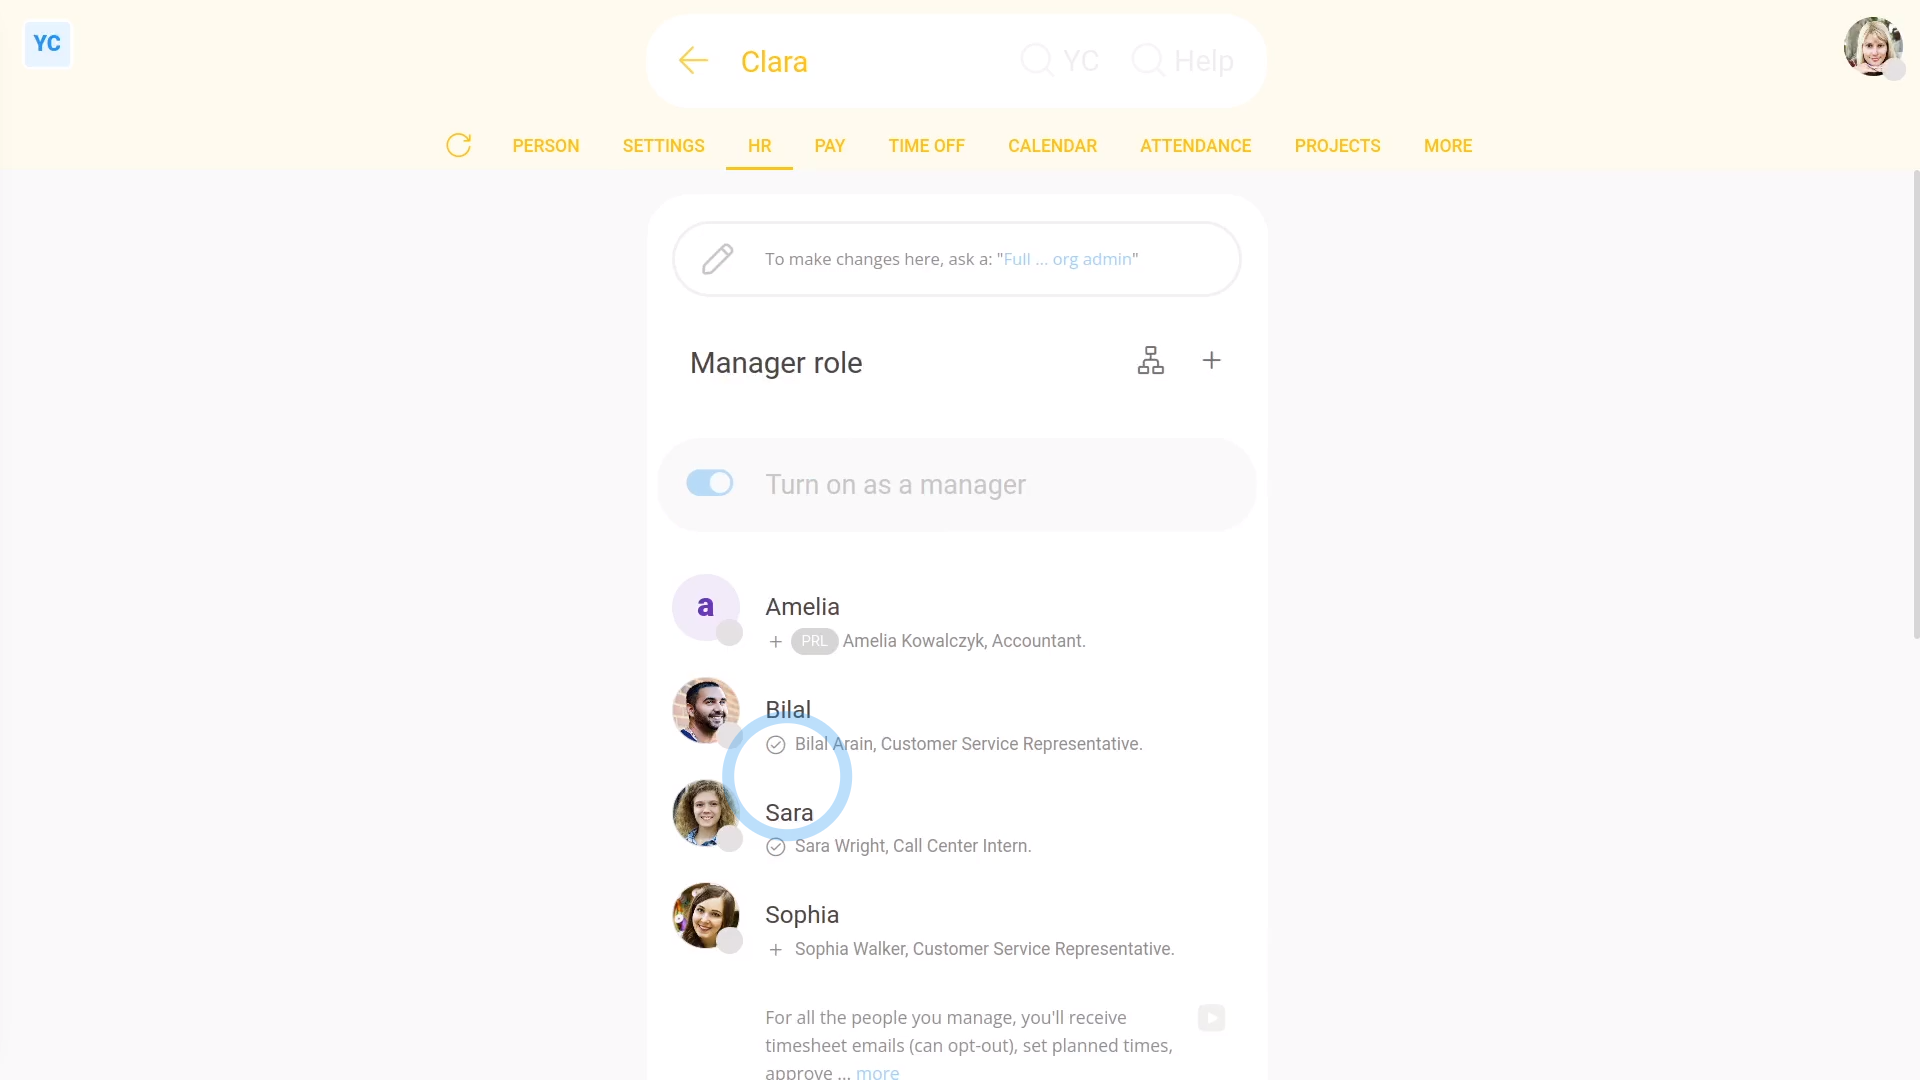
- Alternatively, if the manager you want isn't showing in the list.
- Either, tap: Add yourself, or tap: Add (at the bottom)
- Once it slides out on the right, tap: "Turn on as a manager"
- After it reloads, the new manager is added to the list.
- And finally, select them, and tap: Save
Keep in mind that:
- All time off requests are automatically sent to the manager.
- When a new person's first invited to have a login, a manager is automatically set. It's set to the person who sent the login invite.
- You can always change their manager to a different person later.
- Also, people who don't have admin permissions can still be managers.
- But only admins can change who's managing who.
Now, switching person. You're now logged in as a manager with no admin permissions.
To see a list of all people you're managing:
- First, open yourself on: "Menu", then "Me"
- Then tap: "Settings", then "Roles"
- And finally, you can see all people you're managing.
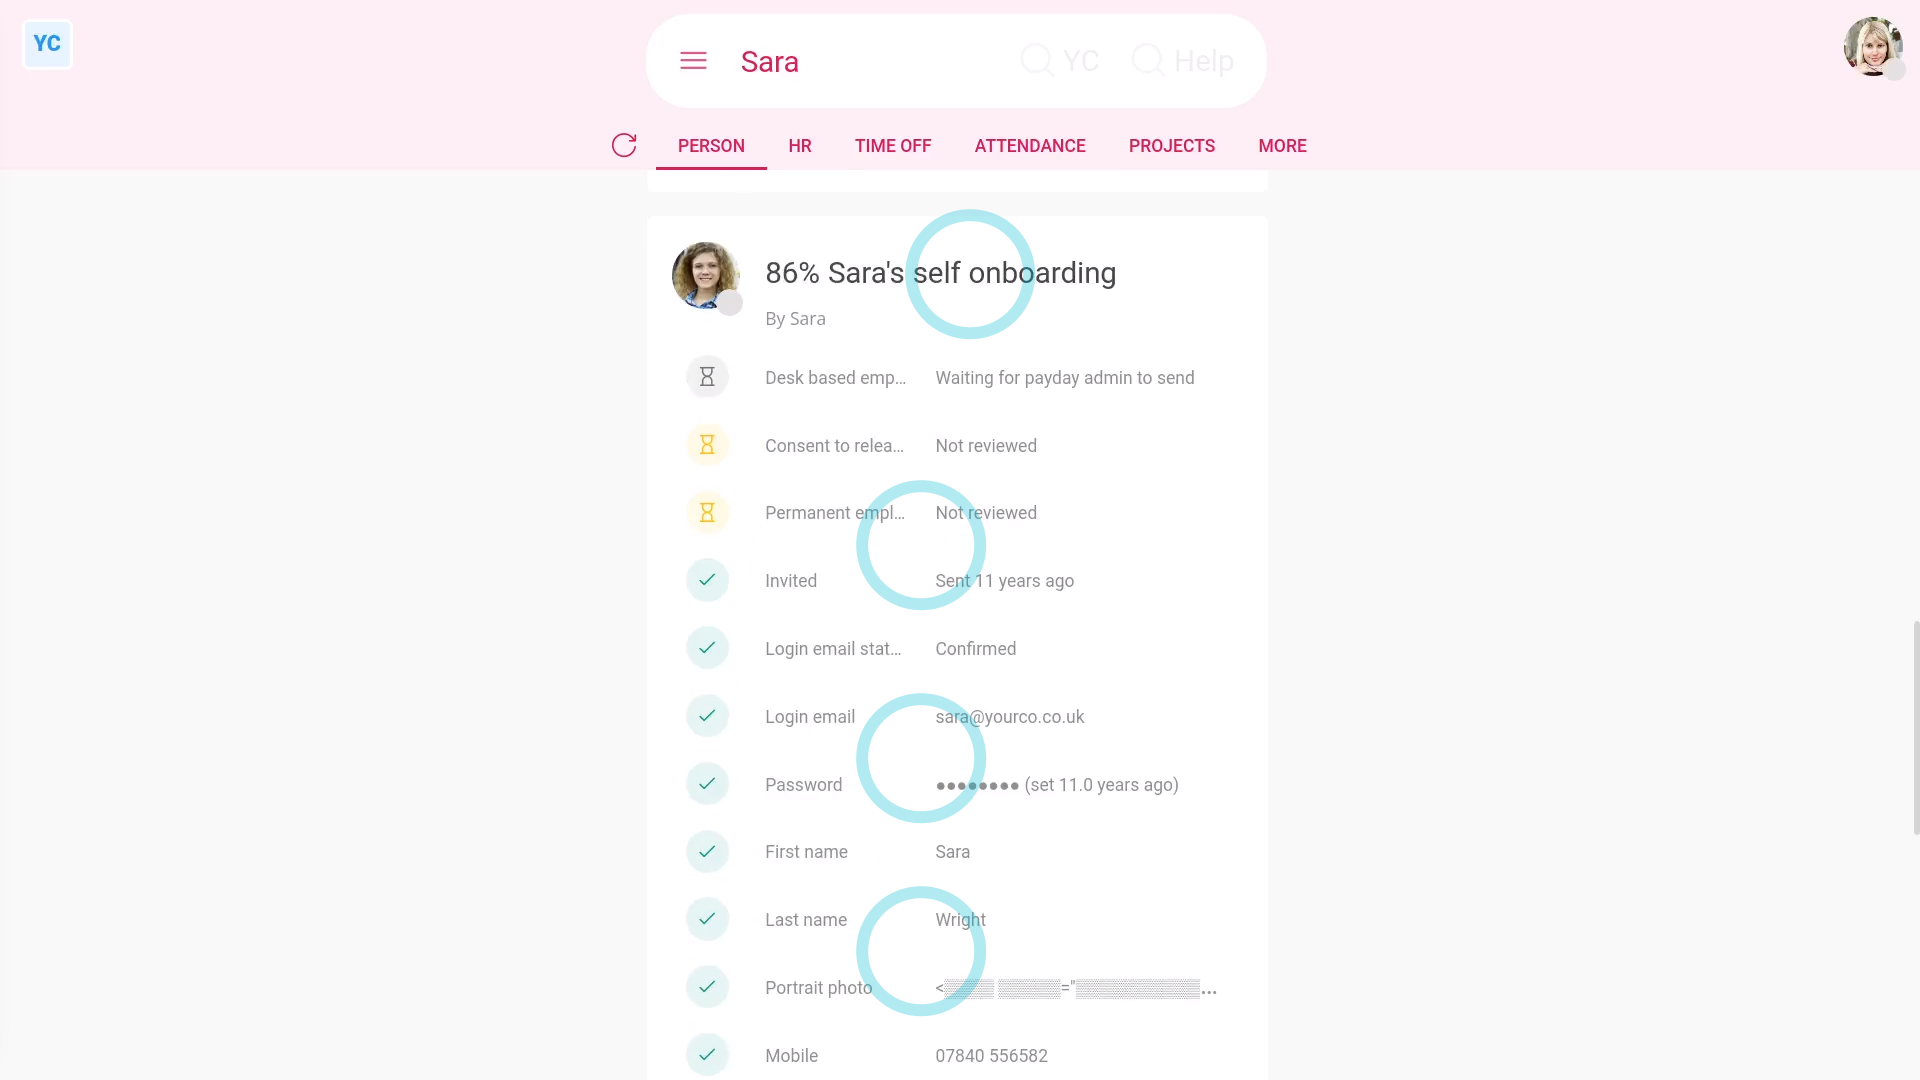
To see what a manager has access to:
- First, open one of the people you're managing on: "Menu", then "People"
- A manager, without admin permissions, can only see four things about the people that're managed or supervised by them.
- First, the manager can see the person's contact info.
- Second, the manager can see the person's "Self onboarded" info (although some are greyed out for privacy reasons).
- Third, the manager can see all the person's "Attendance" reports, when the manager taps: Attendance (at the top)
- Including setting both "Done time" and "Planned time" in timesheets.
- And finally, fourth, the manager can see all the person's time off info, when the manager taps: Time off (at the top)
You may notice:
- That all four things are also available to the supervisors, except supervisors don't see time off.
Now, switching person. You're now logged in as a person who's got org admin permissions.
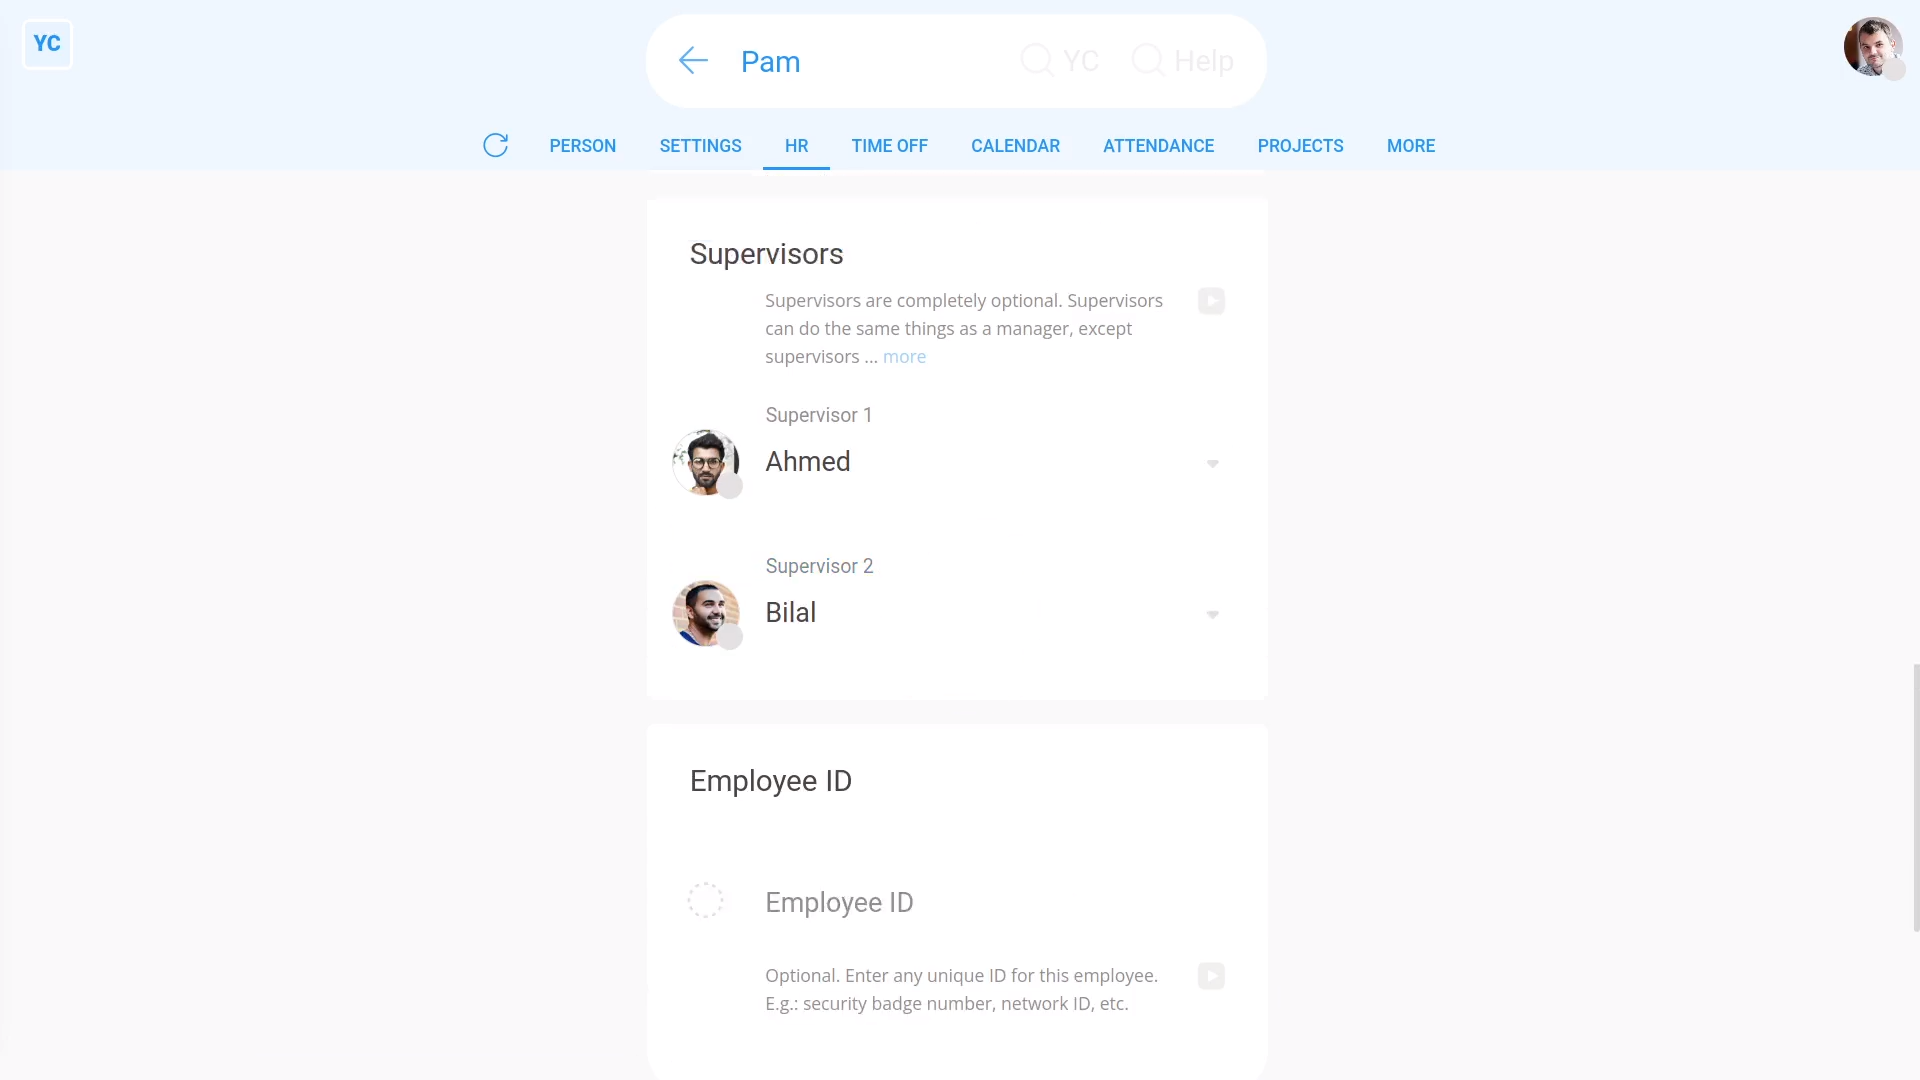
To set a person's supervisor:
- First, select the person on: "Menu", then "People"
- Then tap: "Settings", then "Job settings"
- Then scroll down and select the new supervisor.
- You can set up to two supervisors.
- And finally, tap: Save
Also remember that:
- In contrast to managers, supervisors are completely optional. You don't have to set them.
- Also, supervisors don't show up in the: "Management org chart"
- And you can only set a maximum of two supervisors for each person, or you can always leave it empty.
And that's it! That's everything you need to know about setting managers and supervisors!
4. How do I update my portrait photo?
 1:20
1:20
"How do I update my portrait photo?"
Your portrait photo helps others in your team to recognise you.
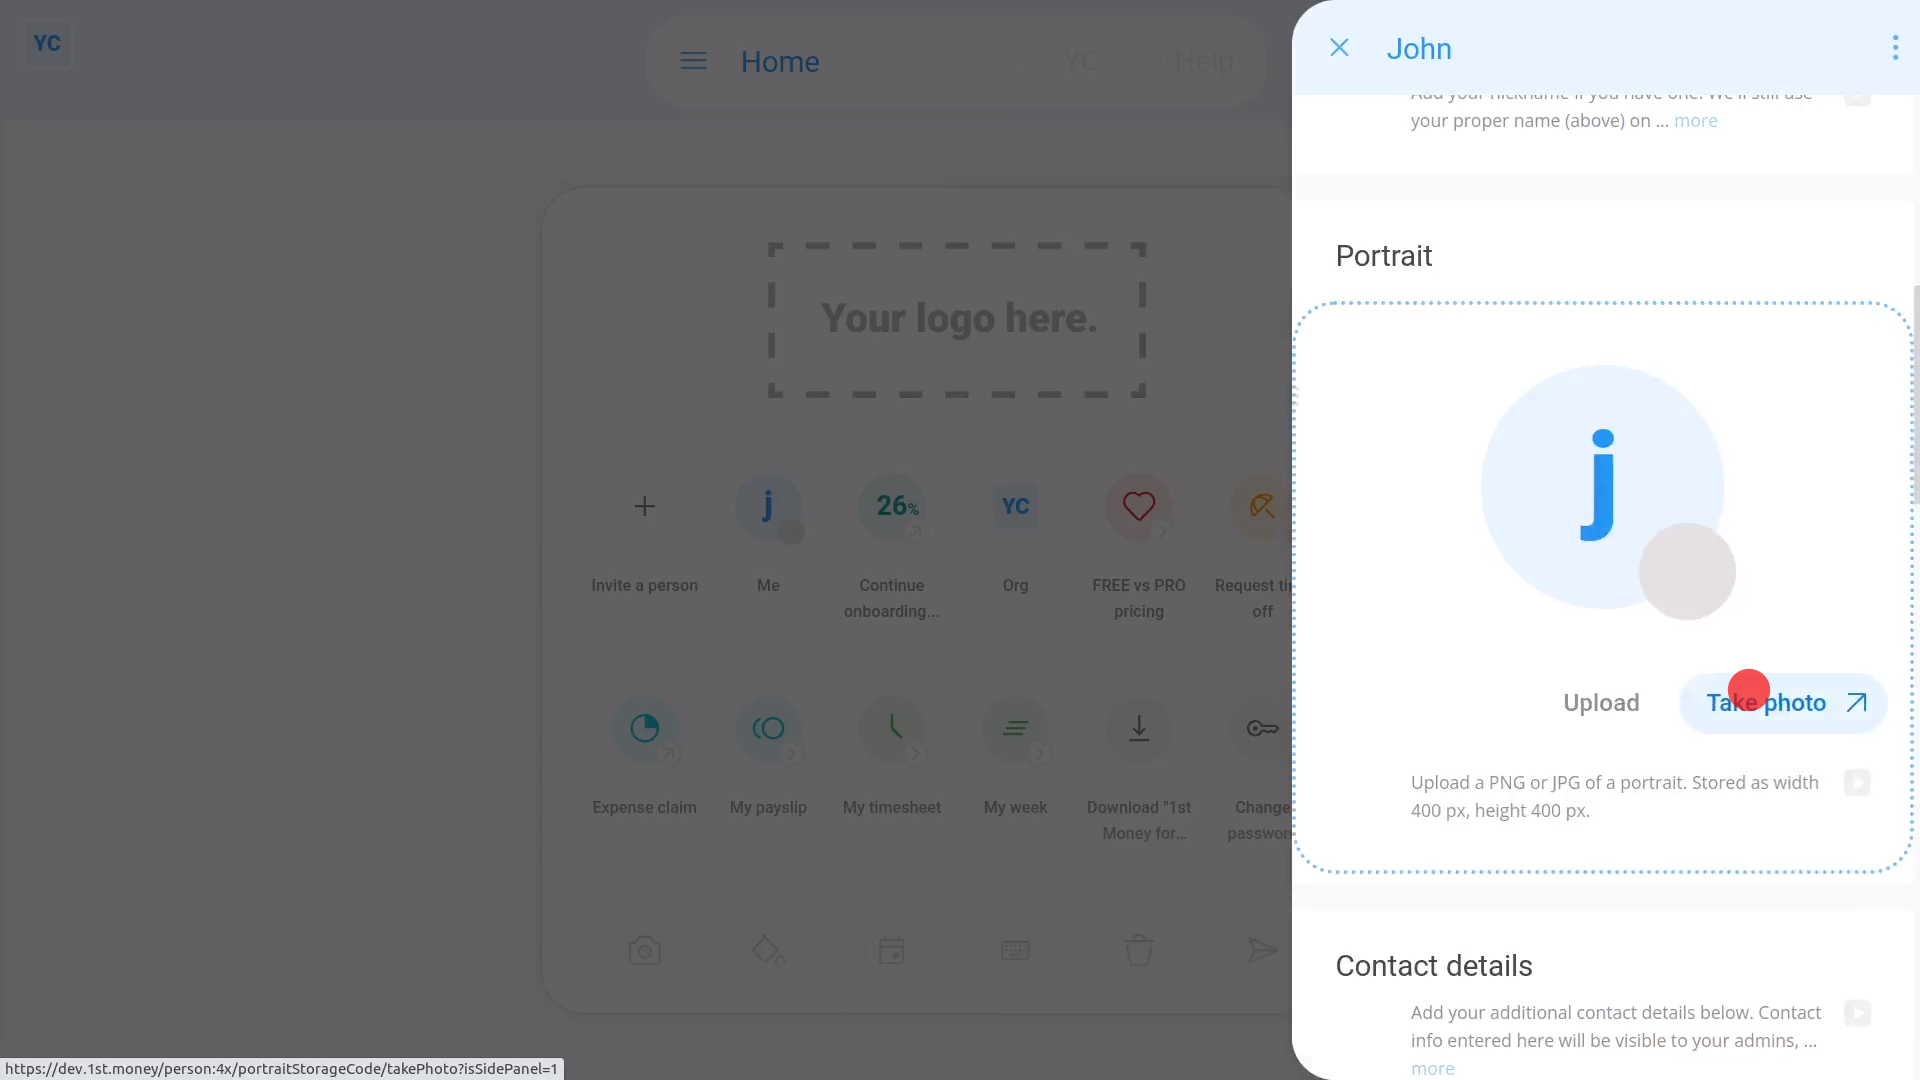
To update your portrait photo:
- First, tap: "Menu", then "Update portrait"
- Then tap: Take photo
- Look into the camera ... with your best smile, and tap: Take photo
- If you're not happy with the photo, tap: Redo
- And finally, if you're happy with it, tap: Save
You may notice:
- That your new portrait photo now shows in the top-right corner.
- And also, everyone else in your org, now sees it in the people list, at: "Menu", then "People"
For advanced usage:
- If you're an admin, you can also use your login to update the portrait photo of others on your team.
- To take other people's photo, open 1st Money on your smartphone.
- Then select the person on: "Menu", then "People"
- Then walk over to the person's desk and ask if you can take their photo.
And that's it! That's everything you need to know about updating portrait photos!
How do I change my language setting in 1st Money?
 1:19
1:19
"How do I change my language setting in 1st Money?"
When you first log in, the default language option is set to: "Same as device"
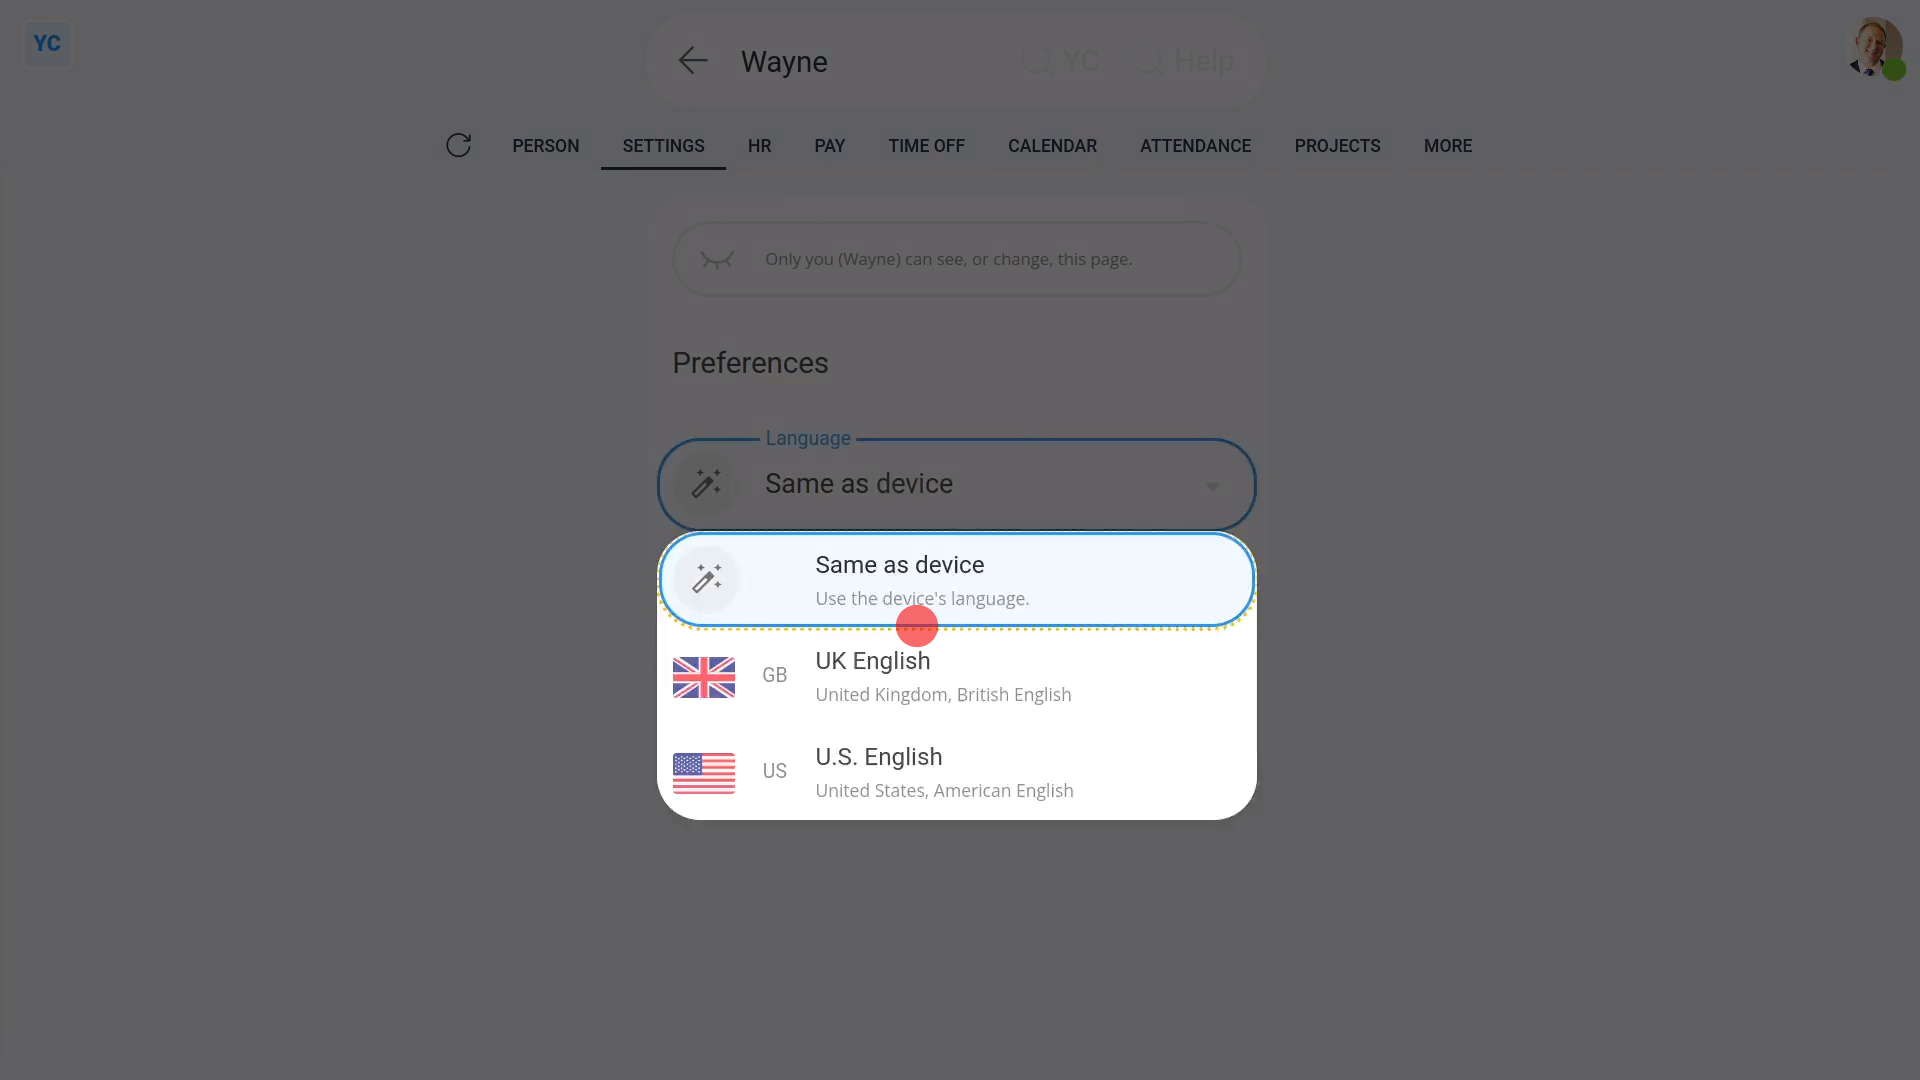
To change your language setting:
- First, open yourself on: "Menu", then "Me"
- Then tap: "More", then "Language"
- Then select a language.
- Then tap: Save
- And finally, once everything's automatically reloaded, it now all shows in your newly selected language.
Keep in mind that:
- There's also a shortcut to change your language near the bottom of the menu.
- And remember, changing your language setting doesn't affect your payroll in any way.
- A UK pay batch would still show in British Pounds, even when you, or any other person, sets their language to: "U.S. English"
You may notice:
- If you select "U.S. English", dates show in the American "month-day-year" format.
- But if you select "UK English", dates instead show in the British "day-month-year" format, as expected.
And that's it! That's everything you need to know about setting your language!
How do I check, or fix the spelling of my name?
 1:37
1:37
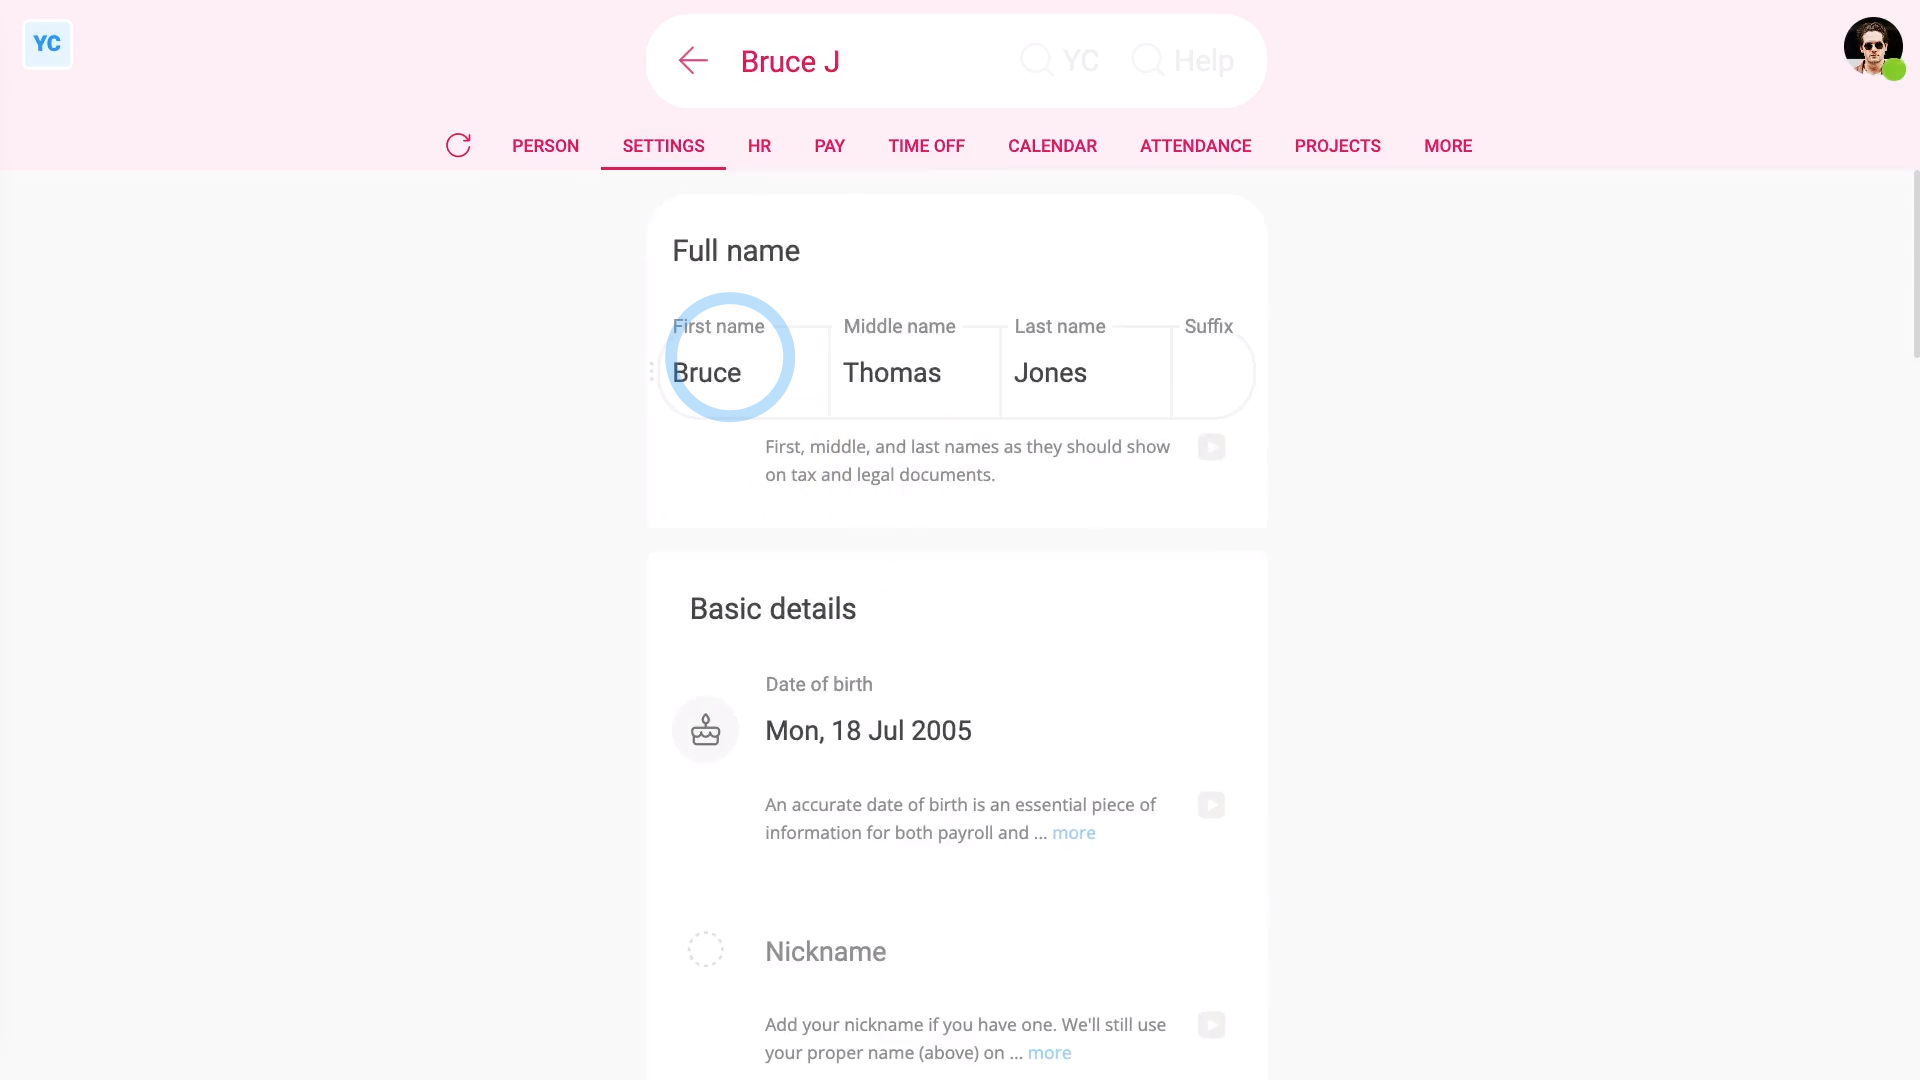
"How do I check, or fix the spelling of my name?"
It's important to check that your full name's correct. It's used when submitting government taxes, and for employment documents.
To check your full name:
- First, open yourself on: "Menu", then "Me"
- Then tap: "Settings", then "Person settings"
- Check, and fix if required, your full name.
- Including your middle name, and also any suffix (on the end).
- And finally, tap: Save
You may notice:
- Occasionally, there's two people with the same first name.
- If so, it adds their surname initial to their names each, so you can tell them apart.
To set a nickname for yourself:
- First, open yourself on: "Menu", then "Me"
- Then tap: "Settings", then "Person settings"
- Type in your nickname.
- And tap: Save
- And finally, when you open the "People" list, you'll see that you're now listed by your nickname.
Keep in mind that:
- Even if you're listed in the "People" list by your nickname, official docs still use your full name.
- Both tax submission and employment documents still use your full name.
And that's it! That's everything you need to know about setting your name!
How do I delete a person?
 2:02
2:02
"How do I delete a person?"
When you delete a person, there's checks on settings, to make sure the person's employment is properly ended.
To delete a person:
- First, select the person on: "Menu", then "People"
- Then tap: "HR", then "End employment"
- And set their: "Date employment ended"
- If the person does timesheets, you can tap the link to set their end date to the date of their last timesheet.
- Next you'll be asked why you're ending the person.
- Normally, you'd tap Help me pick to end the person properly.
- However, to instead skip the step, tap the three dots: (in the top-right corner)
- Then tap: Close
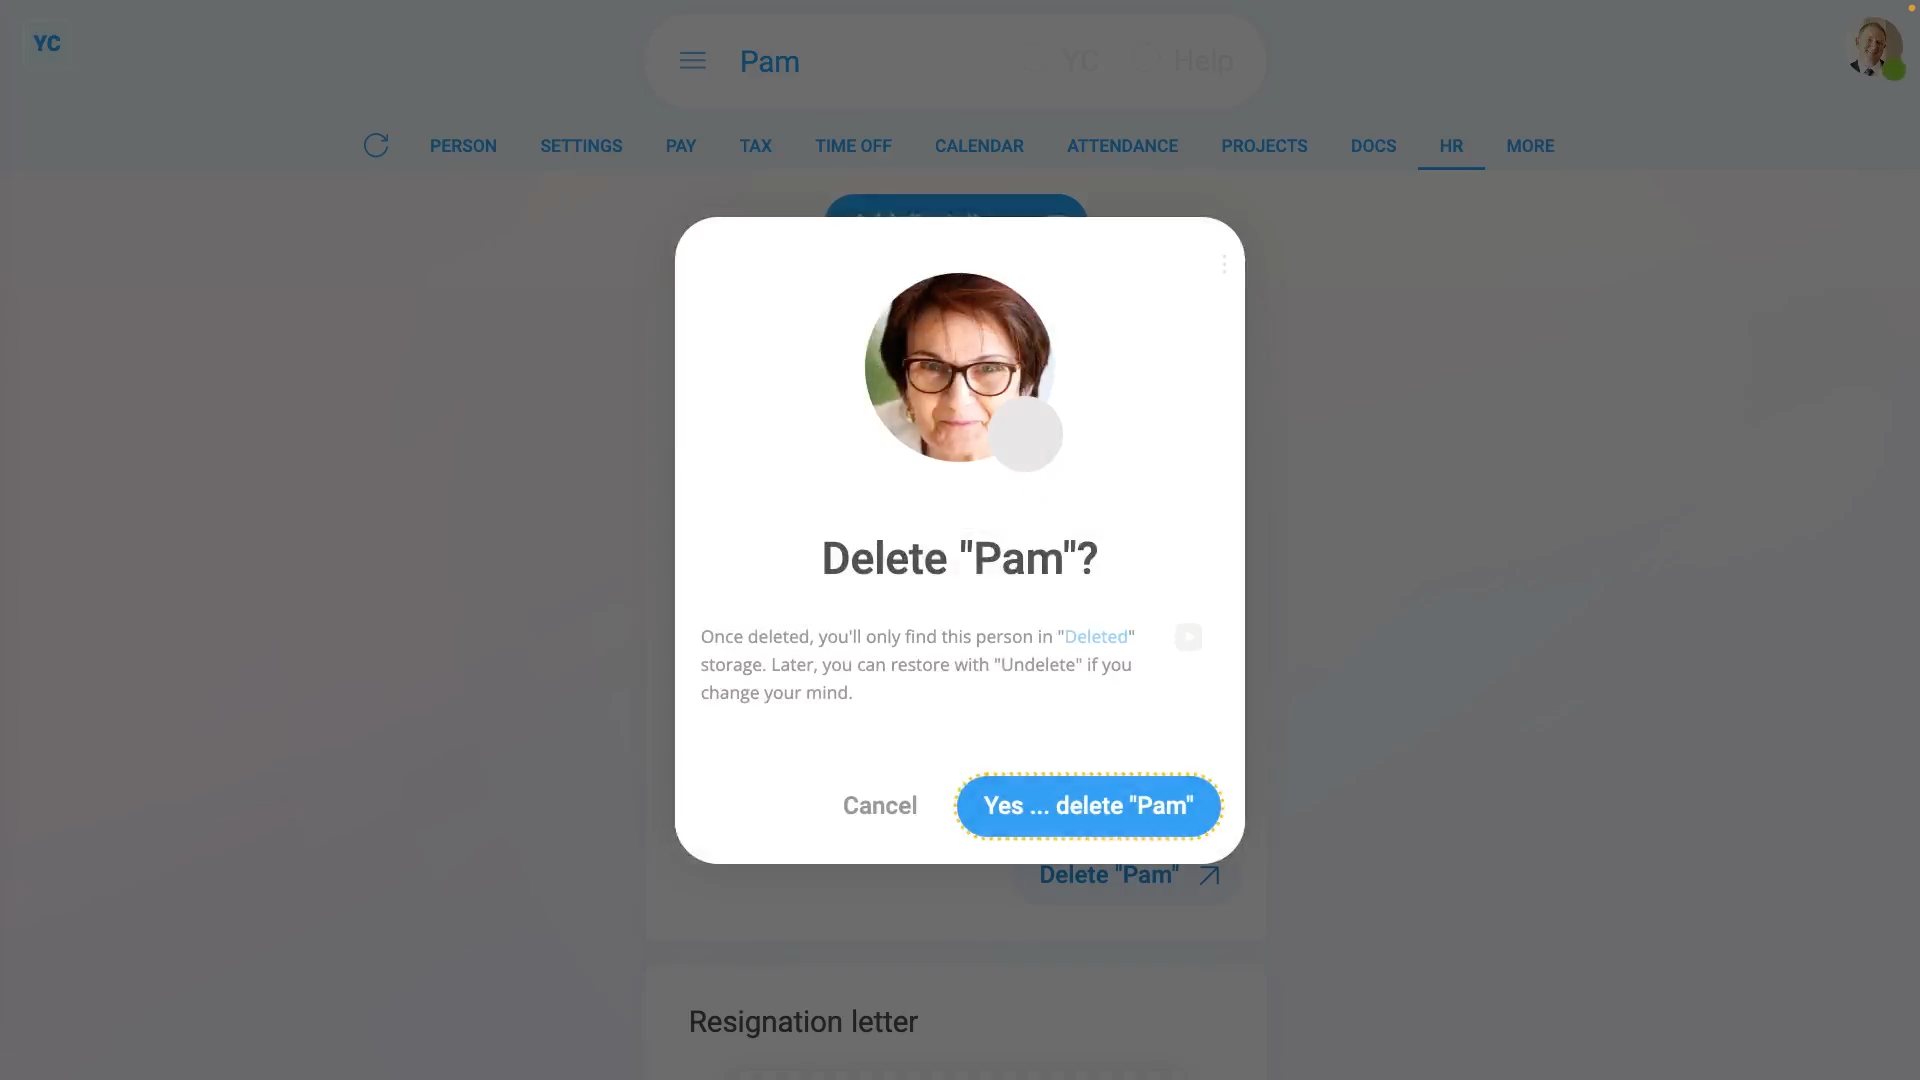
- Now, tap: Delete
- And then tap: Yes ... delete
- And finally, you'll now see that the person's been deleted.
Keep in mind that:
- Because a deleted person remains in the "Deleted bin", you can still retrieve their old employment info, like filed payslips, and leaving documents, like their P45.
- If the person's paid a salary, the person continues to be paid up until their: "Date employment ended"
- If the person's paid hourly, the person's only paid for their clocked-in timesheet time up until their: "Date employment ended"
You may notice:
- Once a person's deleted, the person can't log in anymore, and can't clock-in timesheet time anymore, either.
- If you change your mind and want them back again, tap: Undelete (at the bottom)
To learn more:
- About alternatives to deleting a person, watch the videos on: Temporarily blocking access and: Temporarily halting pay
And that's it! That's everything you need to know about deleting a person!
How do I list all changes made by a person?
 1:44
1:44
"How do I list all changes made by a person?"
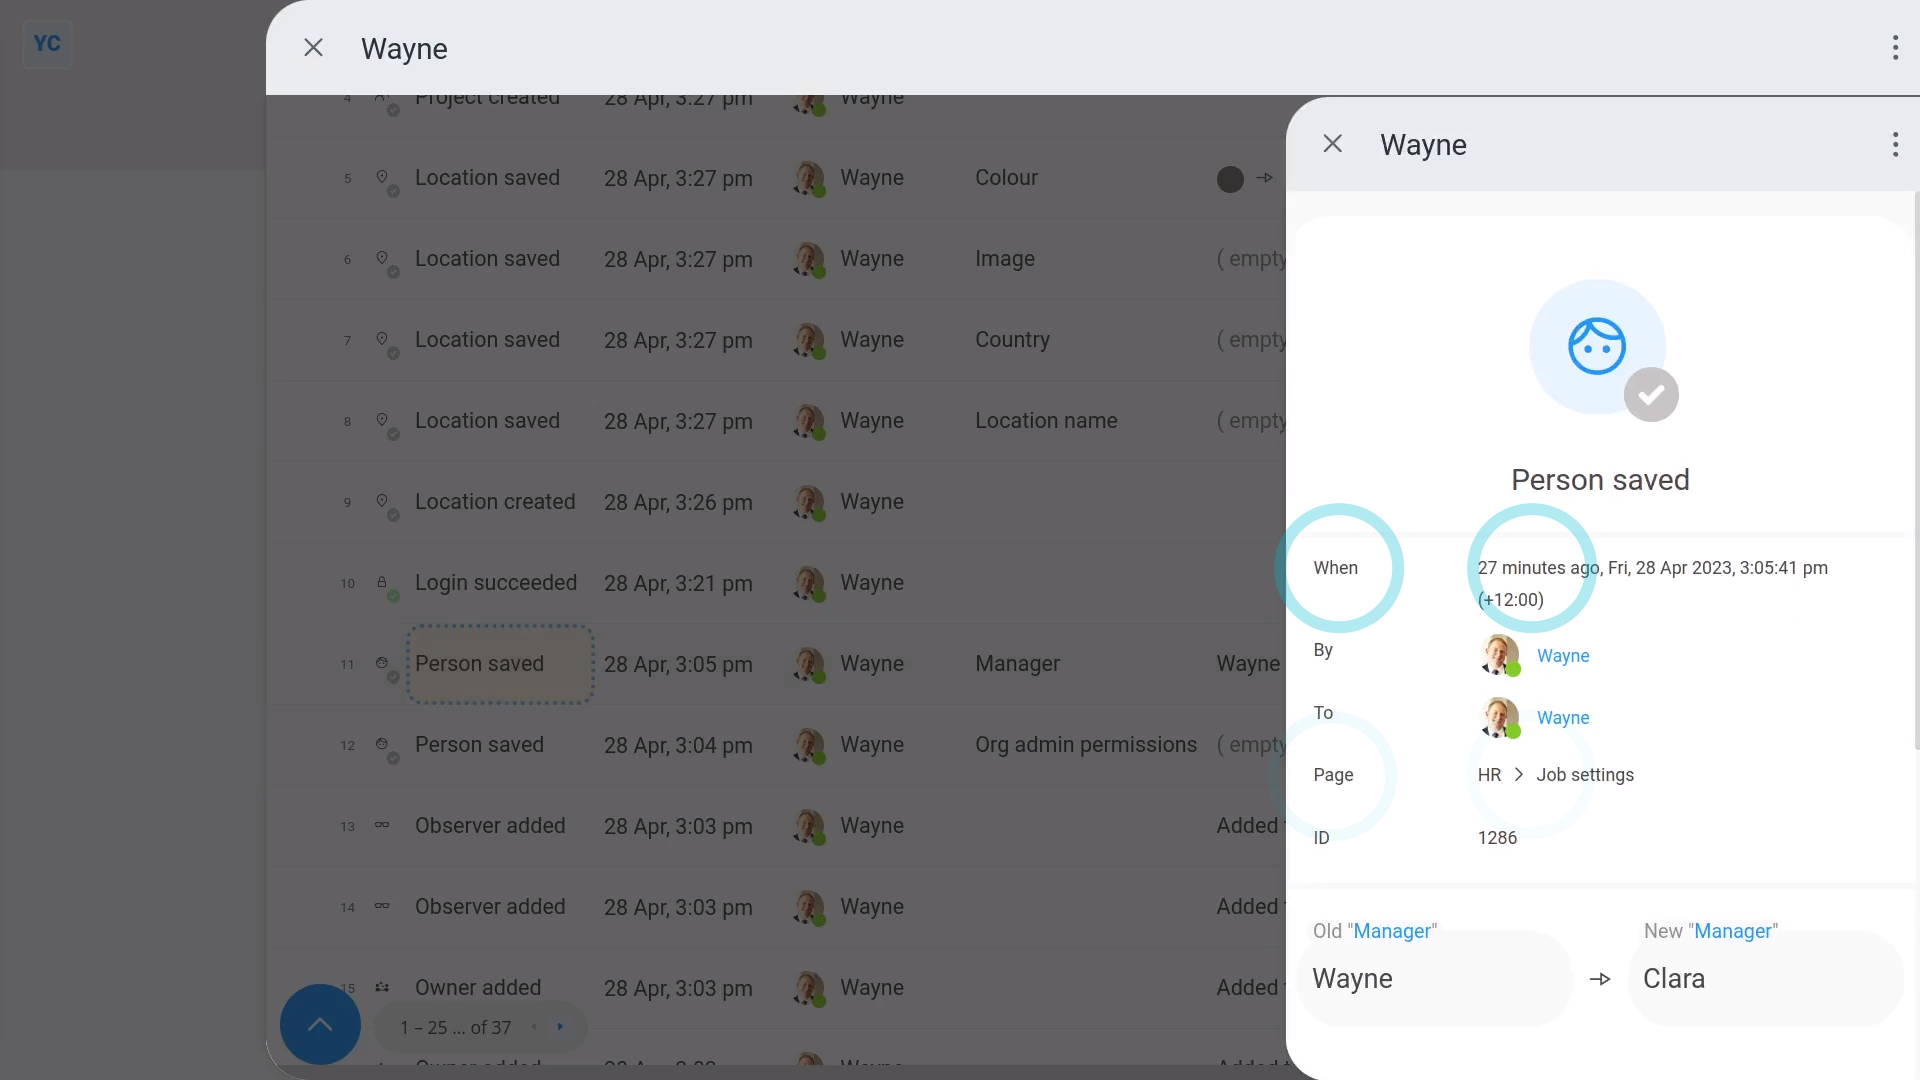
The "Activities" page lists all the changes made by a specific person, over time.
To see a person's "Activities" page:
- First, select the person on: "Menu", then "People"
- Then tap: "More", then "Activities"
- And by default, activities shows you changes made over the last 30 days.
- To show "Activities" events that happened with-in 90 days, tap:
" Show settings", "Dates", then "Previous 90 days" - To see more detail on any "Activities" event, tap a row.
- The "Activities" event shows you what was changed.
- And it also shows you where the change was made, and when the change was made.
- To see "Activities" of two people together, filtered by a single action, tap:
" Show settings", then "Side settings ... show" - Now you can see some more advanced filters.
- Once you control + tap another person (on the right), you'll see a list of all activities of both people listed together.
- Next, to filter the "Activities" to only a single action, tap: Created (on the left)
- And finally, you're now listing only the creates done by both people.
Keep in mind that:
- Each person can always see their own "Activities" page, but only org admins can see the "Activities" pages of others.
And that's it! That's everything you need to know about listing all changes by a person ... even going back years!
How do I manage who's following me, and how do I ghost people?
 3:16
3:16
"How do I manage who's following me, and how do I ghost people?"
The "Following me" menu shows a list of people in your org who've got access to your starts, stops, and timesheet summaries.

To see who's following you:
- First, tap: "Menu", then "Following me"
- And finally, you'll see a list showing you people who are already following you.
To understand two ways people can get into your "Following me" list:
- First, if a person decides to follow you and taps the "Add" button:
- And finally, if a person's automatically added to your follow list. An auto follow happens when you became a person's manager (or supervisor), or when that person became your manager (or supervisor).
To understand your additional follow settings that you get when you're following a person:
- First, tap the three dots: (next to their image)
- The first setting, "Include in timesheet emails ... daily":
Is on by default. - When the setting's on, you'll get a summary of the person's daily timesheets included in your daily timesheet email.
- The daily timesheet email arrives in your email inbox each day.
- The next two "pounce" settings:
Gives you a one-time notification, the next time the person starts or stops their clocked-in timesheet time. - The pounce notifications show up in the corner of your screen.
- Even though it's one-time only, you can keep turning it back on again, every time you need it again.
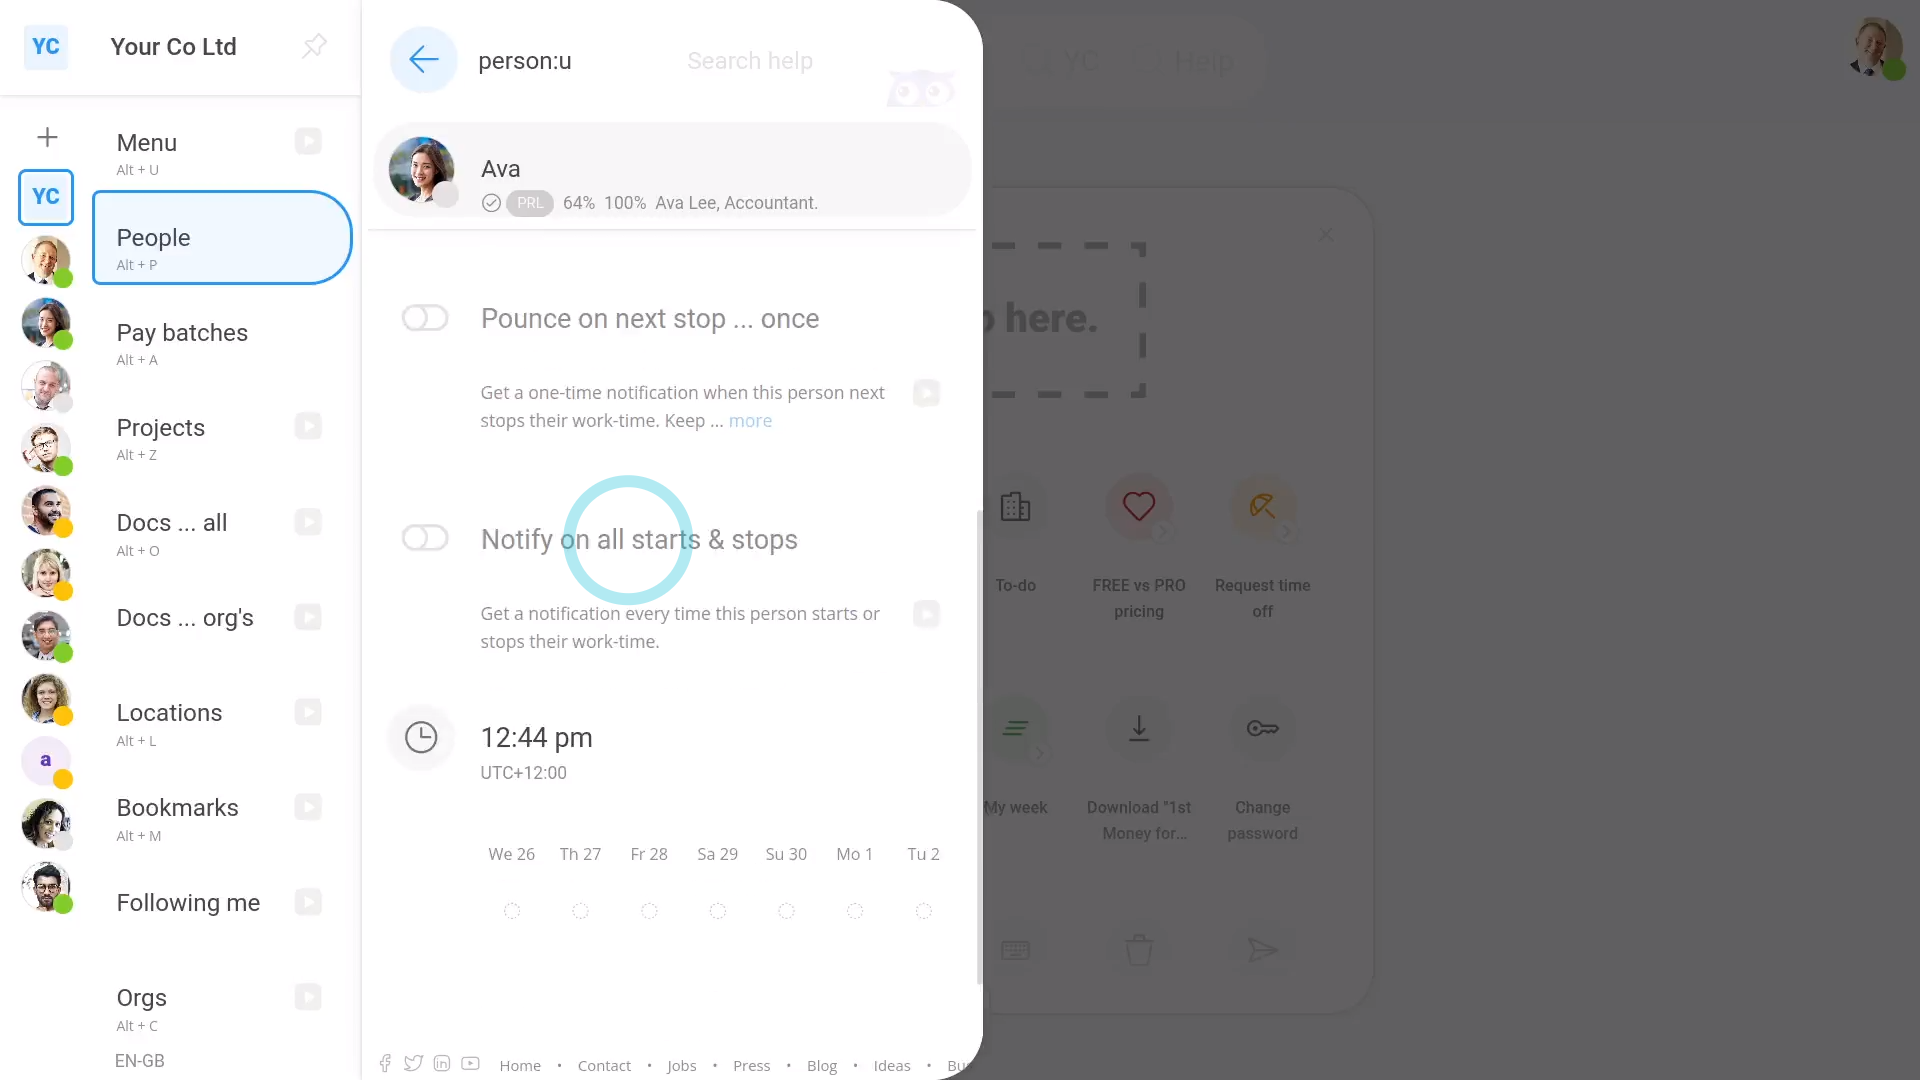
- The fourth setting is "Notify on all starts & stops":
Which gives you a notification every time the person starts or stops. - Start and stop notifications are useful if you're working closely with a person, and need to know when the person's around.
- The notification also shows up in the corner of your screen.
- And finally, you'll be notified every time the person starts or stops, until you turn it off.

To block (or ghost) a person from following you, and block their access to your starts, stops, and timesheet emails:
- First, tap: "Menu", then "Following me"
- Find the person you want to block.
- And tap the "Ghost" button:
- The person following you won't be told that you've ghosted them. But next time the person following you goes to their "People" list, your name now shows with a "Ghost" status:
- And finally, to unblock them, tap the "Ghost" button again:
For advanced usage:
- Pin out the menu.
- Now you can instantly see when your co-workers are working or on break.
Keep in mind that:
- You're free to follow or ghost as many people as you want.
- Even when a person's following you, the person still doesn't get access to any of your contact info, HR settings, or pay info.
And that's it! That's everything you need to know about managing who's following you, and how you can ghost people!
How do I set my childbirth date, and upload a maternity certificate?
 1:17
1:17
"How do I set my childbirth date, and upload a maternity certificate?"
Before requesting paid maternity leave, or statutory maternity pay, you'll need to set your expected childbirth date. It's also a good idea to upload a maternity certificate, or MAT B1, from your doctor.

To set your expected childbirth date, and upload a maternity certificate:
- First, open yourself on: "Menu", then "Me"
- Then tap: "Settings", then "Medical"
- Then scroll down to the "Births & adoptions" heading.
- And set your: "Date expecting child"
- Next, tap Take photo to take a photo of your maternity certificate. Alternatively, tap Upload if you've already got a photo of your maternity certificate.
- And finally, it auto saves, and you're now all set to request paid maternity leave.
And that's it! That's all you need to do to set your expected childbirth date, and upload a maternity certificate!
How do I set my emergency contact info?
 1:06
1:06
"How do I set my emergency contact info?"
Setting your emergency contact info can make it easier for your admins to seek help, in an emergency.
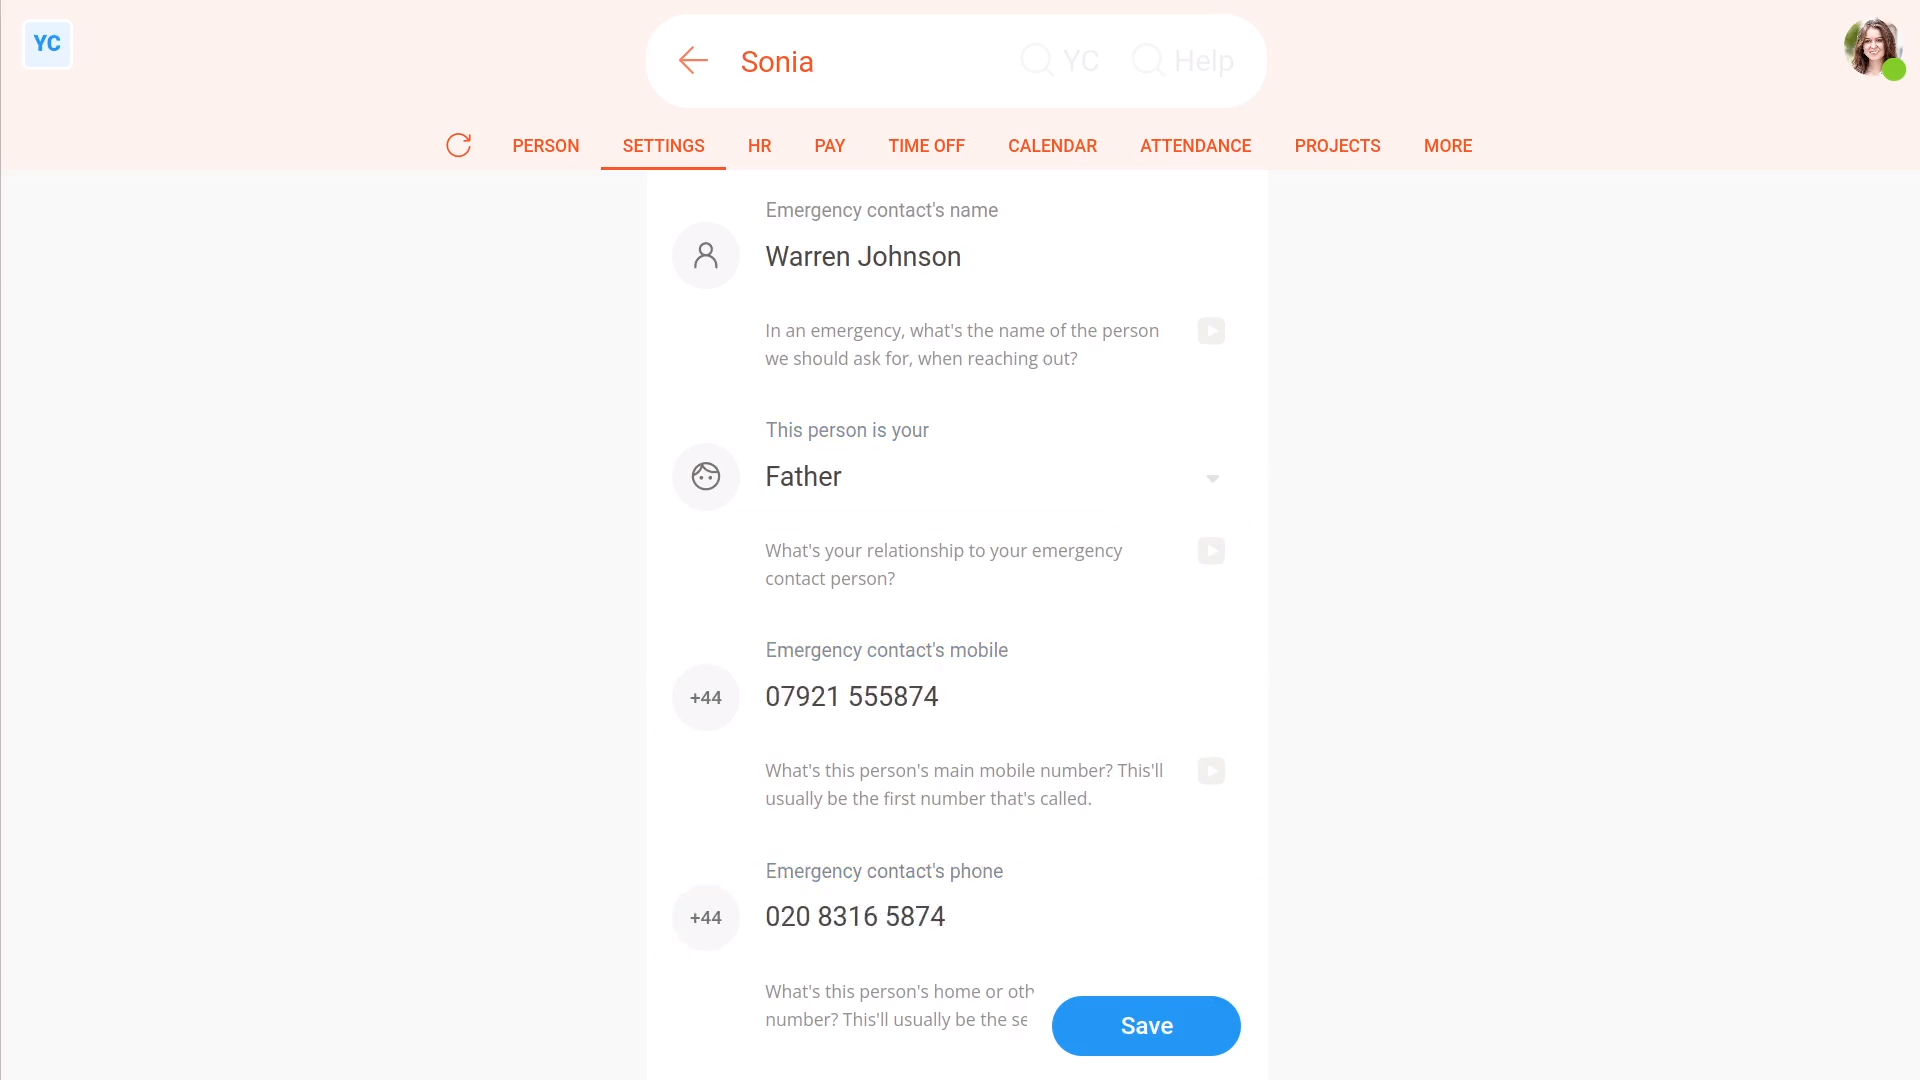
To set your emergency contact info:
- First, open yourself on: "Menu", then "Me"
- Then tap: "Settings", then "Emergency"
- And fill in each of the fields.
- And take care to enter them correctly.
- The info is considered confidential, and isn't available to anyone in your org except yourself and your admins.
- And finally, tap: Save
Keep in mind that:
- If ever something happened to you at work, your admins would know who your emergency contact person was.
- Your admins could quickly get in touch, and perhaps get answers to life saving questions.
And that's it! That's all you need to do to set your emergency contact info!
How do I set my gender and name title?
 1:16
1:16
"How do I set my gender and name title?"
Setting your gender is sometimes required as part of establishing your tax identity.
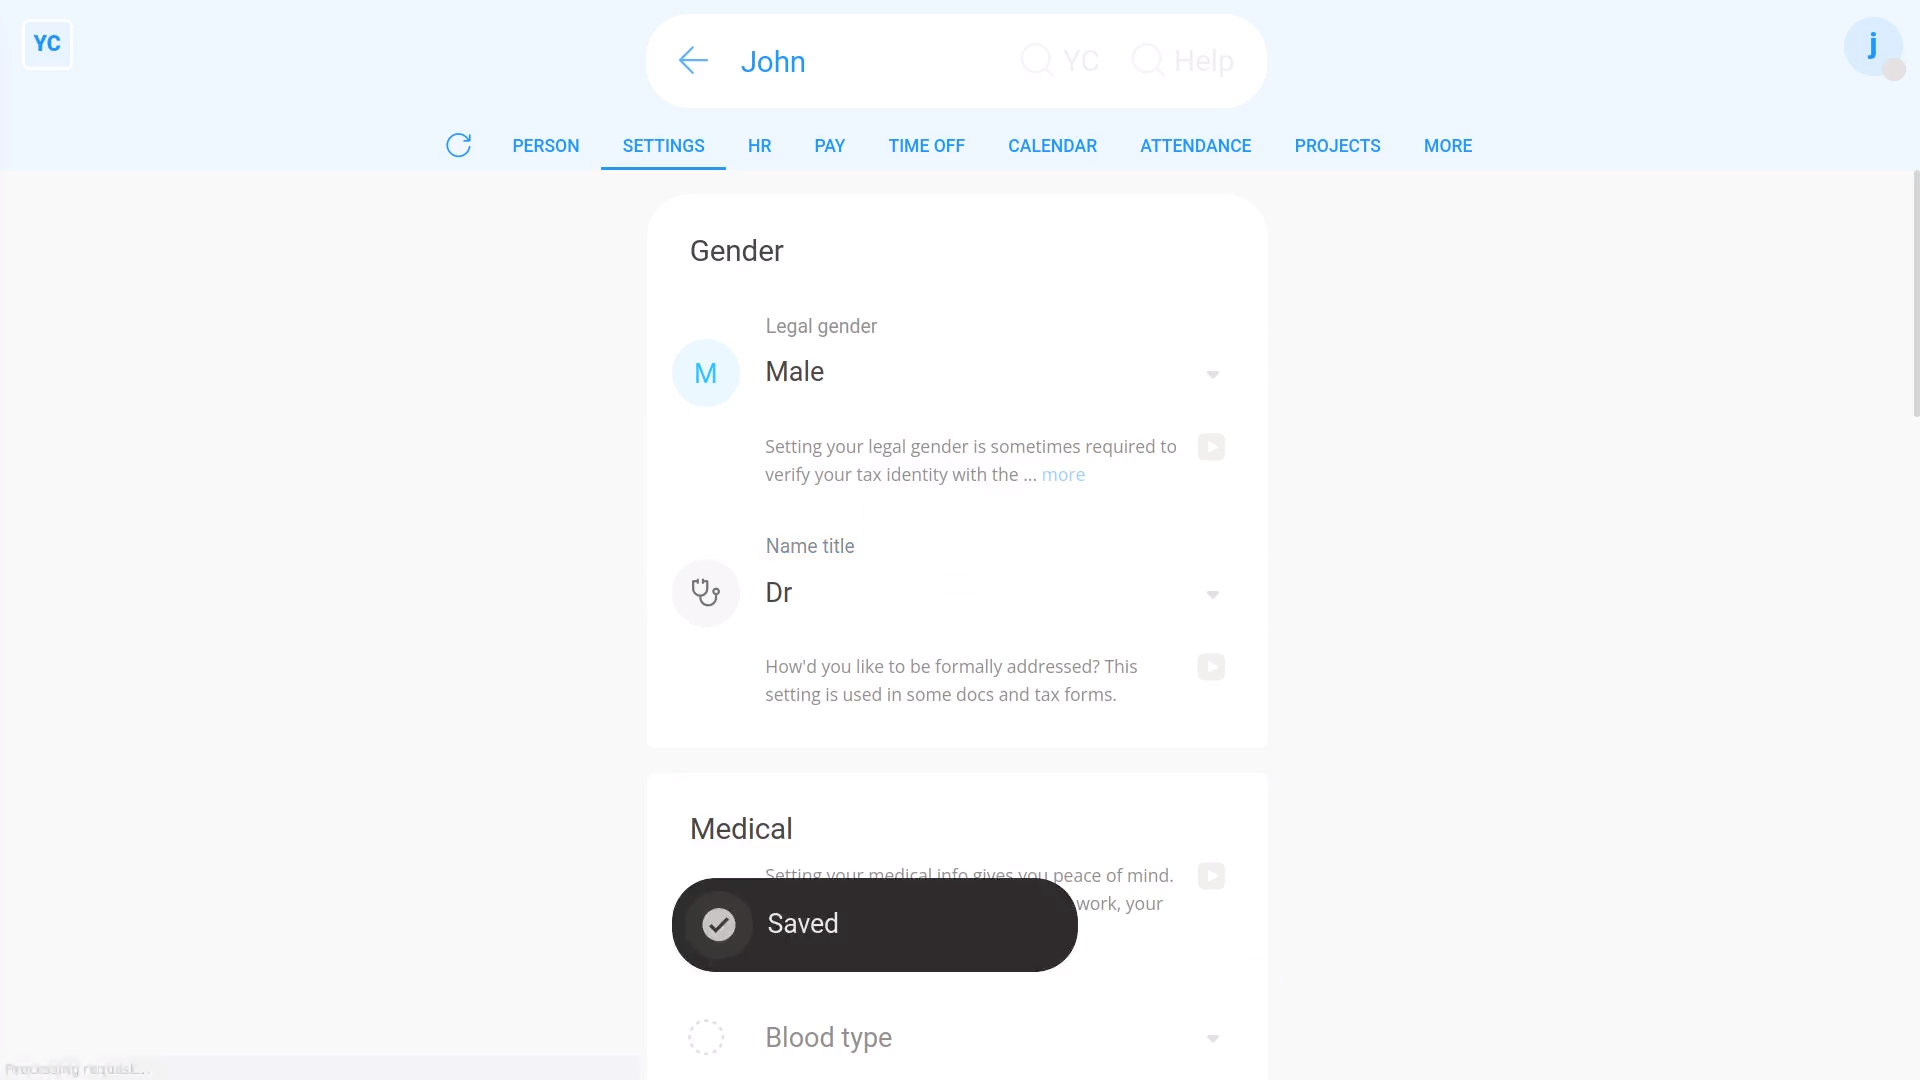
To set your gender and "Name title":
- First, open yourself on: "Menu", then "Me"
- Then tap: "Settings", then "Medical"
- Select your legal gender.
- Next, select your preferred name title.
- And finally, tap: Save
Keep in mind that:
- Once you've selected "Legal gender", the "Name title" is automatically reset to a default.
- You'll need to look at "Name title" again, and set it to the one you prefer.
- The "Name title" is used in some docs and tax forms.
- The info is generally updated by the person themself, but can also be updated by admins.
You may notice:
- In some countries, the tax authority doesn't recognise "Non-binary" gender options.
- When that's the case, the "Non-binary" option is disabled.
And that's it! That's all you need to do to set your gender and name title!
How do I set my IQ score?
 1:45
1:45
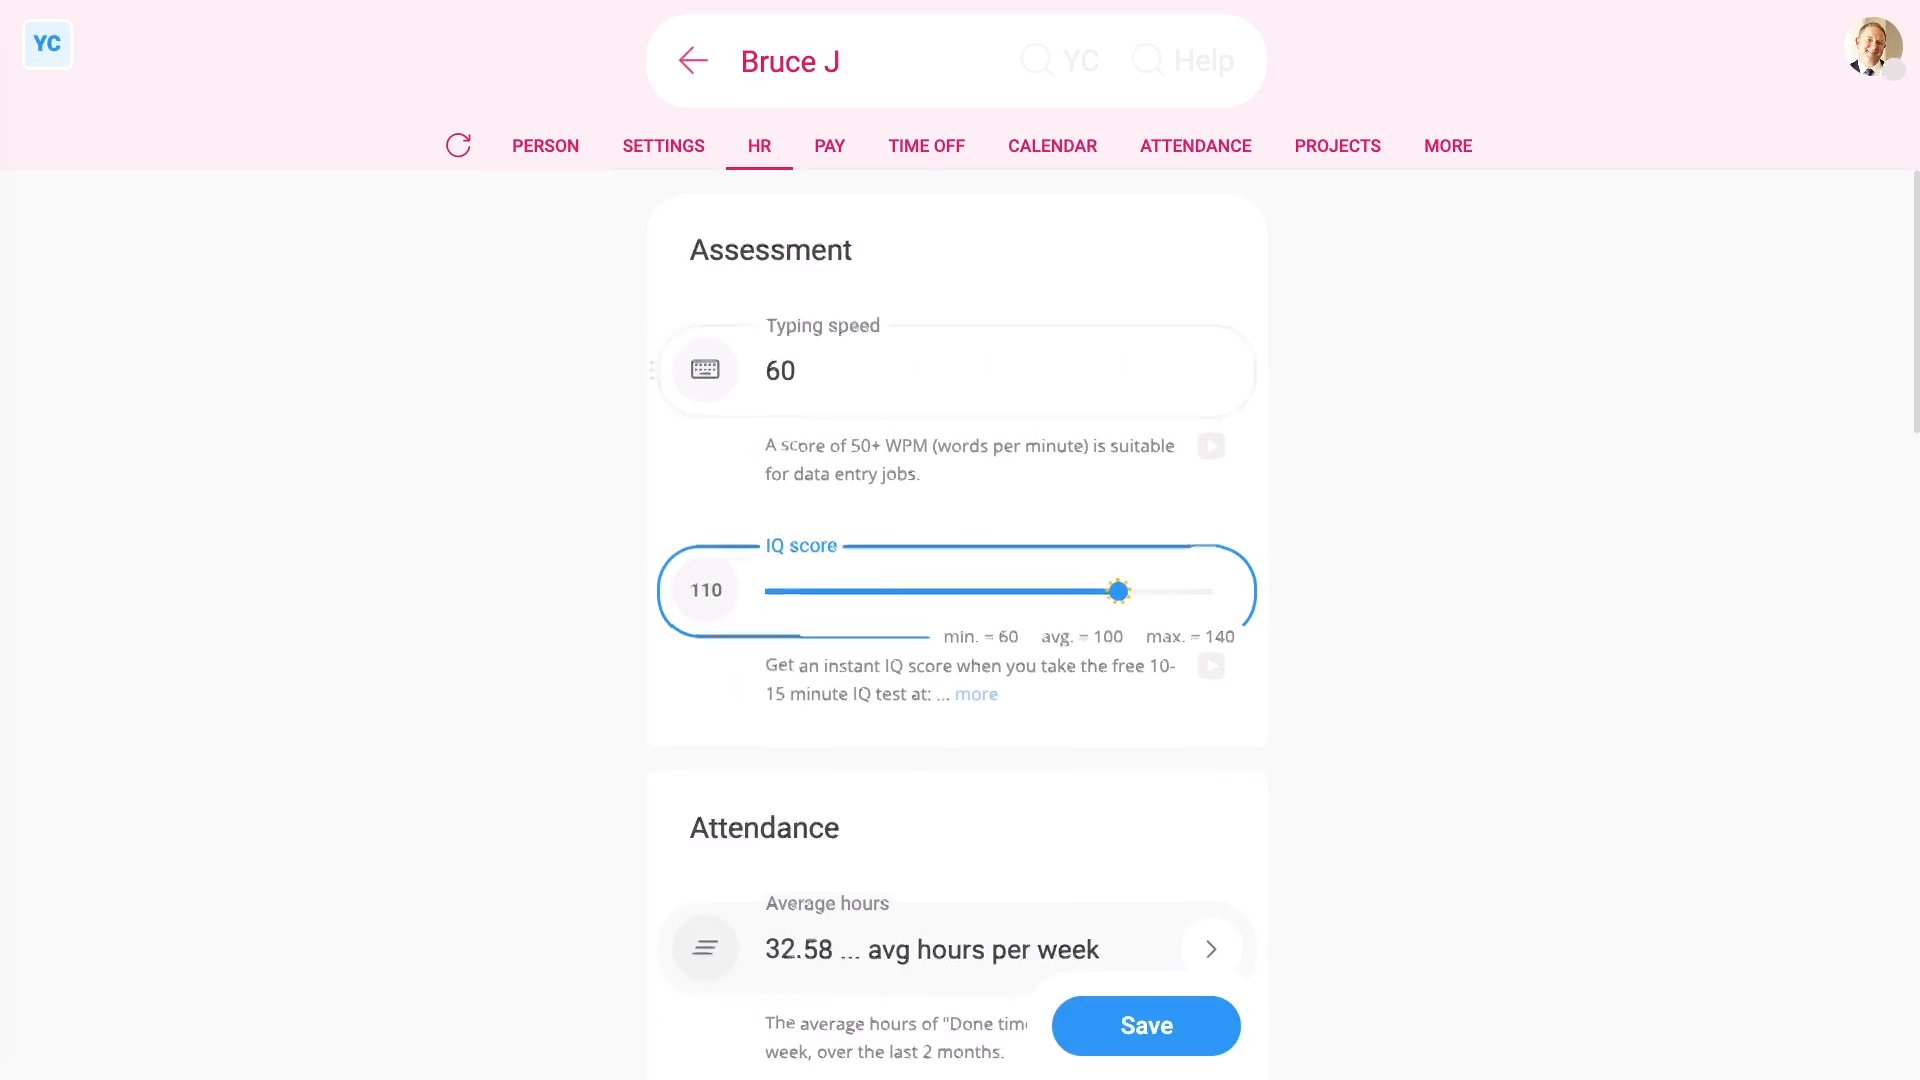
"How do I set my IQ score?"
The assessment section has a field to store a person's IQ score. Setting the IQ score is optional.
To set a person's IQ score:
- First, select the person on: "Menu", then "People"
- Then tap: "HR", then "Assessment"
- Drag the slider to set the: "IQ score"
- You can also move the slider using the arrow keys.
- And finally, tap: Save
You may notice:
- Even if you're an admin, you can never update your own: "IQ score"
- Admins can, however, manually update the "IQ score" of others.
To take an IQ test, you can use the IQ test link found in the notes. It's free, and only takes 10-15 minutes.
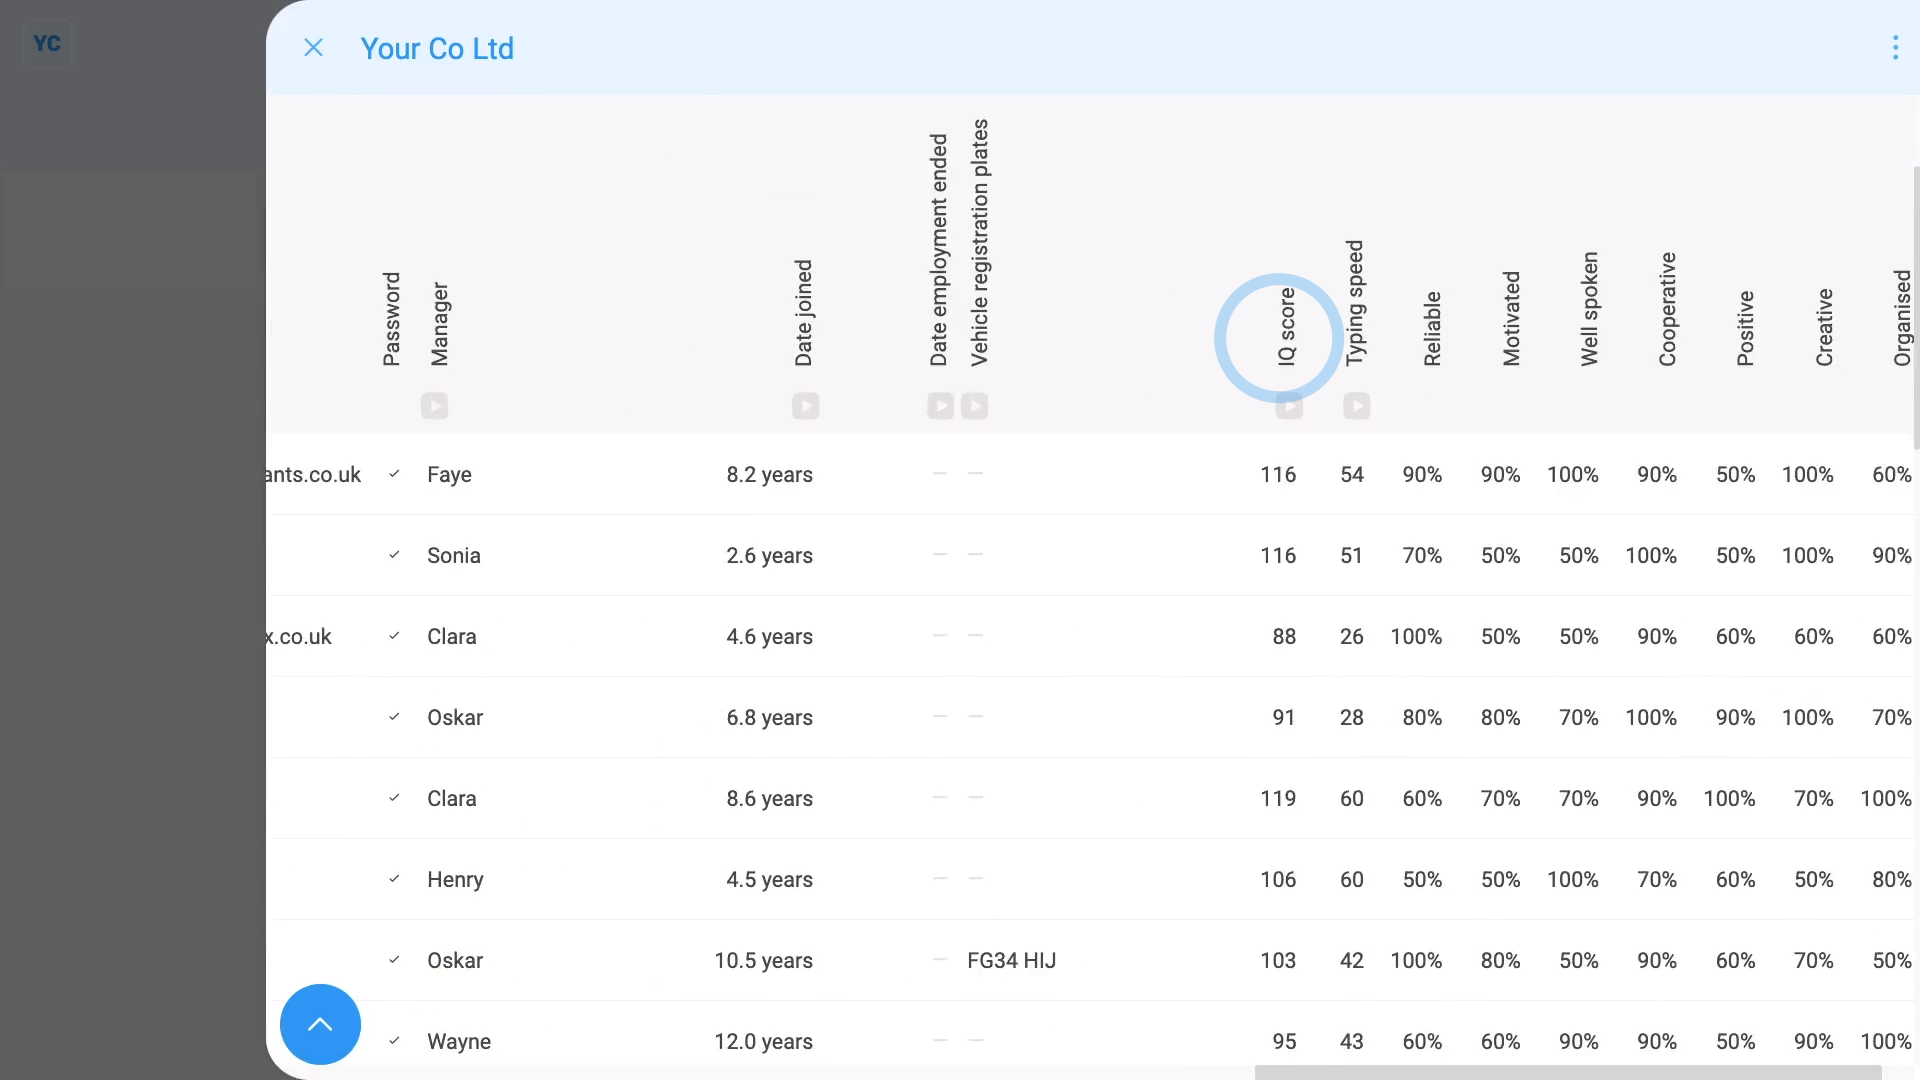
To compare everyone's IQ score:
- First, open your org on: "Menu", then "Orgs"
- Then tap: "HR", then "People"
- And scroll across.
- And you'll see a column with everyone's IQ scores.
- And finally, to order everyone from lowest to highest, tap the top of the column.
Keep in mind that:
- IQ scores range from the lowest score of 60, to the highest score of 140.
- The average IQ score is 100.
And that's it! That's all you need to do to set a person's IQ score!
How do I set my medical and doctor info?
 1:01
1:01
"How do I set my medical and doctor info?"
Setting your medical and doctor info can make it easier for your admins to seek help, in an emergency.
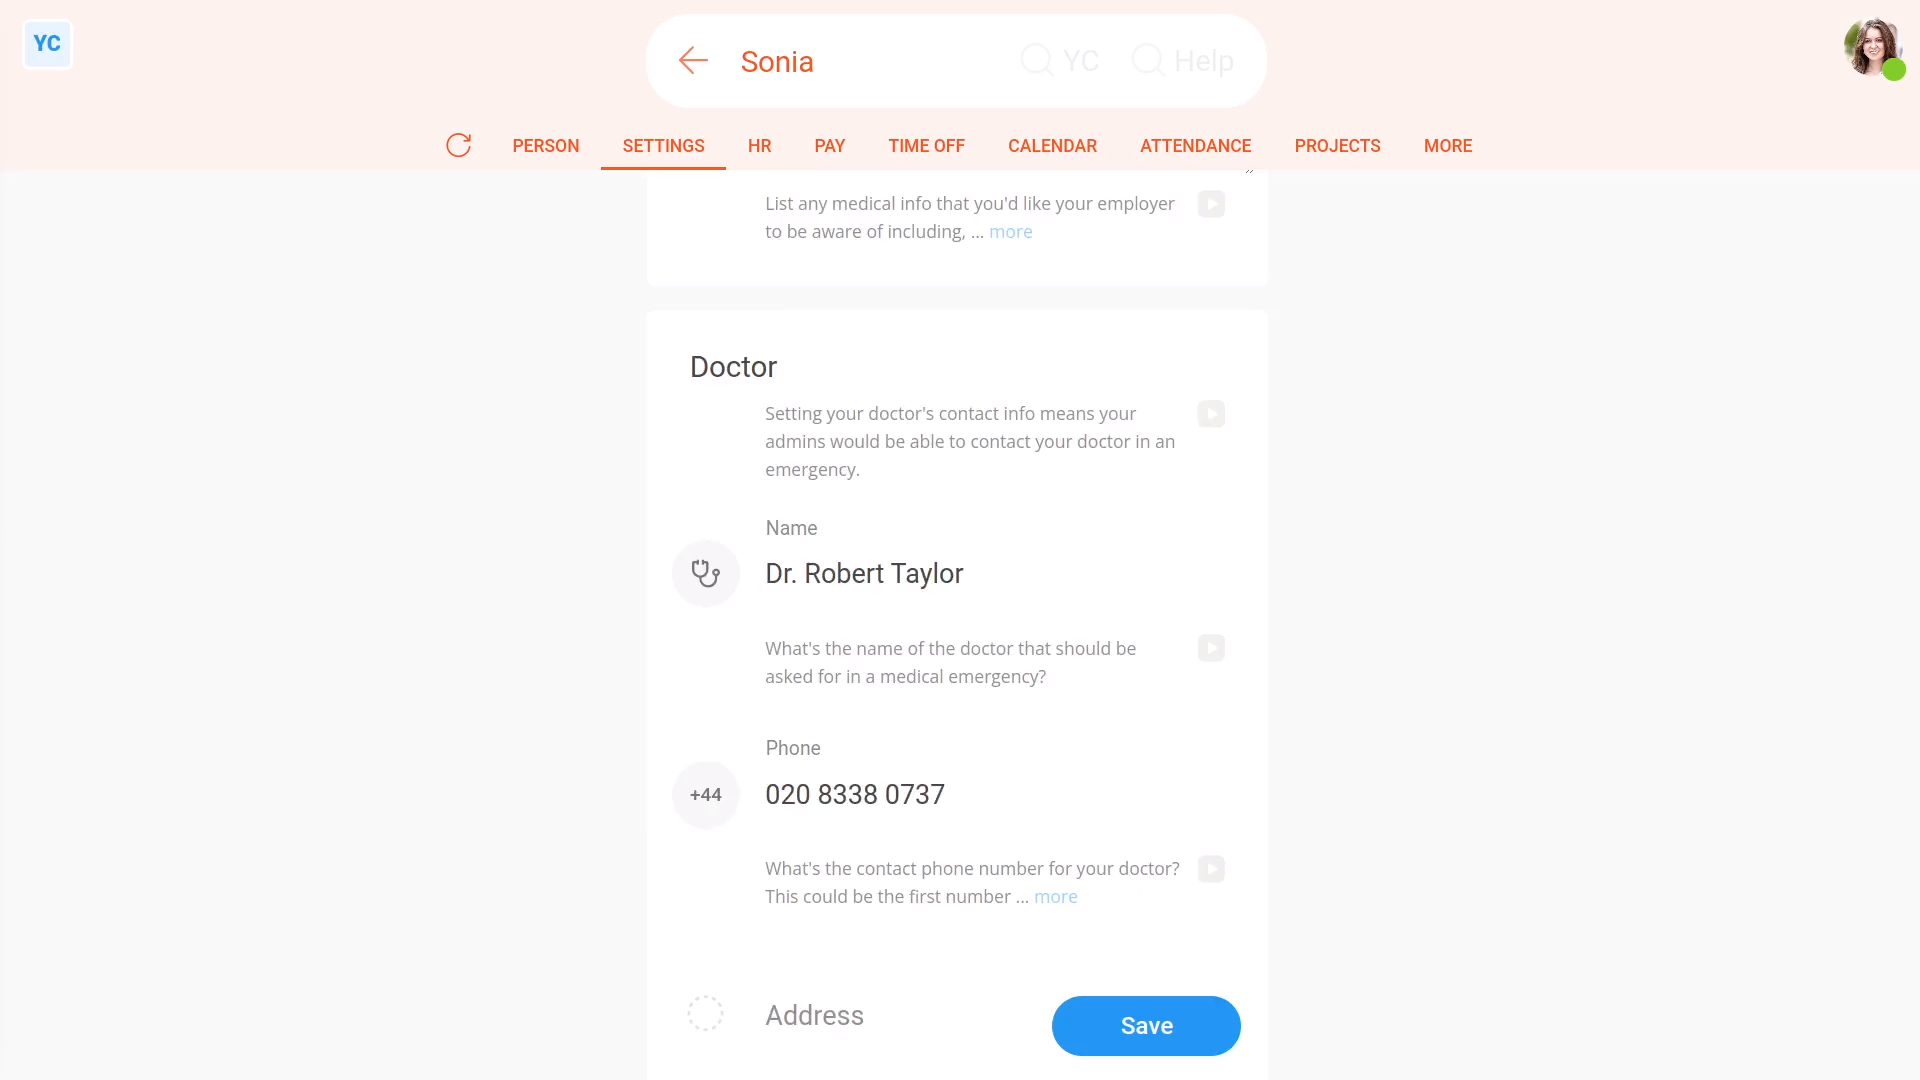
To set your medical and doctor info:
- First, open yourself on: "Menu", then "Me"
- Then tap: "Settings", then "Medical"
- Then fill in the medical fields.
- Also fill in the contact info fields for your doctor.
- The info is considered confidential, and isn't available to anyone in your org except yourself and your admins.
- And finally, tap: Save
Also remember that:
- If something happened to you at work, your admins can instantly look up the medical info you supplied, and alert your doctor.
And that's it! That's all you need to do to set your medical and doctor info!
How do I set my personal info and home address?
 3:24
3:24
"How do I set my personal info and home address?"
Entering your personal info is optional, but it can be useful if your admins need to reach you in an emergency.
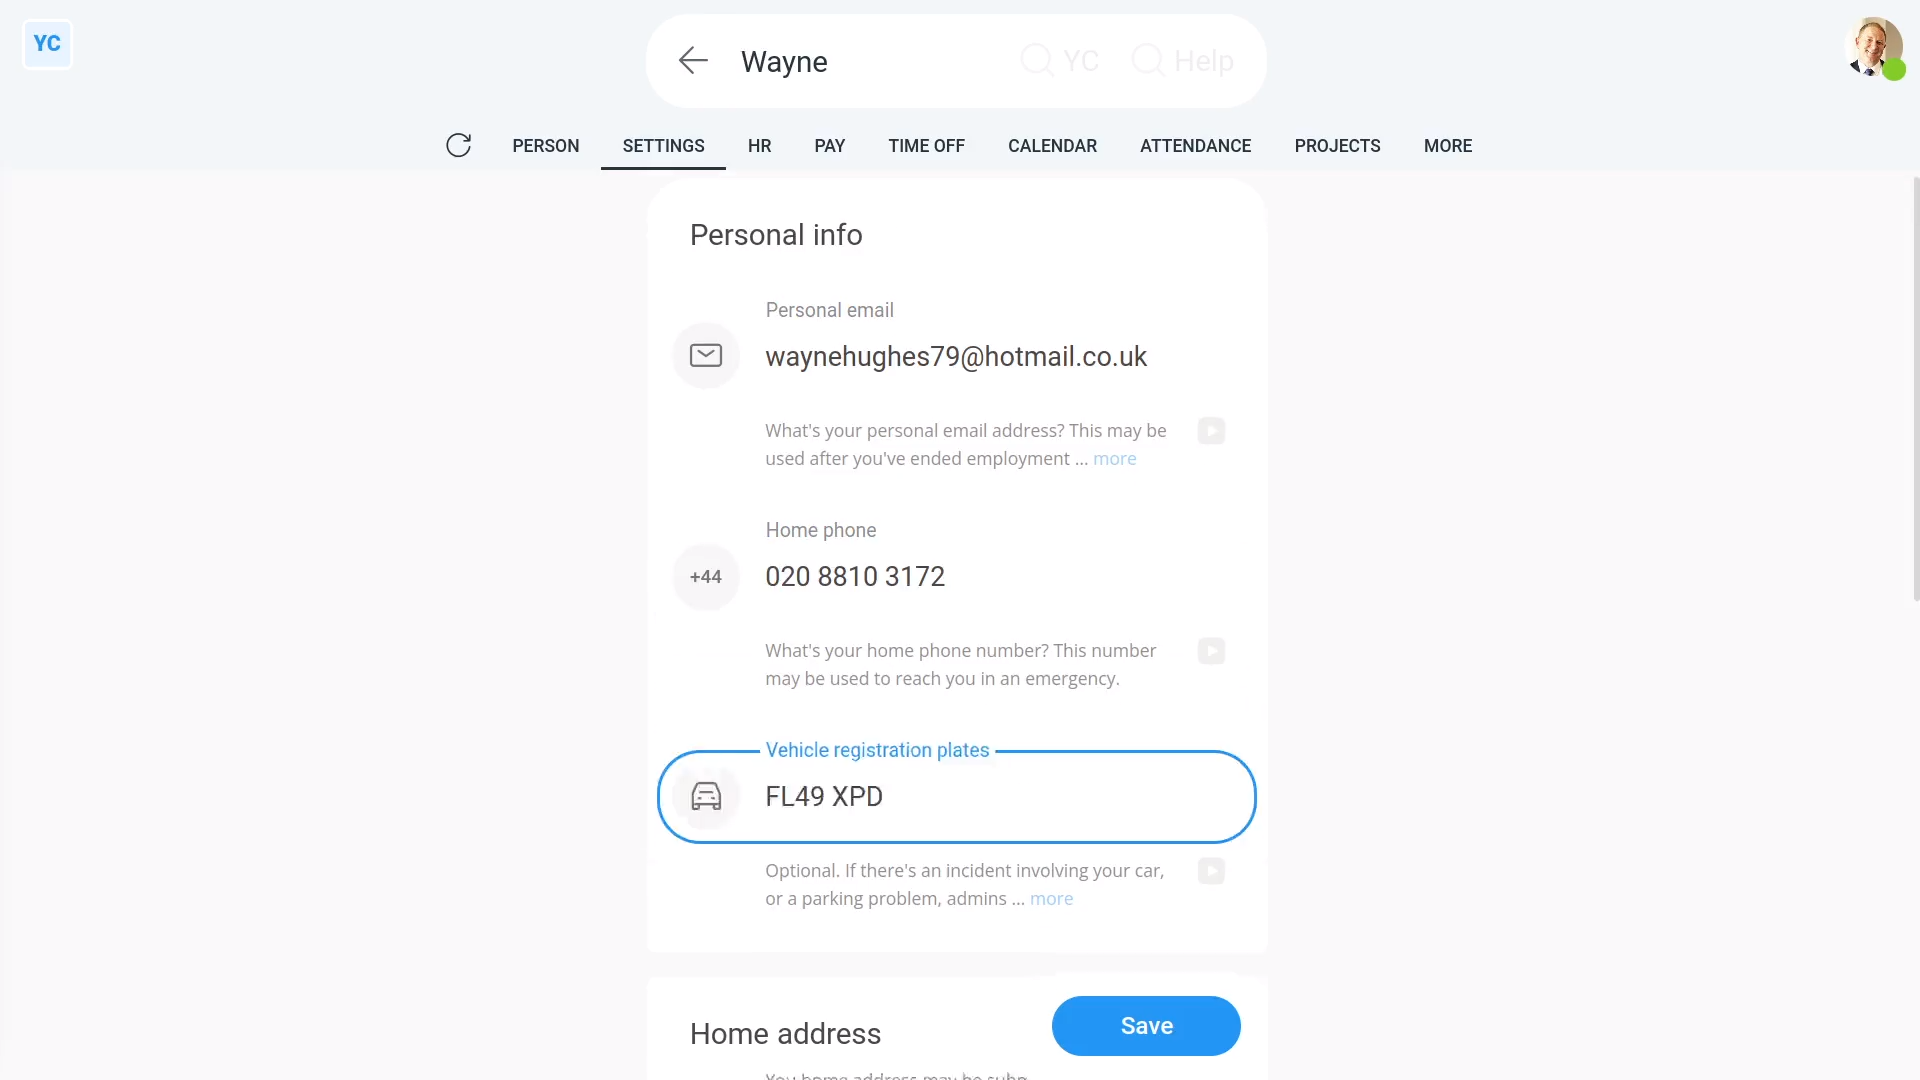
To set your personal info:
- First, open yourself on: "Menu", then "Me"
- Then tap: "Settings", then "Personal"
- Type in your "Personal email", "Home phone", and: "Vehicle registration plates"
- And finally, tap: Save
Keep in mind that:
- There's no reason to store your "Vehicle registration plates" unless you sometimes bring that vehicle into the business's parking area.
- If there's ever an incident with your vehicle, like the lights are left on, your admins can look-up who it belongs to.
- If you sometimes bring in a second vehicle, add a comma between each registration plate.
To look-up who owns a vehicle:
- First, open your org on: "Menu", then "Orgs"
- Then tap: "HR", then "People"
- Then scroll across to: "Vehicle registration plates"
- And scroll down and find the registration plate you're looking for.
- And finally, when you scroll back to the start of the line, you'll see who owns the vehicle.
You may notice:
- That your org's "People" report can only be opened by org admins.
To set your home address:
- First, open yourself on: "Menu", then "Me"
- Then tap: "Settings", then "Personal"
- Next, select your country.
- Then start typing your home address.
- As you type, suggestions of matching addresses appear.
- Tap the address that matches your home address.
- And finally, tap: Save
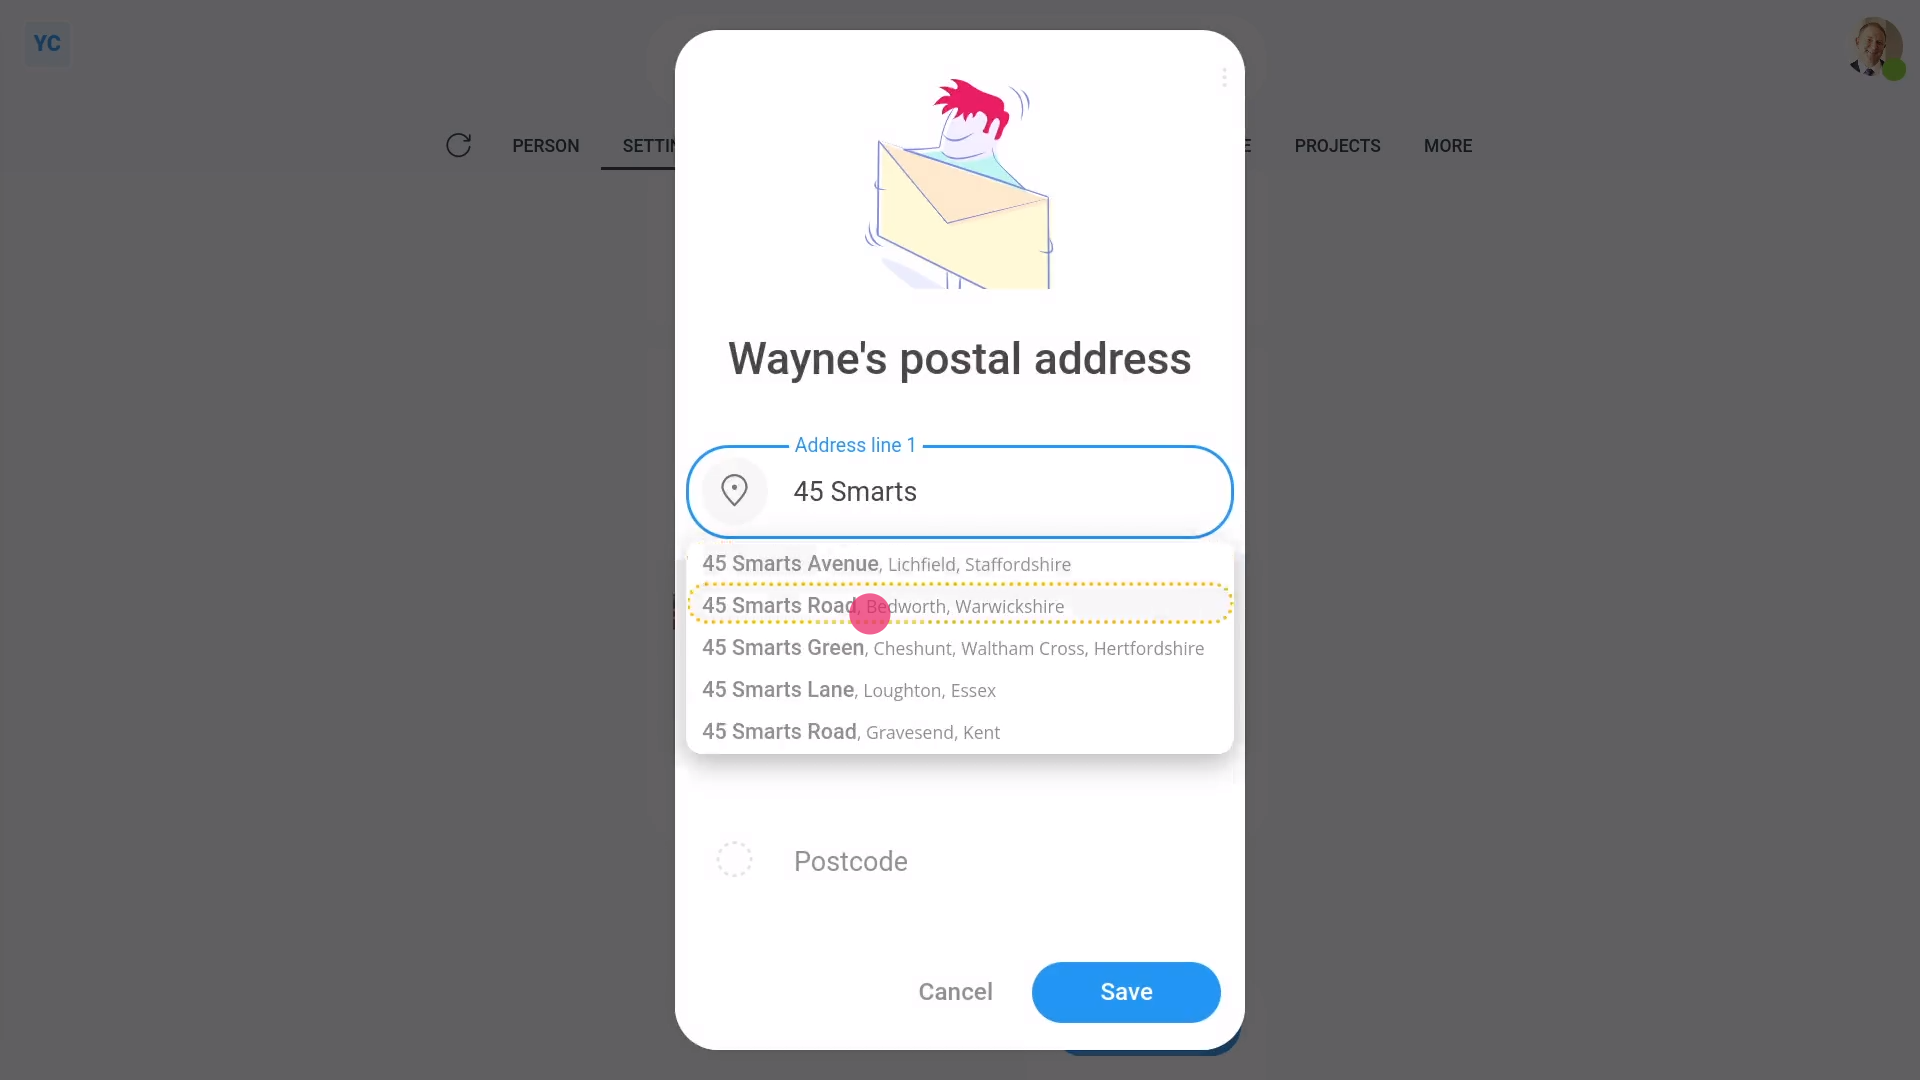
To add a "Postal address" that's different to your "Home address":
- First, turn on: "Post mail to a different address"
- Then tap: Set "Postal address"
- And start typing your postal address.
- Tap the address that matches your postal address.
- And finally, tap: Save
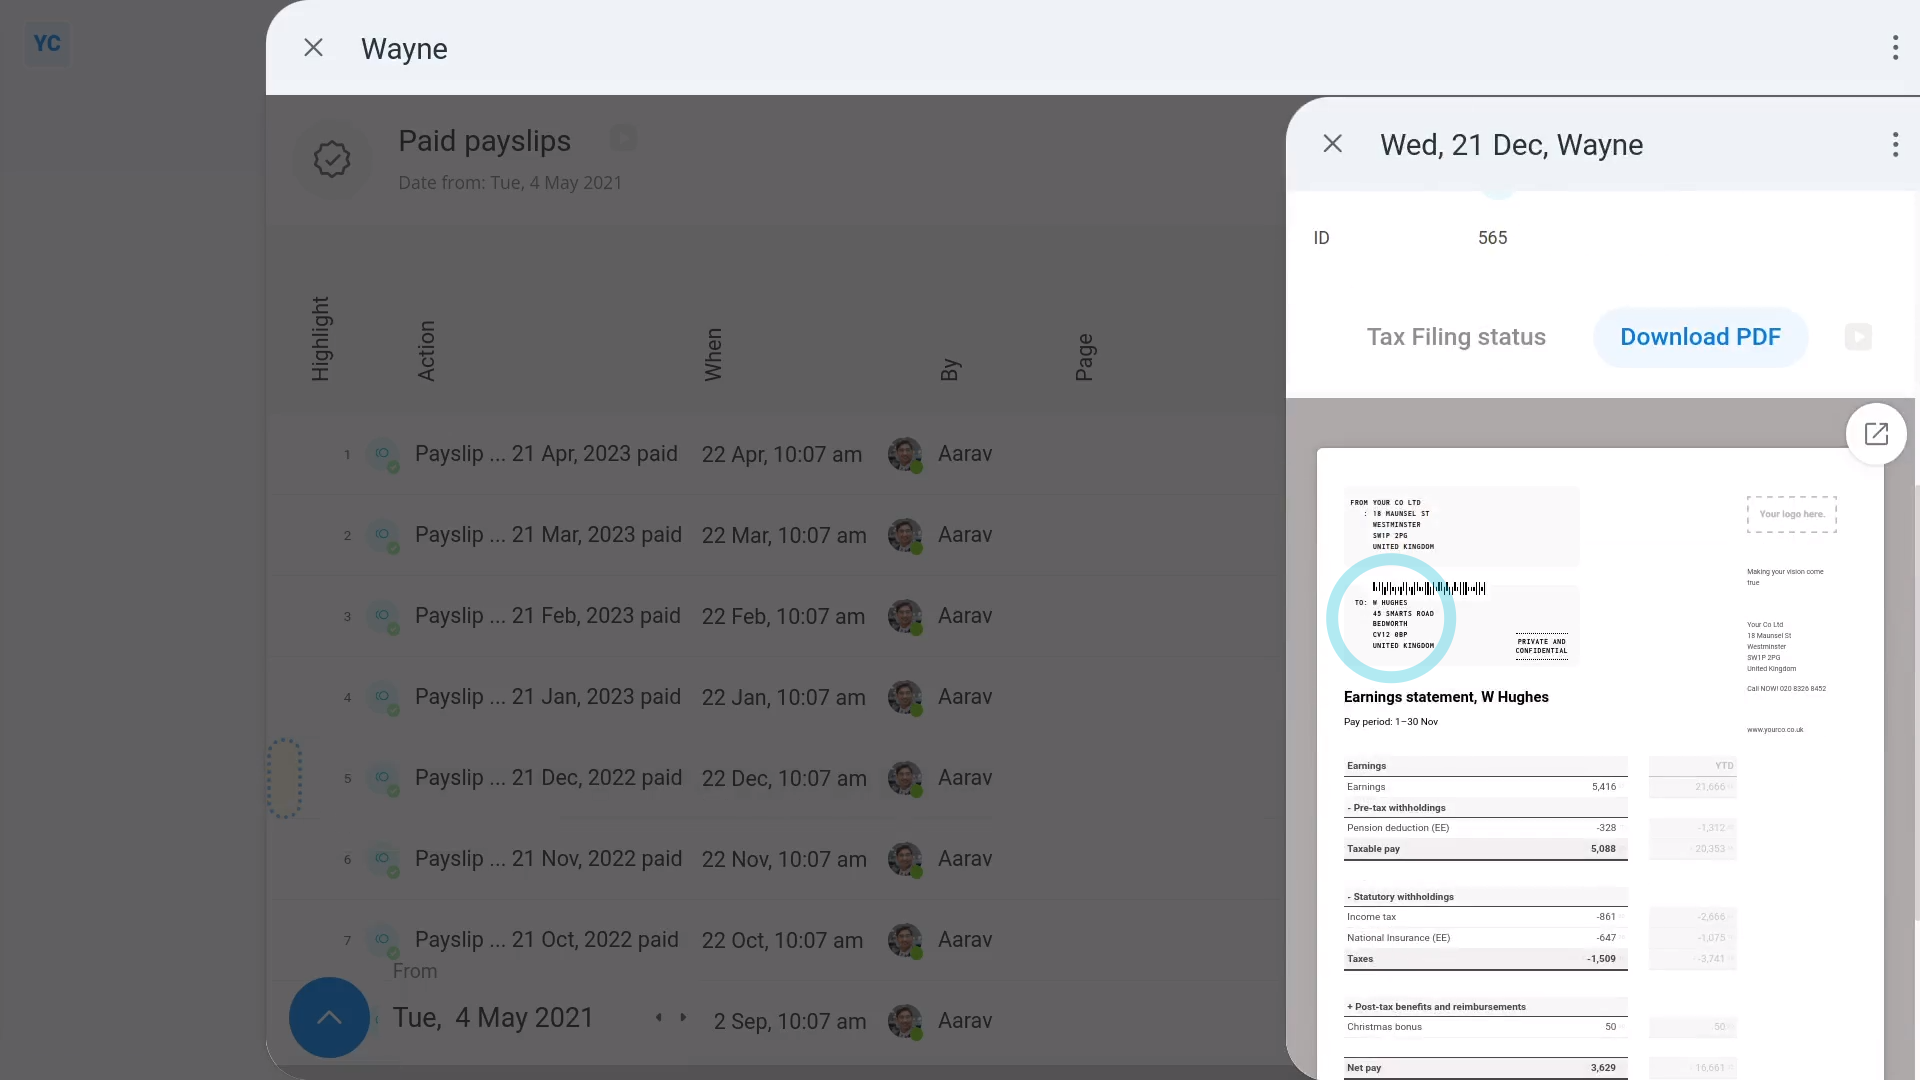
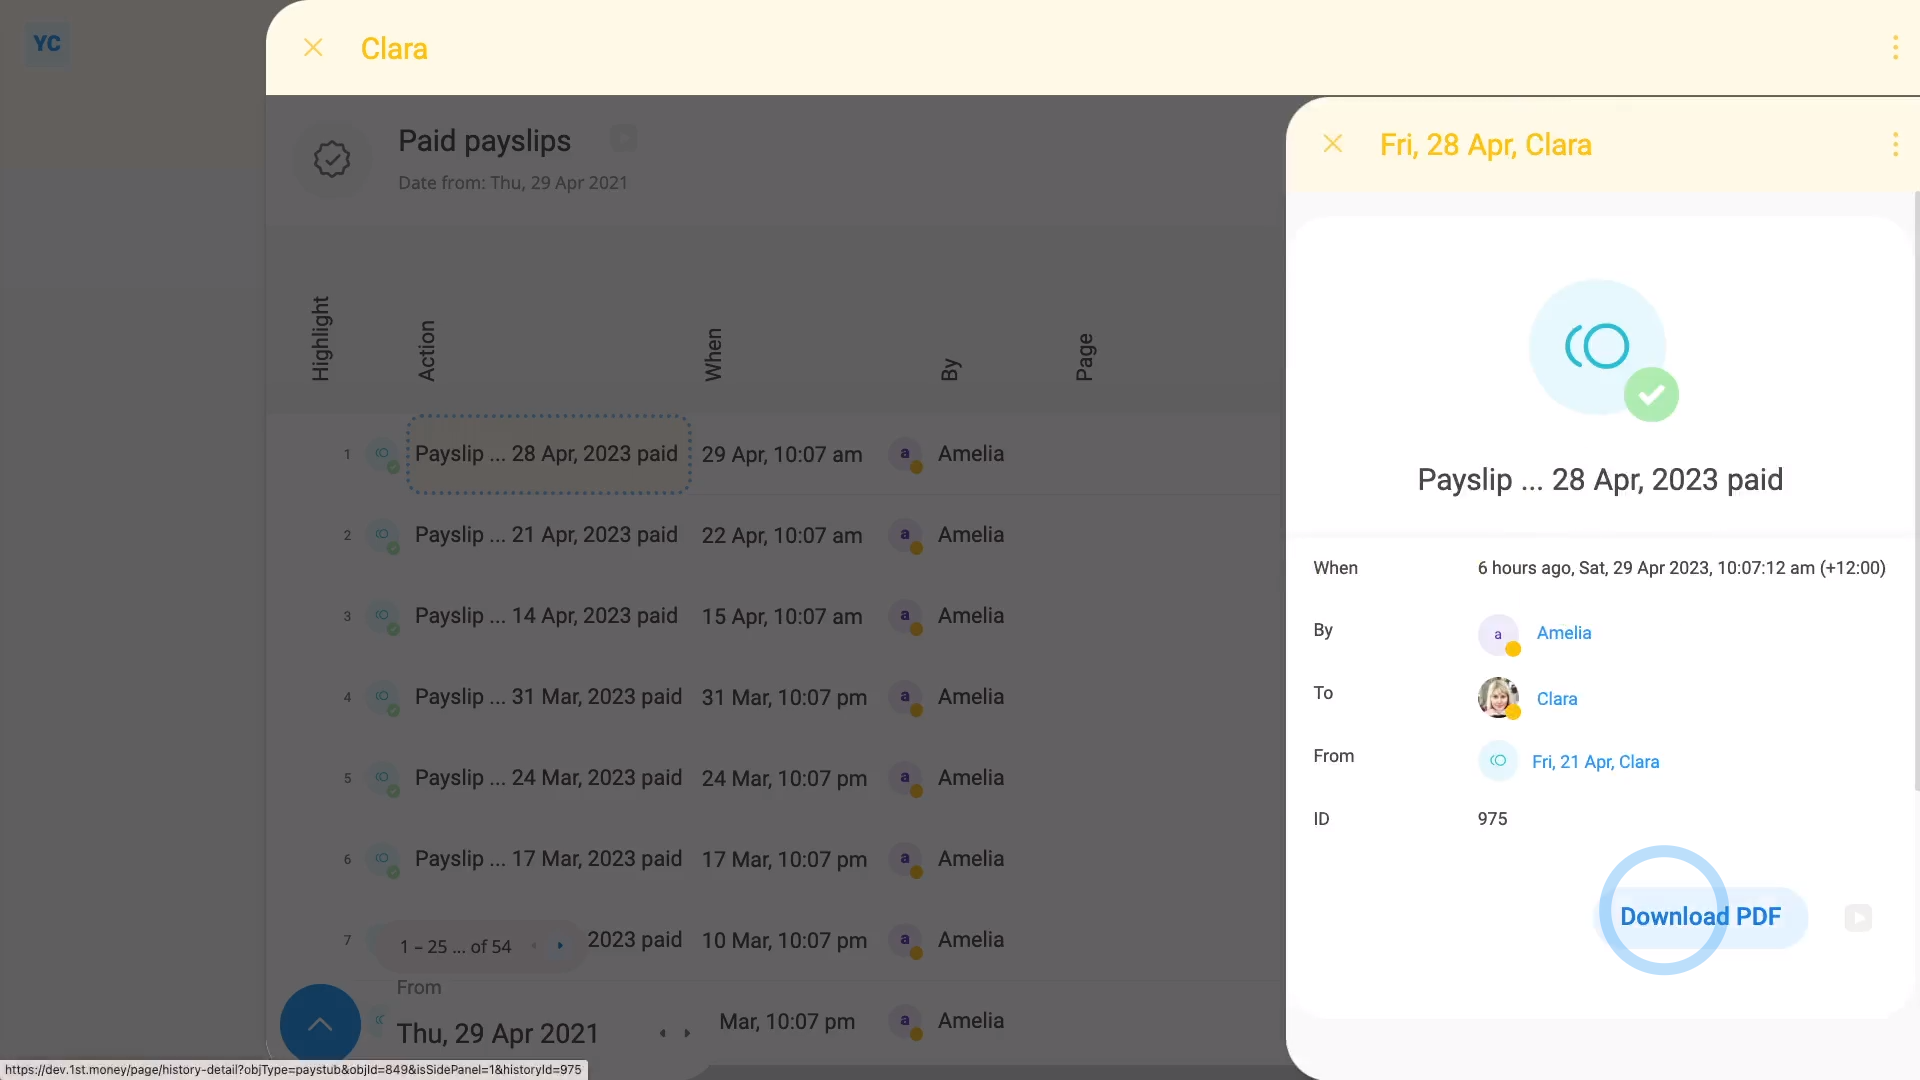
To see your address on a recent payslip:
- First, open yourself on: "Menu", then "Me"
- Then tap: "Pay", then "Payslips history"
- Once you've selected a payslip, tap the blue "See event" button: (at the start of the row)
- And finally, once it slides out on the right, you'll see your newly entered address on your payslip (at the top).
Also remember that:
- Your "Home address", or "Postal address" if it's set, is printed on the top of each payslip.
- It may also be sent to HMRC, to verify your tax status, and help identify you.
- And it may be used on other work related documents that need to be posted to you.
- Including both while you're employed, and also after you've ended employment.
And that's it! That's all you need to do to set your personal info and home address!
How do I set my typing speed?
 2:50
2:50
"How do I set my typing speed?"
Your typing speed allows you to measure how fast you can accurately type on a keyboard.
To see your typing speed, and take a typing test:
- First, open yourself on: "Menu", then "Me"
- Then tap: "HR", then "Assessment"
- And you'll see your current typing speed.
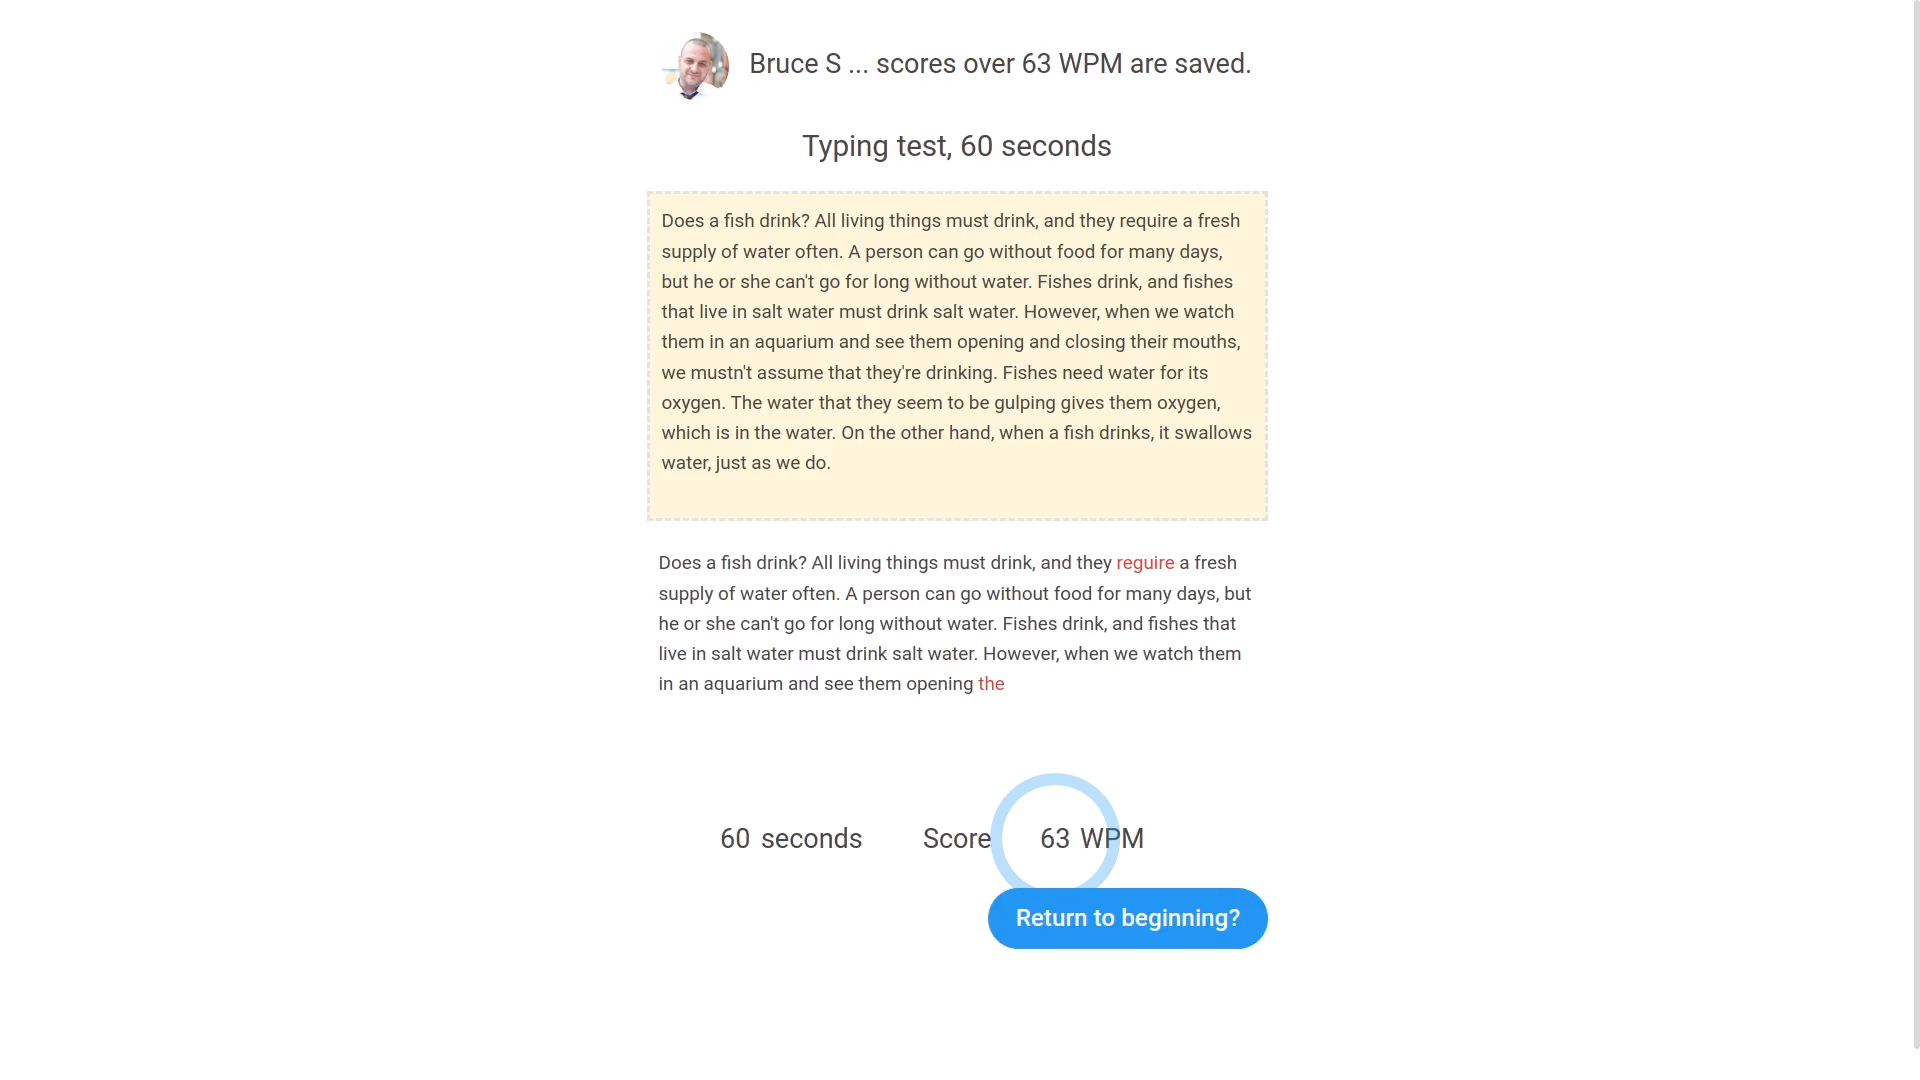
- To test your typing speed, tap: Typing test
- You'll see the text in the upper yellow box, which is the text to be typed into the white lower box.
- Once you're ready to start the test, start typing to begin.
- A 60-second timer automatically starts the moment you type the first character.
- Now it's finished, and you can see the score of your test attempt.
- Now, back to the "Assessment" page.
- To reload the page, tap the "Reload tab" button: (at the top)
- And you'll see that your "Typing speed" has been updated.
- And finally, feel free to re-take the typing test as many times as you like.
You may notice:
- Even if you're an admin, you can never update your own: "Typing speed"
- The only way to update your own "Typing speed" yourself, is by taking the typing test.
- Admins can, however, manually update the "Typing speed" of others.
To see how your typing speed's improved over time:
- First, open yourself on: "Menu", then "Me"
- Then tap: "HR", then "Assessment"
- Then next to "Typing speed", tap the three dots: (on the far left)
- Then tap: History
- And finally, history slides out on the right, listing all your improvements in your typing speed, over time.
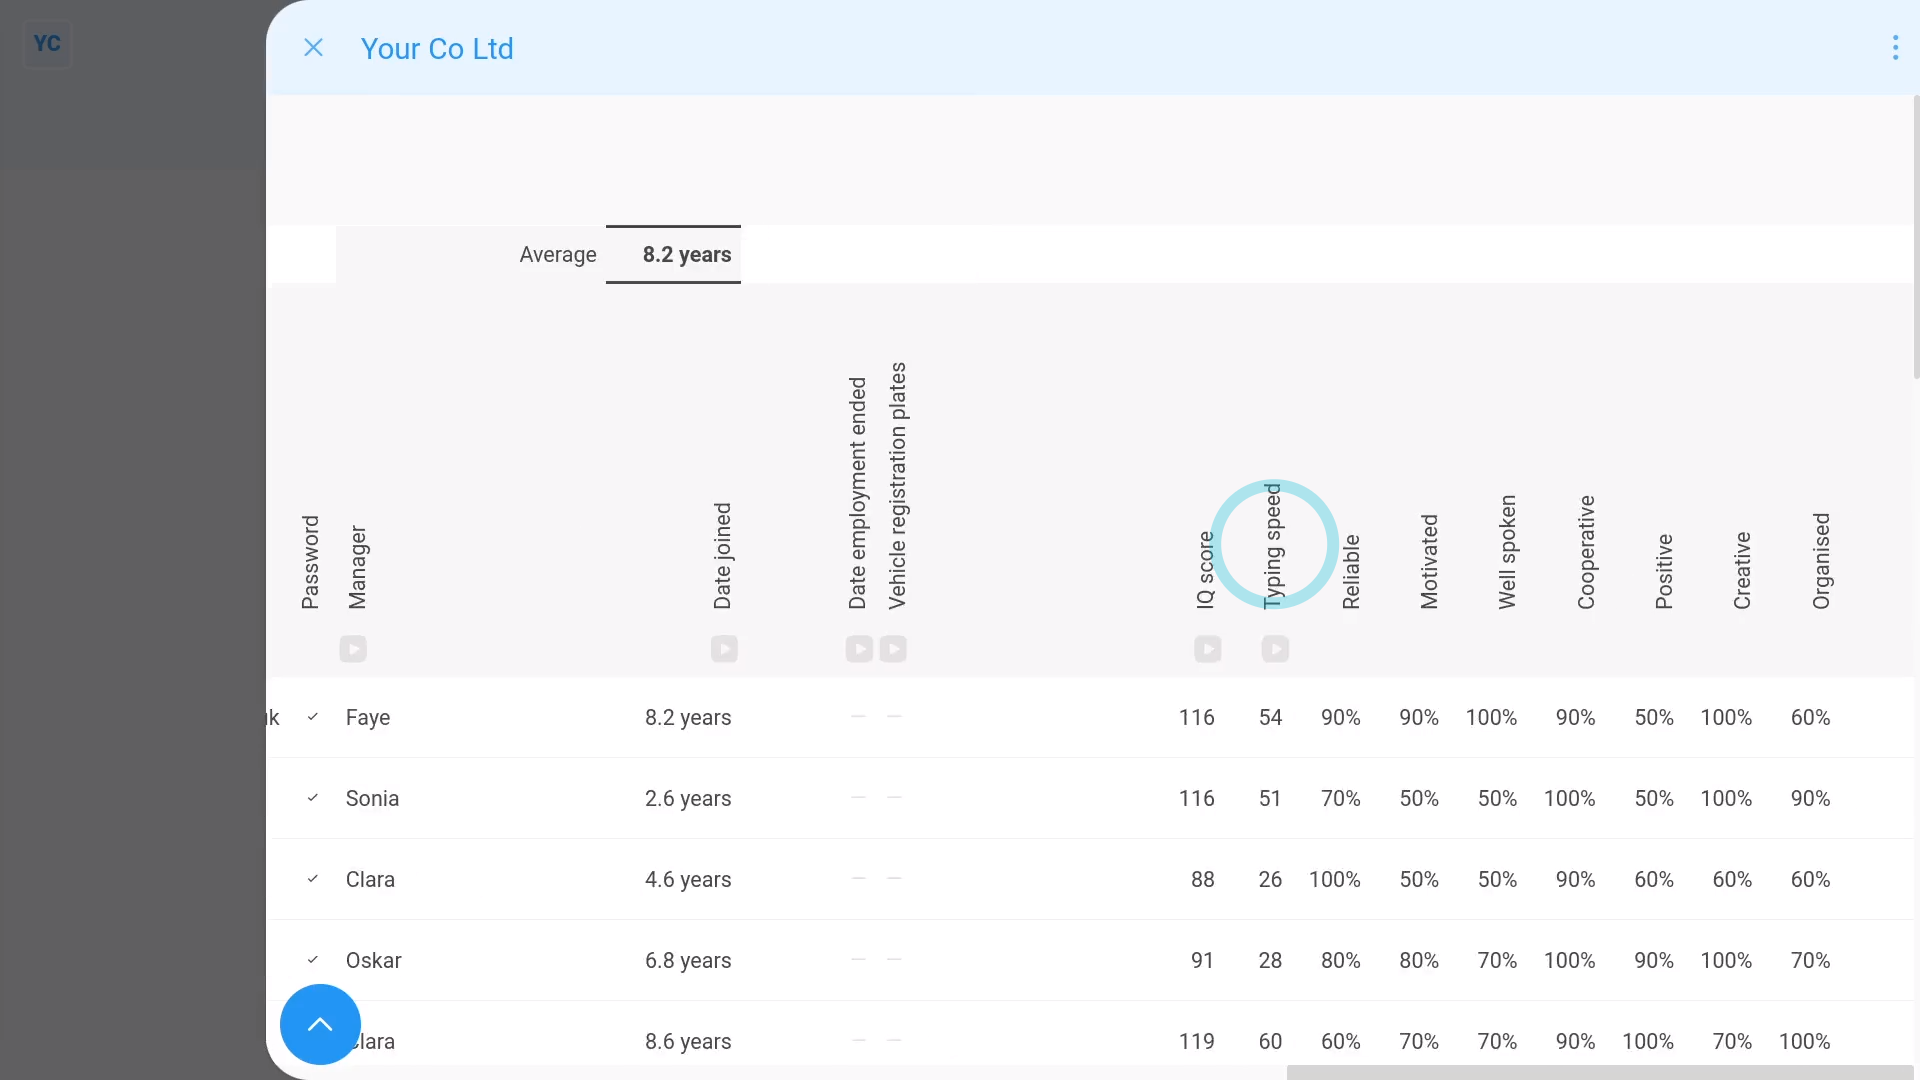
To compare everyone's typing speed:
- First, open your org on: "Menu", then "Orgs"
- Then tap: "HR", then "People"
- And scroll across.
- And you'll see a column with everyone's typing speed.
- And finally, to order everyone from fastest to slowest, tap the top of the column.
Keep in mind that:
- Your typing speed is measured in WPM, which stands for: "Words Per Minute"
- Any word that you type wrong (in the test) is marked in red, and is excluded from your WPM score.
And that's it! That's all you need to do to update your typing speed!
How do I set the employee ID?
 2:12
2:12
"How do I set the employee ID?"
The field for "Employee ID" gives you a place to store any unique ID for any person. "Employee ID" is an optional field, and can be left empty.
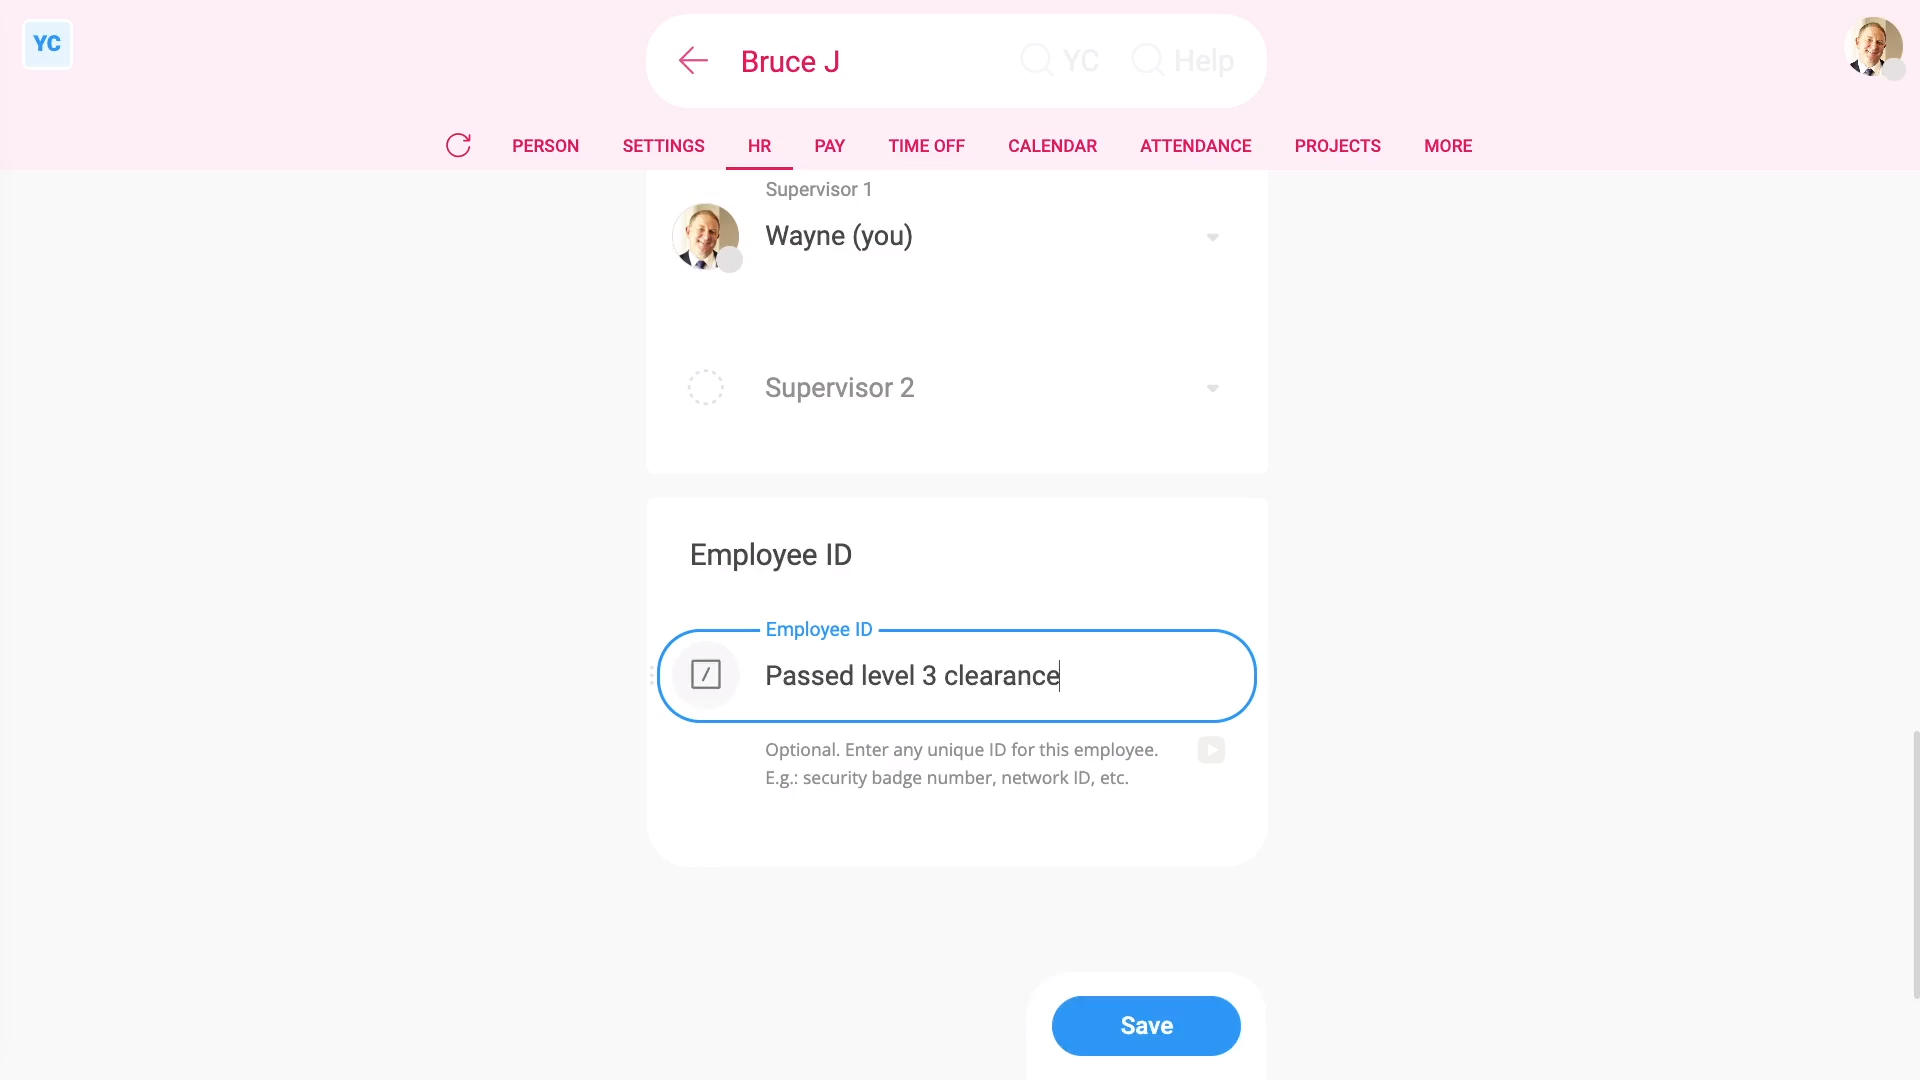
To set an "Employee ID":
- First, select the person on: "Menu", then "People"
- Then tap: "Settings", then "Job settings"
- Then scroll down to: "Employee ID"
- Type in what you'd like to store. You can store up to 100 characters.
- And finally, tap: Save
Examples of what you may store in "Employee ID" include:
- Security badge number.
- Network ID.
- Employee number.
- Insurance number.
- Or anything else.
One important use for the "Employee ID" is that it's available to be used as an "Insert" into docs.
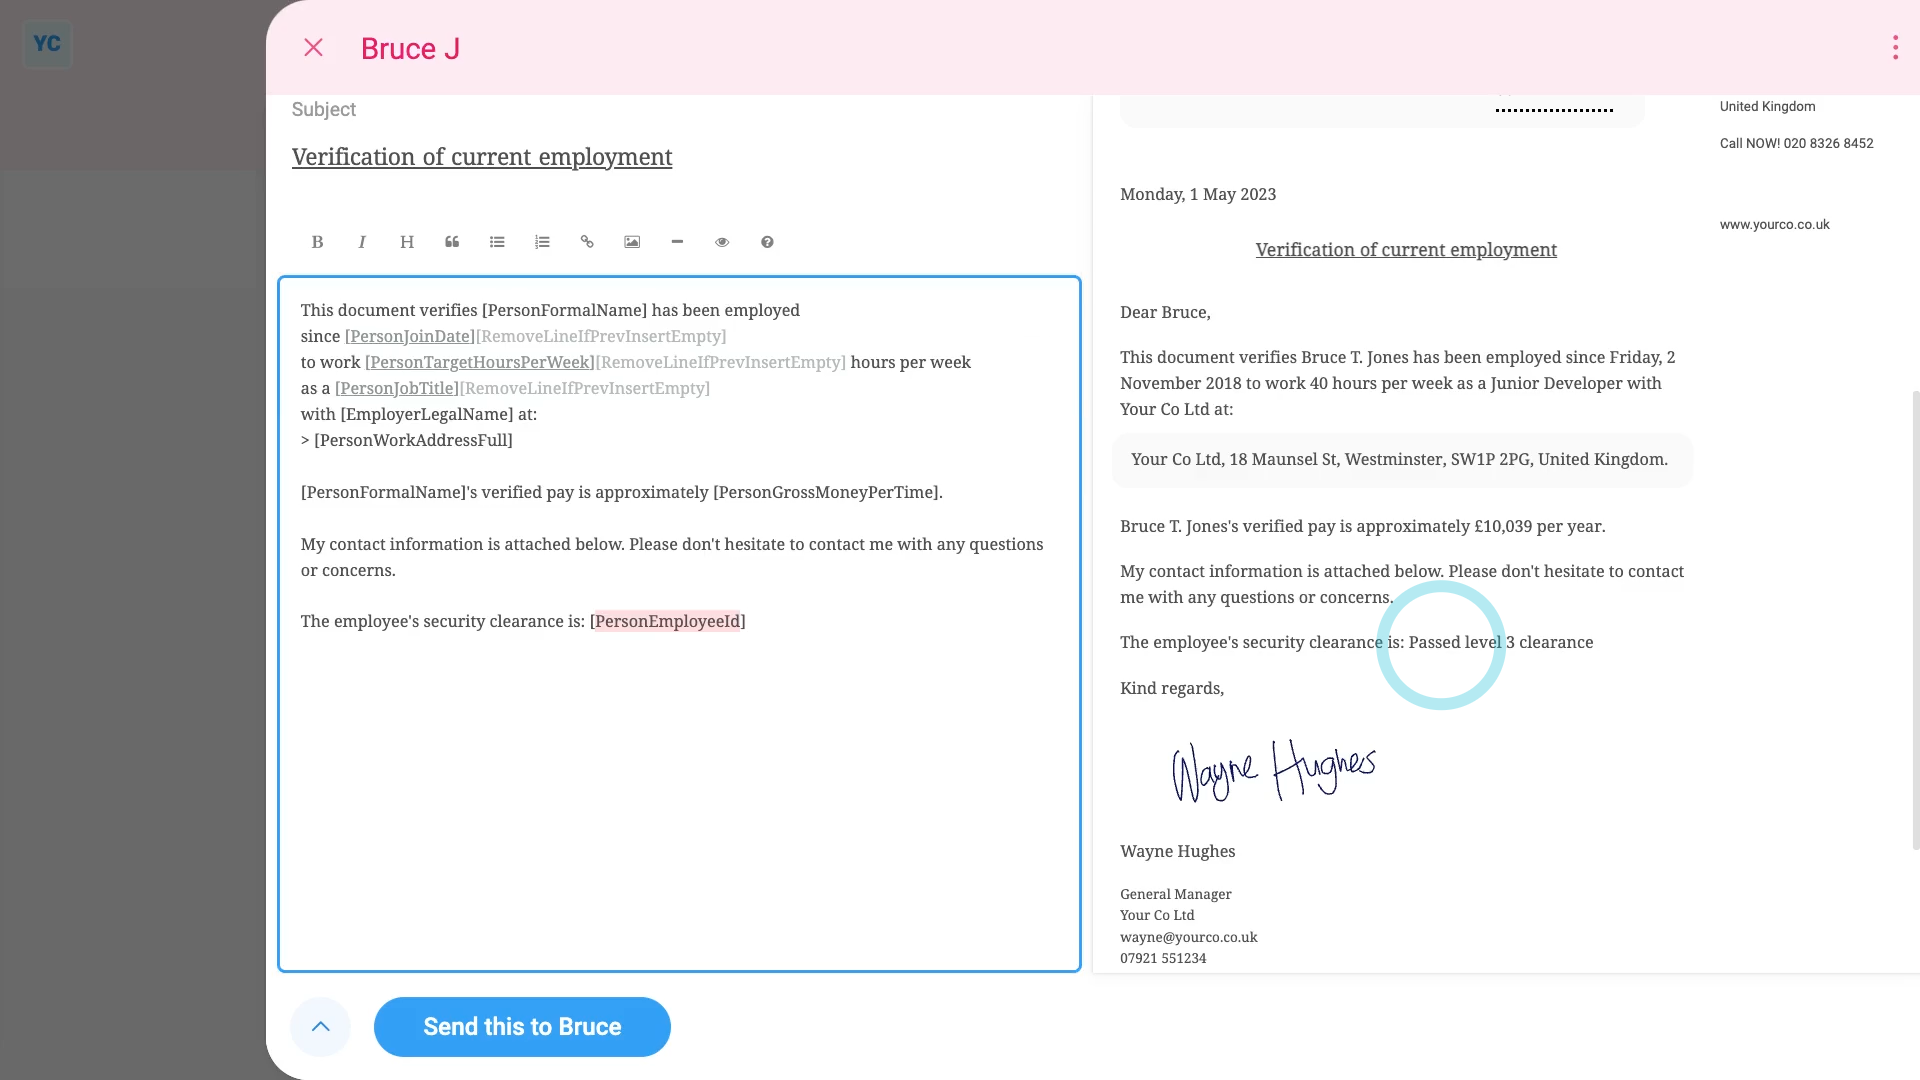
To insert a person's "Employee ID" into a doc:
- First, select the doc on: "Menu", then "Docs ... all"
- And select a doc.
- Then select the same person you recently set the "Employee ID" for.
- Now that the doc's opened, type in some words near the bottom.
- As you type, you'll see a preview instantly on the right side.
- Then tap the "Insert" button, and select: "[PersonEmployeeId]"
- And finally, again on the right-side preview, the person's "Employee ID" automatically shows up.
Keep in mind that:
- You can also insert an "Employee ID" into bookmarks.
And that's it! That's everything you need to know about setting a person's "Employee ID"!
How do I switch between light and dark themes?
 1:07
1:07
"How do I switch between light and dark themes?"
1st Money supports both light and dark themes, so you can select the theme that you find most comfortable.
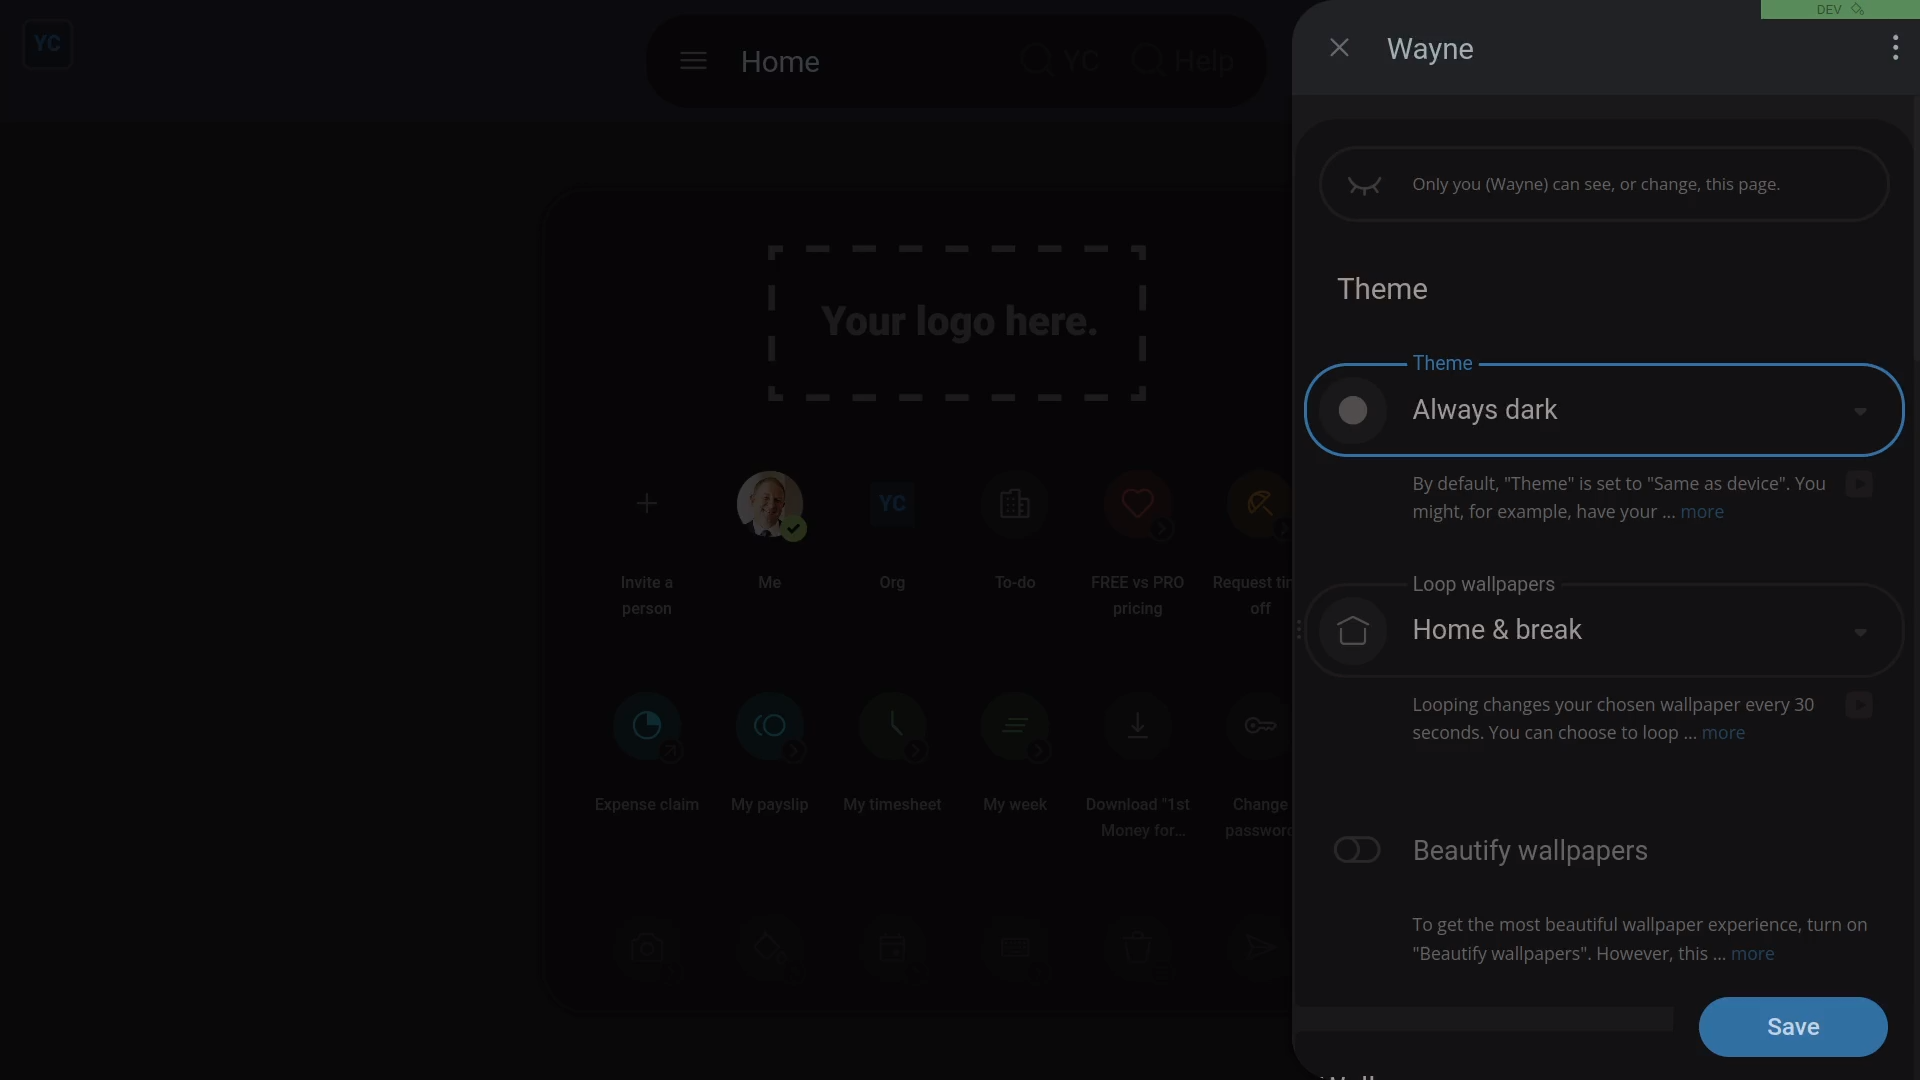
To set your theme:
- First, right-click anywhere, then tap: "Theme"
- Alternatively, you can instead tap: "Menu", then "Theme"
- Select the theme you want.
- And everything instantly switches to the theme you chose.
- If you're happy with the change, tap: Save
- And finally, from now on, on every device, you'll now see everything in your selected theme.
For advanced usage:
- Keeping your theme set to "Same as device" is sometimes the best choice.
- You could set "Light" theme on your laptop, and "Dark" theme on your smartphone.
- It then shows whatever theme you've set on your device.
And that's it! That's everything you need to know about switching between your light and dark themes!
How do I temporarily block one of my people from having access?
 2:05
2:05
"How do I temporarily block one of my people from having access?"
The Temporarily block access feature instantly blocks a person's login access to every feature in 1st Money.
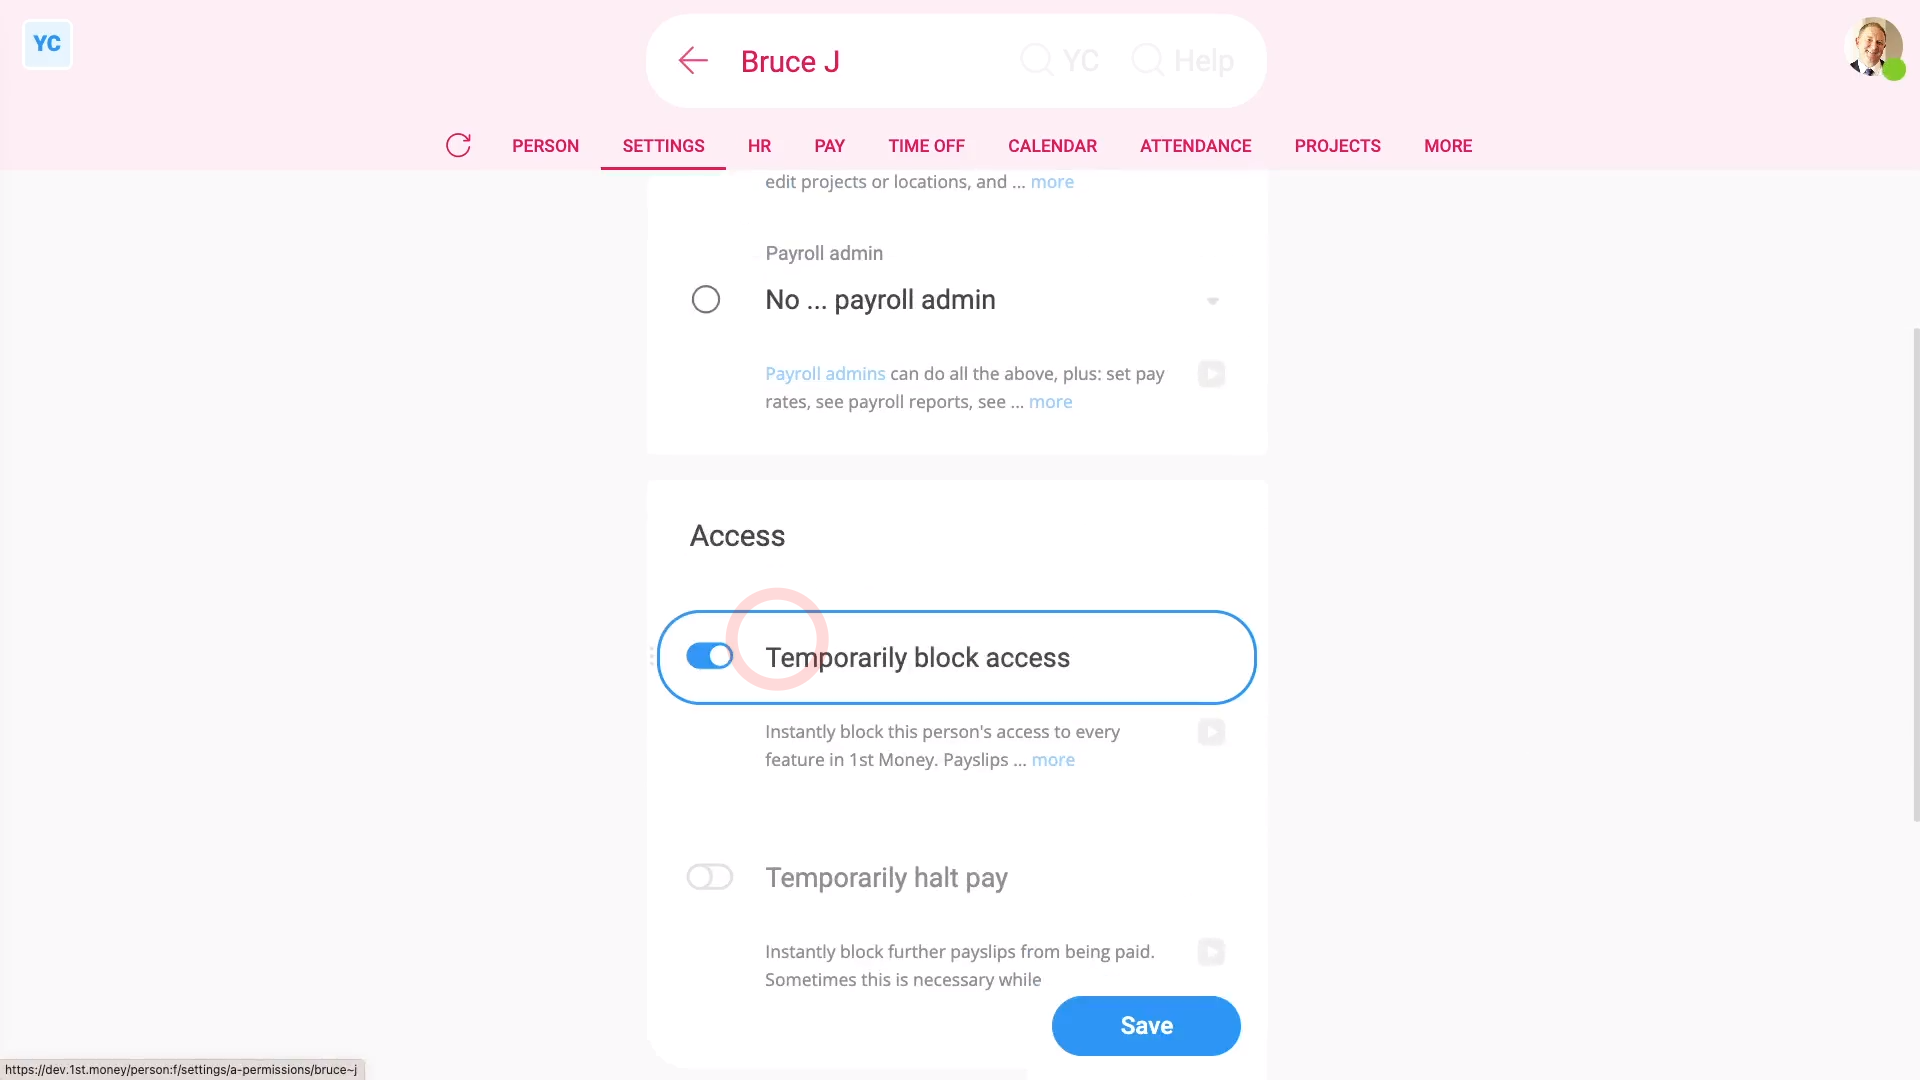
To temporarily block a person from logging in:
- First, select the person on: "Menu", then "People"
- Then tap: "Settings", then "Permissions"
- Then turn on: "Temporarily block access"
- And tap: Save
- And finally, when you go to the "People" menu, the person's now marked as blocked.
Now, switching person. You're now logged in as the newly blocked person.
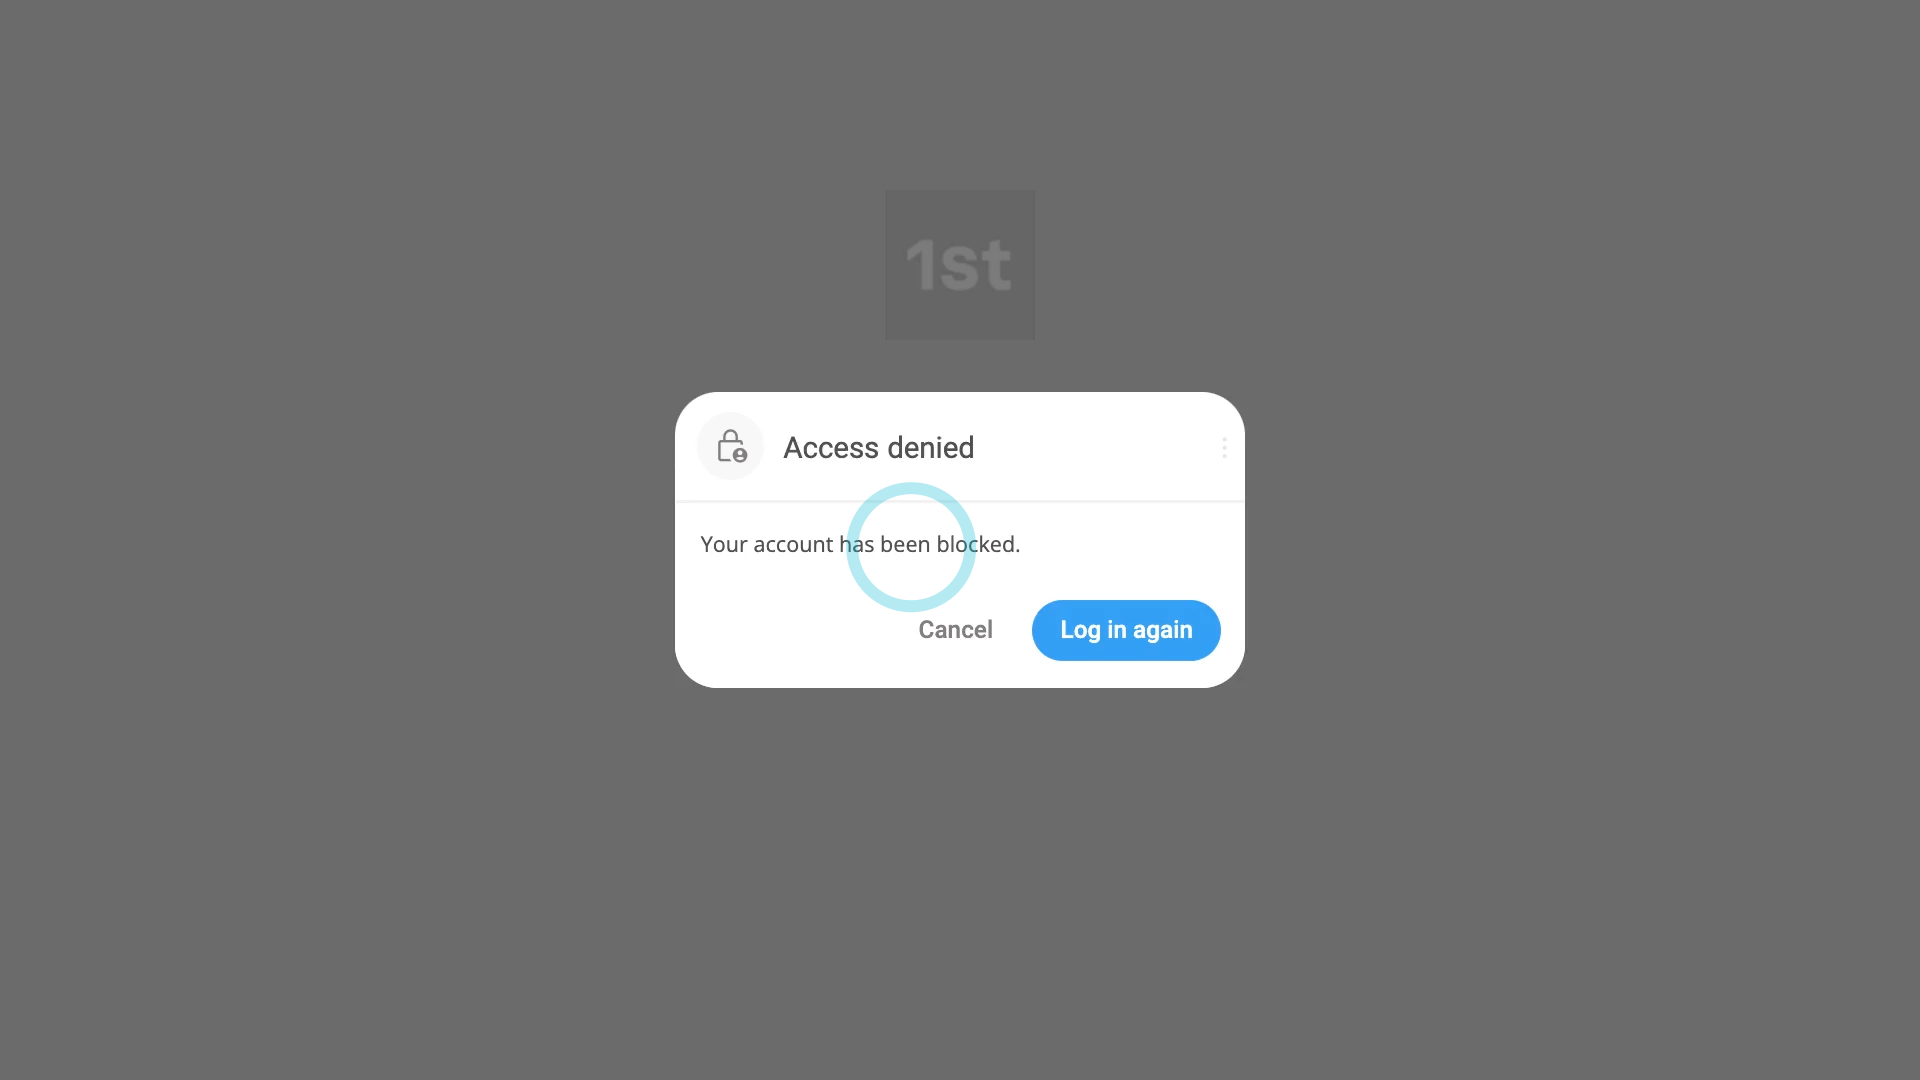
To understand what a blocked person sees when blocked by their admin:
- First, the next time the blocked person goes to a different tab, the blocked person now sees a message saying their login's blocked.
- If the blocked person tries to tap somewhere else, the blocked person sees the same message.
- And finally, if the blocked person tries to log in again, and if it's their only org, the blocked person also sees a similar message.
You may notice:
- A blocked person's payslips continue to be filed, and all their data still displays in all reporting.
- Blocking them means that the blocked person can't log in to your org.
Keep in mind that:
- If the blocked person belongs to other orgs, the blocked person can still access those other orgs.
- Once you're ready to have them back, turn off: "Temporarily block access"
- The blocked person can then instantly log back into your org again.
- However, you may need to contact them, to tell them that their login's working again.
And that's it! That's all you need to do to temporarily block one of your people from having access!
How do I use the 12-month calendar?
 3:45
3:45
"How do I use the 12-month calendar?"
There's a 12-month calendar for both pay batch and person. Each shows you a full year of events, both past and future.
To see a pay batch's 12-month calendar, and change its holidays:
- First, select the pay batch on: "Menu", then "Pay batches"
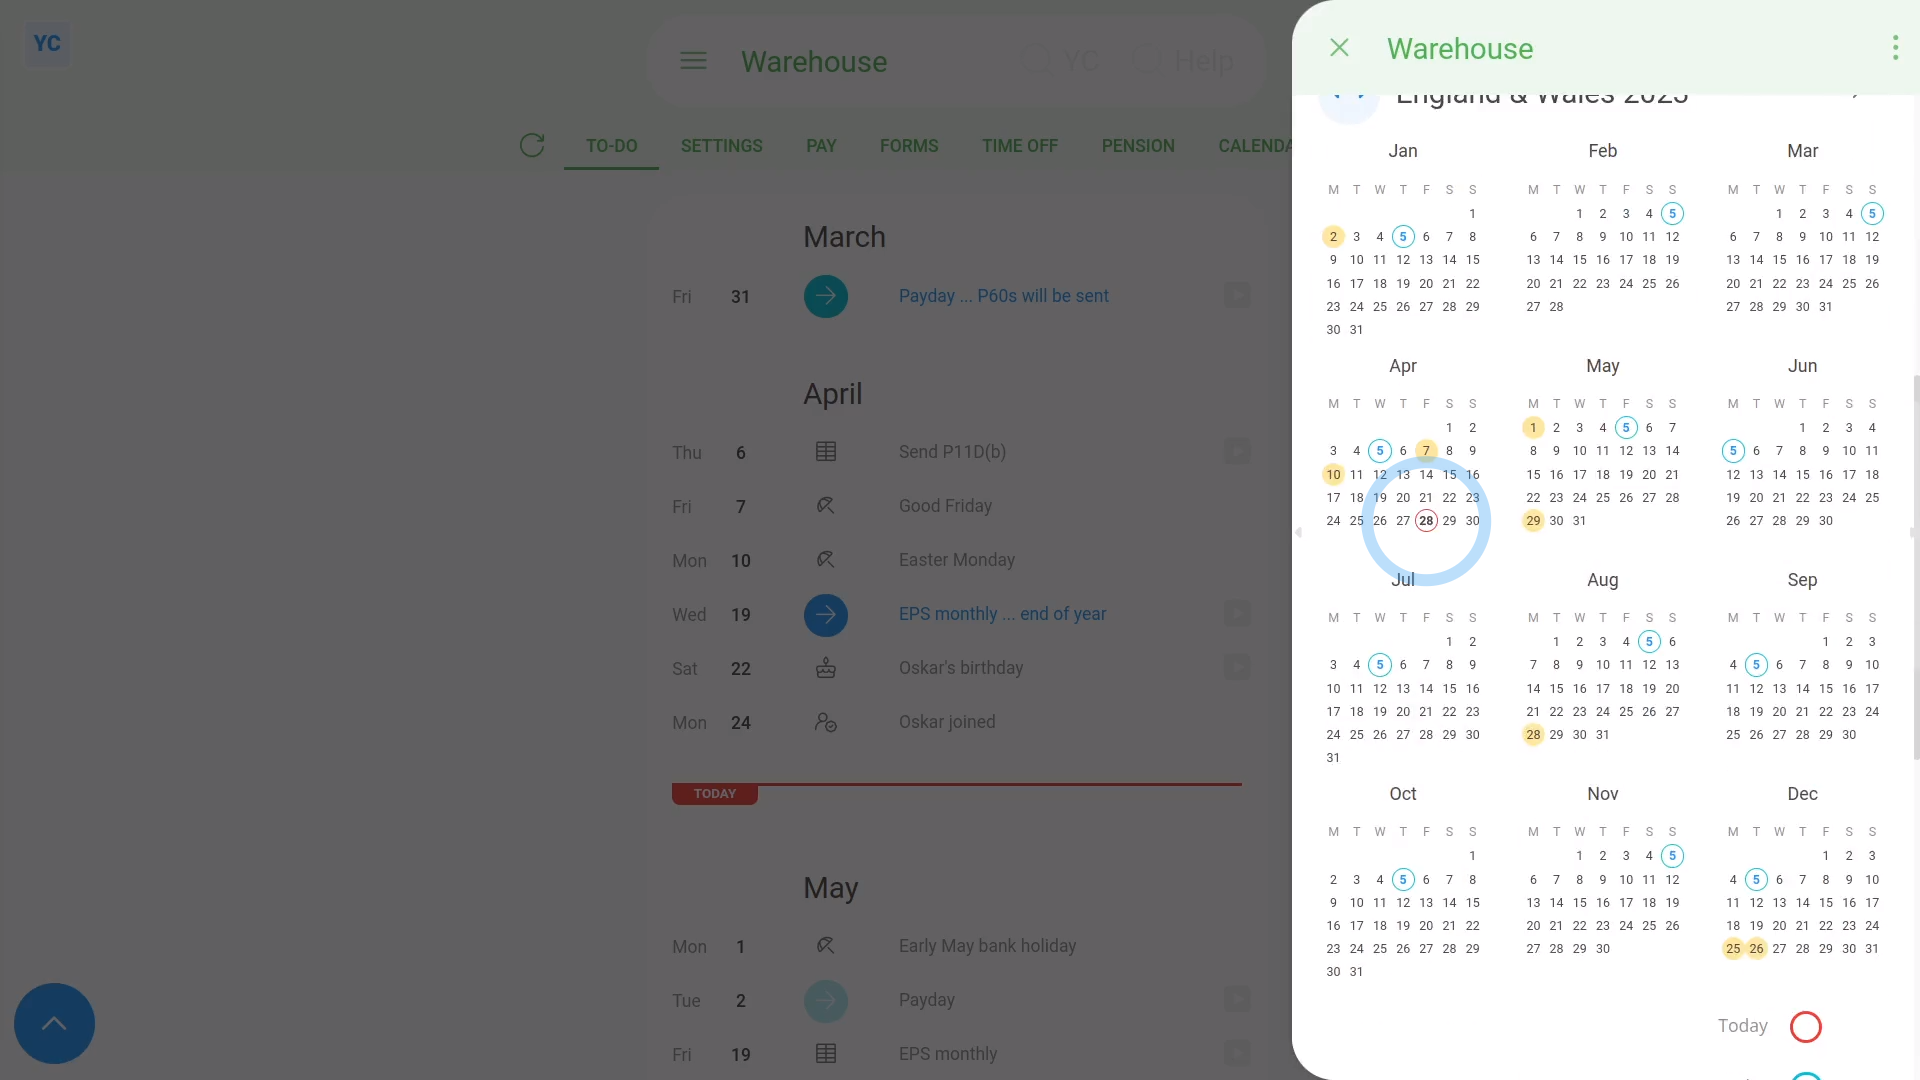
- Then tap: "Calendar", then "12-month calendar"
- You can see the pay batch's next upcoming holiday (at the top).
- And you can see how many days until its next payday.
- In the main part of the page you can see all 12 months of the year, with today's date circled in red.
- To change its holidays, scroll down to "Pay batch holidays" (near the bottom). Then tap the "Edit" button:
- And select a different "Paid holidays" setting.
- After the calendar updates, you'll see the new calendar heading, with its new holiday dates shown in light orange.
- Next, the days with blue outlines mark each of the pay batch's paydays for the year.
- And finally, if you hover your mouse over a day with a blue outline, it highlights the pay period days that the payday covers. Now you'll see the first and last day that each pay period covers.
Keep in mind that:
- Changing the holidays for a pay batch applies the change to all the people in the pay batch.
To see a person's 12-month calendar:
- First, select the person on: "Menu", then "People"
- Then tap: "Calendar", then "12-month calendar"
- You can see the year that you're on, in the heading.
- And you can tap the triangle buttons (near the heading) to skip forward and back a year.
- Next, to see 7 days of a person's timesheets in "Timelines ... weekly", tap the grey circles (at the start of each week).
- The light grey days mark non-working days, like weekends.
- And the light orange days mark: "Pay batch holidays"
- When you hover your mouse over one, it also tells you the name of the holiday.
- All the other days are working days.
- If you tap any working day, you'll see the person's timesheet for that day.
- And finally, if you tap a payday (with a blue outline), it asks if you want to open that day's "Payslip" or: "Timesheet"
To change which days are a person's non-working days:
- First, select the person on: "Menu", then "People"
- Then tap: "Pay", then "Pay settings"
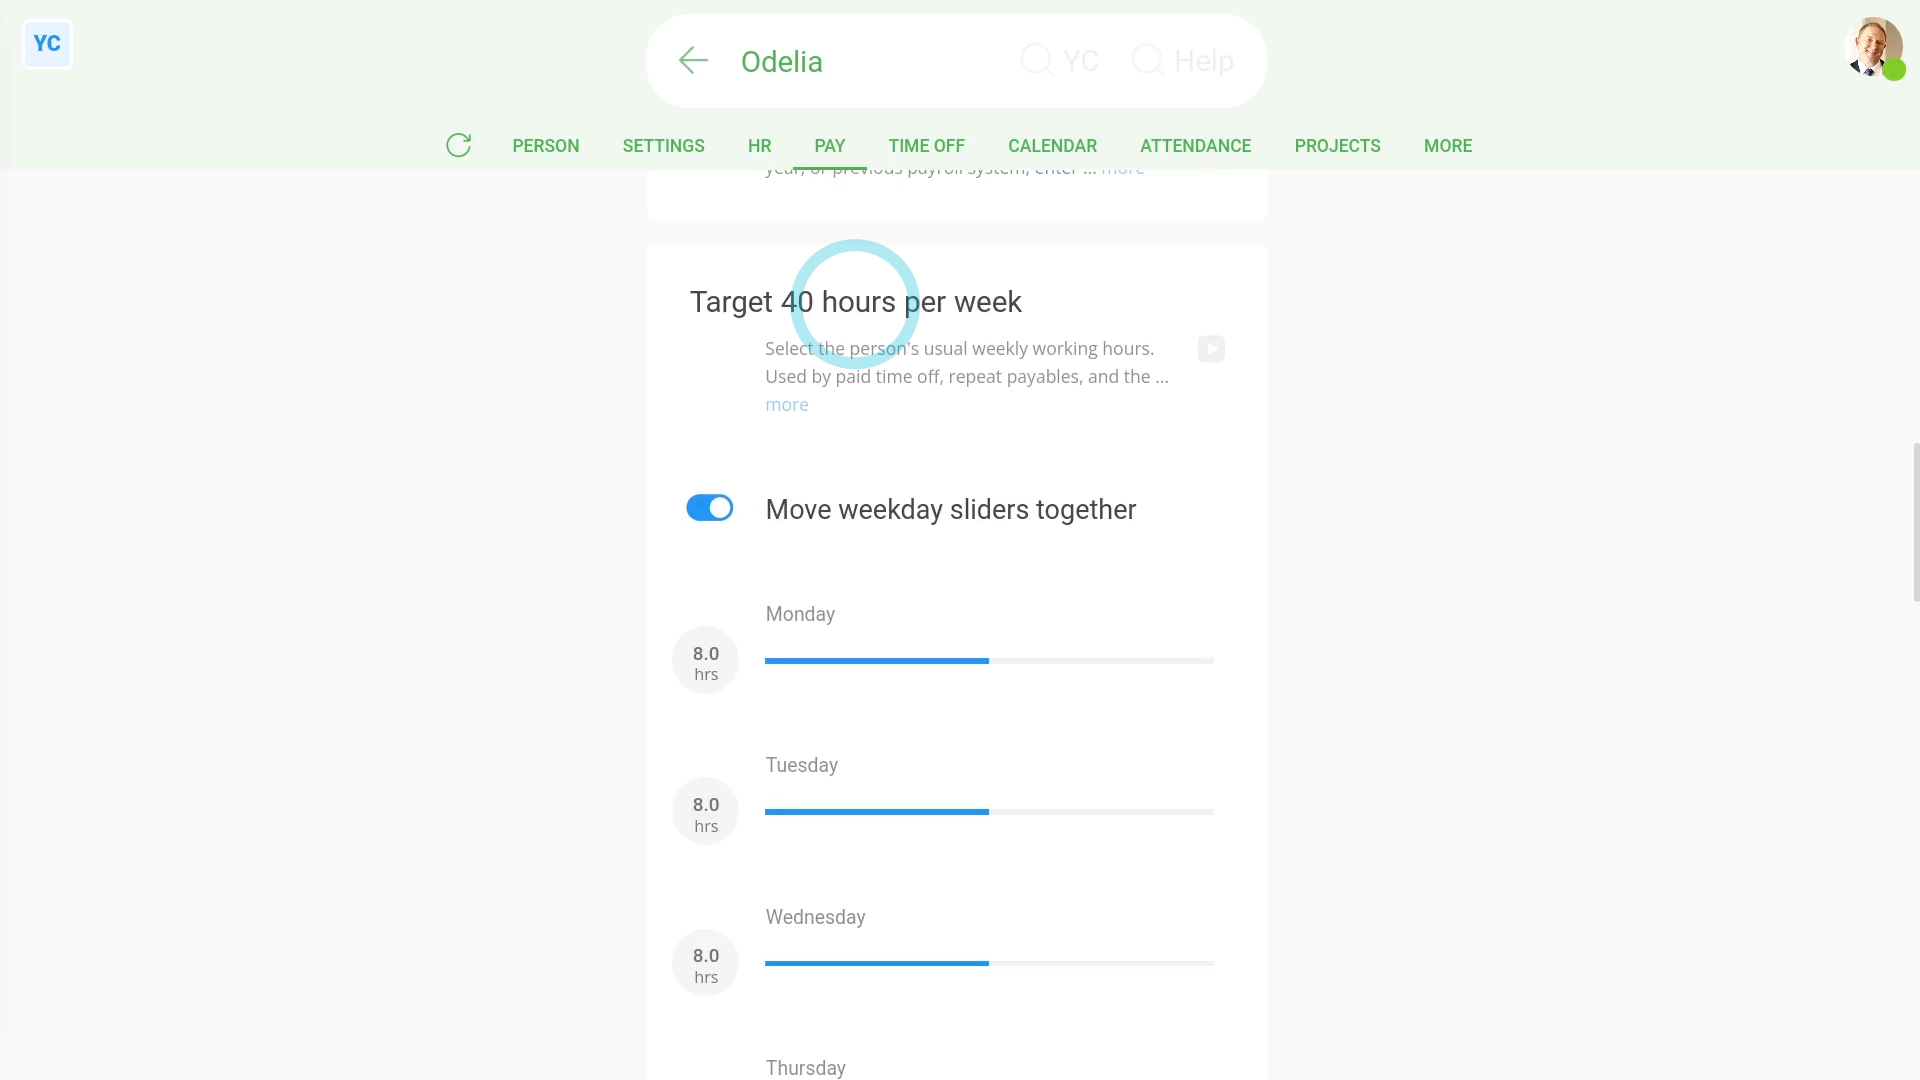
- Scroll down to the "Target hours per week" heading.
- And turn off: Move weekday sliders together
- Next, drag the person's working days' sliders to whatever hours the person works.
- And drag the non-working days' sliders to zero.
- Then tap: Save
- Next, go to the person's: "Calendar", then "12-month calendar"
- And finally, you'll now see the new non-working days marked in light grey.
You may notice:
- That if you scroll to the bottom of the 12-month calendar, there's a useful colour reference.
- The colour reference reminds you what each part of the calendar means.
And that's it! That's everything you need to know about a pay batch or person's 12-month calendar!
How do I use the confidential notes?
 1:49
1:49
"How do I use the confidential notes?"
The "Confidential notes" page is a place to write notes that're only available to people who've got "Full payroll admin" permissions.
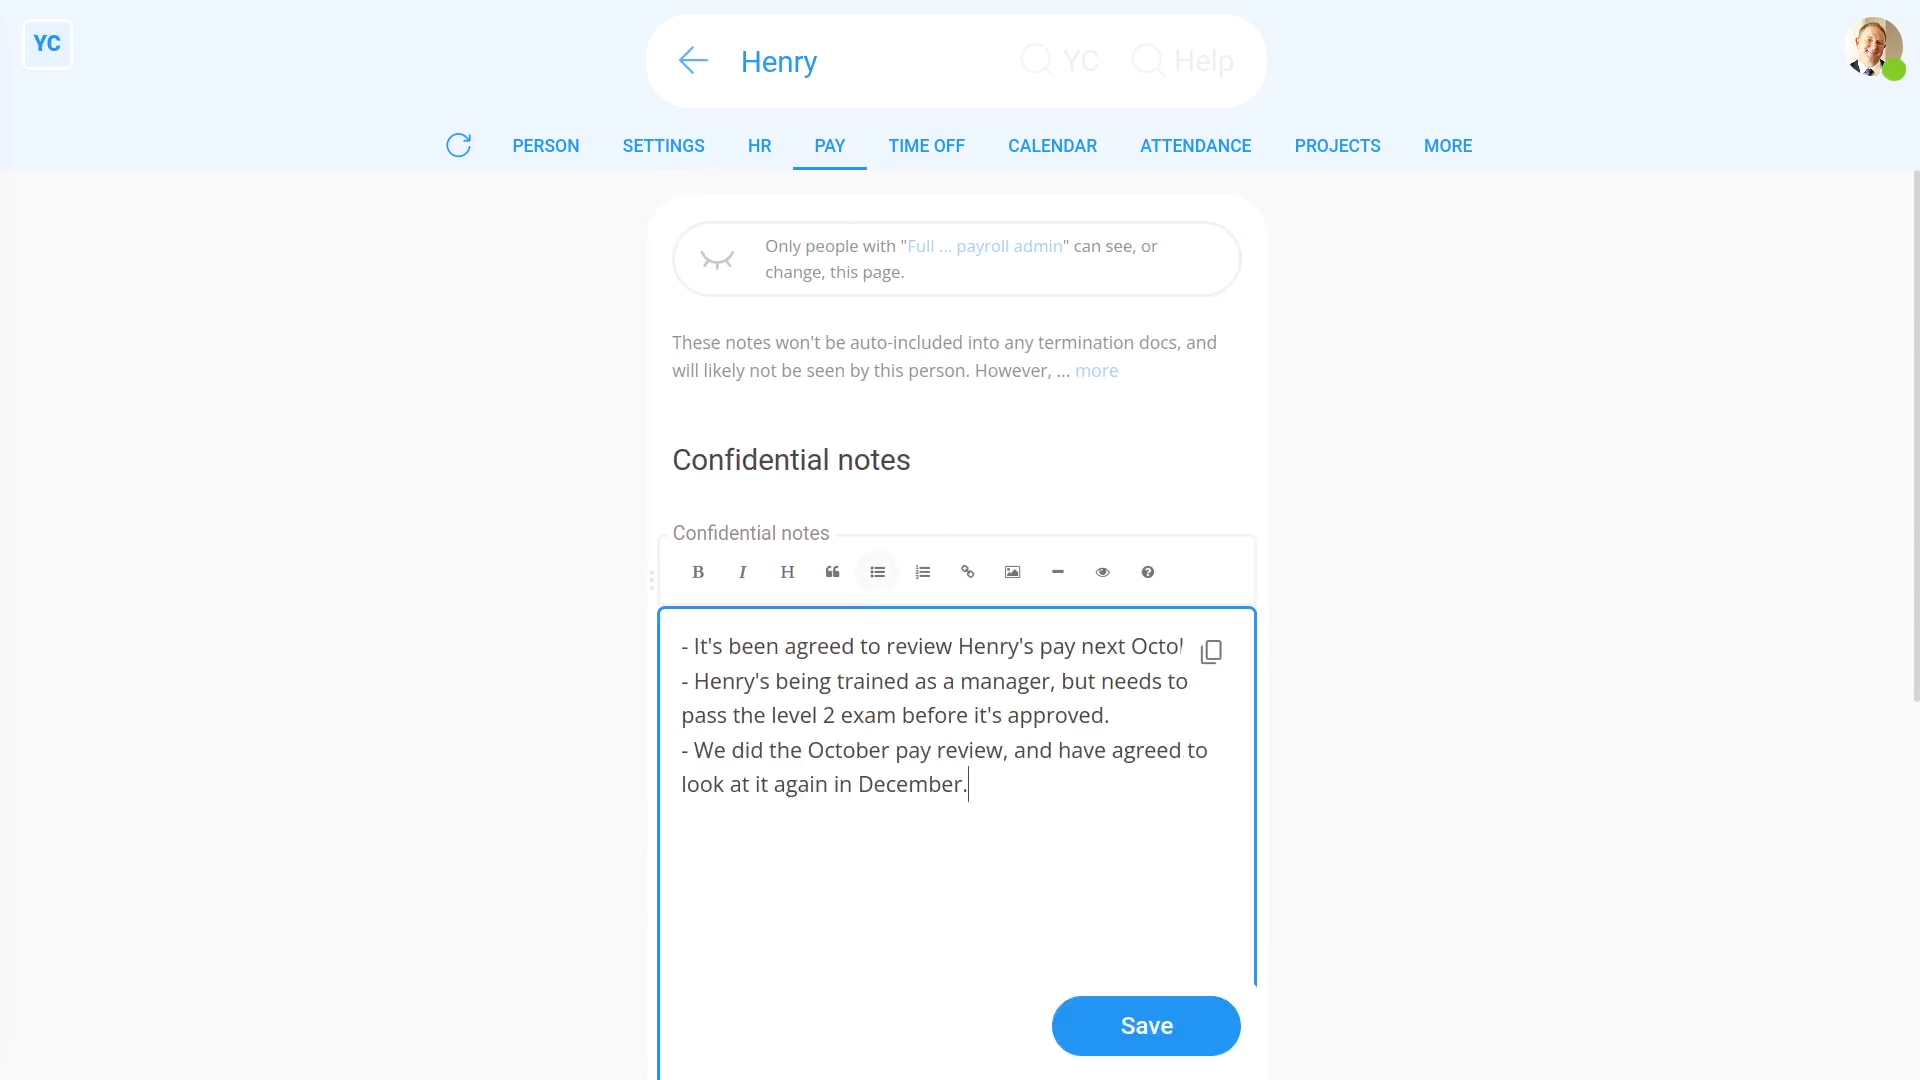
To add to a person's confidential notes:
- First, select the person on: "Menu", then "People"
- Then tap: "Pay", then "Confidential notes"
- Tap into the "Confidential notes" box.
- And type in your notes.
- And finally, tap: Save
You may decide to add "Confidential notes" about:
- Disciplinary actions.
- Changes in pay rate.
- Managerial decisions.
- Notes about final pay.
- And much more.
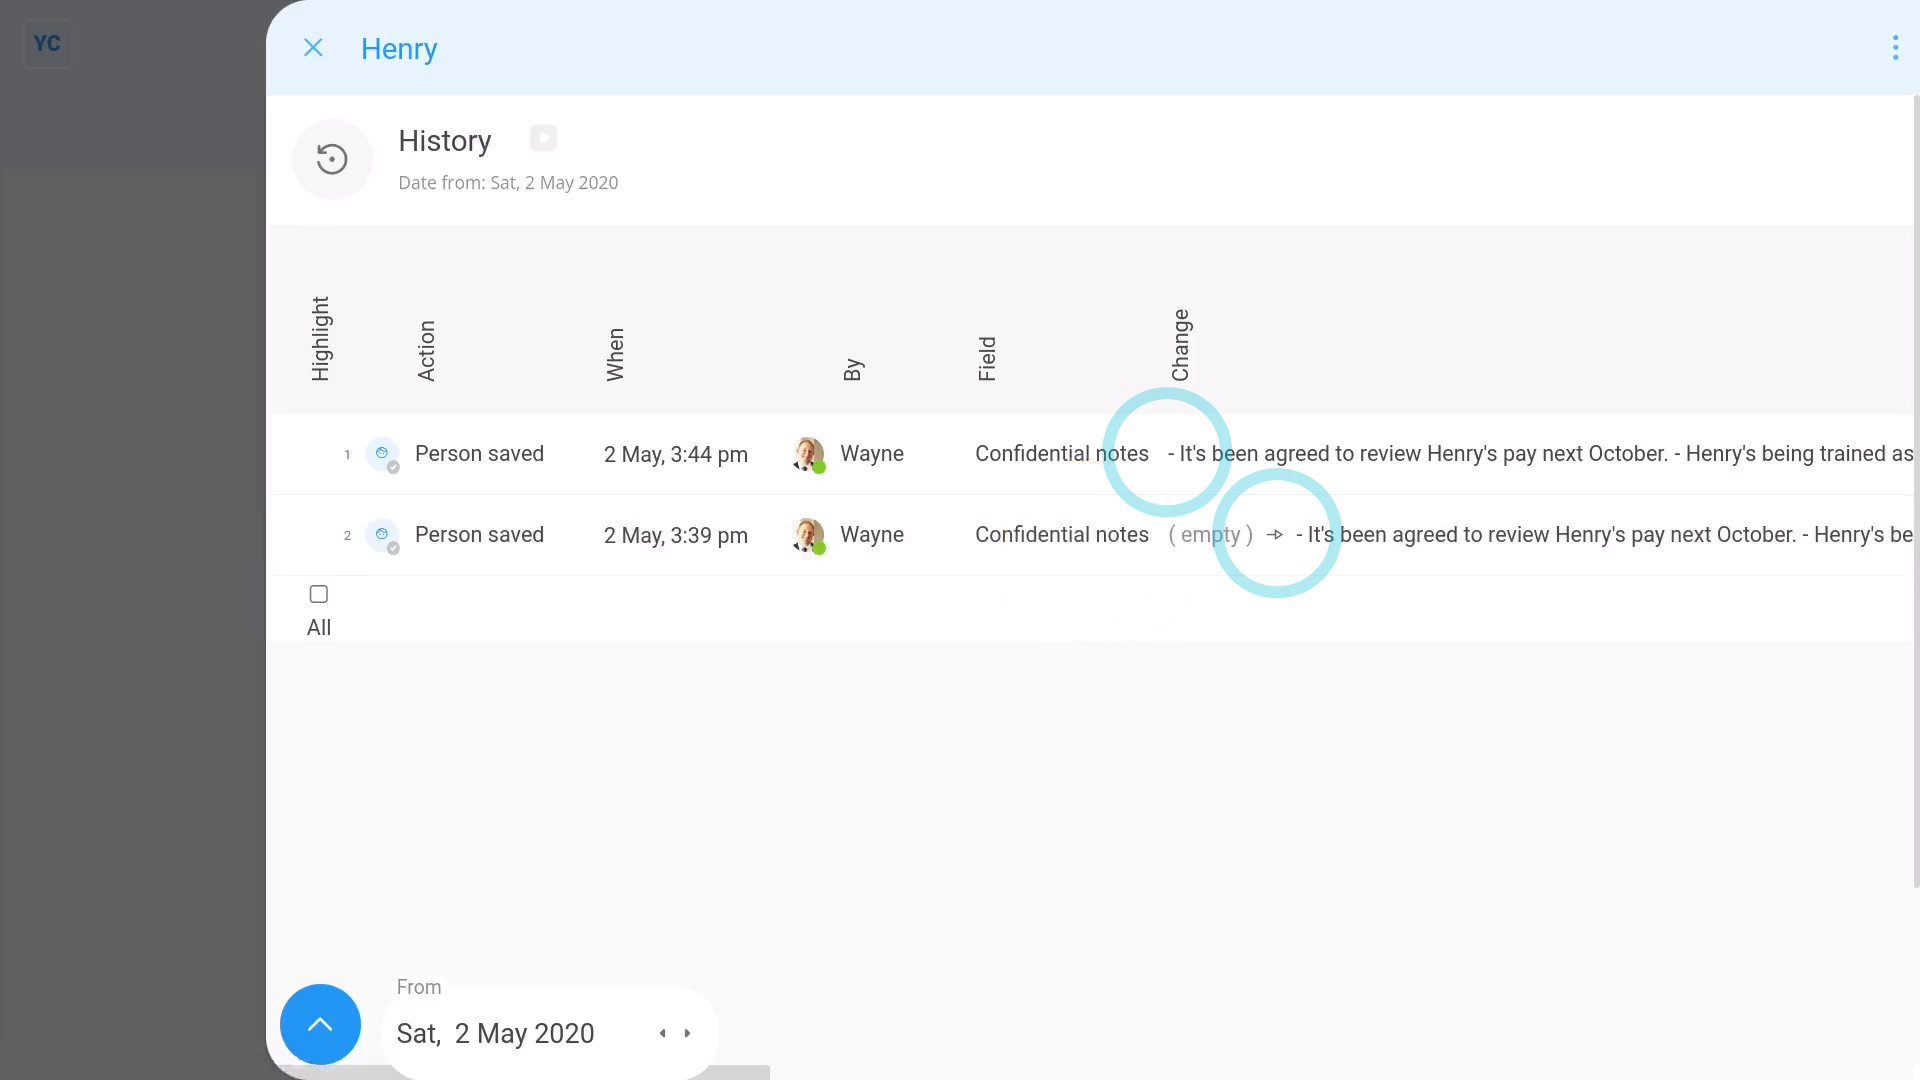
To see a history of previously recorded notes:
- First, hover your mouse over: "Confidential notes"
- Then next to "Confidential notes", tap the three dots: (on the far left)
- Then tap: History
- And finally, history slides out on the right, listing all the notes that've been recorded in the past.
Keep in mind that:
- The "Confidential notes" won't be visible to org admins or regular people.
- In addition, even if you're a "Full payroll admin" yourself, you can't see the "Confidential notes" page about yourself.
For advanced usage:
- Remember, that any employee may have the right to request a copy of their own: "Confidential notes"
- The employee may have request rights under GDPR article 15: "Right of access by the data subject"
And that's it! That's everything you need to know about using confidential notes!
How do things look when a person's got no admin permissions?
 2:42
2:42
"How do things look when a person's got no admin permissions?"
When a person logs into 1st Money, some features may be hidden, depending on permissions.
To understand what a typical employee, who doesn't have any admin permissions, can see and do:
- First, a typical employee...
- Can see payslip PDFs, at: "Person", "Pay", then "Payslips history"
- And can submit an expense claim, at: "Menu", then "Expense claim"
- And can request time off, at: "Menu", then "Request time off"
- And can see approved time-off, at: "Person", "Calendar", then "12-month calendar"
- And can see upcoming shift times, at: "Work-time menu" (top-right)
- And can clock-in timesheet time, at: "Work-time menu", then "Start"
- And can update their contact details, at: "Person", "Settings", then "Person settings"
- And can update their home address, at: "Person", "Settings", then "Personal"
- And can see their pay settings (but can't change them), at: "Person", "Pay", then "Pay settings"
- And can see their tax settings (but can't change them), at: "Person", then "Tax"
- But can't see other people's contact info (except for people directly managed by them, etc).
- And can't see any locations or projects (except those that the person's been added to).
- And finally, a typical employee can't see anyone else's pay info (except their own).
For advanced usage:
- A typical employee can install 1st Money on their phone or laptop, at: "Menu"
- And a typical employee can see the "Management" org chart (but it's limited to first names and job titles only), at: "Menu", "Org", "Org charts", then "Management"
Keep in mind that:
- You can set a person's permissions at: "Person", "Settings", then "Permissions"
- As an org admin, you can block or delete a person's 1st Money login at any time.
- The person still gets paid, and still gets their payslip by email. But the person can't log in anymore.
And that's it! That's everything you need to know about how things look to a person who's got no admin permissions!
How do things look when a person's got org admin permissions?
 1:46
1:46
"How do things look when a person's got org admin permissions?"
An "org admin" is a person who's got "Full org admin" permissions, but doesn't have to have any payroll admin permissions.

To understand what a person with "Full org admin" permissions can see and do:
- First, an org admin...
- Can see projects, and create new projects, at: "Menu", then "Projects"
- And can see locations, and create new locations, at: "Menu", then "Locations"
- And can see all your org's settings, at: "Menu", then "Org"
- And can see everybody's contact info.
- And can see and change everyone's timesheets.
- And can approve time off requests.
- And can send HR docs.
- In summary, org admins can see and update all HR related settings.
- However, org admins can't see anything about pay, pay batches, payroll, or payslips.
- When an org admin looks at onboarding, anything that's pay related is greyed out.
- And finally, when an org admin goes to "Person", "Docs", then "Docs history", pay related info is also greyed out.
Keep in mind that:
- You can set a person's permission to be an org admin, at: "Person", "Settings", then "Permissions"
And that's it! That's everything you need to know about how things look to a person who's got "Full org admin" permissions!
How do things look when a person's got payroll admin permissions?
 2:07
2:07
"How do things look when a person's got payroll admin permissions?"
A "payroll admin" is a person who's got "Full payroll admin" permissions (which means the person automatically also has "Full org admin" permissions).
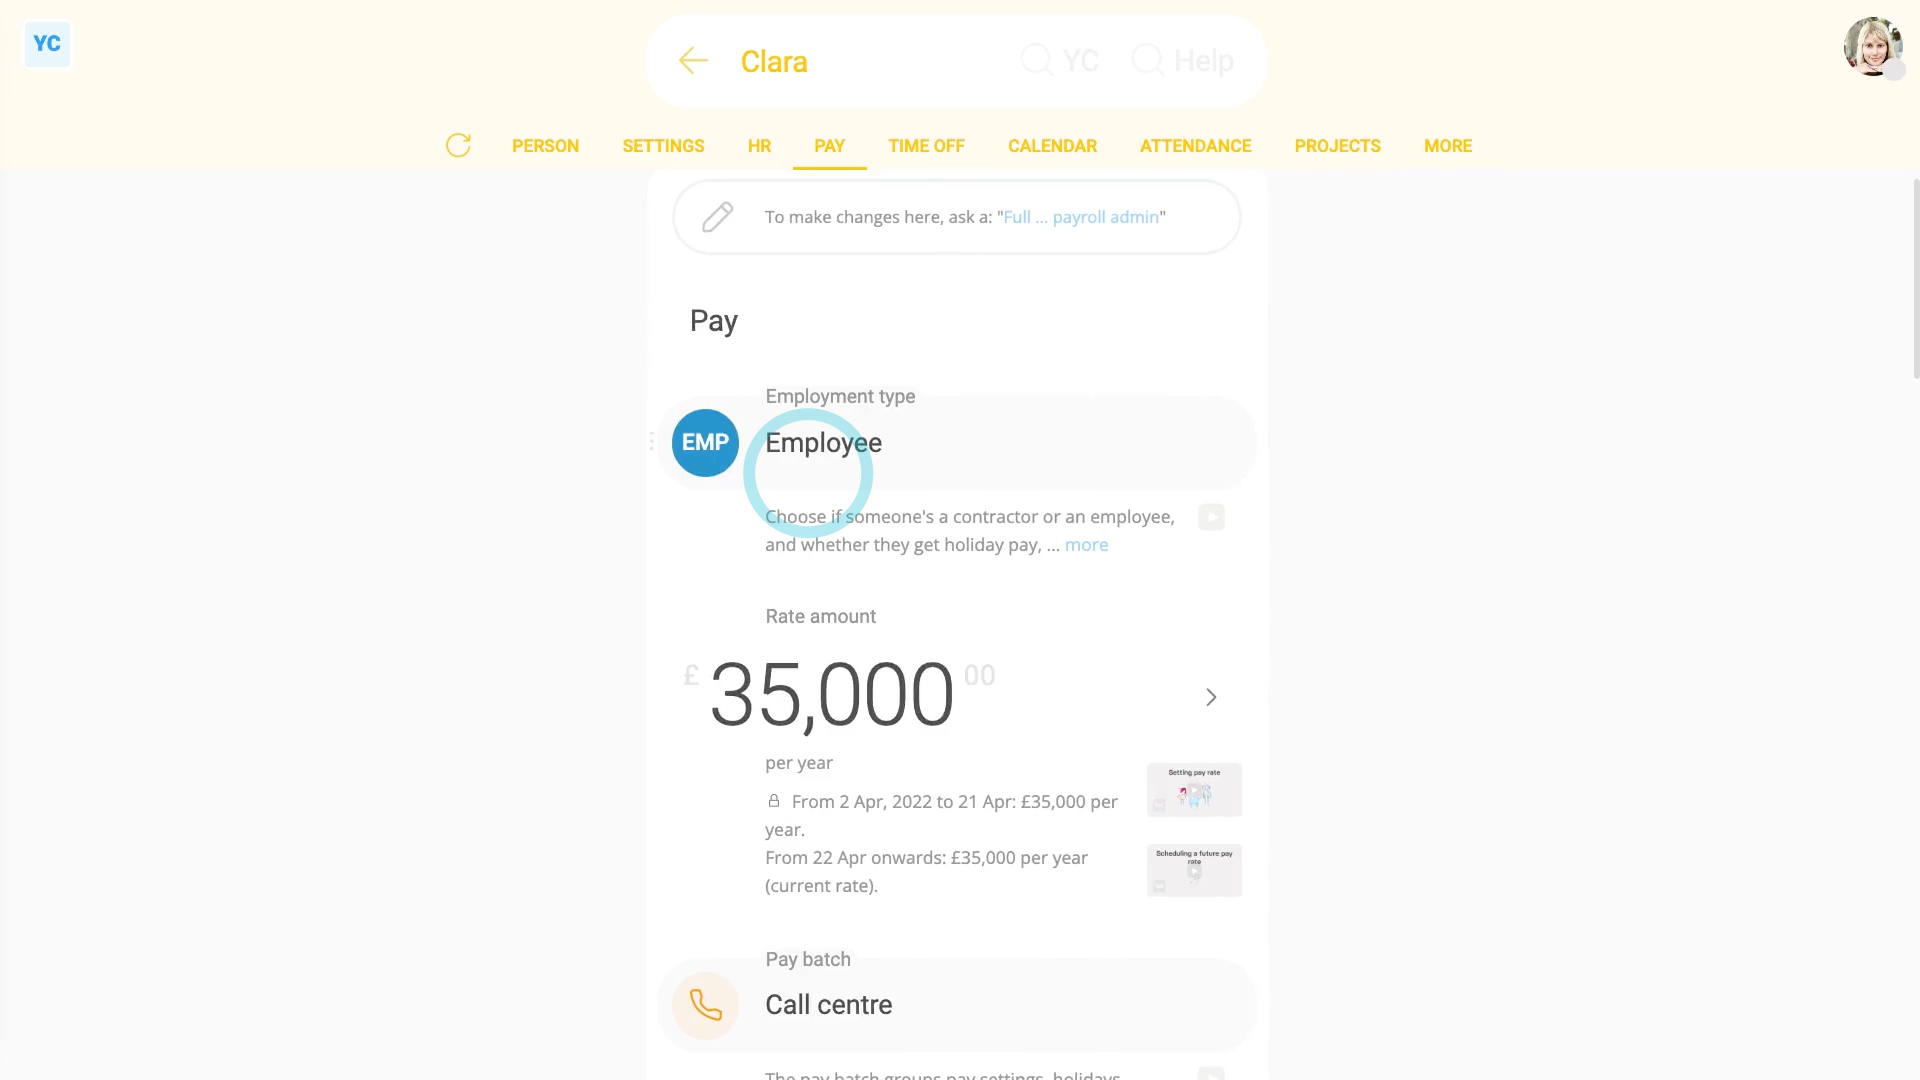
To understand what a person with "Full payroll admin" permissions can see and do:
- First, a payroll admin can do everything an org admin can do. In addition, a payroll admin...
- Can see pay batches, at: "Menu", then "Pay batches"
- And can pay people's payslips, at: "Pay batch", "Pay", then "Pay now"
- And can download a payslip PDF for any person, at: "Person", "Pay", then "Payslips history"
- And can see a pay estimate for any person, at: "Person", "Pay", then "Pay summary"
- And finally, a payroll admin can see (and change) everyone's pay rates and tax settings.
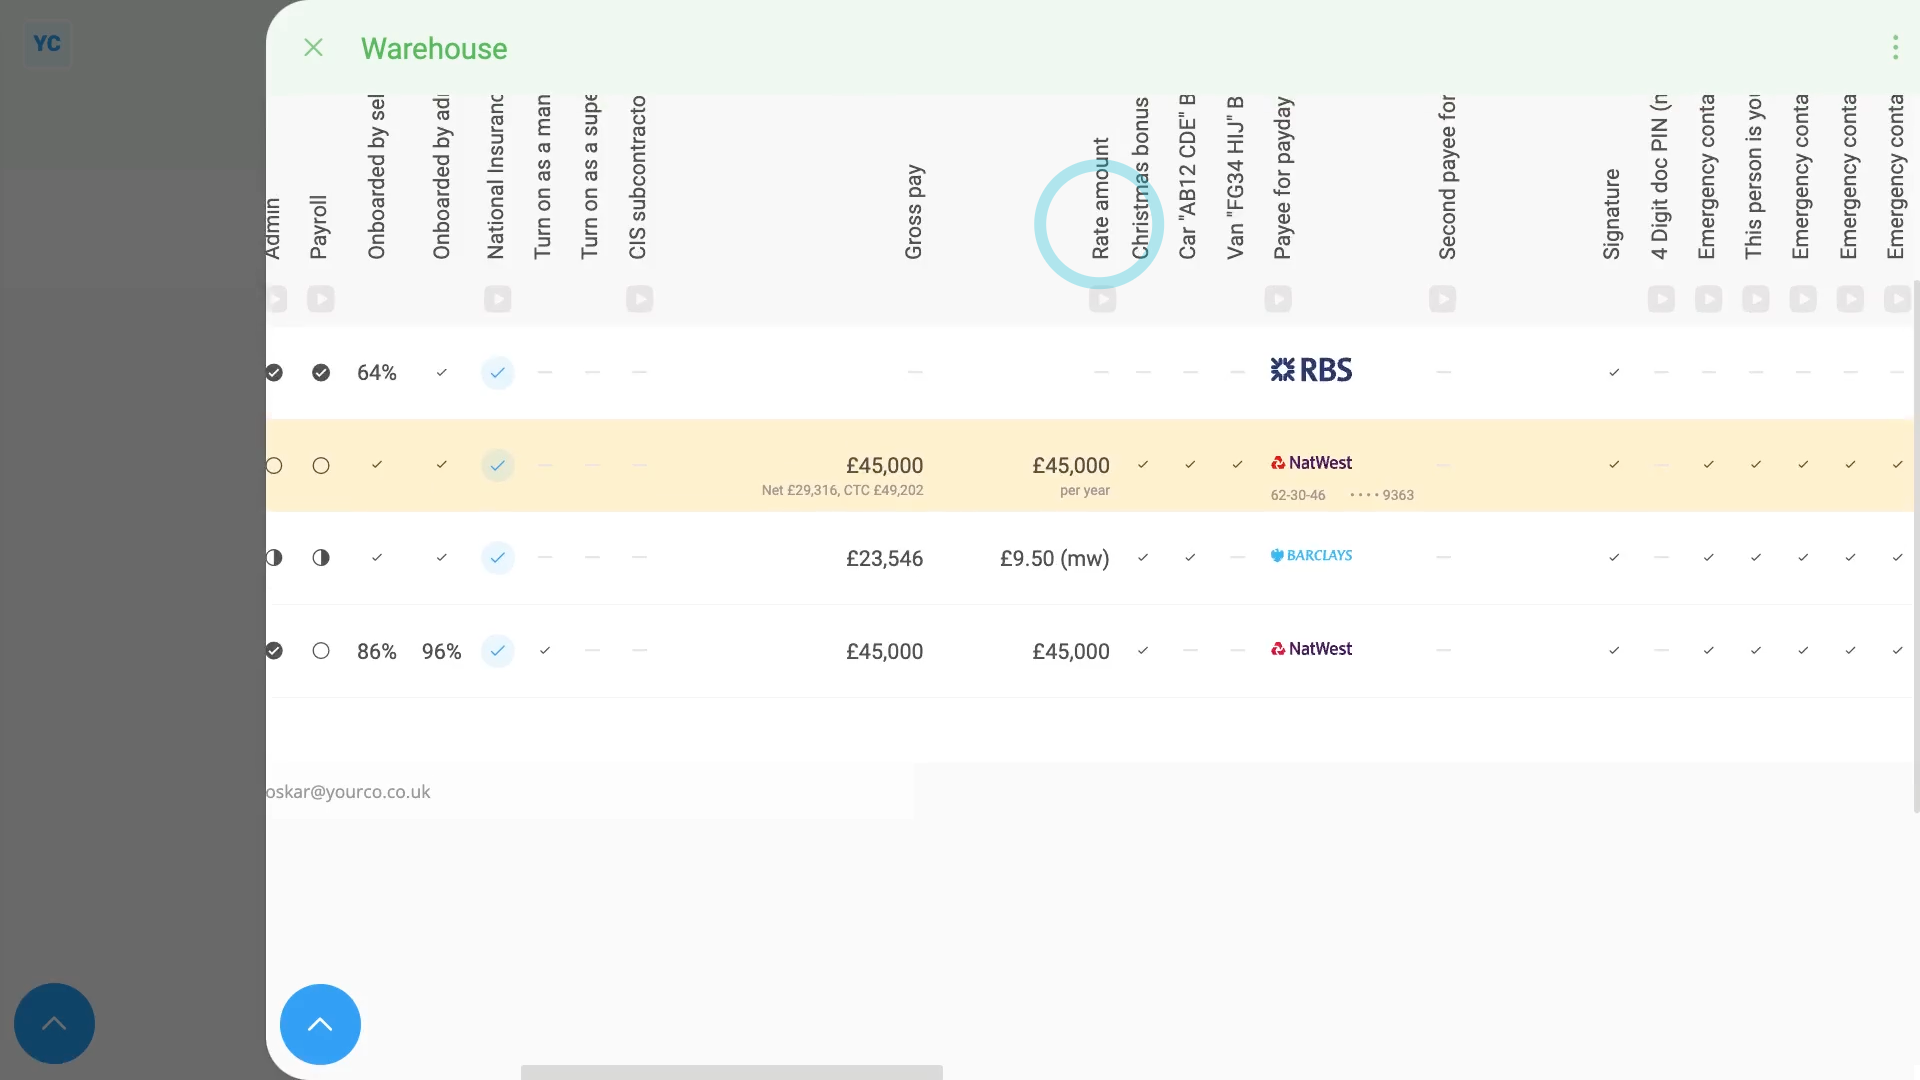
To see everyone's pay rates:
- First, select the pay batch on: "Menu", then "Pay batches"
- Then tap: "Pay", then "People"
- You may prefer to tap the tick boxes (at the start of any row).
- With the highlight turned on, it's easier to keep track of rows as you scroll across.
- Then scroll across to the "Rate amount" column.
- And finally, as a payroll admin, you can tap the "Rate amount", and instantly make changes.
Keep in mind that:
- You can set a person's permission to be a payroll admin, at: "Person", "Settings", then "Permissions"
- Also, only a person that's already a payroll admin, can set another person to be a payroll admin.
And that's it! That's everything you need to know about how things look to a person who's got "Full payroll admin" permissions!
What do I need to know about setting a person's join date?
 1:47
1:47
"What do I need to know about setting a person's join date?"
In order to have their payslip filed, a person's got to have their "Date joined" set.
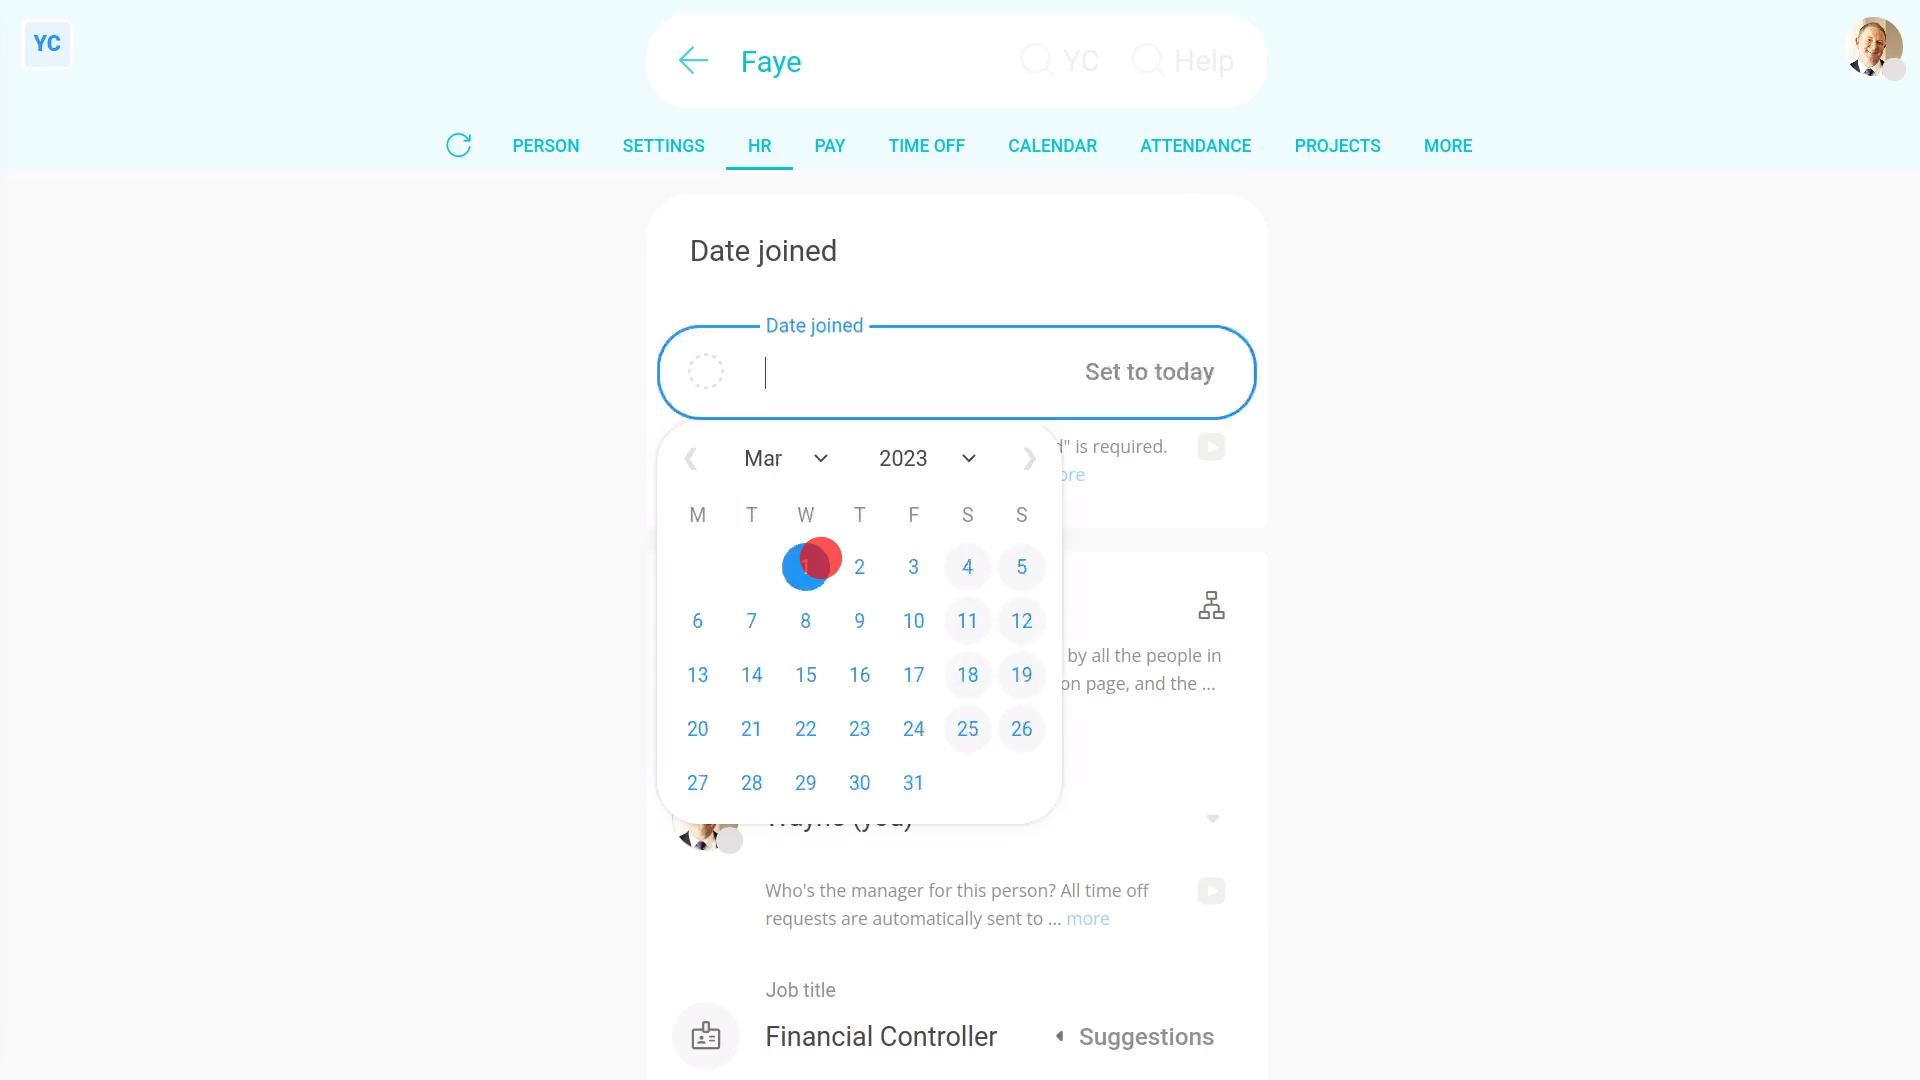
To set "Date joined":
- First, select the person on: "Menu", then "People"
- Then tap: "Settings", then "Job settings"
- Pick the date the person is to do their first day of work.
- And finally, tap: Save
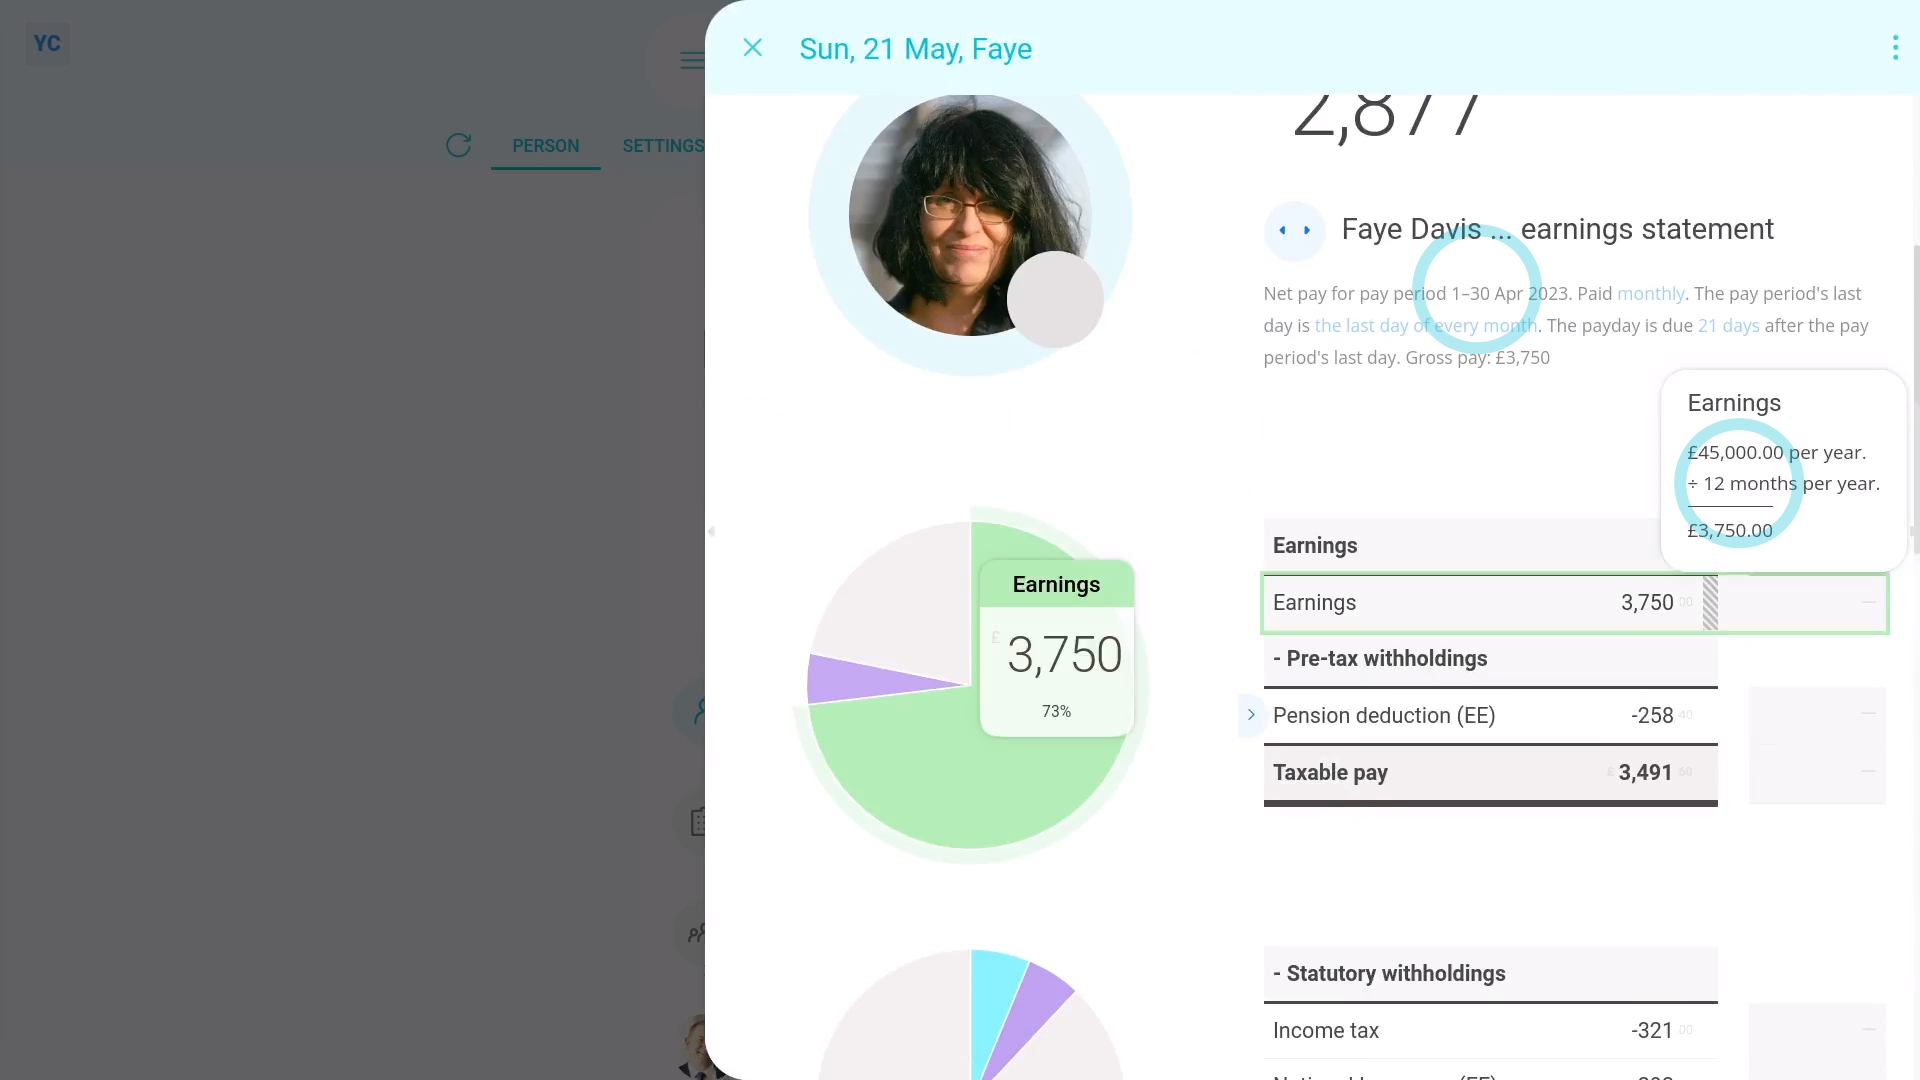
To check their pay:
- First, select the person on: "Menu", then "People"
- Then tap: "Pay", then "Payslip"
- And finally, if the "Date joined" was the first day of the month, when you hover your mouse over "Earnings", you'll see their full month's pay.
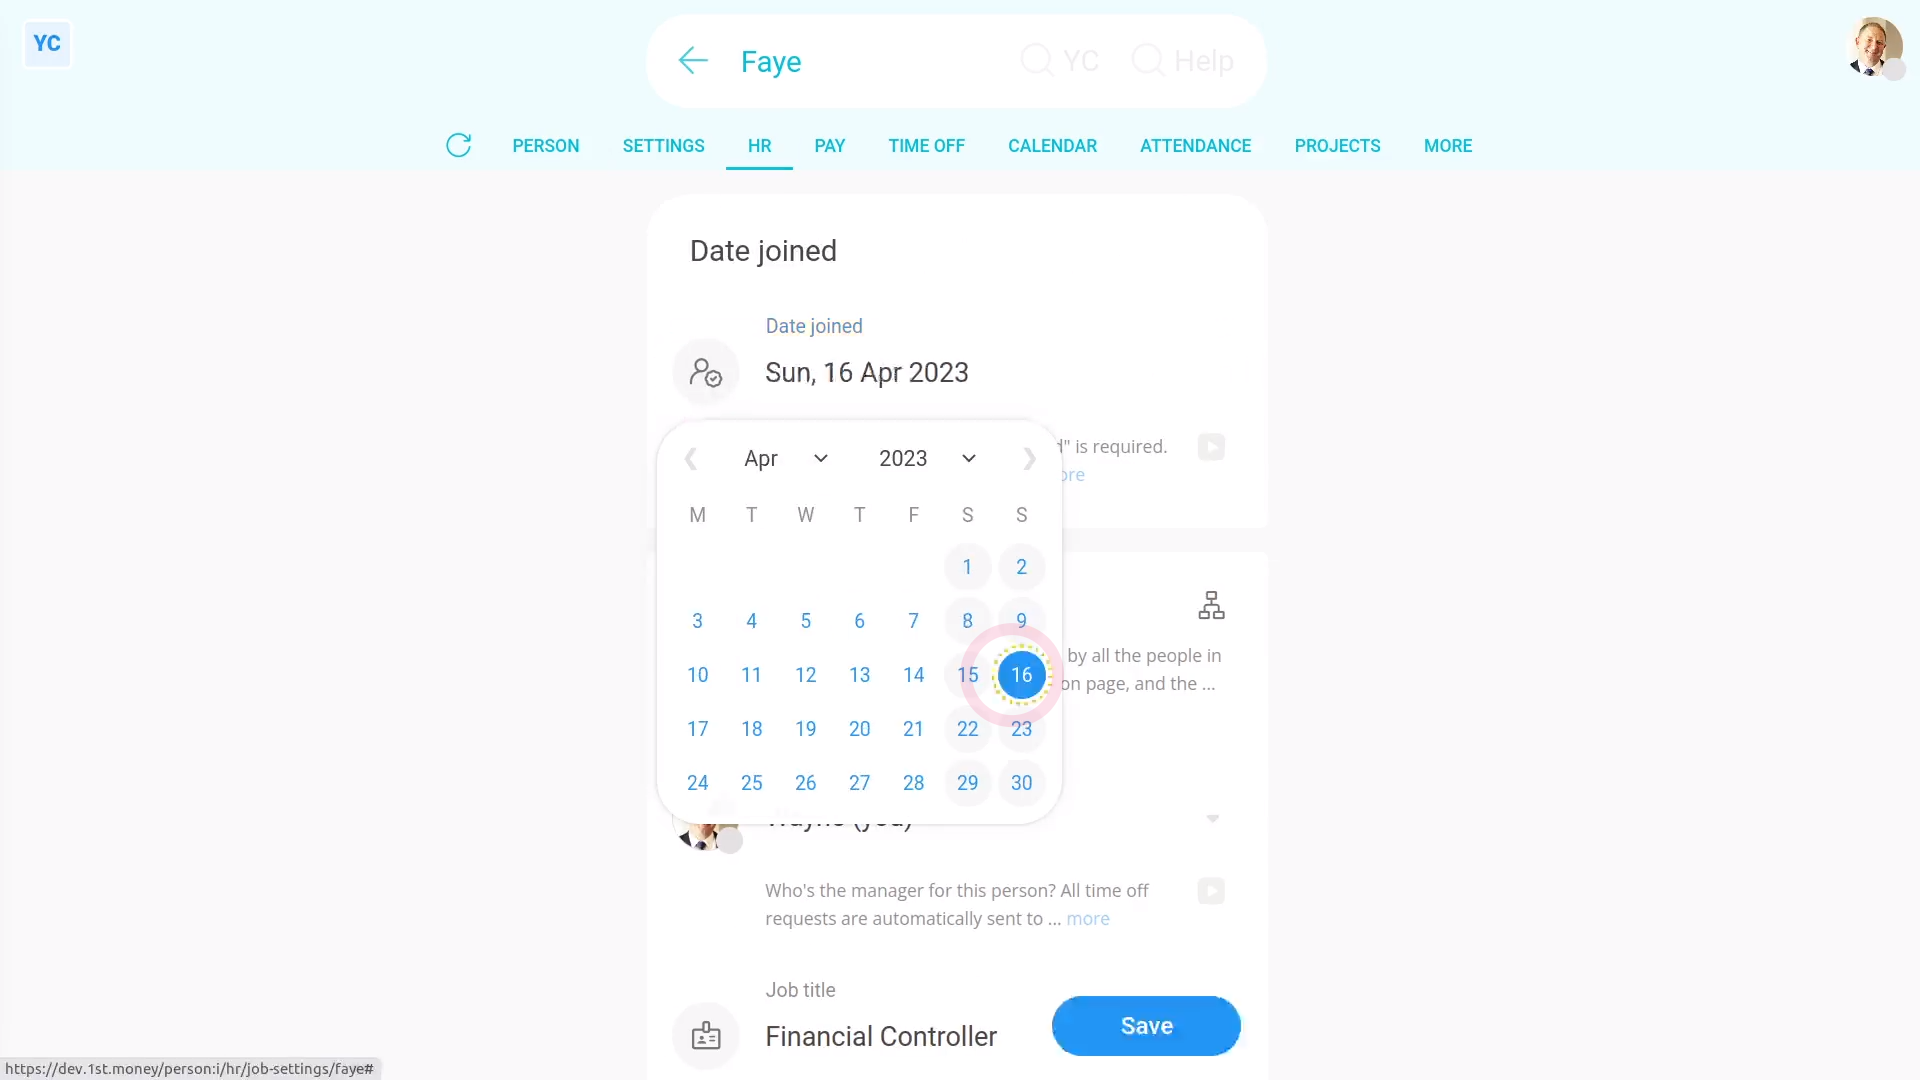
To see a person's pay, if joining half way into a month:
- First, change the "Date joined" to the 16th, or half way into the month.
- And tap: Save
- And then reopen the person's payslip: "Pay", then "Payslip"
- When you hover your mouse over "Earnings", you'll see the person's now only paid for half the month, as expected.
- And finally, you can see that "Date joined" does affect the first payslip of salaried people.
Keep in mind that:
- The "Date joined" is usually the day the person first worked for your org.
- It's usually not the day you sent them their job offer, and usually not the day their job offer was accepted.
And that's it! That's everything you need to know about setting a person's join date!