
HR Docs
 3:33
3:33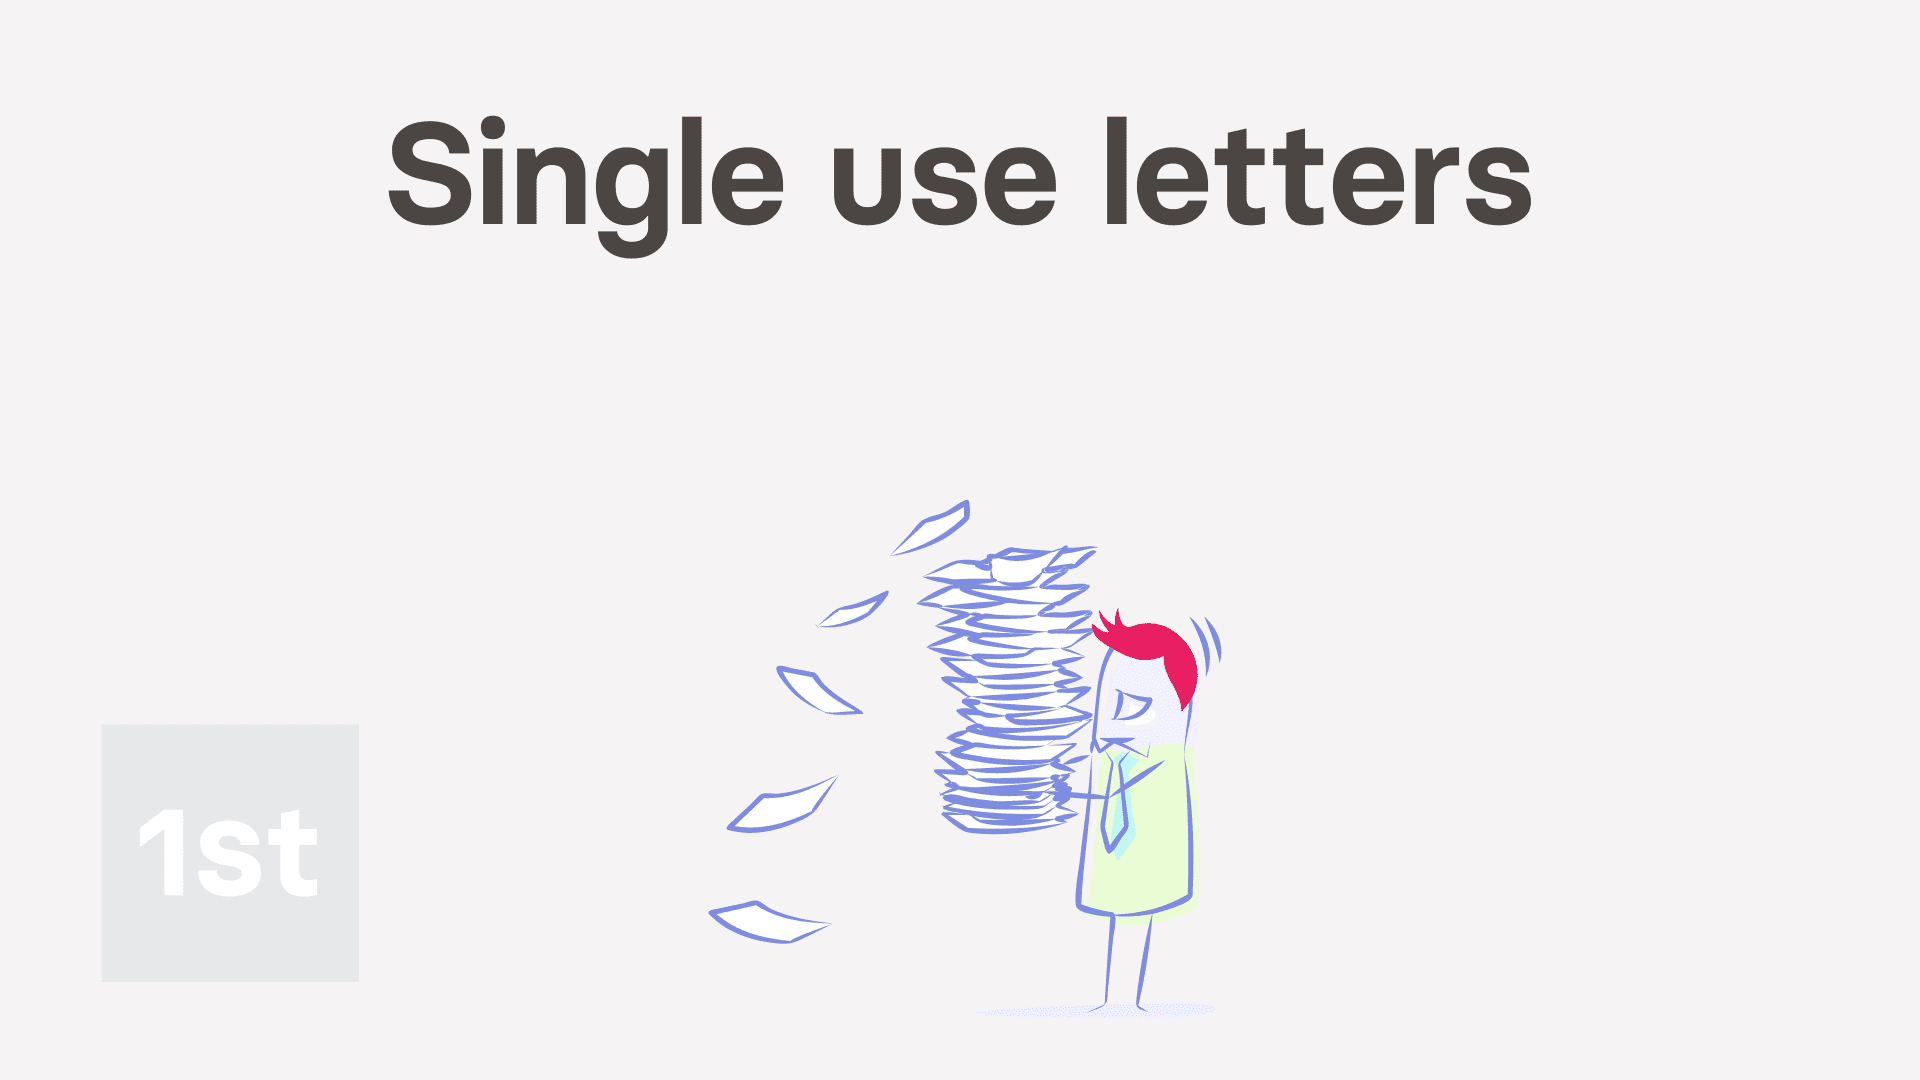 2:32
2:32 2:04
2:04 2:16
2:16 1:43
1:43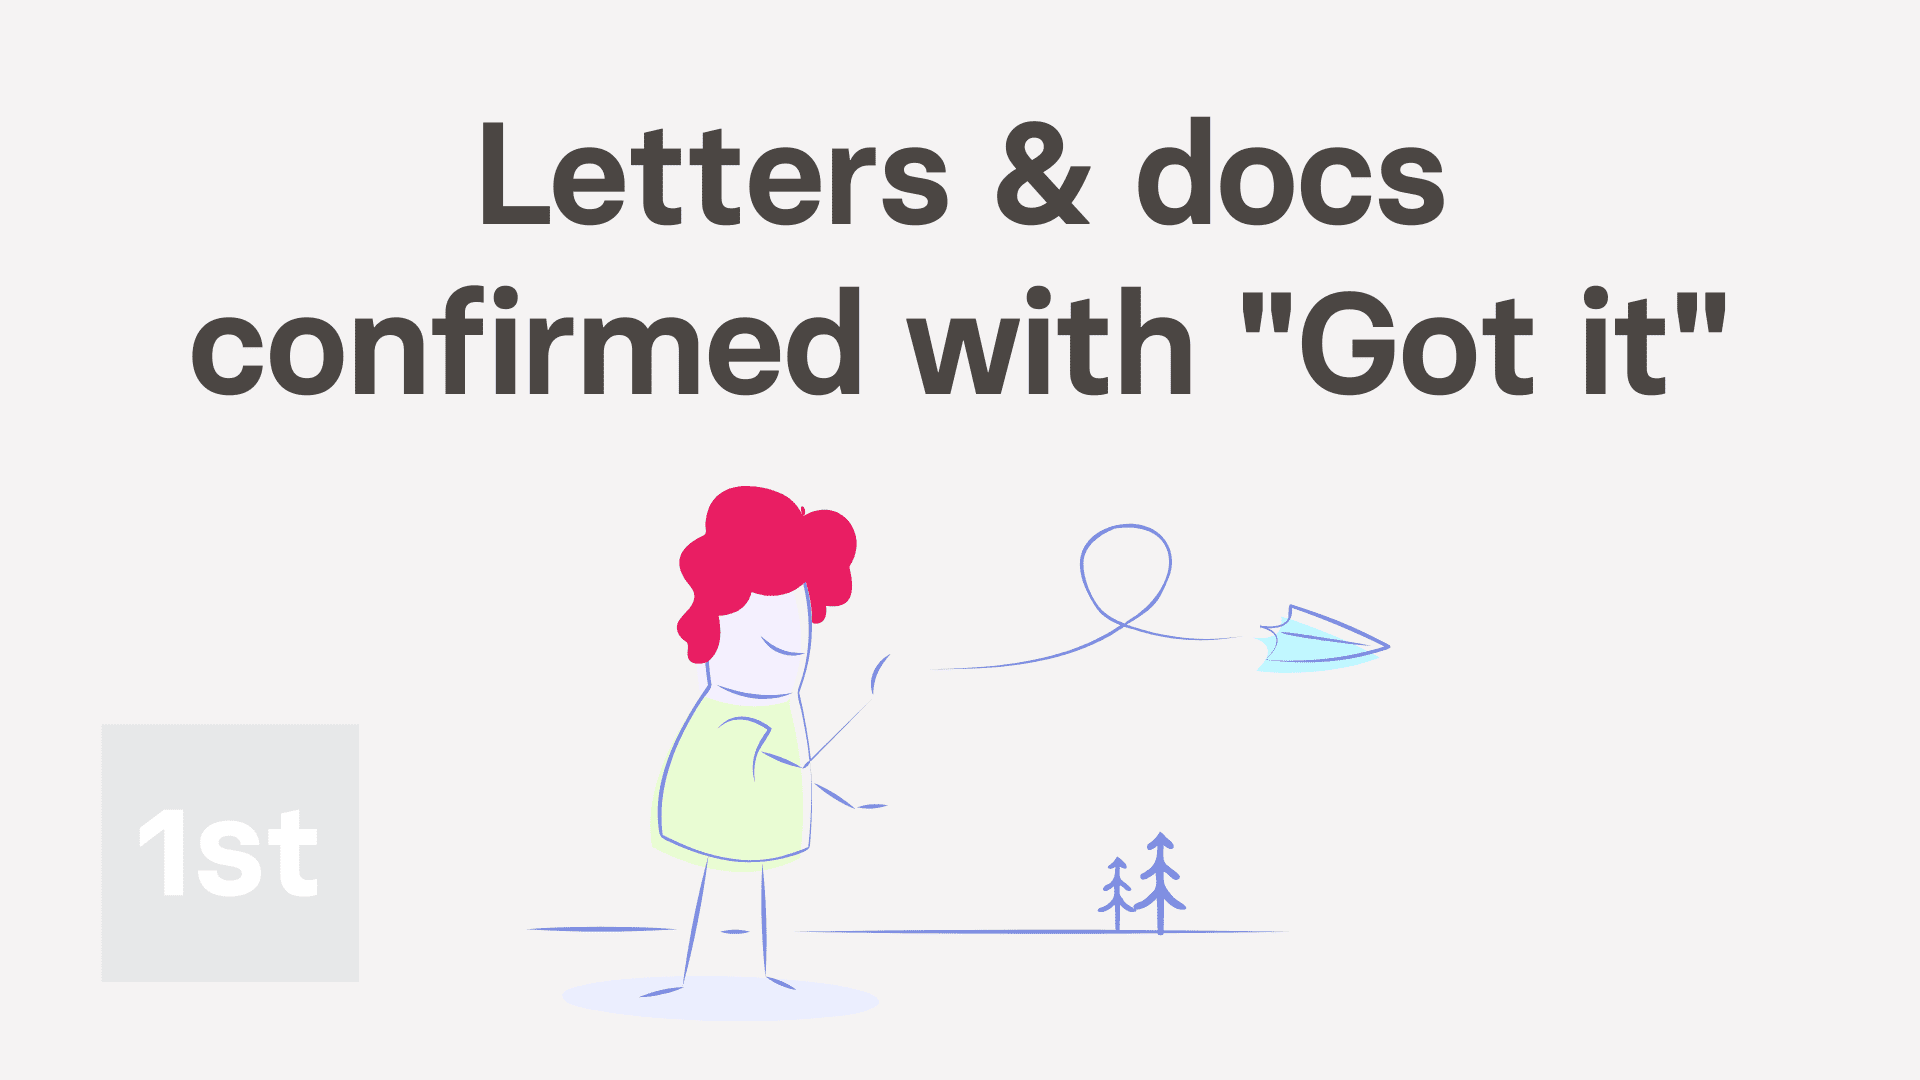 4:08
4:08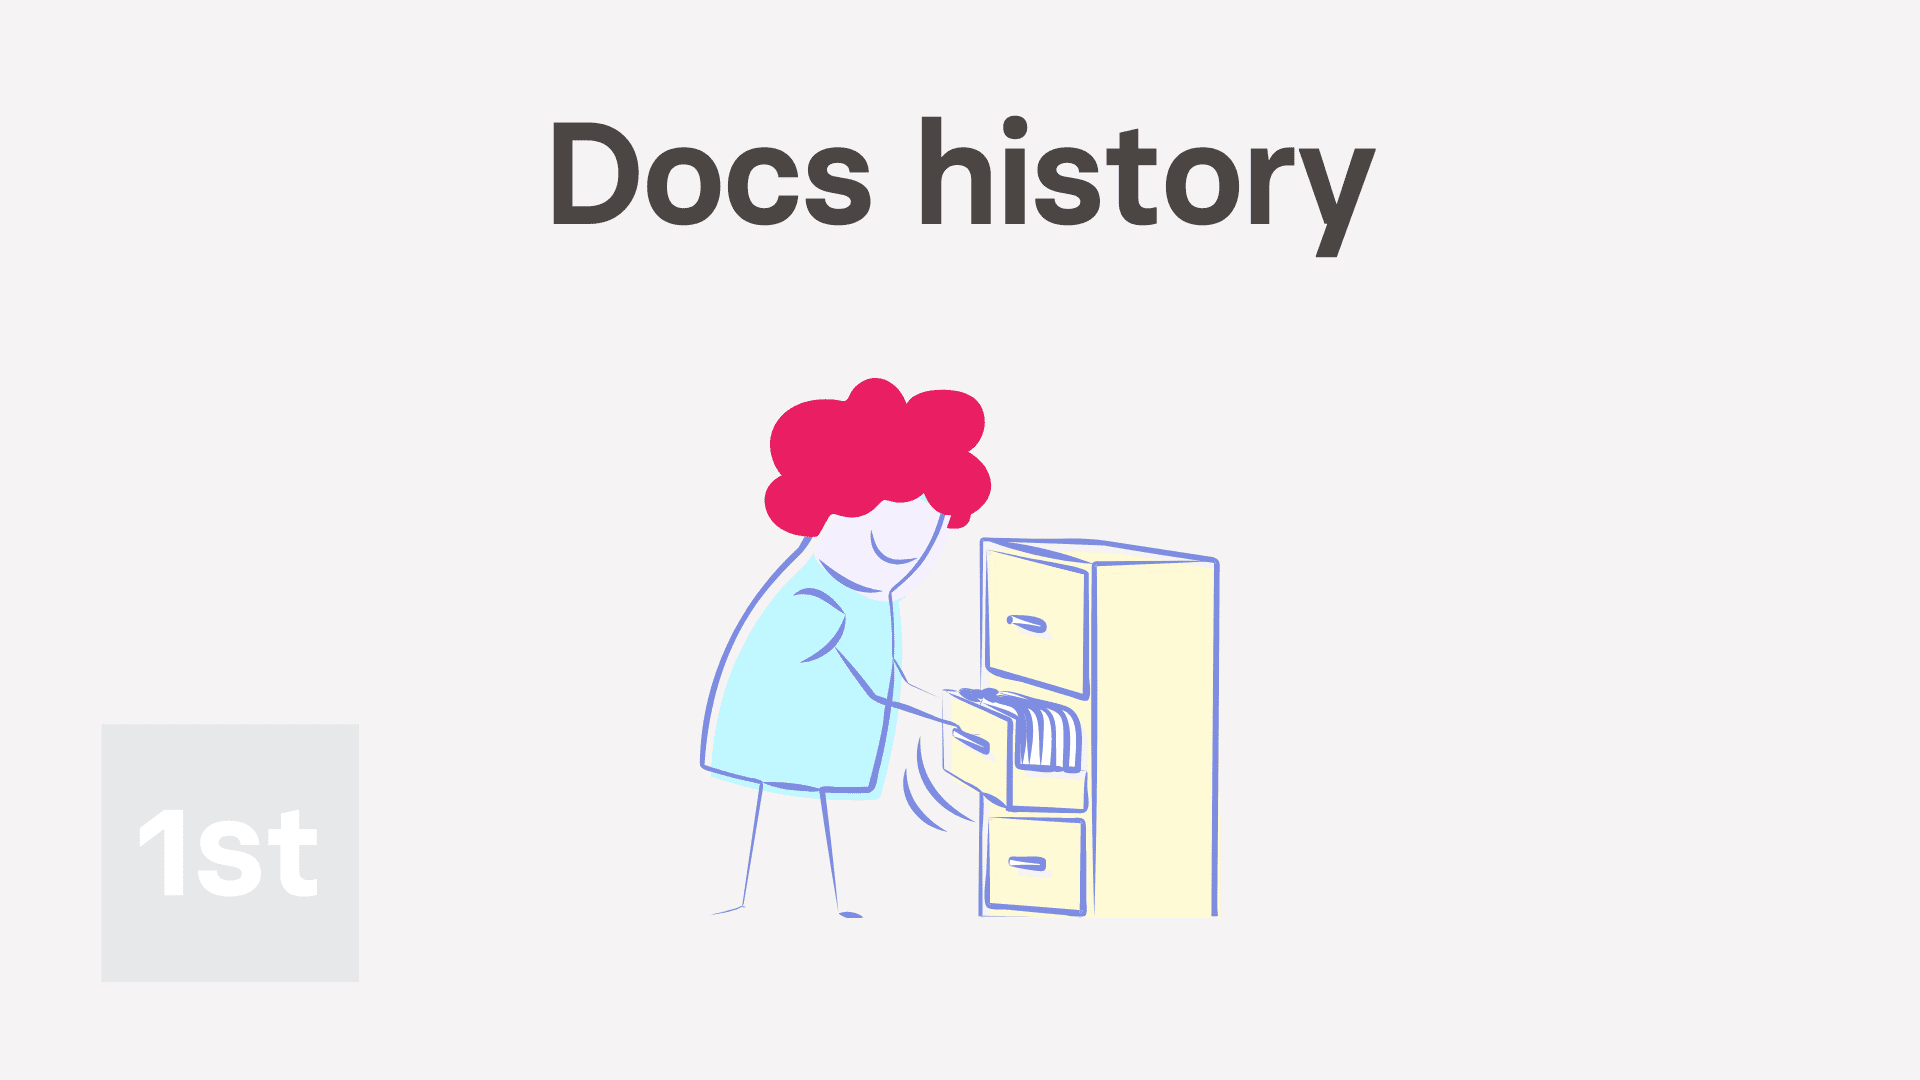 2:01
2:01 3:07
3:07 1:36
1:36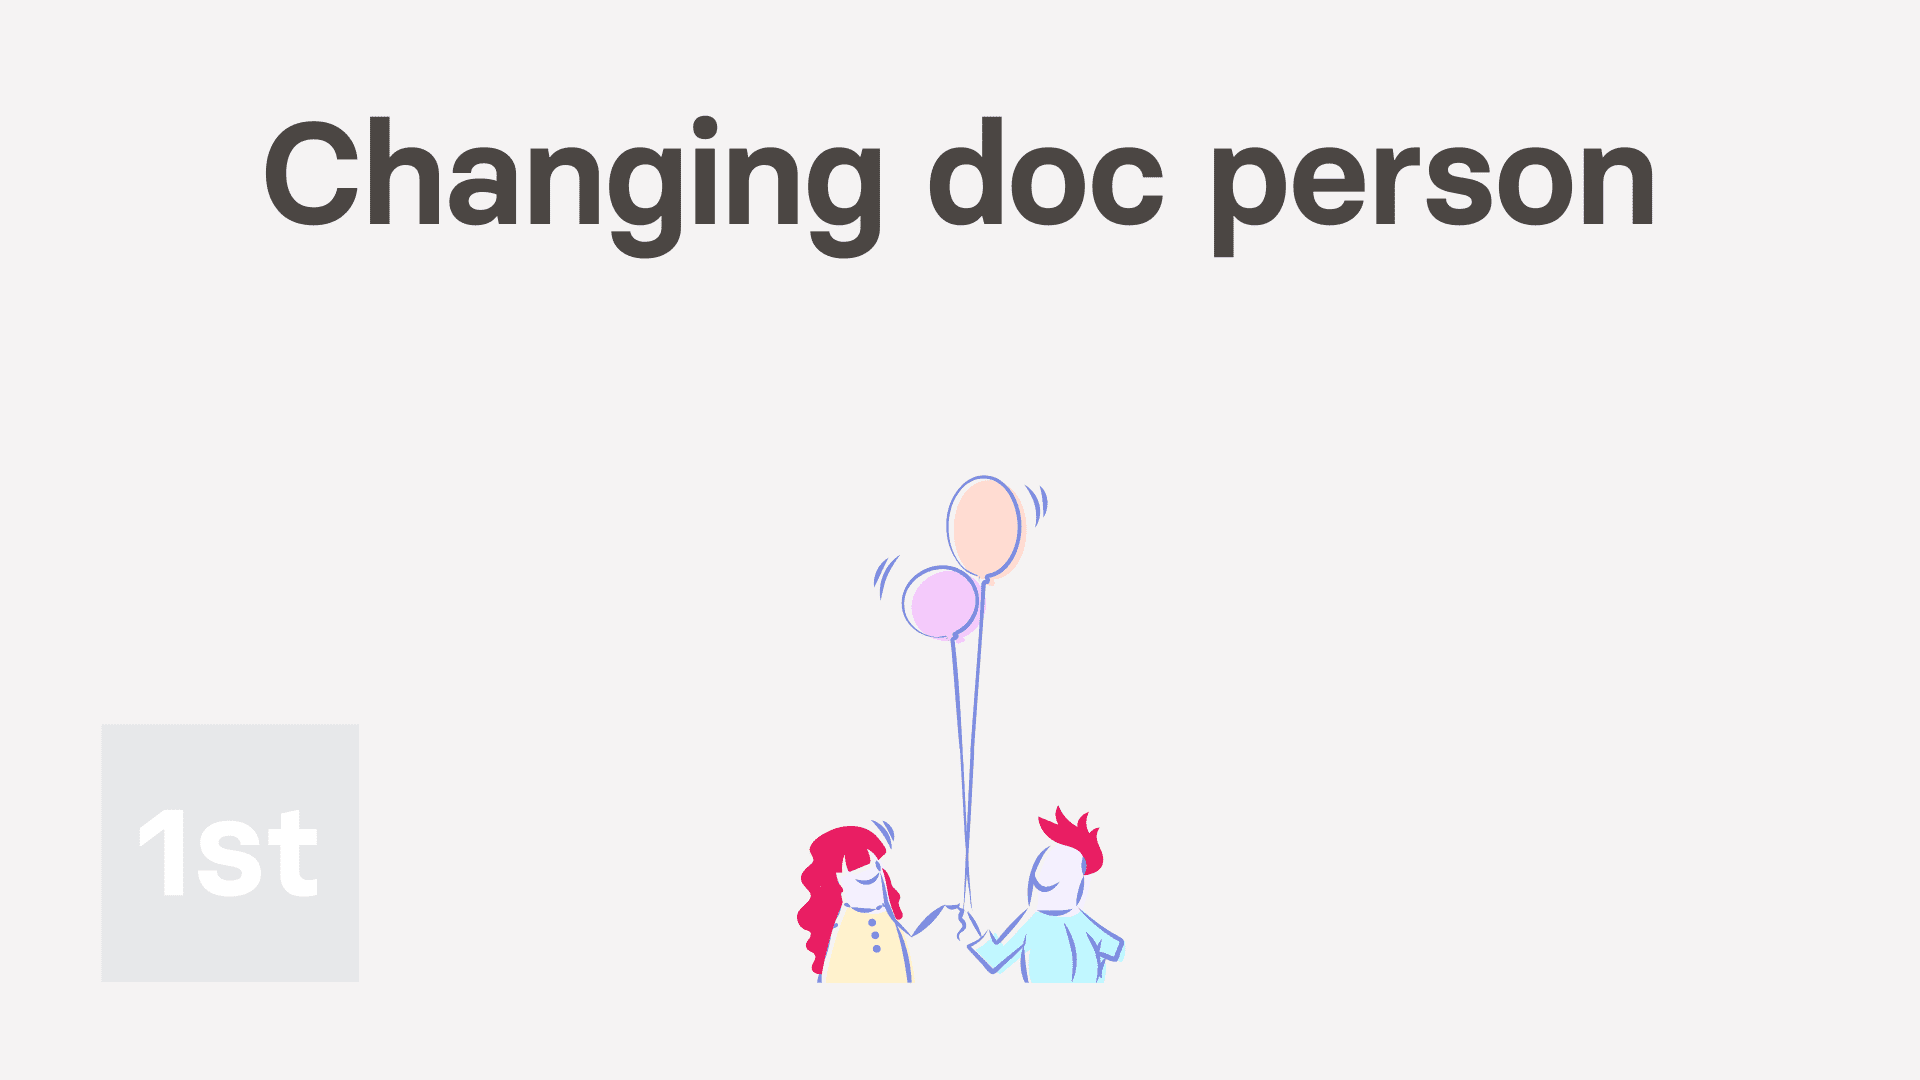 1:19
1:19 2:58
2:58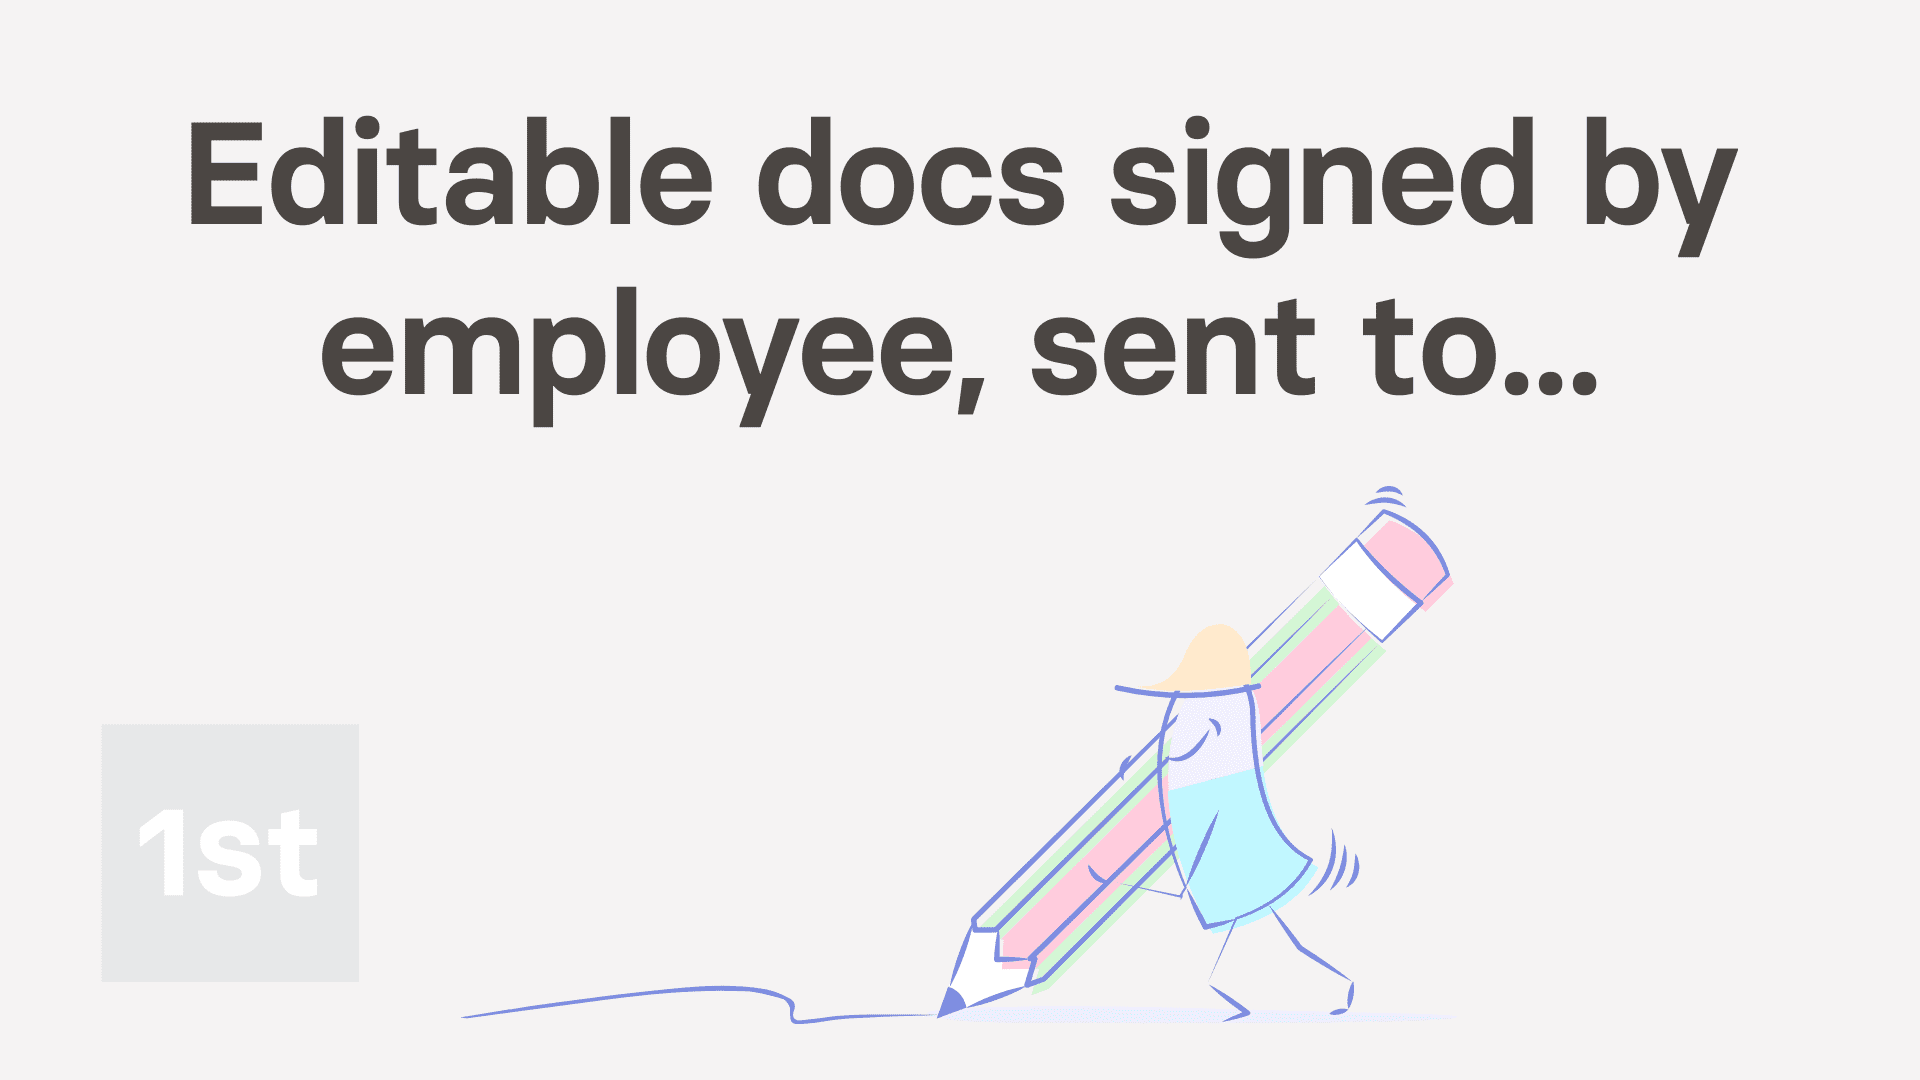 4:44
4:44 5:28
5:28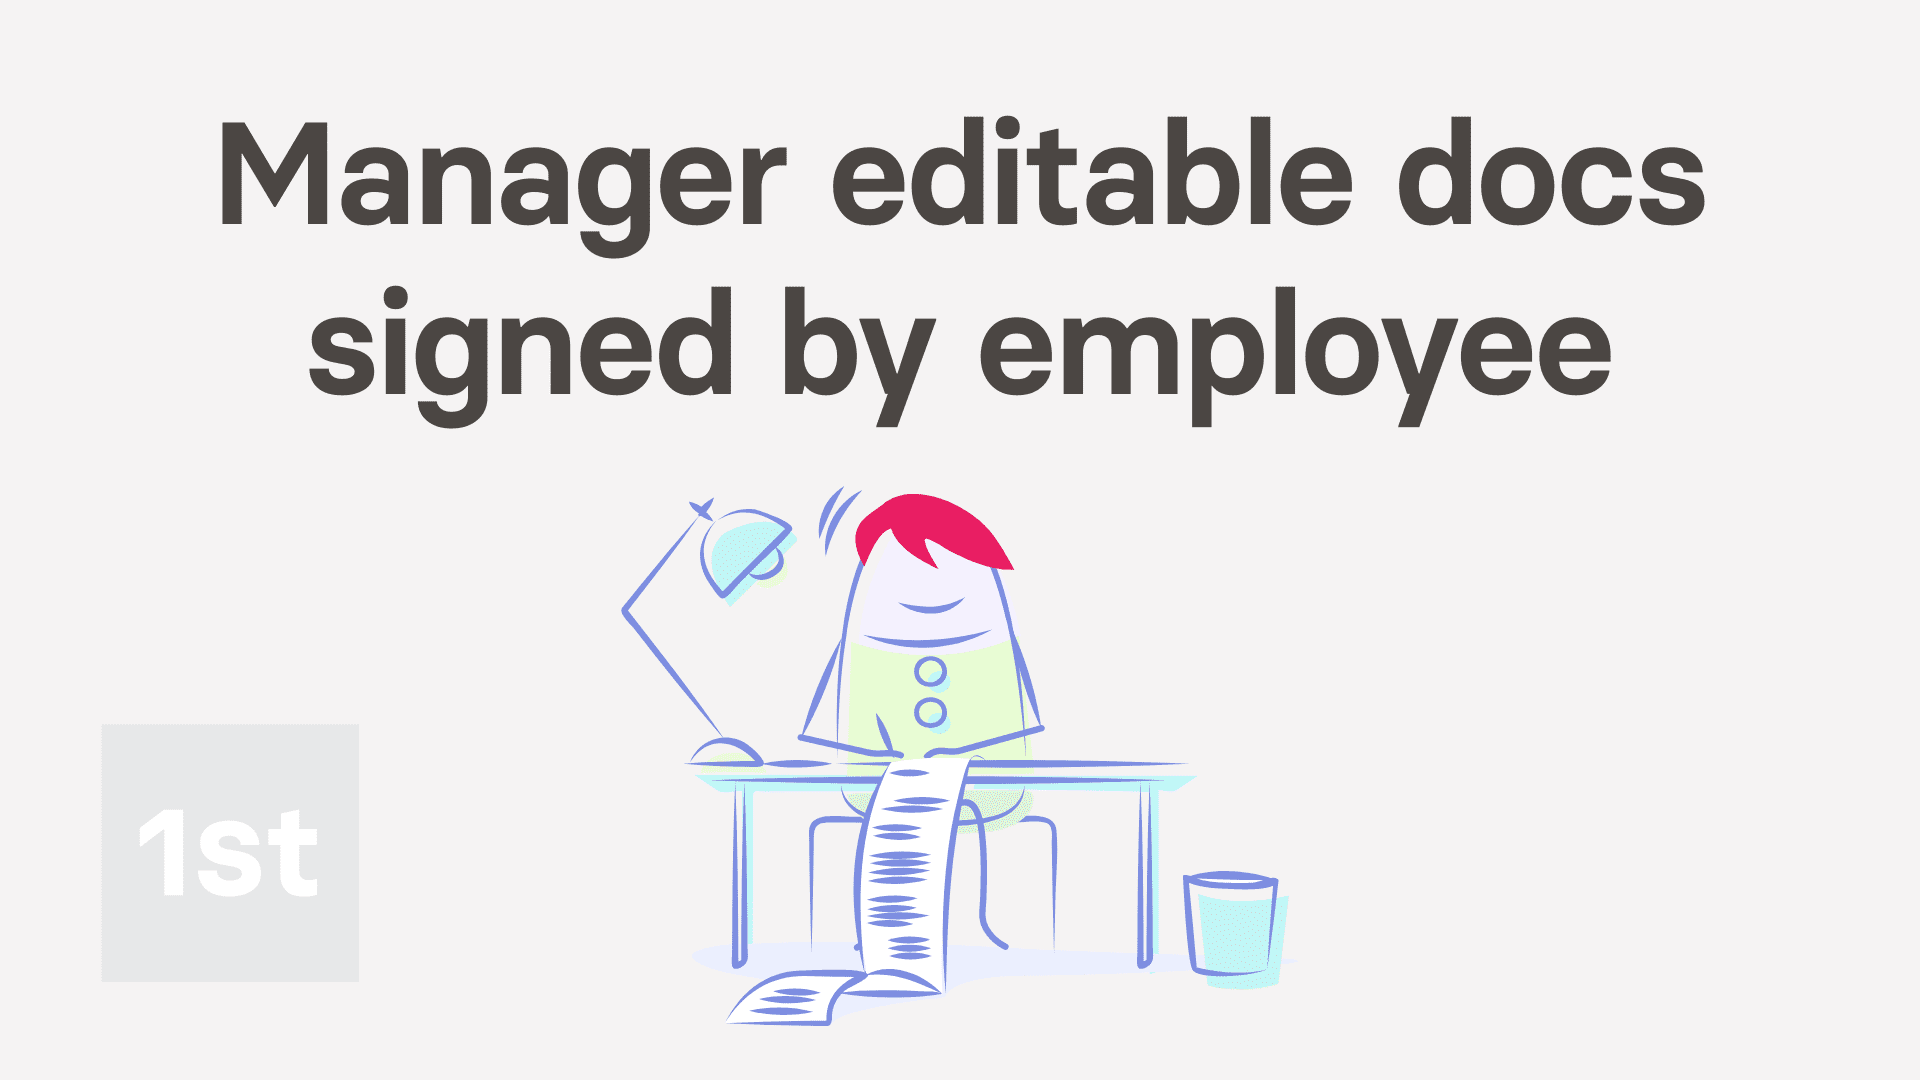 5:06
5:06 5:09
5:09 2:43
2:43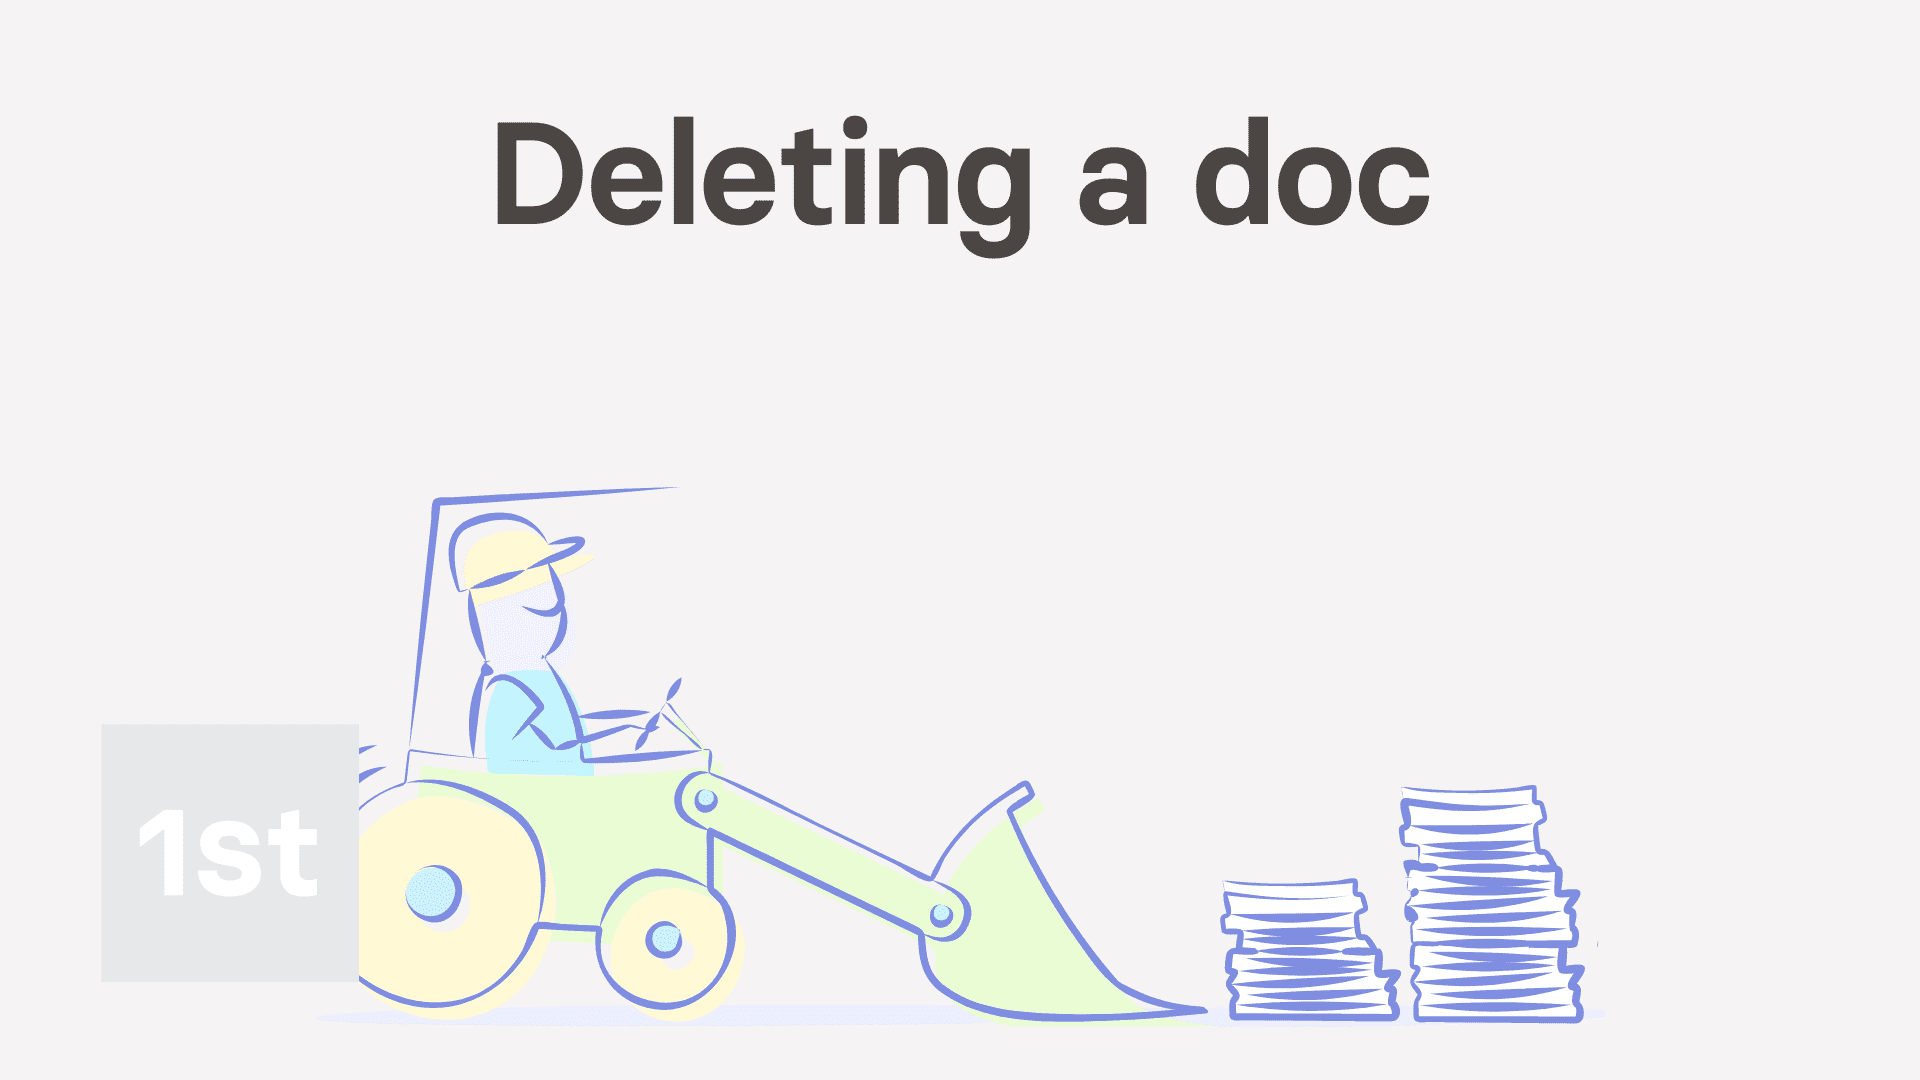 1:27
1:27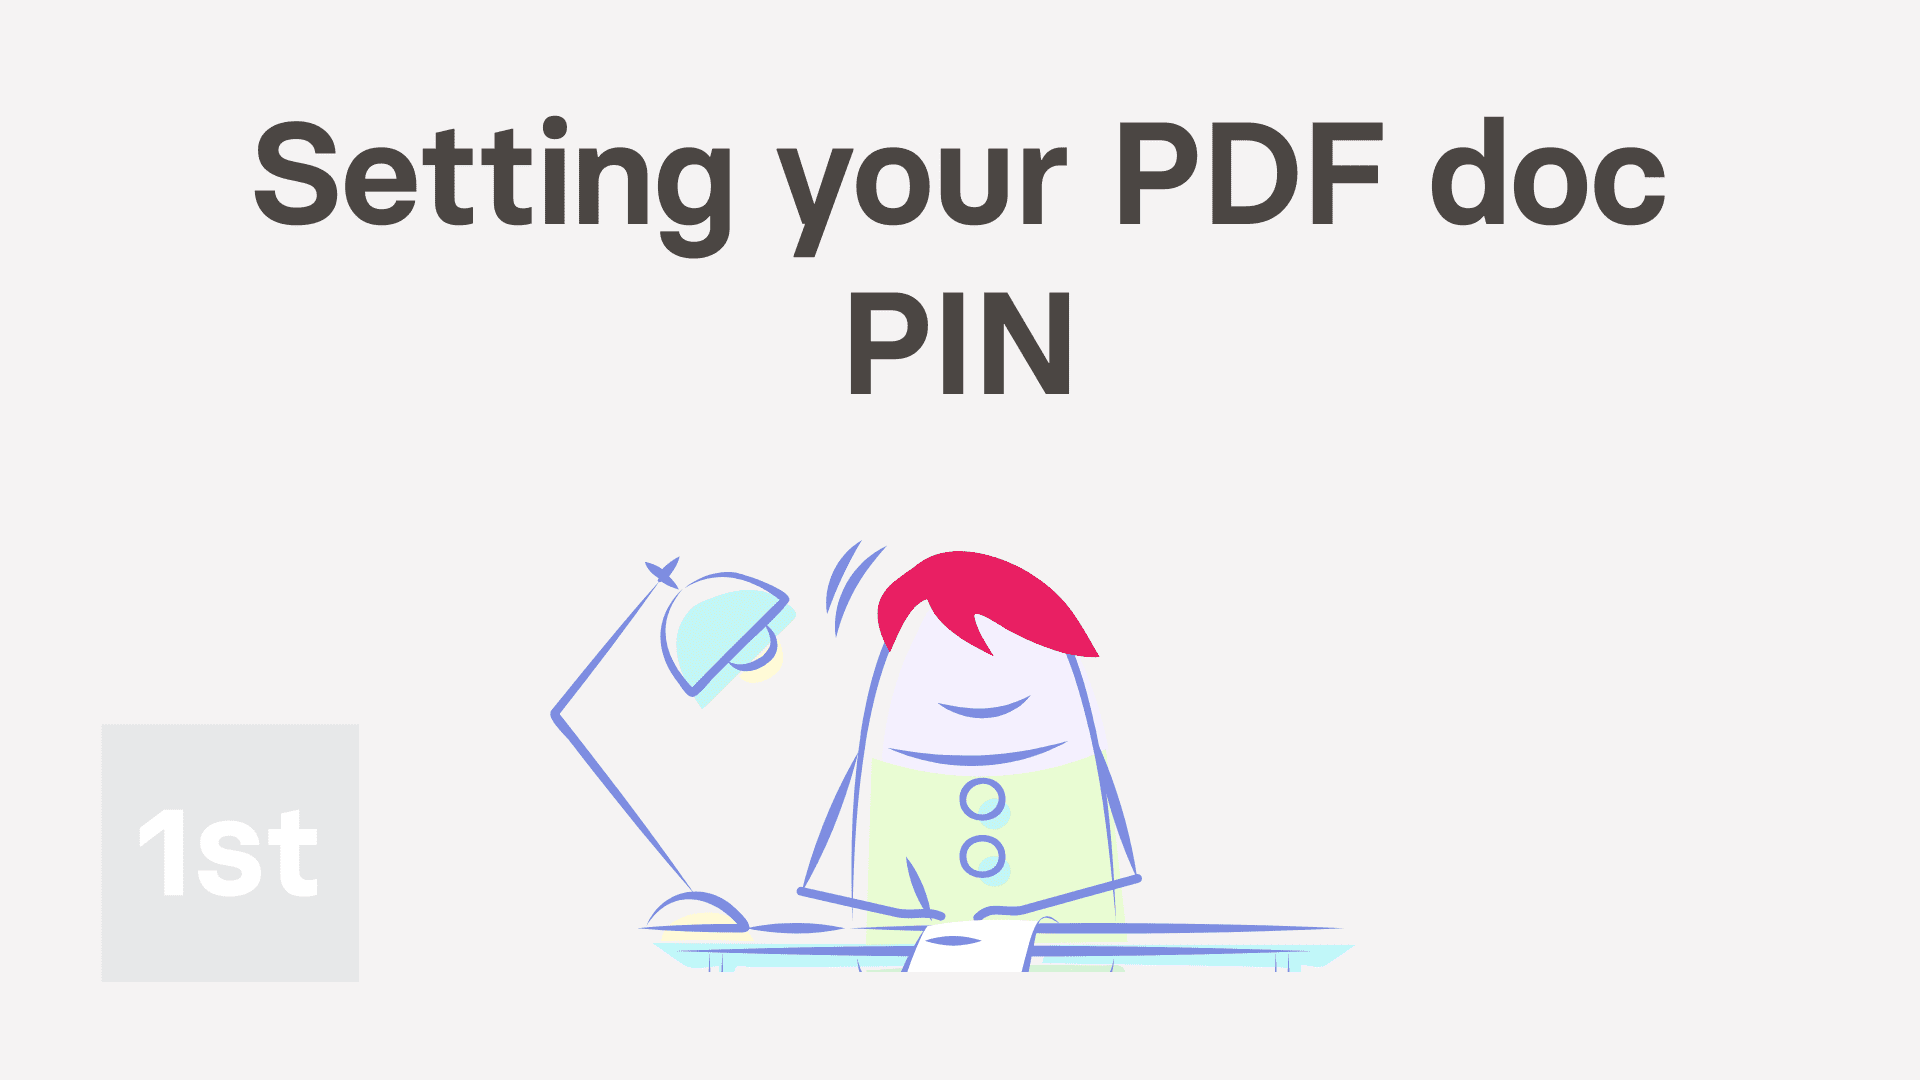 1:58
1:58 1:39
1:39 1:41
1:41 2:28
2:28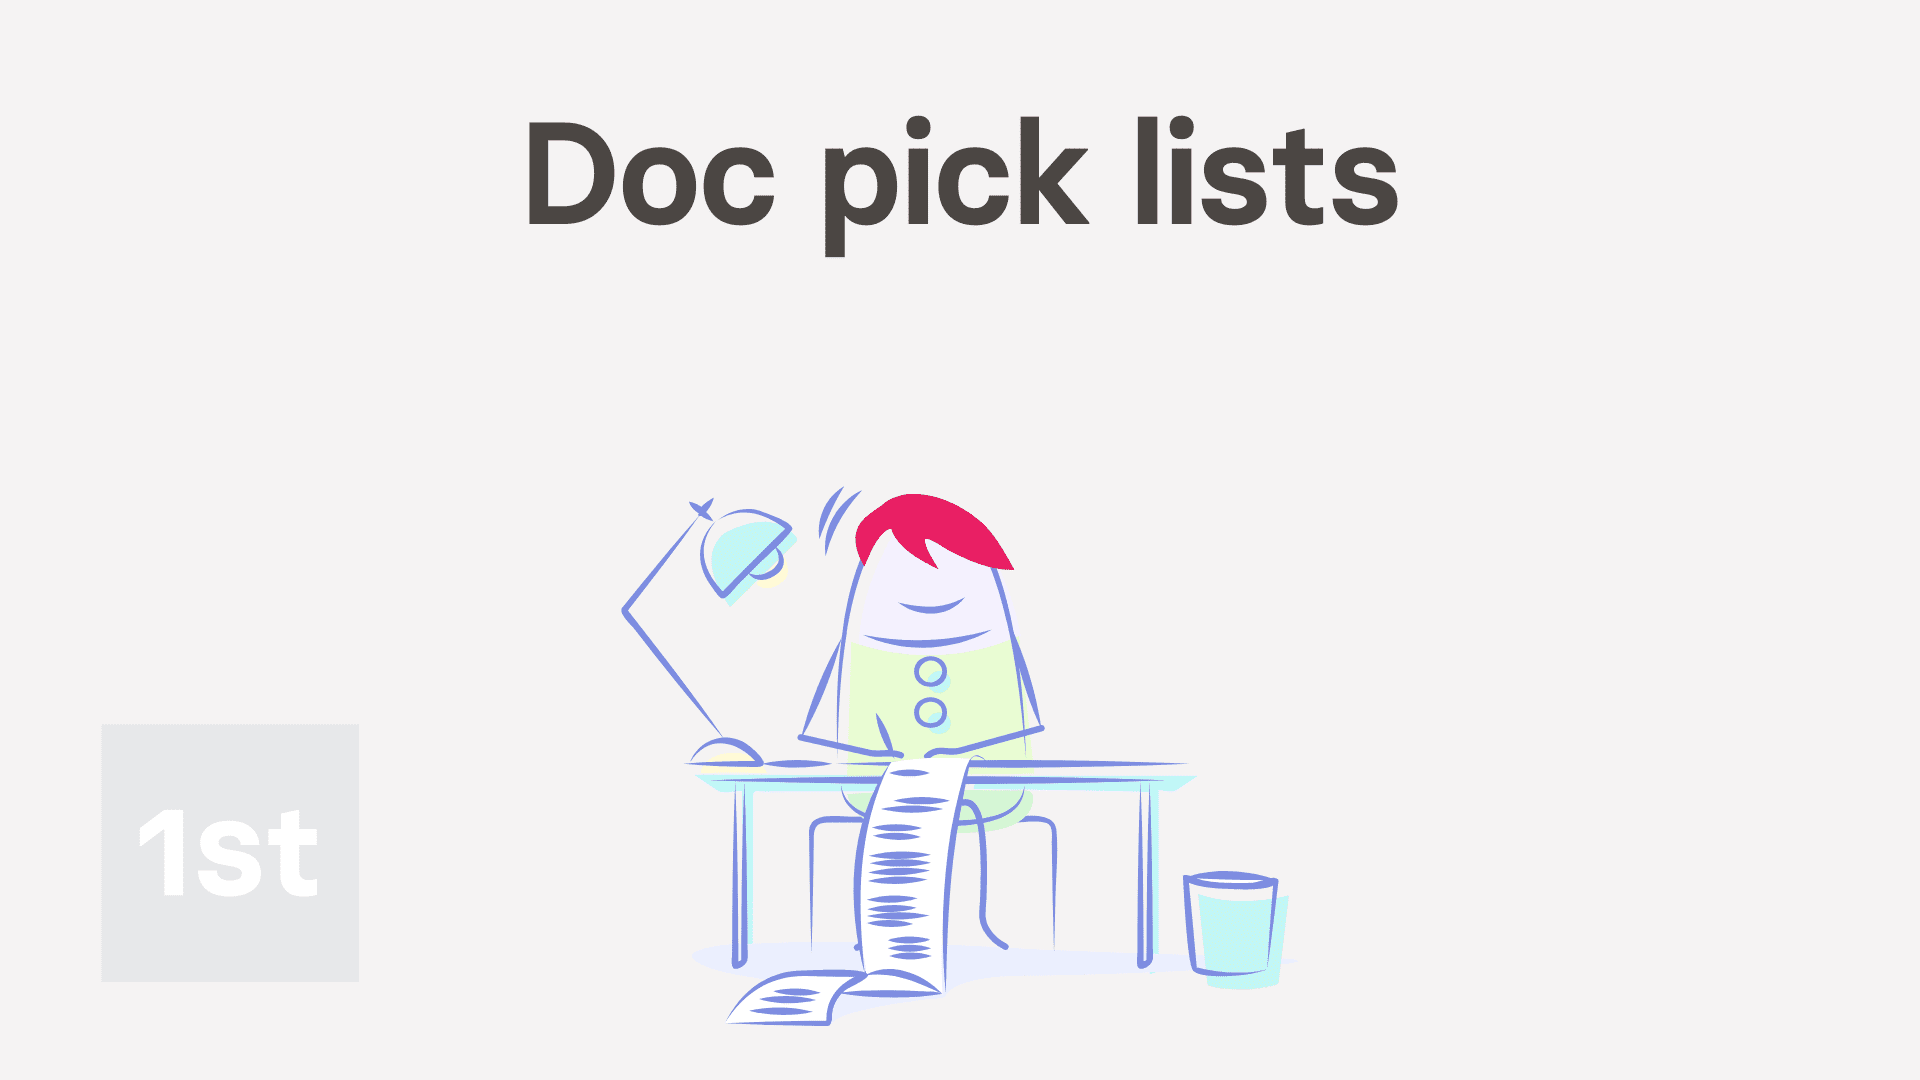 2:34
2:34 1:59
1:591. What's the difference between a letter and a doc?

 3:33
3:33
"What's the difference between a letter and a doc?"
Both letters and docs have a number of differences.
To understand some advantages of a letter, compared to a doc:
- First, to make a new letter, tap: "Menu", "Docs ... all", then "New doc"
- And then select: New letter
- Once it slides out on the right, you can set the "Subject" and contents of your letter to whatever you like.
- You'll see that by filling out a few things on the left.
- That, on the right, you'll have a nicely formatted preview of a letter. Including: the address, date, subject, greeting, letter body, signature, logo, and letterhead.
- Then to download your letter as a PDF, tap: Download PDF (at the bottom)
- The download takes a few seconds while it generates a PDF that includes your company's letterhead on the side of the first page.
- Once it's downloaded, tap the downloaded PDF to see it.
- And finally, when printed, the "To" address is perfectly positioned for windowed envelopes when posting in the mail.
To understand some advantages of a doc, compared to a letter:
- First, to make a new doc, tap: "Menu", "Docs ... all", then "New doc"
- And then select: New doc
- Some advantages of a doc, compared to a letter, is that a doc doesn't add any extra formatting to the top or bottom of the page.
- Instead, it gives you a large blank area to work with.
- Once it slides out on the right, you can set the "Subject" and contents of your doc to whatever you like.
- Once you've entered your subject, a useful way to create the doc body is to tap the link: "Copy for ChatGPT"
- Then go to ChatGPT and paste what it's copied.
- Feel free to type in more info to tell ChatGPT more about what you want.
- But keep the note about "markdown format" on the end.
- Once ChatGPT's generated your doc body, tap: Copy code (at the top)
- And then back in 1st Money, paste it into the doc body.
- Also, you may want to delete the duplicate heading (at the top).
- Then to download your doc as a PDF, tap: Download PDF (at the bottom)
- The download takes a few seconds while it generates a PDF that includes your company's letterhead on the side of the first page.
- And finally, once it's downloaded, tap the downloaded PDF to see it.

Keep in mind that:
- Both of the "New letter" and "New doc" options show your letterhead on the right side of the first page.
- But after the first page, the letterhead isn't shown any more.
- Also, for both of the "New letter" and "New doc" options, nothing about your doc or letter is stored on 1st Money's servers.
- Once you download your PDF, and tap Close & discard your doc or letter is gone from 1st Money's servers forever.
And that's it! That's everything you need to know about any differences between letters and docs!
2a. What's a single use letter, and how do I make one?
 2:28
2:28
"What's a single use letter, and how do I make one?"
A single use letter is a doc that's got all the formatting of a letter, including the "to" and "from" addresses (at the top), and your org's letterhead on the side. It also has the sender's signature block (at the bottom).
To make a single use letter, and download it as a PDF:
- First, tap: "Menu", "Docs ... all", then "New doc"
- Then set it to: "New letter"
- Once it slides out on the right, look up the address of the person you're sending it to.
- You might also type in the name of the person you're sending it to, above the address.
- Then type in the subject, name, and contents of your letter.
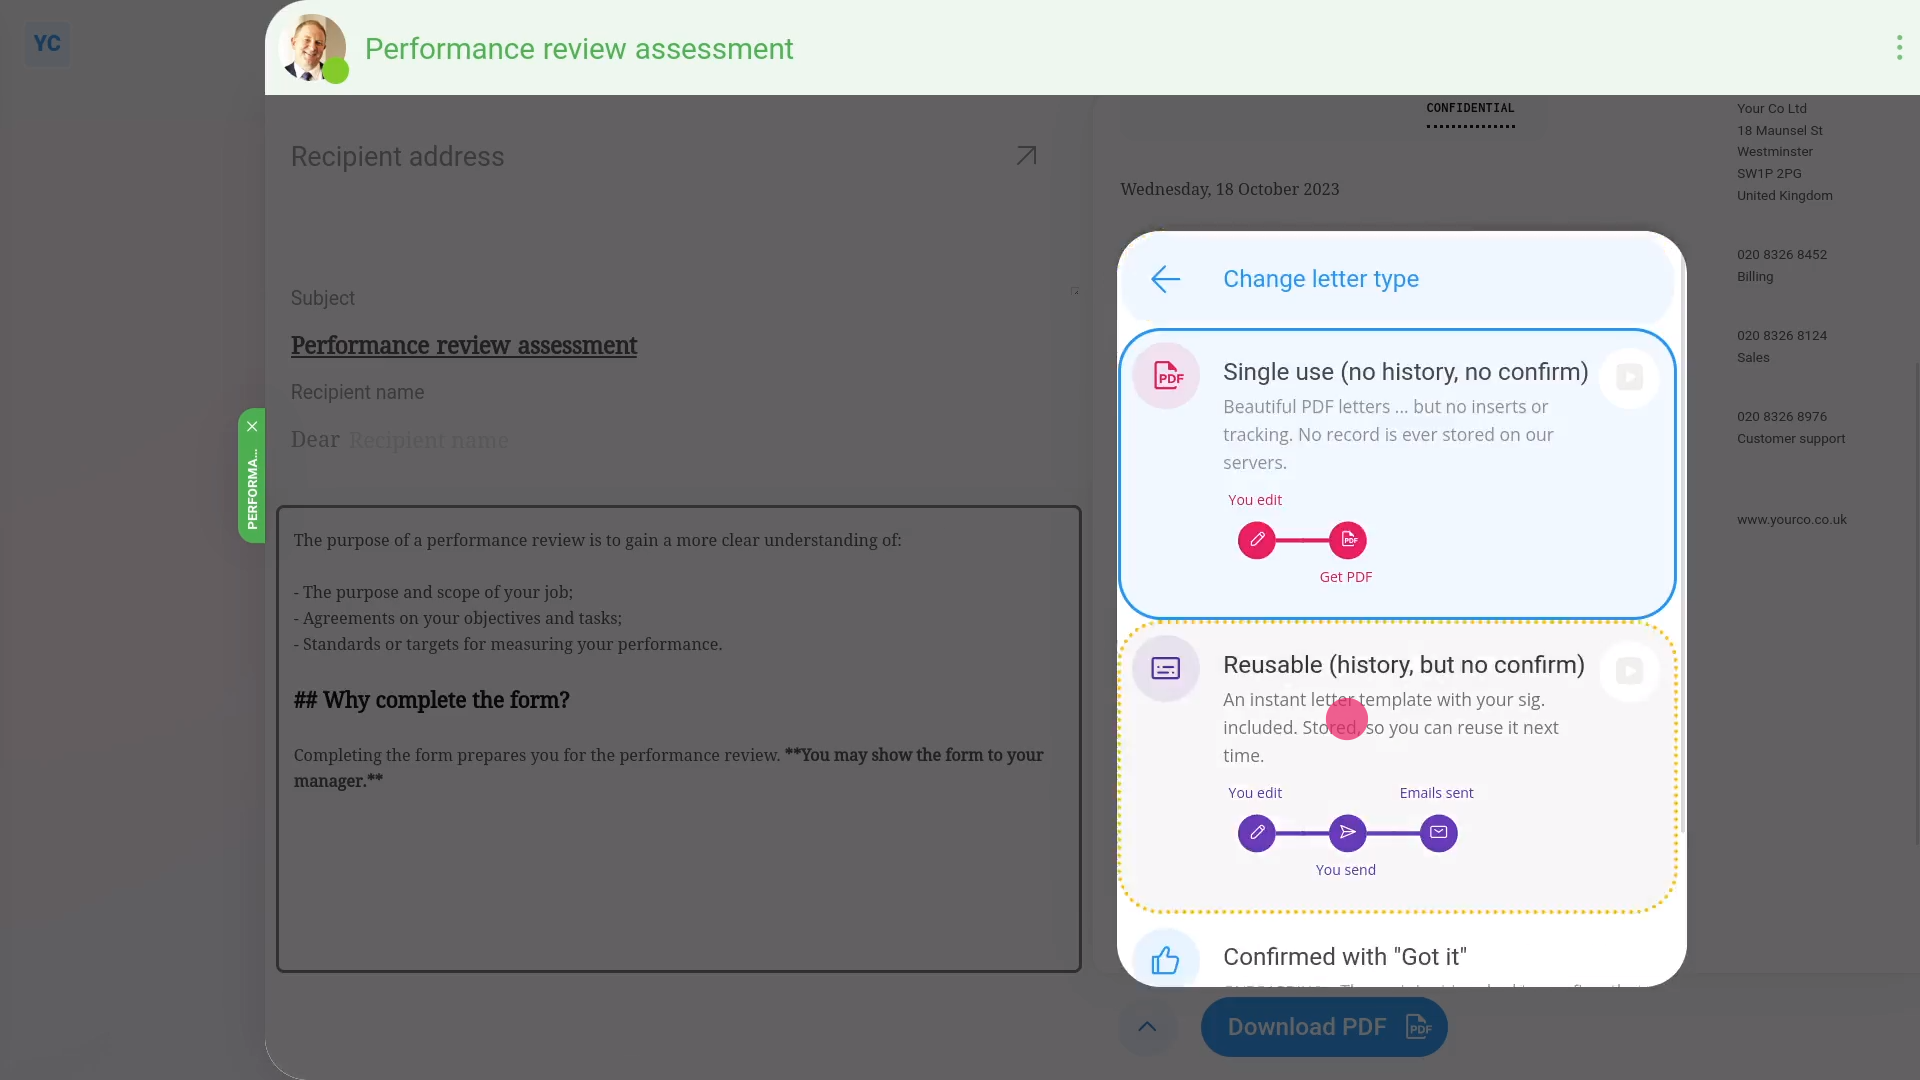
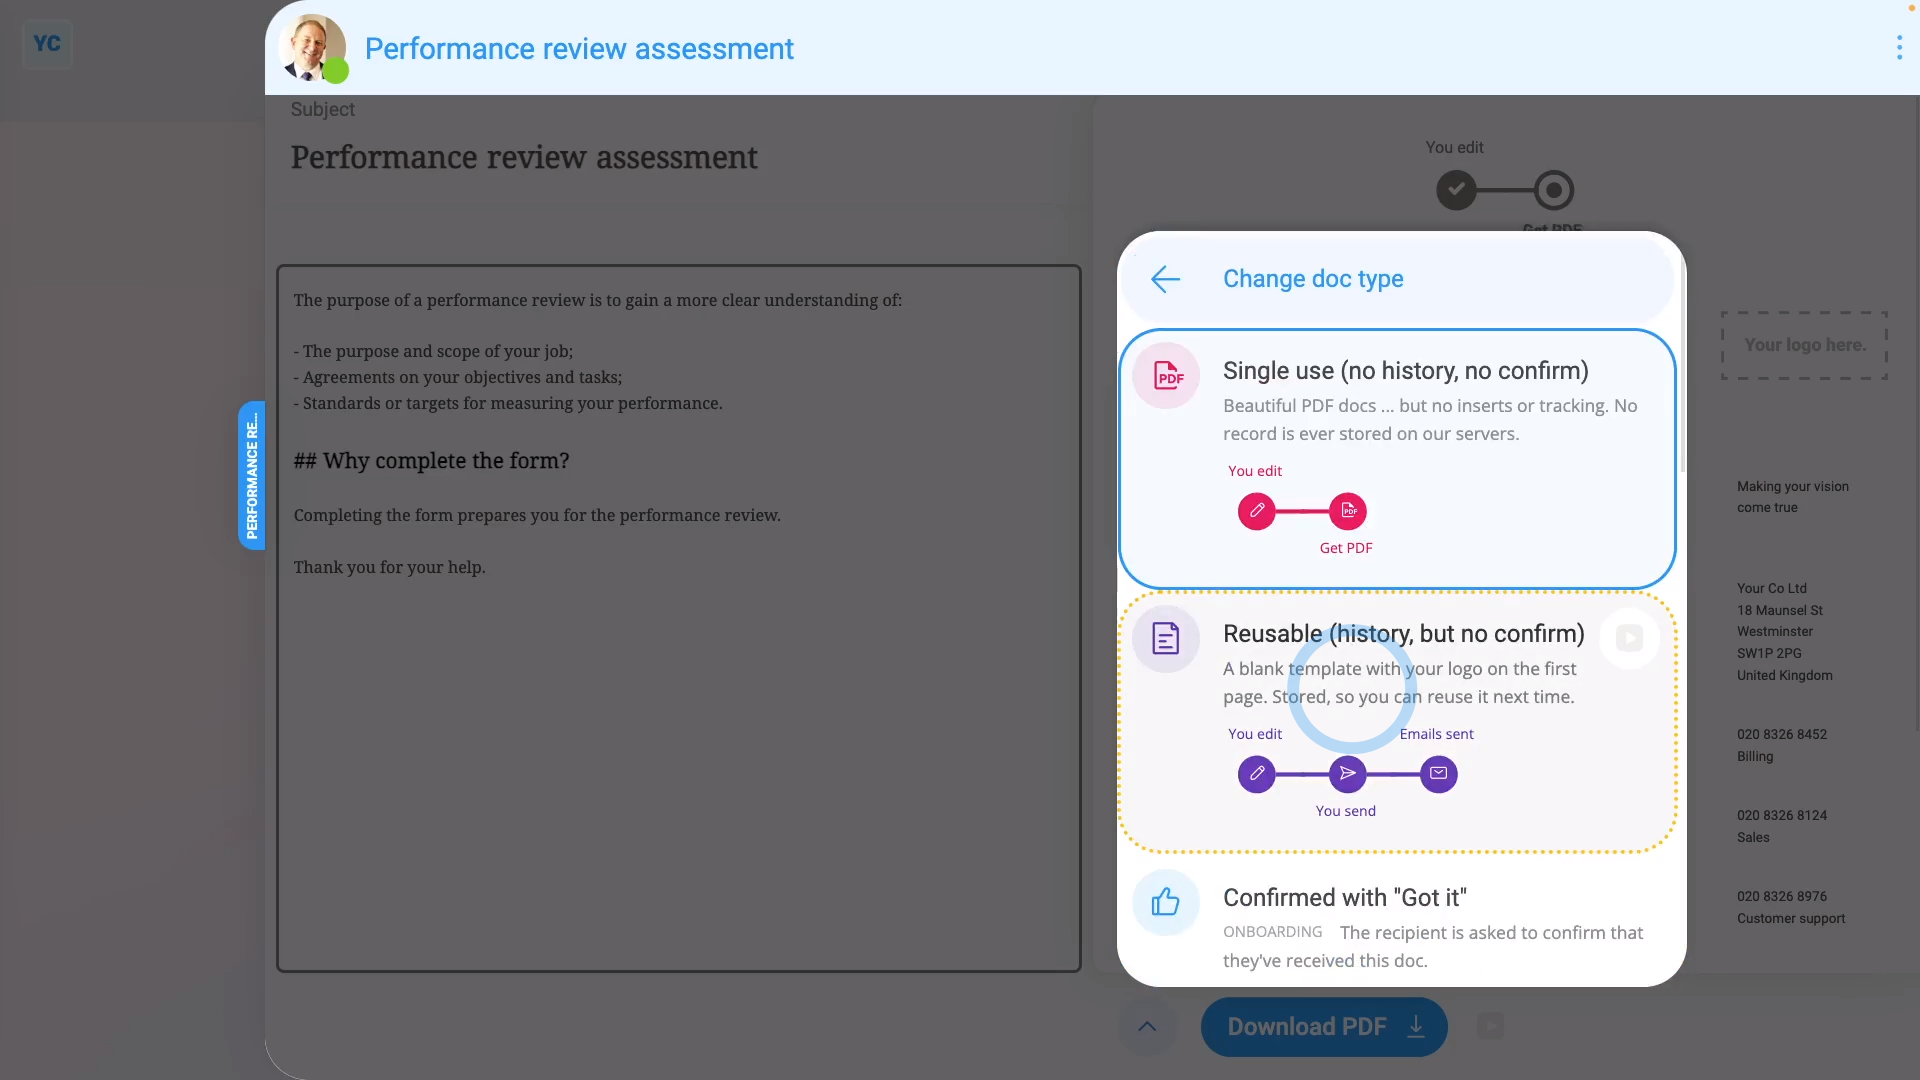
- Next, now that you've got your letter exactly how you'd like it to look, to see what type it's set to, open the bottom menu:
- Then tap: Change letter type
- And you'll see that, by default, all new letters are set to: "Single use (no history, no confirm)"
- In the notes, you can see that the main purpose of a "single use" letter is to download it as a PDF.
- You'll also see that nothing about the "single use" letter is stored on 1st Money's servers once you close it.
- Next, to download the letter as a PDF, tap: Download PDF (at the bottom)
- The download takes a few seconds while it generates a PDF that includes your company's letterhead on the side of the first page.
- Once it's downloaded, tap the downloaded PDF to see it.
- You can now save or print your downloaded PDF.
- And finally, tap Close & discard, and now that it's closed, nothing remains stored on 1st Money's servers.
Keep in mind that:
- Once you close your letter there's no way to restore it back.
- If you want to save your letter for future use, you'll need to change it to a different type.
 Changing doc or letter type
And that's it! That's everything you need to know about making a single use letter, and downloading it as a PDF!
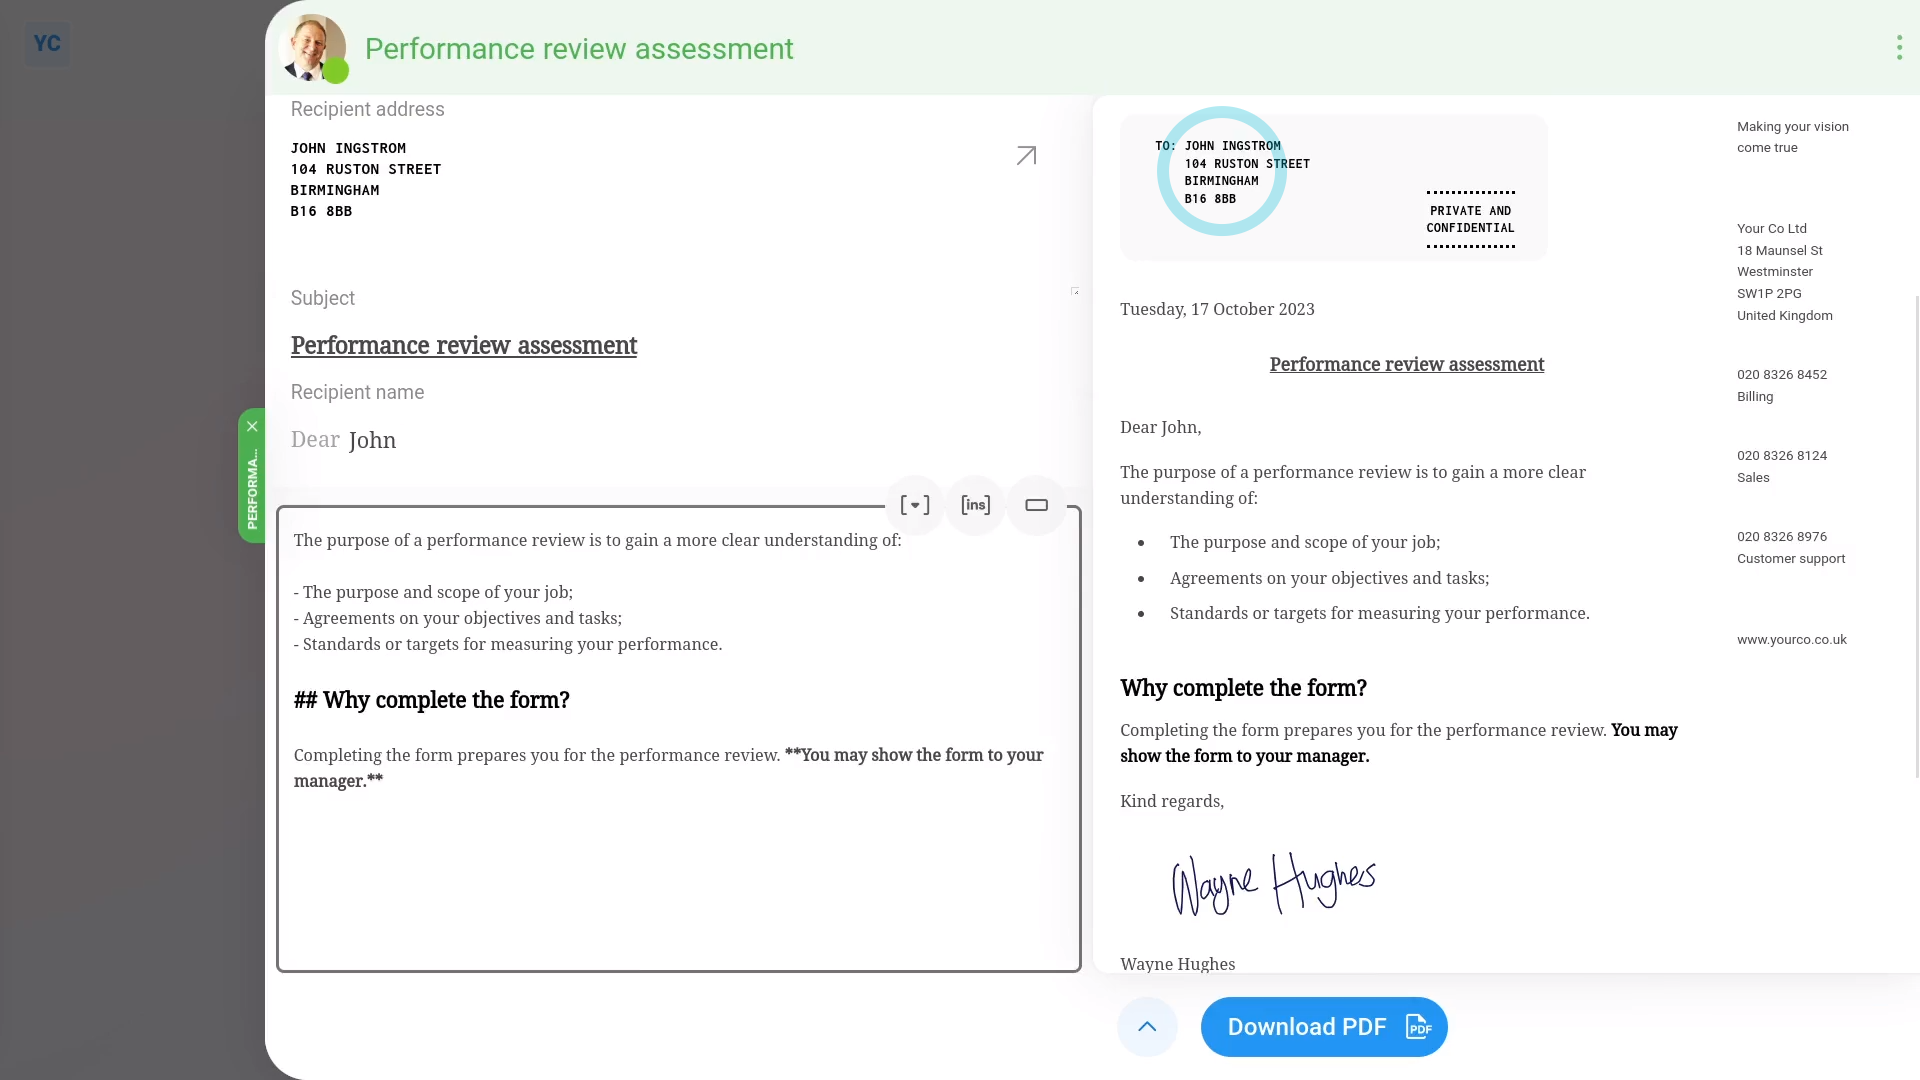
2b. What's a single use doc, and how do I make one?
 2:03
2:03
"What's a single use doc, and how do I make one?"
A single use doc allows you to format a document, as a PDF, with your org's letterhead on the side.
To make a single use doc, and download it as a PDF:
- First, tap: "Menu", "Docs ... all", then "New doc"
- Then set it to: "New doc"
- Once it slides out on the right, type in the subject and contents of your doc.
- Next, now that you've got your doc exactly how you'd like it to look, to see what type it's set to, open the bottom menu:
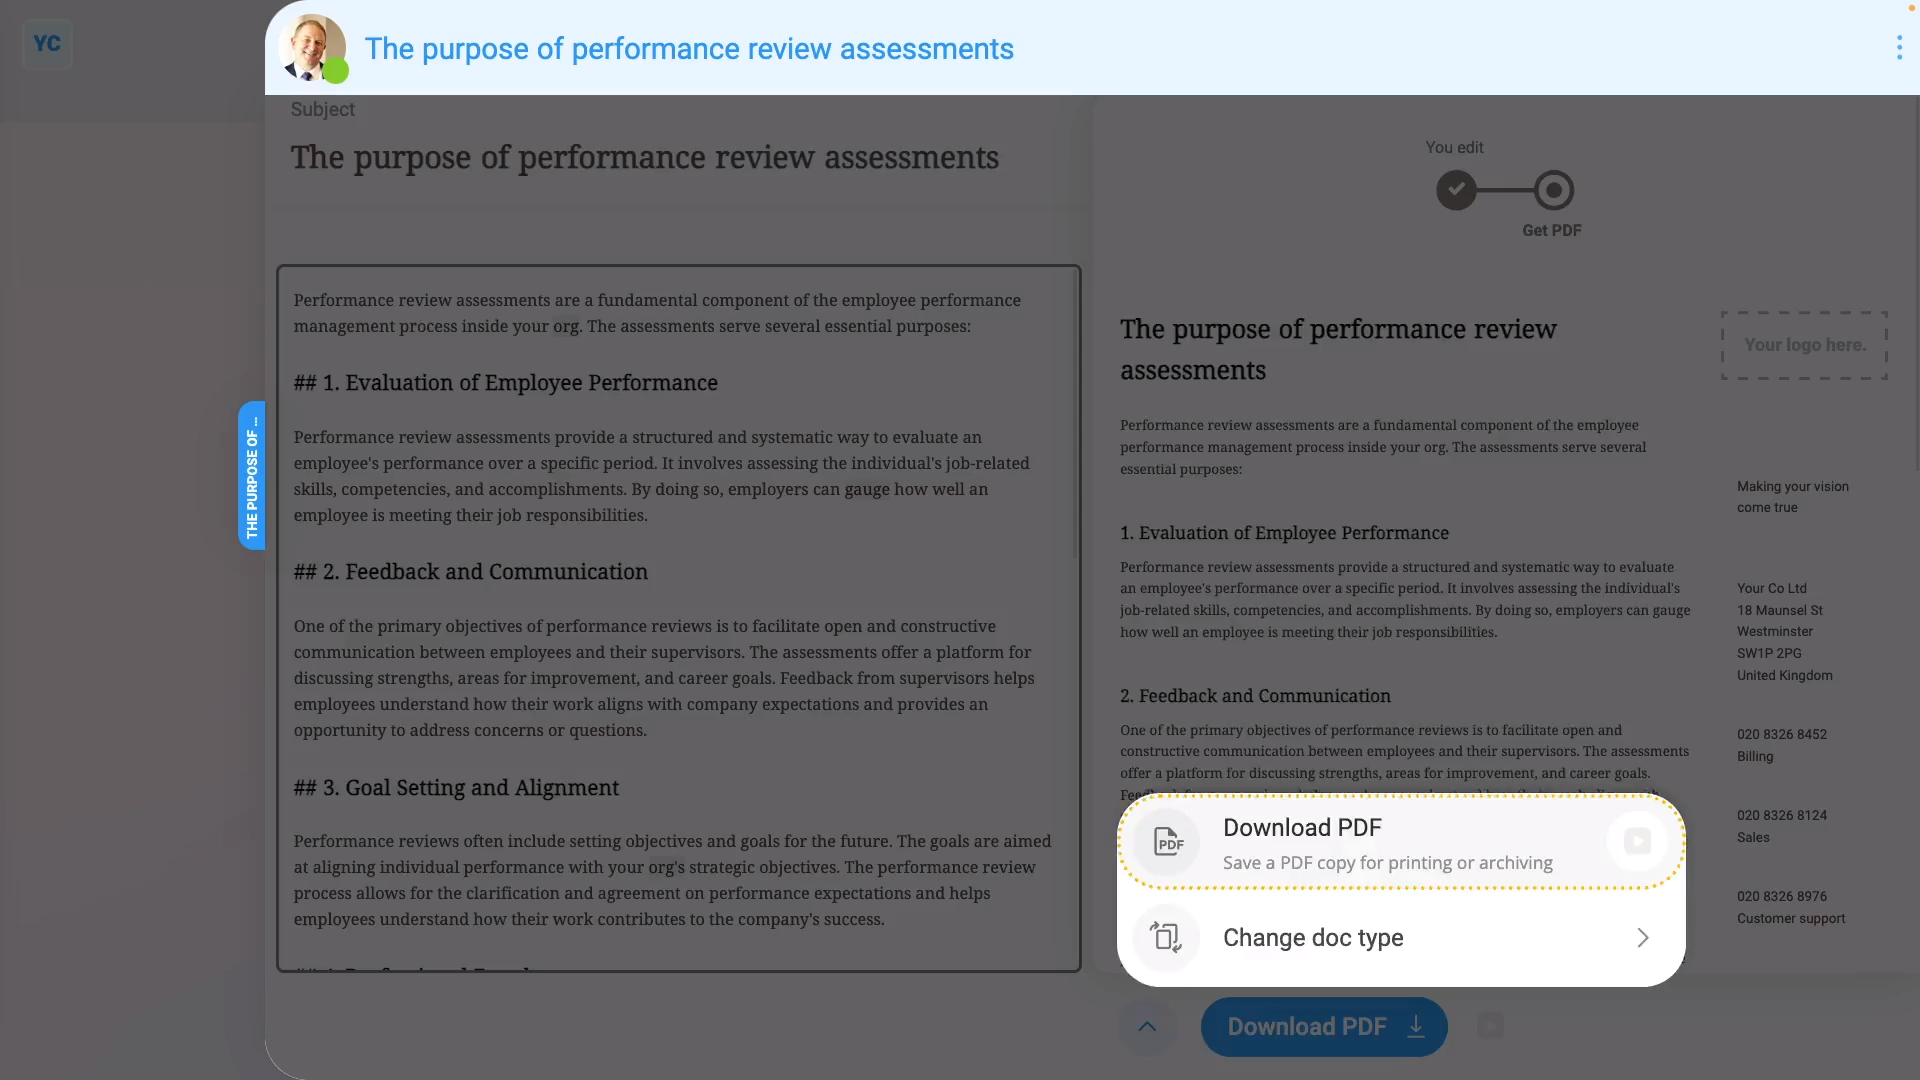
- Then tap: Change doc type
- And you'll see that, by default, all new docs are set to: "Single use (no history, no confirm)"
- In the notes, you can see that the main purpose of a "single use" doc is to download it as a PDF.
- You'll also see that nothing about the "single use" doc is stored on 1st Money's servers once you close it.
- Next, to download the doc as a PDF, tap: Download PDF (at the bottom)
- The download takes a few seconds while it generates a PDF that includes your company's letterhead on the side of the first page.
- Once it's downloaded, tap the downloaded PDF to see it.
- You can now save or print your downloaded PDF.
- And finally, tap Close & discard, and now that it's closed, nothing remains stored on 1st Money's servers.
Keep in mind that:
- Once you close your doc there's no way to restore it back.
- If you want to save your doc for future use, you'll need to change it to a different type.
And that's it! That's everything you need to know about making a single use doc, and downloading it as a PDF!
3. How do I format the contents of my letter or doc?
 2:14
2:14
"How do I format the contents of my letter or doc?"
You can format the contents of your doc by using the buttons in the toolbar.
To do formatting on letter or doc contents:
- First, tap: "Menu", "Docs ... all", then "New doc"
- Then decide between "New letter" and: "New doc"
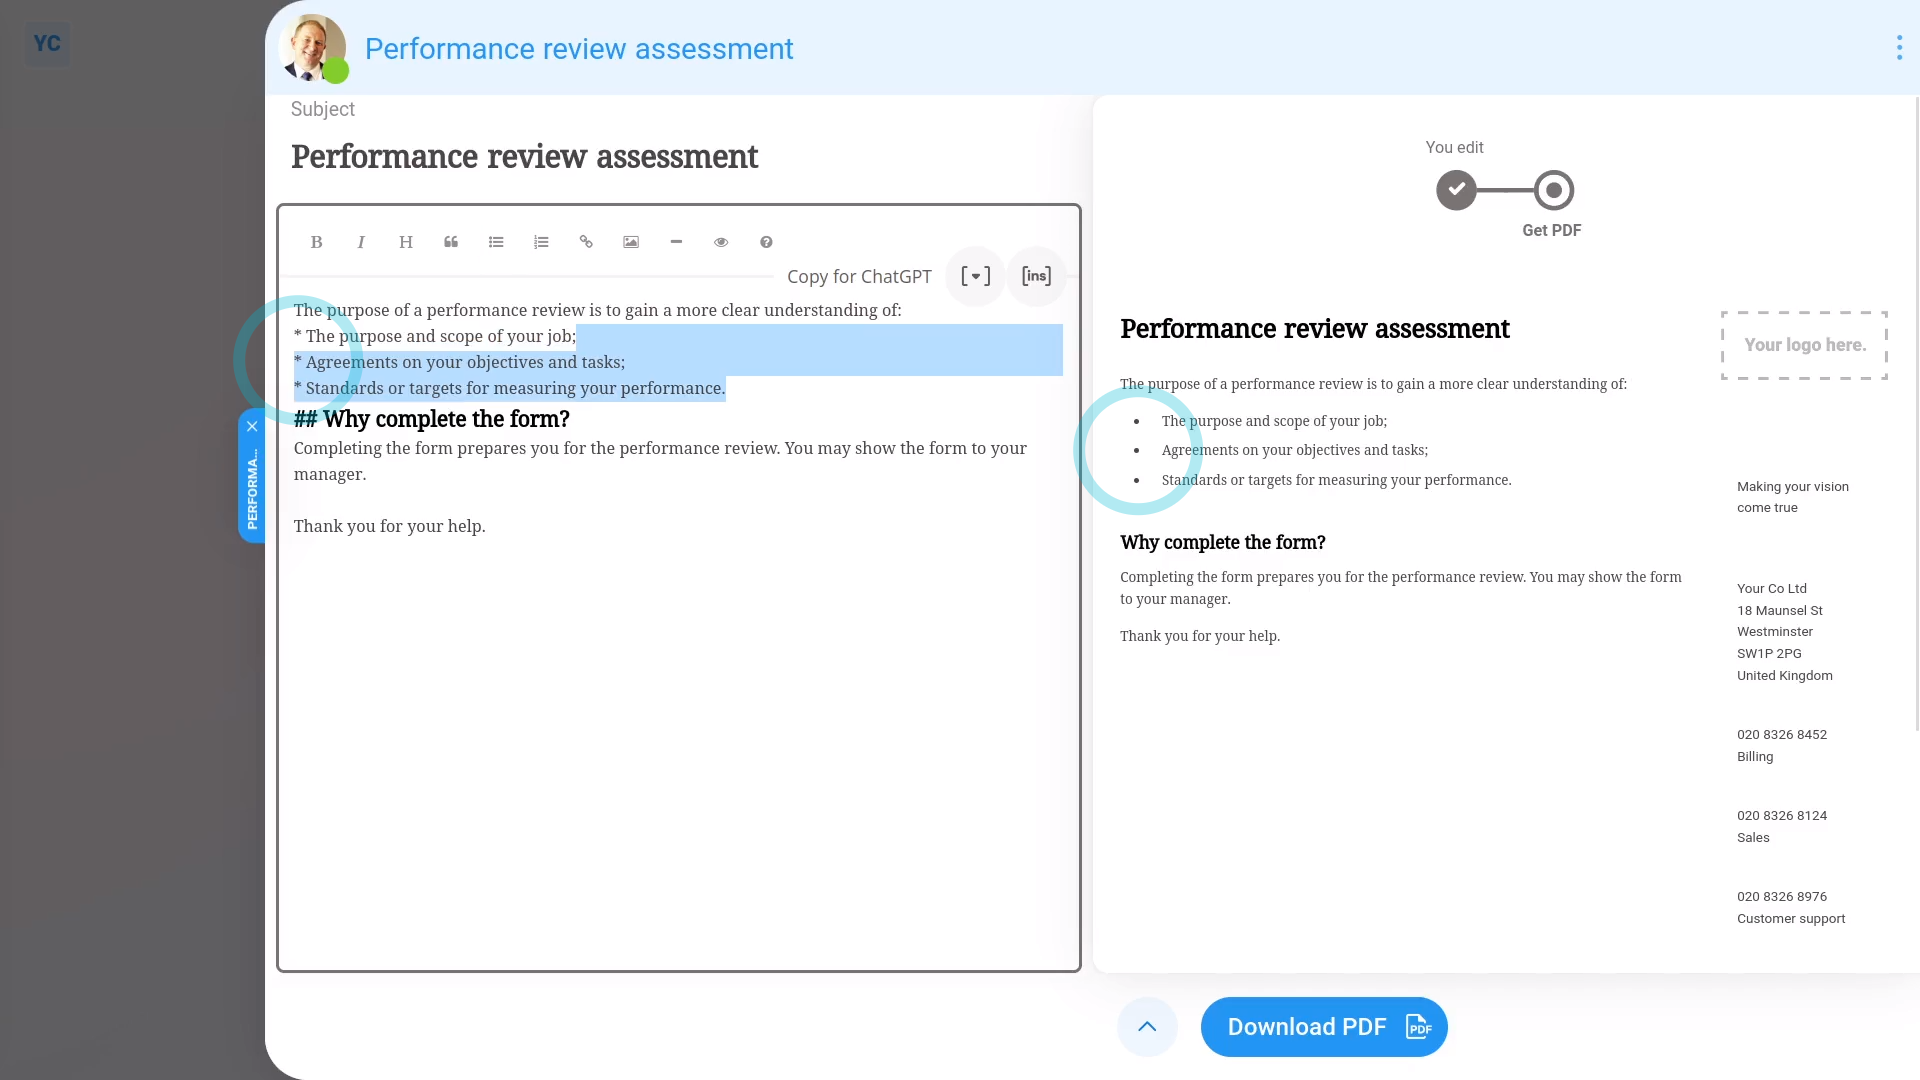
- Once it slides out on the right, you can set the "Subject" and contents of your doc to whatever you like.
- Then as you make changes, you'll see a preview of your changes show instantly on the right.
- If you're making formatting changes, it might also help to first tap: Show toolbar
- Formatting headings:
To format headings, first tap the line you want to be a heading. - Then tap the heading button: H
- And you'll see that line become a heading. You can tap the heading button more than once to make the heading smaller or bigger. In total, there's six heading sizes.
- Formatting lists:
To format lists, first select the text you want to be a list. - Then tap the bullet button:
- And you'll see the selected text become bullets. You can also tap the "Numbered list" button for numbered bullets.
- Formatting bold text:
To make text go bold, first select the text you want to go bold. - Then tap the bold button: B
- And finally, you'll see the selected text become bold. You can also tap the "Italic" button for italic text.
For advanced usage:
- To learn more about using markdown to style your docs, tap the question mark button:
- Which takes you through a ten-minute markdown tutorial.
- Also, to add inserts into your doc, tap the "Insert" button:
And that's it! That's everything you need to know about formatting any contents of your letter or doc!
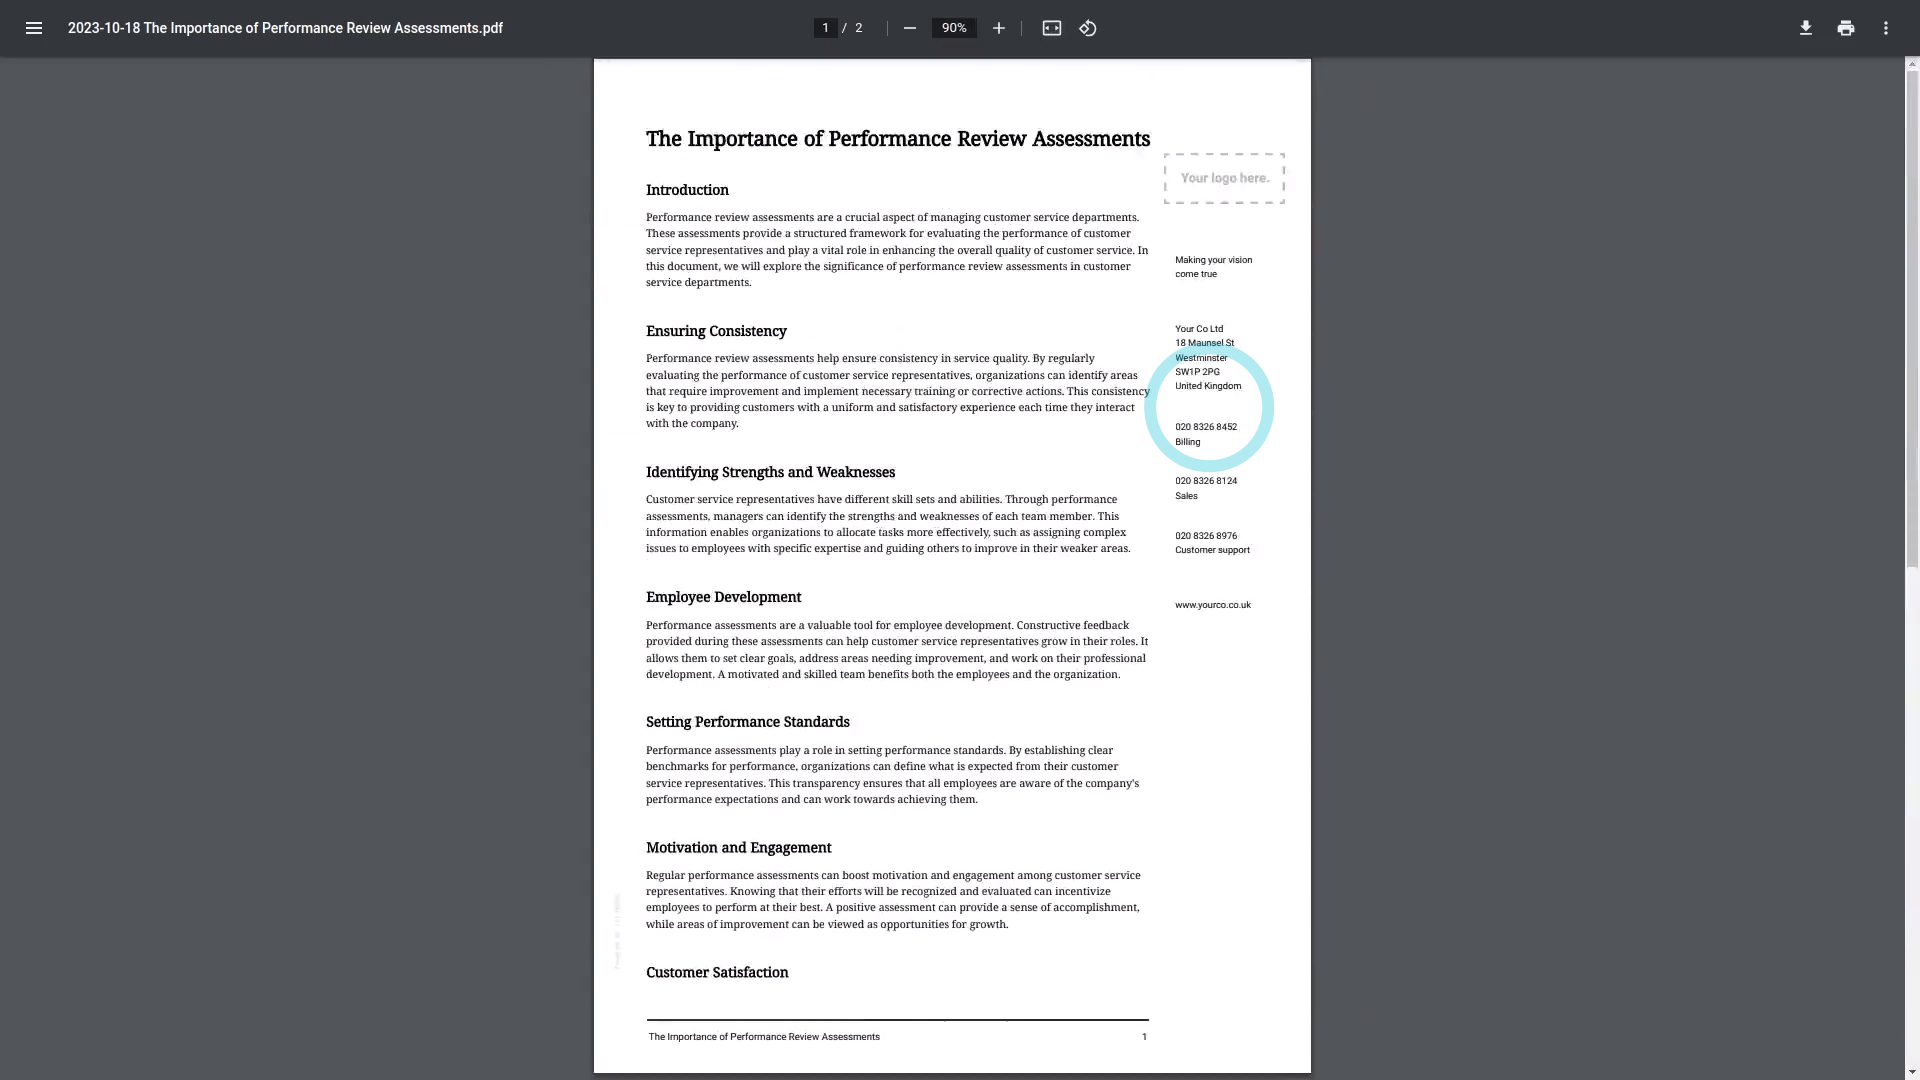
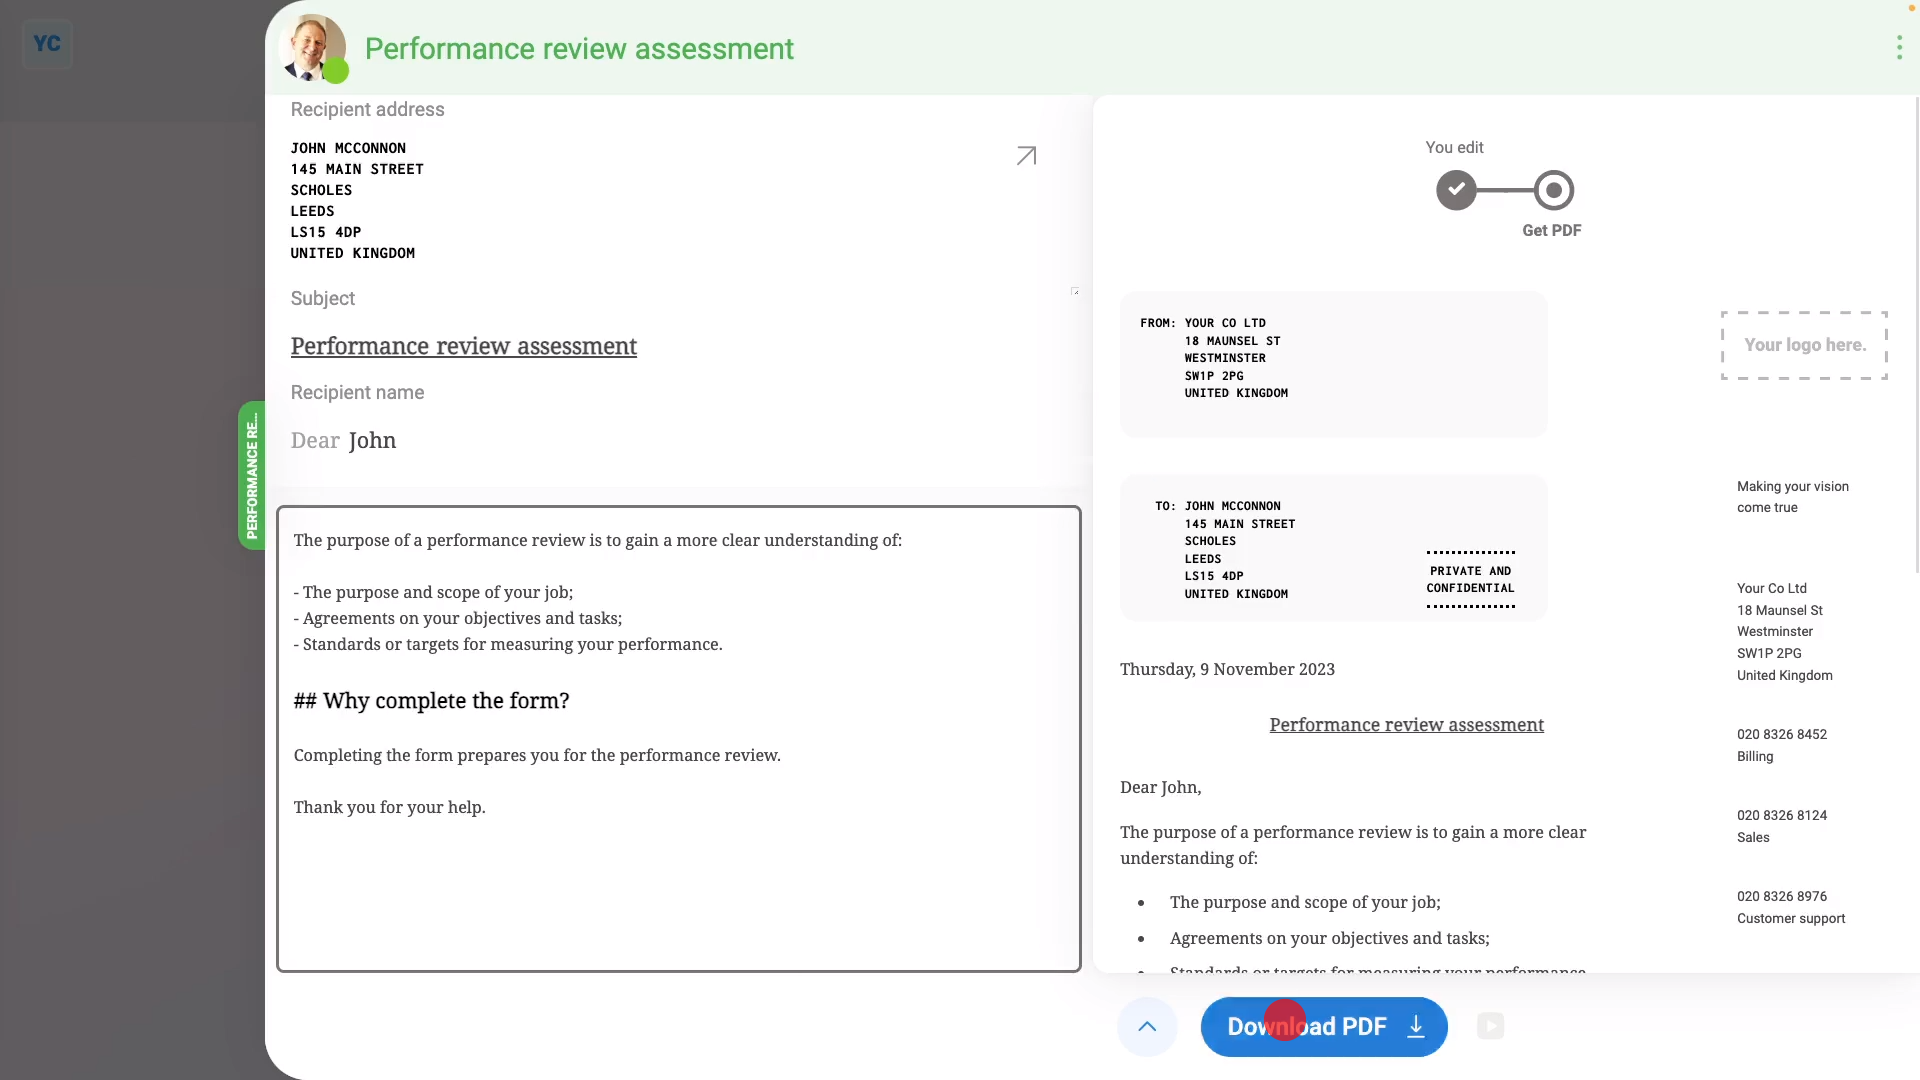
4. How do I download my letter or doc as a PDF, and print it?
 1:41
1:41
"How do I download my letter or doc as a PDF, and print it?"
One of the main benefits of creating letters or docs is downloading them as a PDF, and printing them.
To download your letter or doc as a PDF, and then print it:
- First, tap: "Menu", "Docs ... all", then "New doc"
- Then decide between "New letter" and: "New doc"
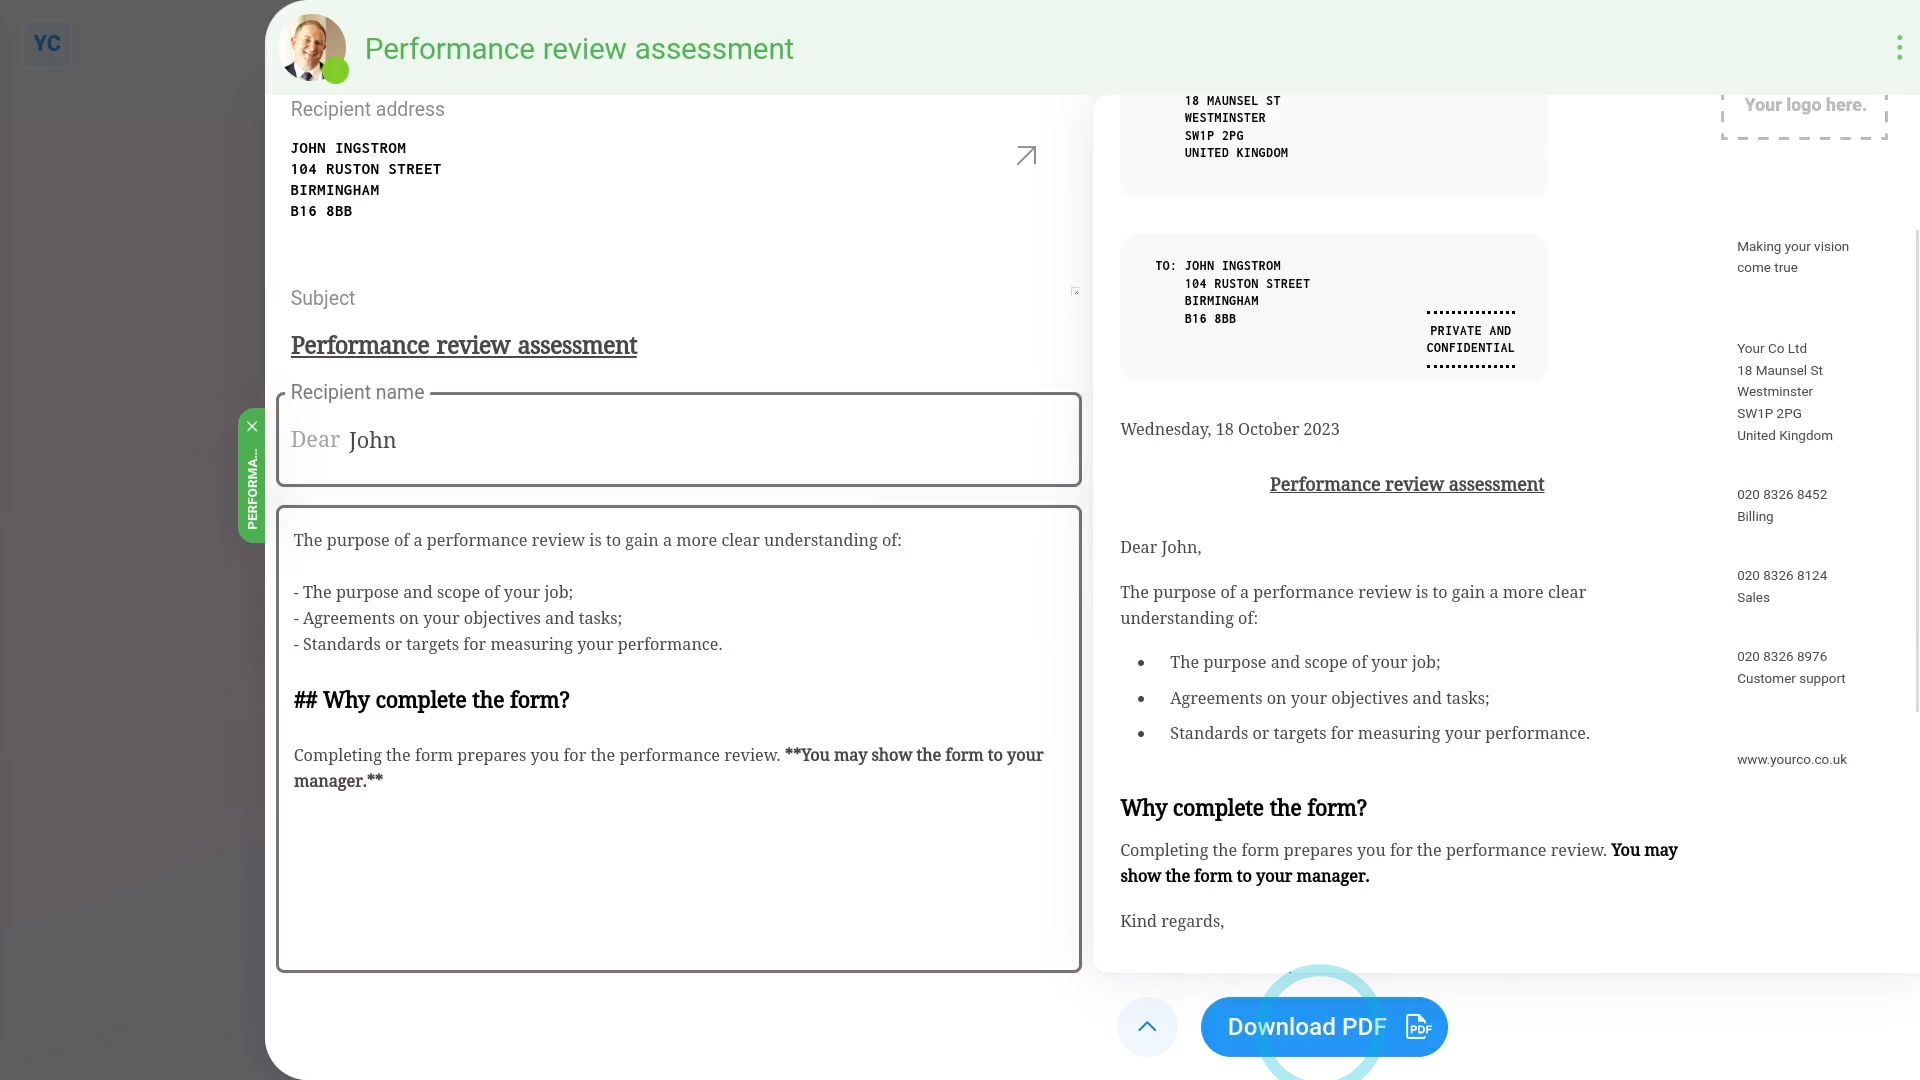
- Once it slides out on the right, you can set the "Subject" and contents of your doc to whatever you like.
- Then to download a doc as a PDF, tap: Download PDF (at the bottom)
- You can also find Download PDF in the bottom menu:
- The download takes a few seconds while it generates a PDF that includes your company's letterhead on the side of the first page.
- Once it's downloaded, tap the downloaded PDF to see it.
- And finally, to print your downloaded PDF, tap the "Print" button: (in the top-right corner)
You may notice:
- That for both A4 and letter paper sizes, when printed, the "To" address is perfectly positioned for windowed envelopes when posting in the mail.
To learn more:
- About how to change the "PDF paper size", watch the video on: Changing PDF paper size
And that's it! That's everything you need to know about downloading a letter or doc as a PDF, and then printing it!
5. How do I email a letter or doc with recipient confirmation?
 4:07
4:07
"How do I email a letter or doc with recipient confirmation?"
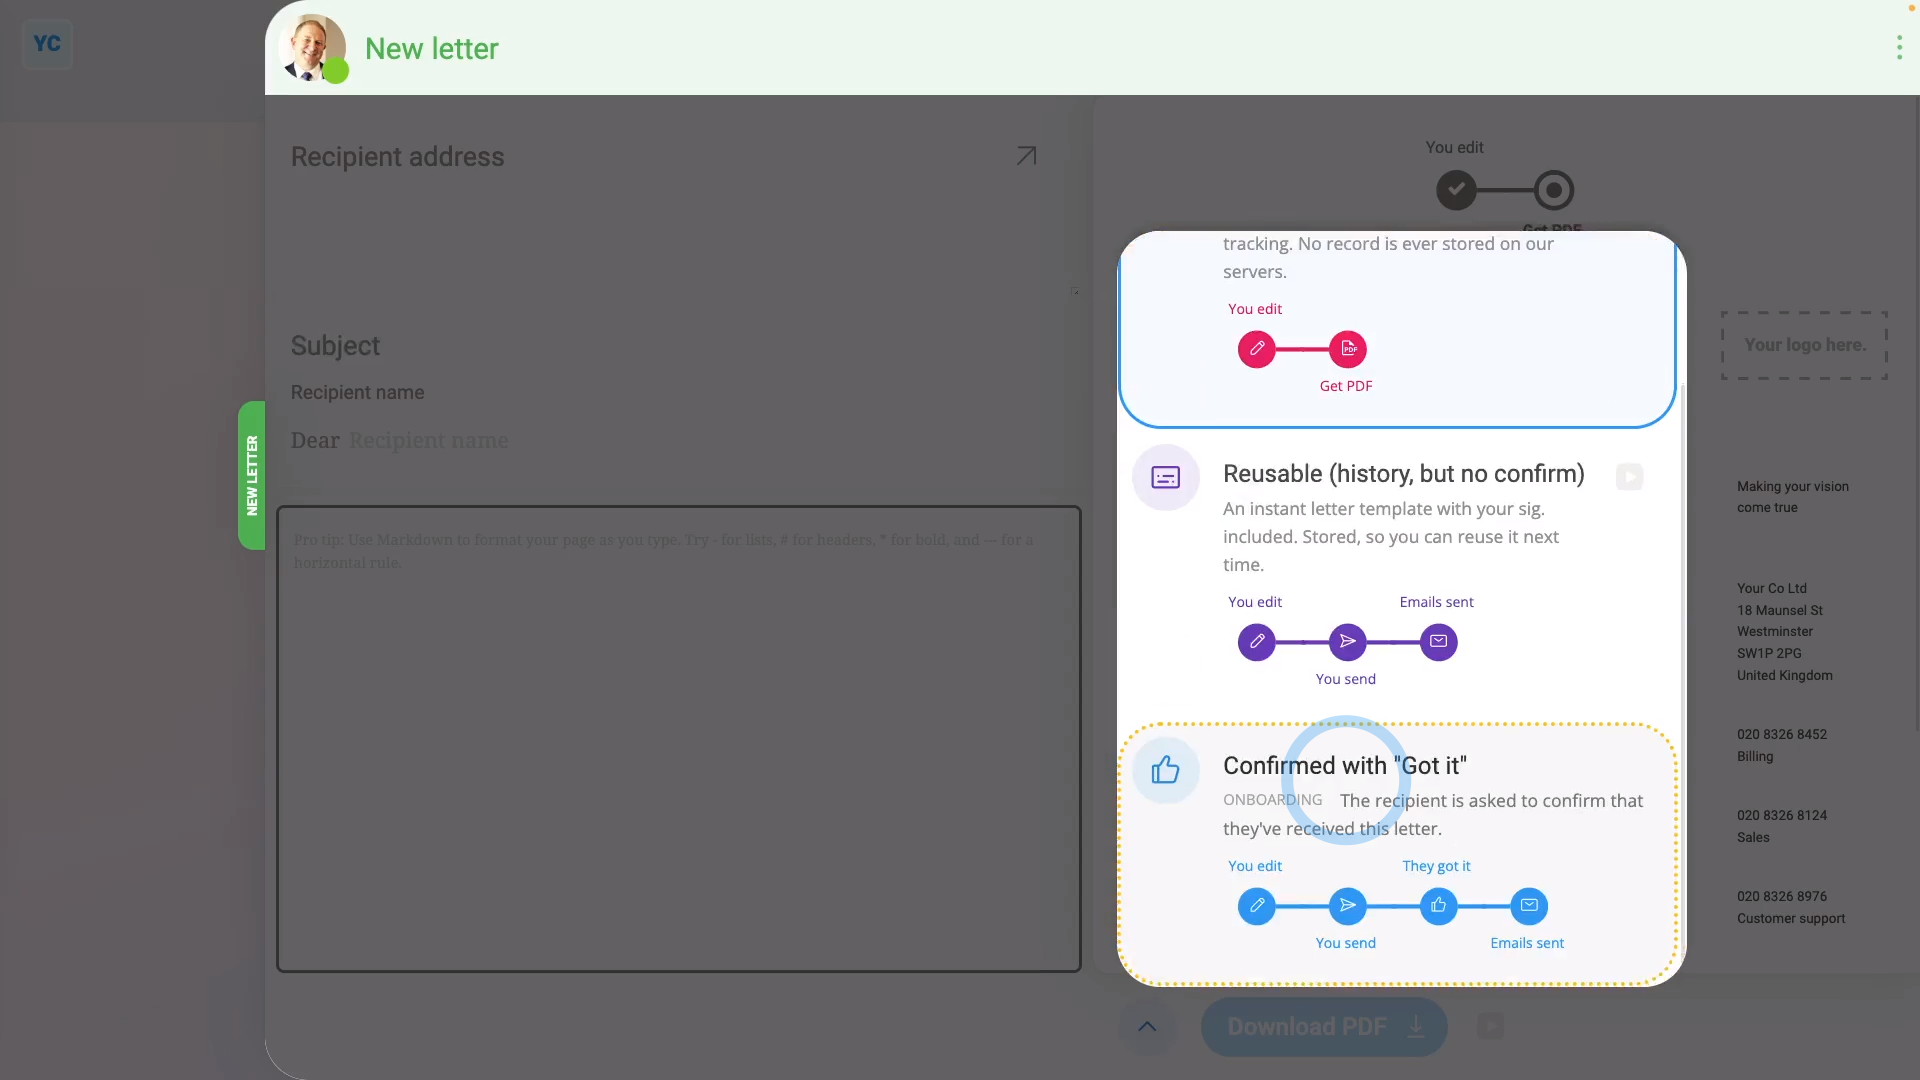
HR Docs can store your letter or doc as a reusable template, and then when it's emailed, require a confirmation from each recipient.
To store your letter or doc as "Confirmed with "Got it"", and then send it to a person:
- First, to create the reusable letter or doc template:
Tap: "Menu", "Docs ... all", then "New doc" - Then decide between "New letter" and: "New doc"
- Once it slides out on the right, the first thing to do is to change its type. Open the bottom menu:
- Then tap: Change letter type
- And look for: "Confirmed with "Got it""
- In the notes, you can see that a "reusable" letter or doc is stored for future use, and can be sent to the person by email.
- Also, the recipient is asked to confirm that the letter or doc's been received.
- Once you've set the type for your letter or doc, type in the subject and contents.
- Then optionally, tap the image circle and set the doc's colour and image.
- Currently, your letter or doc, by default, is only shown to you.
- If you'd like others in your team to also see your template, tap Me only, and select who else can reuse it.
- Next, to save the template, so that it can be reused, tap: Save
- To open and send the letter or doc to a person:
Tap: "Menu", then "Docs ... org's" - Tap the name of the doc template that you've recently created.
- Then select the person you'd like to send it to.
- Once it opens, you'll notice that it's personalised to the selected person's name and address.
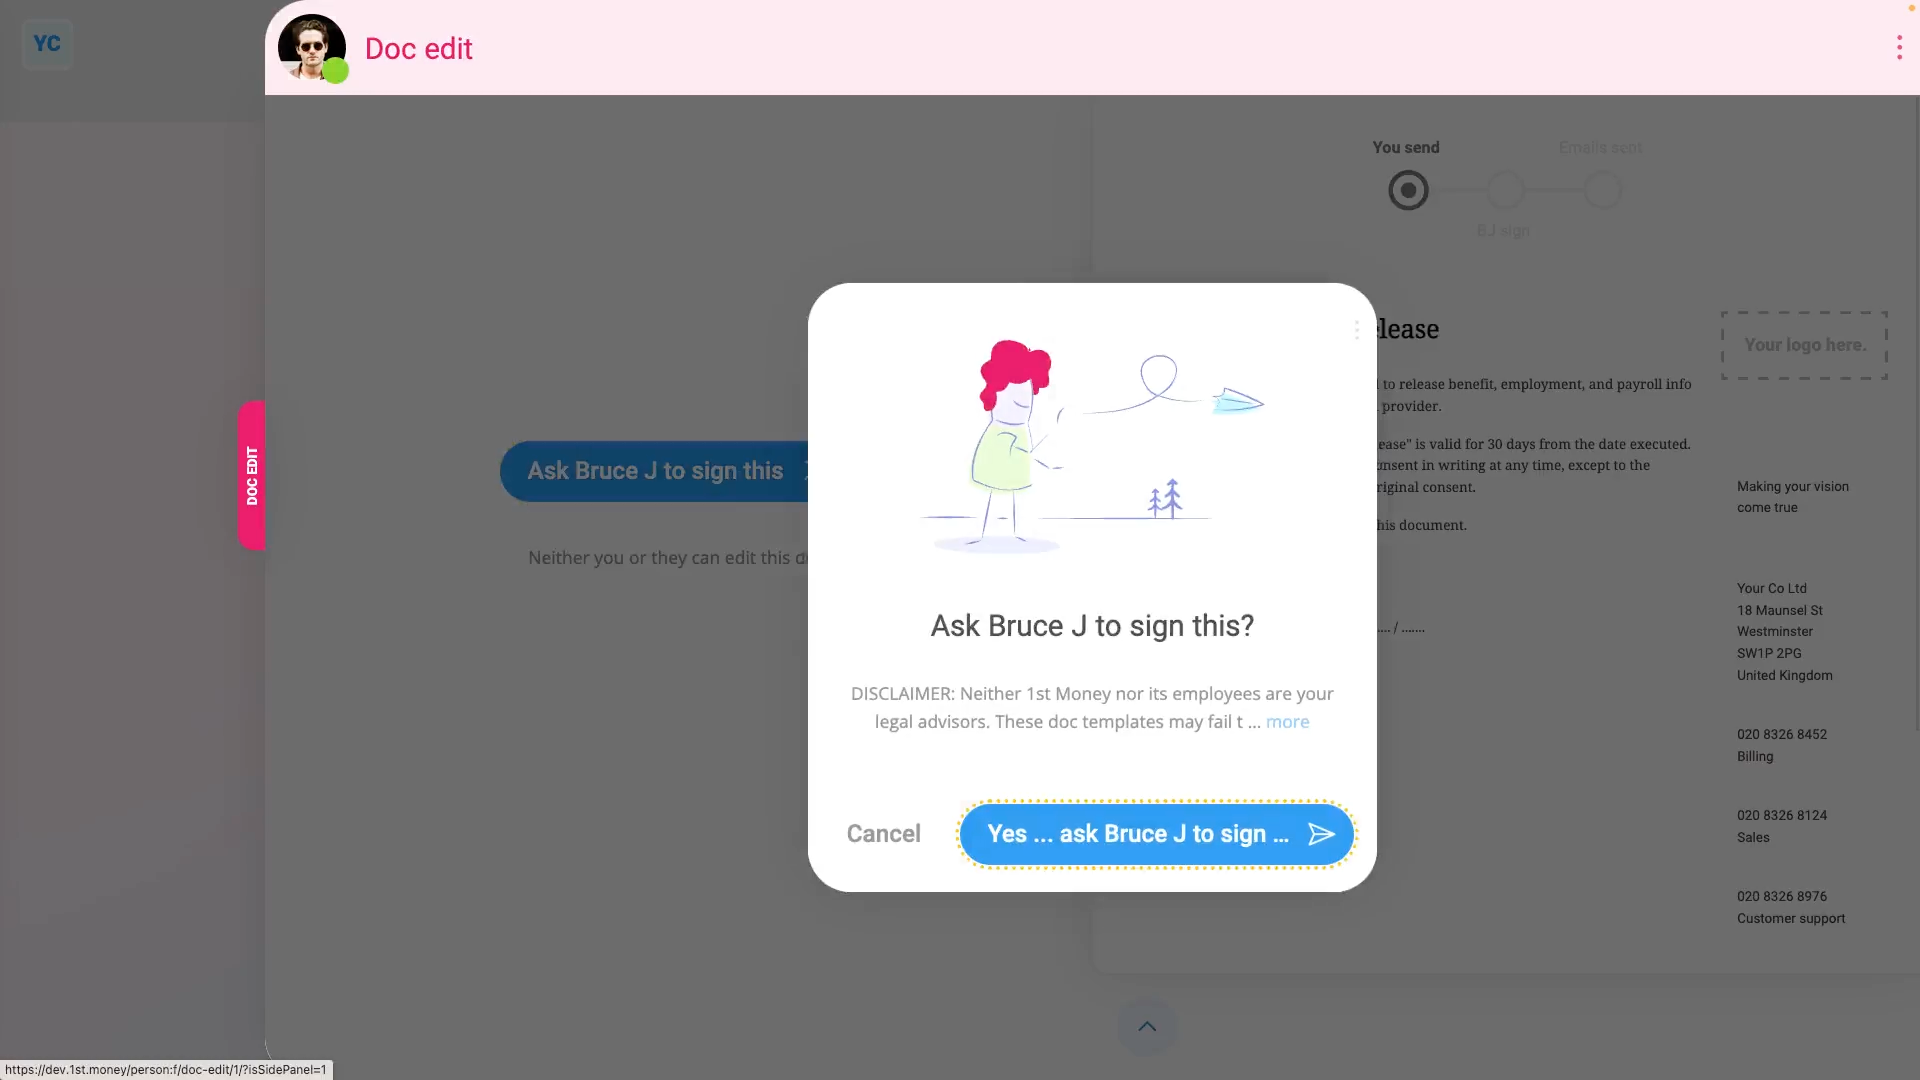
- Next, if you're ready to email it, tap: Request "Got it" (at the bottom)
- And then tap: Yes ... request "Got it"
- Then once it's sent, you'll see the "Doc sent!" confirmation, and you can tap: Close
- To see how it looks when the person receives the letter or doc:
When the person receives your email, it includes a screenshot of the first page of the PDF. - Also, because you've set the doc to require confirmation, there's a blue See doc button for the person to tap through to see the entire doc.
- When the person taps See doc, the person's taken to 1st Money and shown the full contents of the doc.
- However, for now, the person's got no way to access the rest of 1st Money until the Got it button's tapped.
- Once the person's read the doc, and tapped Got it (at the bottom), the person can now access 1st Money again.
- Also, an email's now sent to the person with a PDF attachment of the letter or doc that the person's recently marked as: "Got it"
- To see that the doc's been marked as "Got it" in "Docs history":
Select the person you sent it to, on: "Menu", then "People" - Then tap: "Docs", then "Docs history"
- Once it slides out on the right, you'll see a list of all the docs that've been sent to the person.
- Then tap the "Docs history" row for the letter or doc you recently sent, and you'll see it marked as: "Got it"
- And finally, tap the blue "more" link, and you'll see even more details. Including when it was marked as "Got it", and what emails were used.
Keep in mind that:
- When a person taps Got it, it doesn't imply that the person agrees with the contents of your letter or doc.
- Instead, it means that the person's received the letter or doc.
- Also, only people with "Full org admin" permissions can create a doc confirmed with: "Got it"
And that's it! That's everything you need to know about storing and emailing a reusable template of a letter or doc, with confirmation!
6. How do I see a history of all the docs sent to a person?
 2:03
2:03
"How do I see a history of all the docs sent to a person?"
Sometimes you may want to see all the docs that've been sent to a person. You can see their sent docs in their: "Docs history"
To see a history of all docs sent to a person in their "Docs history":
- First, select the person that you'd like to see a history of all their sent docs, on: "Menu", then "People"
- Then tap: "Docs", then "Docs history"
- Once it slides out on the right, you'll see a list of all the docs that've been sent to the person.
- The "Docs history" listing, by default, shows any docs that've been sent over the last five years.
- To lengthen or shorten the listing date range, tap:
" Show settings", then "Dates" - And pick a date range.
- When you tap one of the "Docs history" rows, and tap the blue "more" link, you'll see even more details.
- Including when it was sent, who sent it, and what email it was sent to.
- To download a PDF of the doc, first hover your mouse over the preview.
- Then tap the round "PDF" button (on the right side).
- In a few seconds, you'll get a downloaded PDF.
- And finally, once it's downloaded, tap the downloaded PDF to see it.
Keep in mind that:
- "Docs history" stores your sent documents indefinitely.
- As long as you keep your org open on 1st Money, you can still come back and retrieve any sent documents, even years later.
- Even if the person is terminated, or deleted, you can still retrieve their sent documents.
- You don't need to undelete the person to retrieve their sent documents.
And that's it! That's everything you need to know about seeing a history of all docs that've been sent to a person!
How can I email a doc with no recipient confirmation?
 3:04
3:04
"How can I email a doc with no recipient confirmation?"
HR Docs has the feature of storing a reusable template of your letter or doc. It can then be emailed to different people, with no confirmation required from each recipient.
To store your letter or doc as "Reusable (history, but no confirm)", and then send it to a person:
- First, to create the reusable letter or doc template:
Tap: "Menu", "Docs ... all", then "New doc" - Then decide between "New letter" and: "New doc"
- Once it slides out on the right, you can set the "Subject" and contents of your doc to whatever you like.
- Next, now that you've got your template exactly how you'd like it to look each time, open the bottom menu:
- Then tap: Change letter type
- Then select: Reusable (history, but no confirm)
- Once it reloads, your letter is now presented as an unsaved template, which by default, is only shown to you.
- If you'd like others in your team to also see your template, tap Me only, and select who else can reuse it.
- Next, to save the template, so that it can be reused, tap: Save
- To open and send the letter or doc to a person:
Tap: "Docs ... org's" - Tap the name of the doc template that you've recently created.
- Then select the person you'd like to send it to.
- Once it opens, you'll notice that it's personalised to the selected person's name and address.
- Next, if you're ready to email it, tap: Send this to... (at the bottom)
- And then tap: Yes ... send this to...
- Then once it's sent, you'll see the "Doc sent!" confirmation, and you can tap: Close
- To see how it looks when the person receives the letter or doc:
When the person receives your email, it includes an attached PDF. - Also, because you've set the doc to not require confirmation, there's no blue button asking the person to confirm that your doc was received.
- And then when the person scrolls down, and taps on the attached PDF, the person sees it presented exactly as you'd expect.
- To see that the sending of the doc's been stored in "Docs history":
Now, back in 1st Money. - Select the person you sent it to, on: "Menu", then "People"
- Then tap: "Docs", then "Docs history"
- Once it slides out on the right, you'll see a list of all the docs that've been sent to the person.
- And finally, when you tap one of the "Docs history" rows, and tap the blue "more" link, you'll see even more details. Including when it was sent, who sent it, and what email it was sent to.
And that's it! That's everything you need to know about storing and emailing a reusable template of a letter or doc!
How do I add history and signature features to a doc or letter?
 1:36
1:36
"How do I add history and signature features to a doc or letter?"
Changing a doc or letter's type adds features to it. The features you can add include history storage, "Got it" confirmation, and four different signature collection flows.
To change a doc's type:
- First, tap: "Menu", "Docs ... all", then "New doc"
- Then decide between "New letter" and: "New doc"
- Once it slides out on the right, you can set the "Subject" and contents of your doc to whatever you like.
- Next, now that you've got your template exactly how you'd like it to look each time, open the bottom menu:
- Then tap: Change doc type
- You'll now see a list of eight different options to select from.
- Read the notes, and watch the videos of each one to decide which one has the features you're looking for.
- And once you've selected one, tap it.
- And finally, tap Save and your doc is all ready to send with its new features.
Keep in mind that:
- The steps to change the type of an existing doc, or new and existing letters are the same.
- You can change the type of any doc or letter, at any time.
- Once the type's changed, its new features become instantly available from then on.
And that's it! That's everything you need to know about how to change a doc or letter's type!
How do I change who I'm sending a doc to?
 1:21
1:21
"How do I change who I'm sending a doc to?"
If you've got a doc open to send to a person, but you accidentally picked the wrong person, you can change who it's sent to.

To change which person you're sending a doc to:
- First, select the doc on: "Menu", then "Docs ... all"
- And select a doc.
- Then select the person to send the doc to.
- Once the doc's send page slides out on the right, to change who the doc's sent to, open the bottom menu:
- Then tap: Change person
- If the name of a person's greyed out, it means that you don't have permission to sent a doc to the person.
- Next, from the names that aren't greyed out, select the new person to send it to.
- And you'll see that the doc's reloaded, and has now been updated with the details of the new person instead.
- And finally, if you're ready to send the doc, tap: Send this to... (at the bottom)
Keep in mind that:
- Usually you need to be an org admin, manager, or supervisor to send a doc to another person in your org.
And that's it! That's everything you need to know about how to change which person you're sending a doc to!
How do I copy or clone a doc to add my own changes?
 2:59
2:59
"How do I copy or clone a doc to add my own changes?"
Sometimes, an existing doc's close, but not exactly what you want. To change it to exactly how you want, clone the doc, and then add your own changes.
To clone a doc, and add your own changes:
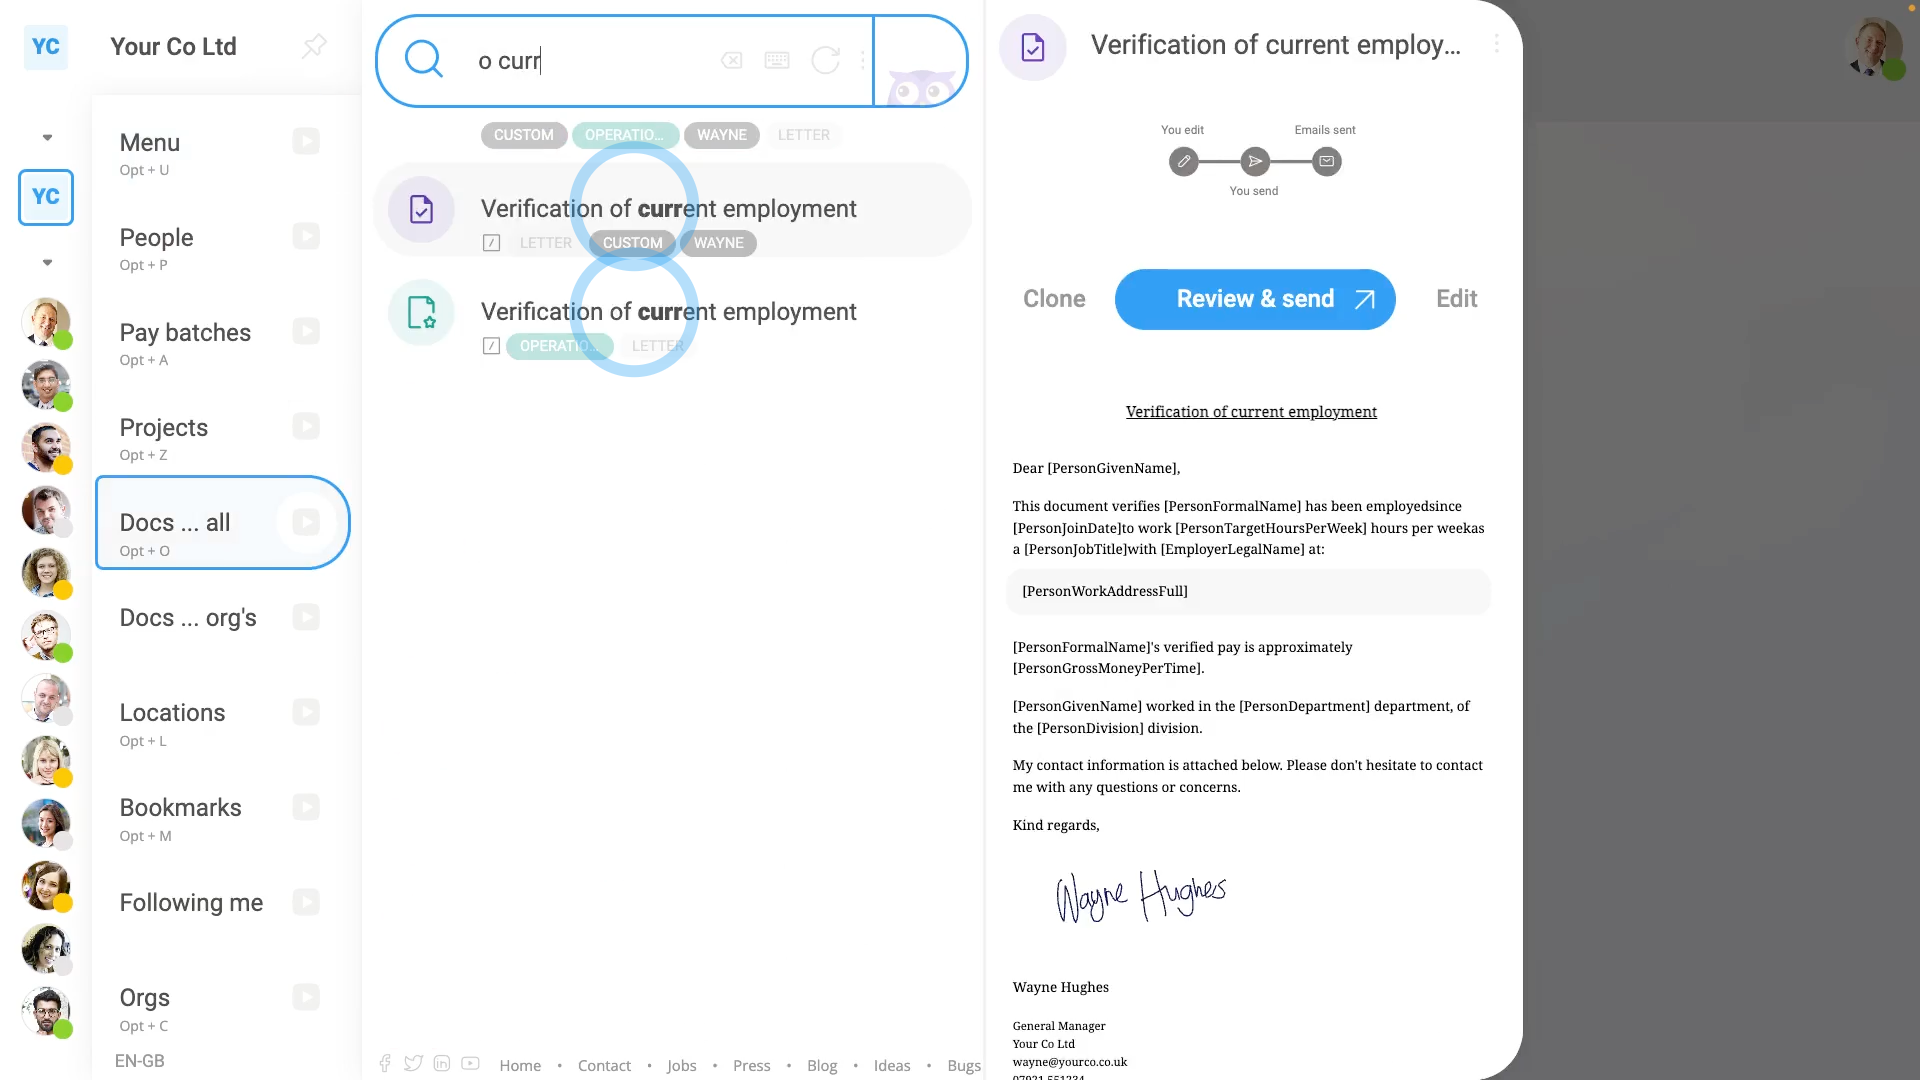
- First, to clone a doc
Select the doc you want to clone on: "Menu", then "Docs ... all" - Then hover your mouse over it, and tap: Clone
- You've now got an exact duplicate of the original doc. The only difference is that the colour and image have been reset to the default.
- To add your changes to your cloned doc:
Start by setting the colour and image to what you want. - Then type in your other changes in the editor.
- You can add as many changes as you like.
- To make your changes reusable, where possible, use inserts in your newly typed sentences.
- In most cases, you won't have to change who the doc's reusable by, as the cloned doc has the same settings as the original doc.
- The same goes for "Change doc type". You mostly won't have to change it, as the cloned doc also has the same settings as the original doc.
- And when you're done adding your changes, tap Save, and then: Close
- To find your cloned doc:
Now when you go to "Menu", then "Docs ... all", you'll see both the original, and your clone. - You'll know which is your clone because of the different colour and image.
- When you instead go to "Docs ... org's", you'll only see your clone, as the "Docs ... org's" menu only shows docs made by people in your org.
- To send your cloned doc to a person:
Tap the cloned doc, then select the person you're sending it to. - And finally, if you're ready to send it, tap: Send (at the bottom)
Keep in mind that:
- Any of 1st Money's supplied doc templates can be cloned.
- So if there's ever a doc that's close to what you want, but not quite perfect. Go ahead, and clone it to add your changes.
- The same goes for docs made by other people in your org. Those can also be cloned, after which, you can then add your changes.
And that's it! That's everything you need to know about cloning a doc, and adding your changes!
How do I create editable docs for my employees to sign?
 4:43
4:43
"How do I create editable docs for my employees to sign?"
With HR Docs, you can create an editable doc template for your people to fill in, sign, and send back to you, as their manager.
To store your doc as "Emp. edits/signs ... sent to mgr.", and then request a person to sign it:
- First, to create the reusable doc template:
Tap: "Menu", "Docs ... all", then "New doc" - And select: "New doc"
- Once it slides out on the right, the first thing to do is to change its type. Open the bottom menu:
- Then tap: Change doc type
- And look for: "Emp. edits/signs ... sent to mgr."
- In the notes, you can see that the manager can send a request for the employee to complete the doc.
- The employee can then edit, sign, and send the completed doc back to their manager.
- Once you've set the type for your doc, type in the subject and contents.
- Then optionally, tap the image circle and set the doc's colour and image.
- Currently, your doc, by default, is only shown to you.
- So that others in your team can also open the doc, change it to be reusable by: Everyone
- Next, to save the template, tap: Save
- To open and request a person to fill in the doc:
Tap: "Menu", then "Docs ... org's" - Tap the name of the doc template that you've recently created.
- Then select the person you'd like to request it to be filled in by.
- Once it opens, you'll notice that it's personalised to the selected person's name and job title.
- Next, tap: Ask to sign this (on the side)
- And then tap: Yes ... send it
- Then once it's sent, you'll see the "Request sent!" confirmation, and you can tap: Close
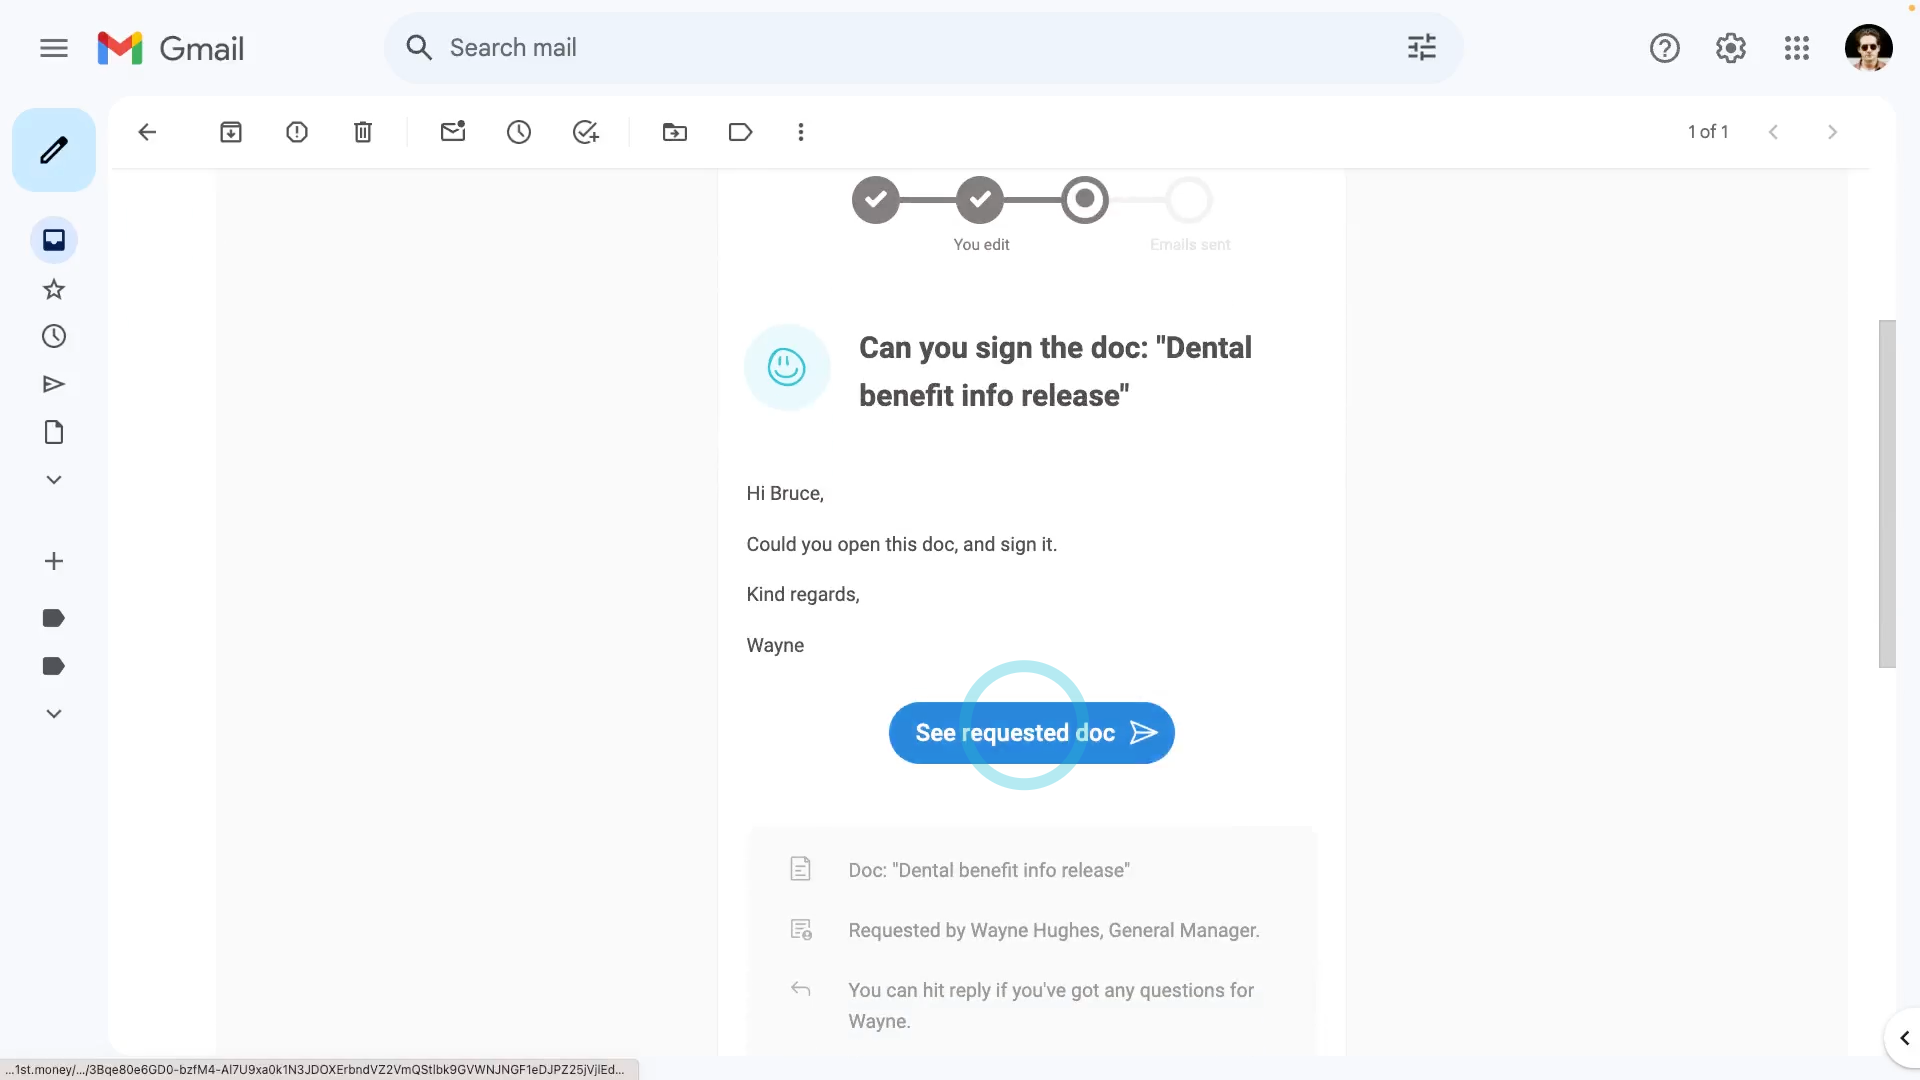
- To see how it looks when the person receives the request:
When the person receives your request, it includes a blue See requested doc button. - When the person taps See requested doc, the person's taken to 1st Money and shown the doc, ready for signing.
- Also, if the person taps Show editor, the person can make changes to the docs contents before signing.
- Once the person's read the doc, the next step is to tap Sign, and then: I accept & electronically sign
- Once signed, the doc is then emailed back to the person who requested it.
- If no one requested the doc, it's instead automatically sent to the person's manager.
- Next, an email's now sent to the person who signed, with an attached PDF that's signed and dated.
- As the person who requested the doc, you'll also get an email letting you know that the doc's been signed.
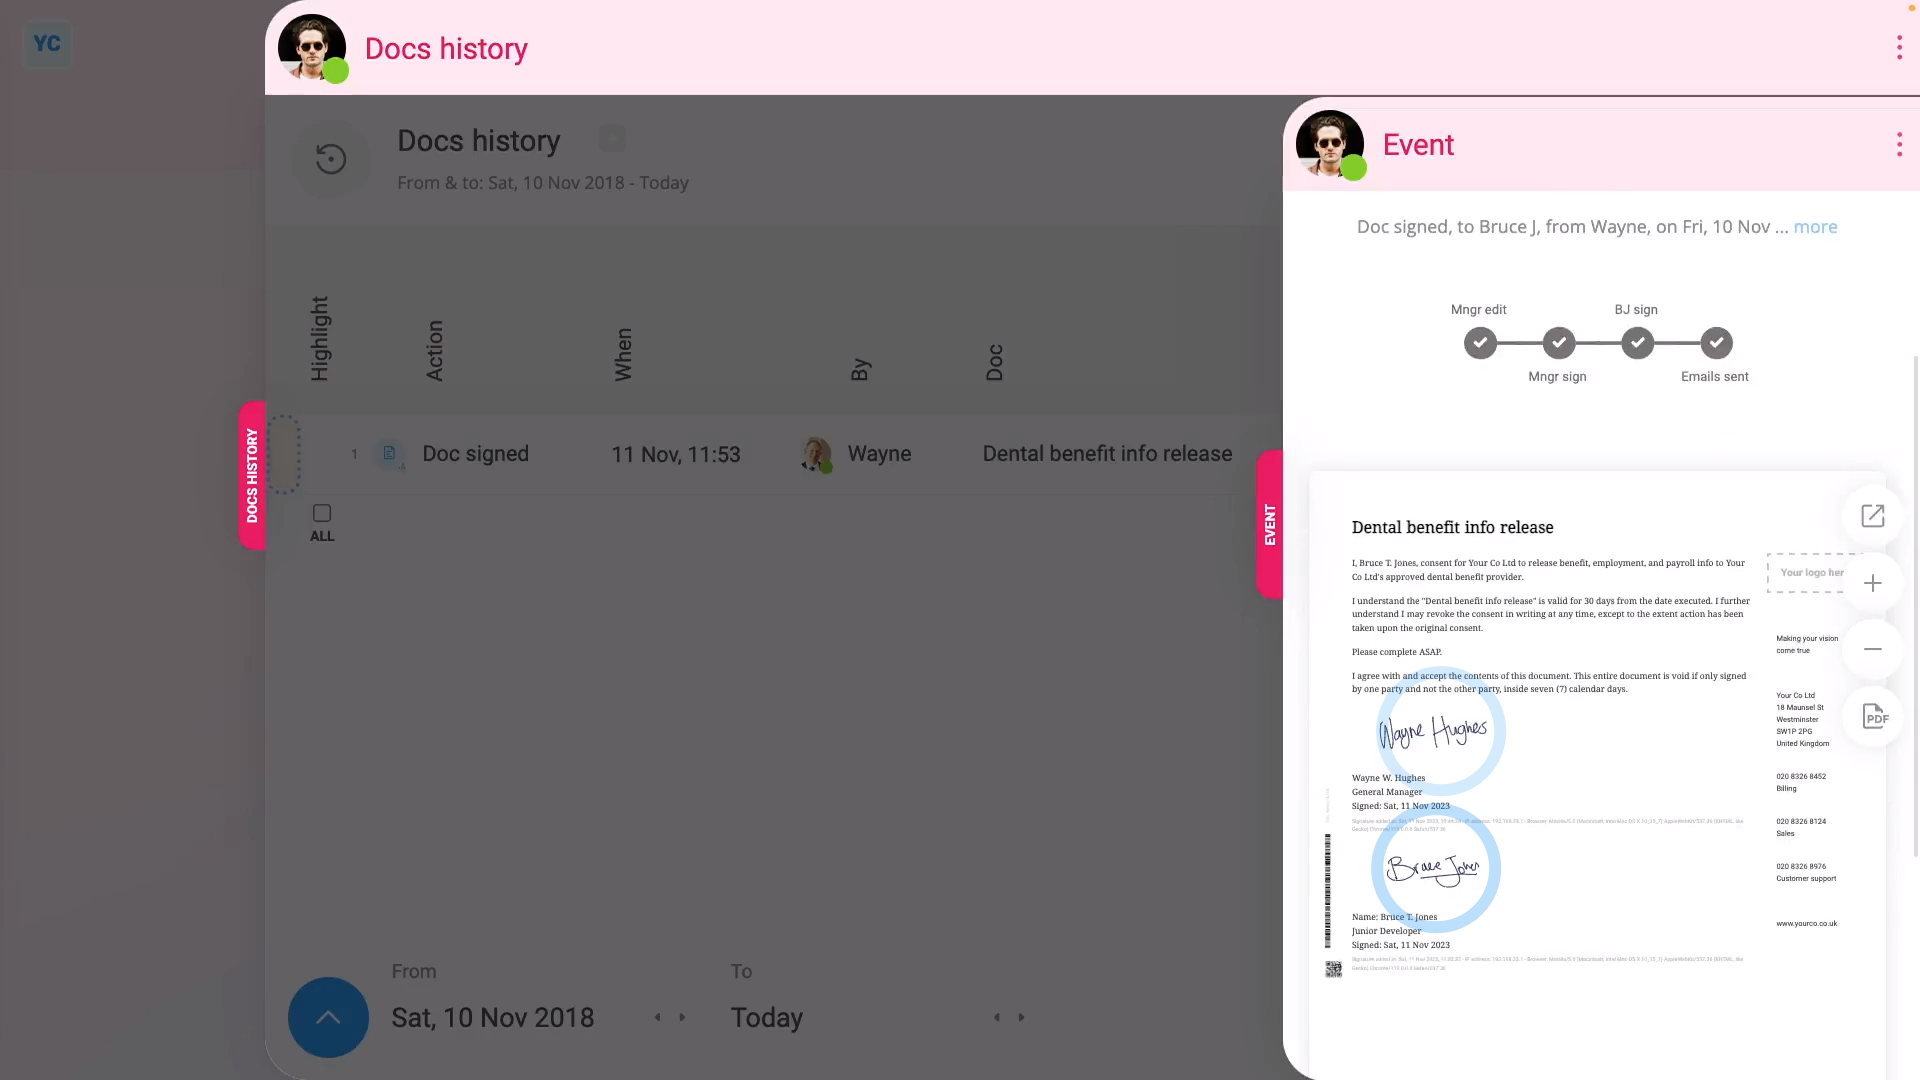
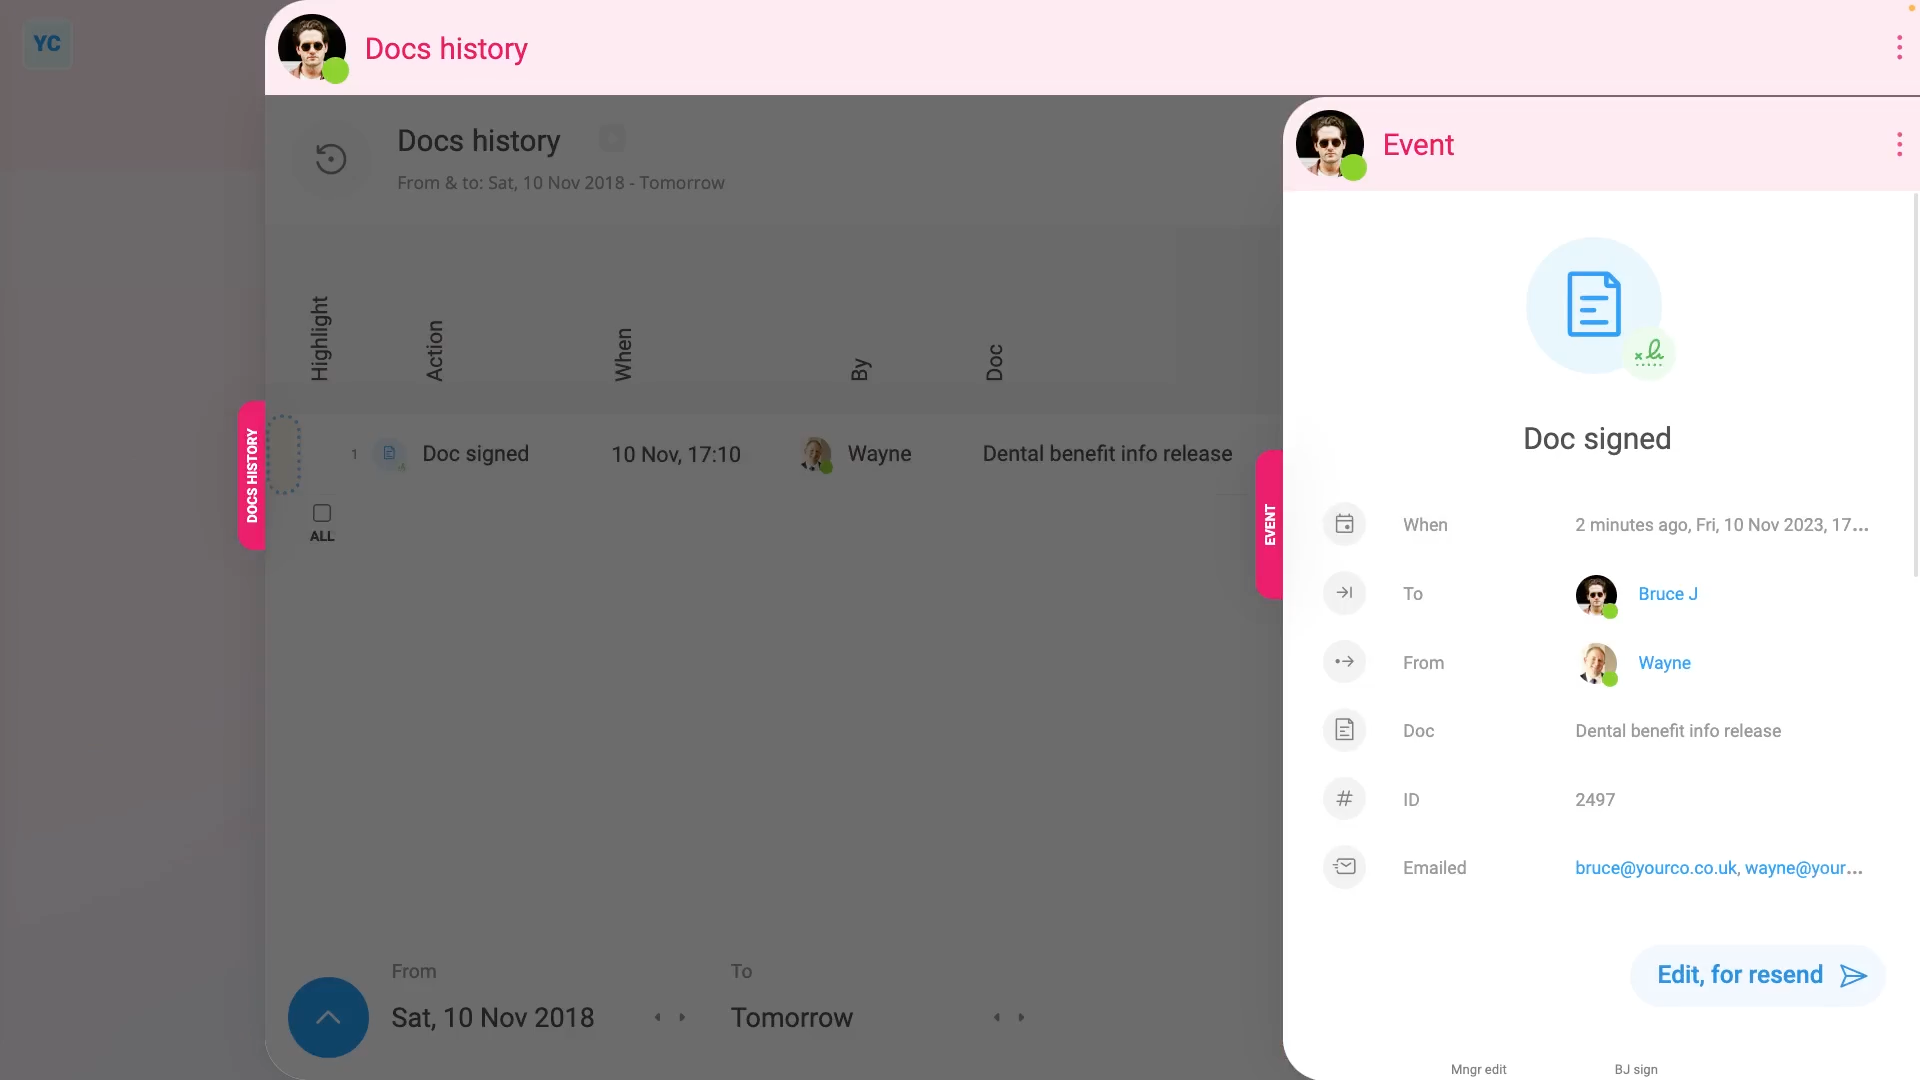
- To see that the doc's been signed in "Docs history":
Select the person you sent it to, on: "Menu", then "People" - Then tap: "Docs", then "Docs history"
- Once it slides out on the right, you'll see a list of all the docs that've been sent to, or signed by the person.
- Then tap the "Docs history" row for the doc you recently sent, and you'll see it marked as: "Doc signed"
- And finally, tap the blue "more" link, and you'll see even more details. Including when it was signed, and what emails were used.
Keep in mind that:
- Once you've set an editable doc to being reusable by "Everyone", your people can find and fill in the doc, even when it wasn't requested.
- All the person's got to do is go to "Docs ... org's", fill in the doc, and send it.
- In which case, the recipient of the doc would automatically be set to the person's manager.
- Also, only people with "Full org admin" permissions can create an editable doc.
You may notice:
- That building a library of editable employee signable docs, can make all your custom HR processes much more manageable. Example HR processes include:
- Employee benefit applications.
- Complaint forms.
- Accident forms.
- Requests for payment advances.
- Self assessments.
- Absence explanation forms.
- Employee referral forms.
- Consent forms.
- And much more.
And that's it! That's everything you need to know about making editable docs that can be requested, signed, and sent back to you!
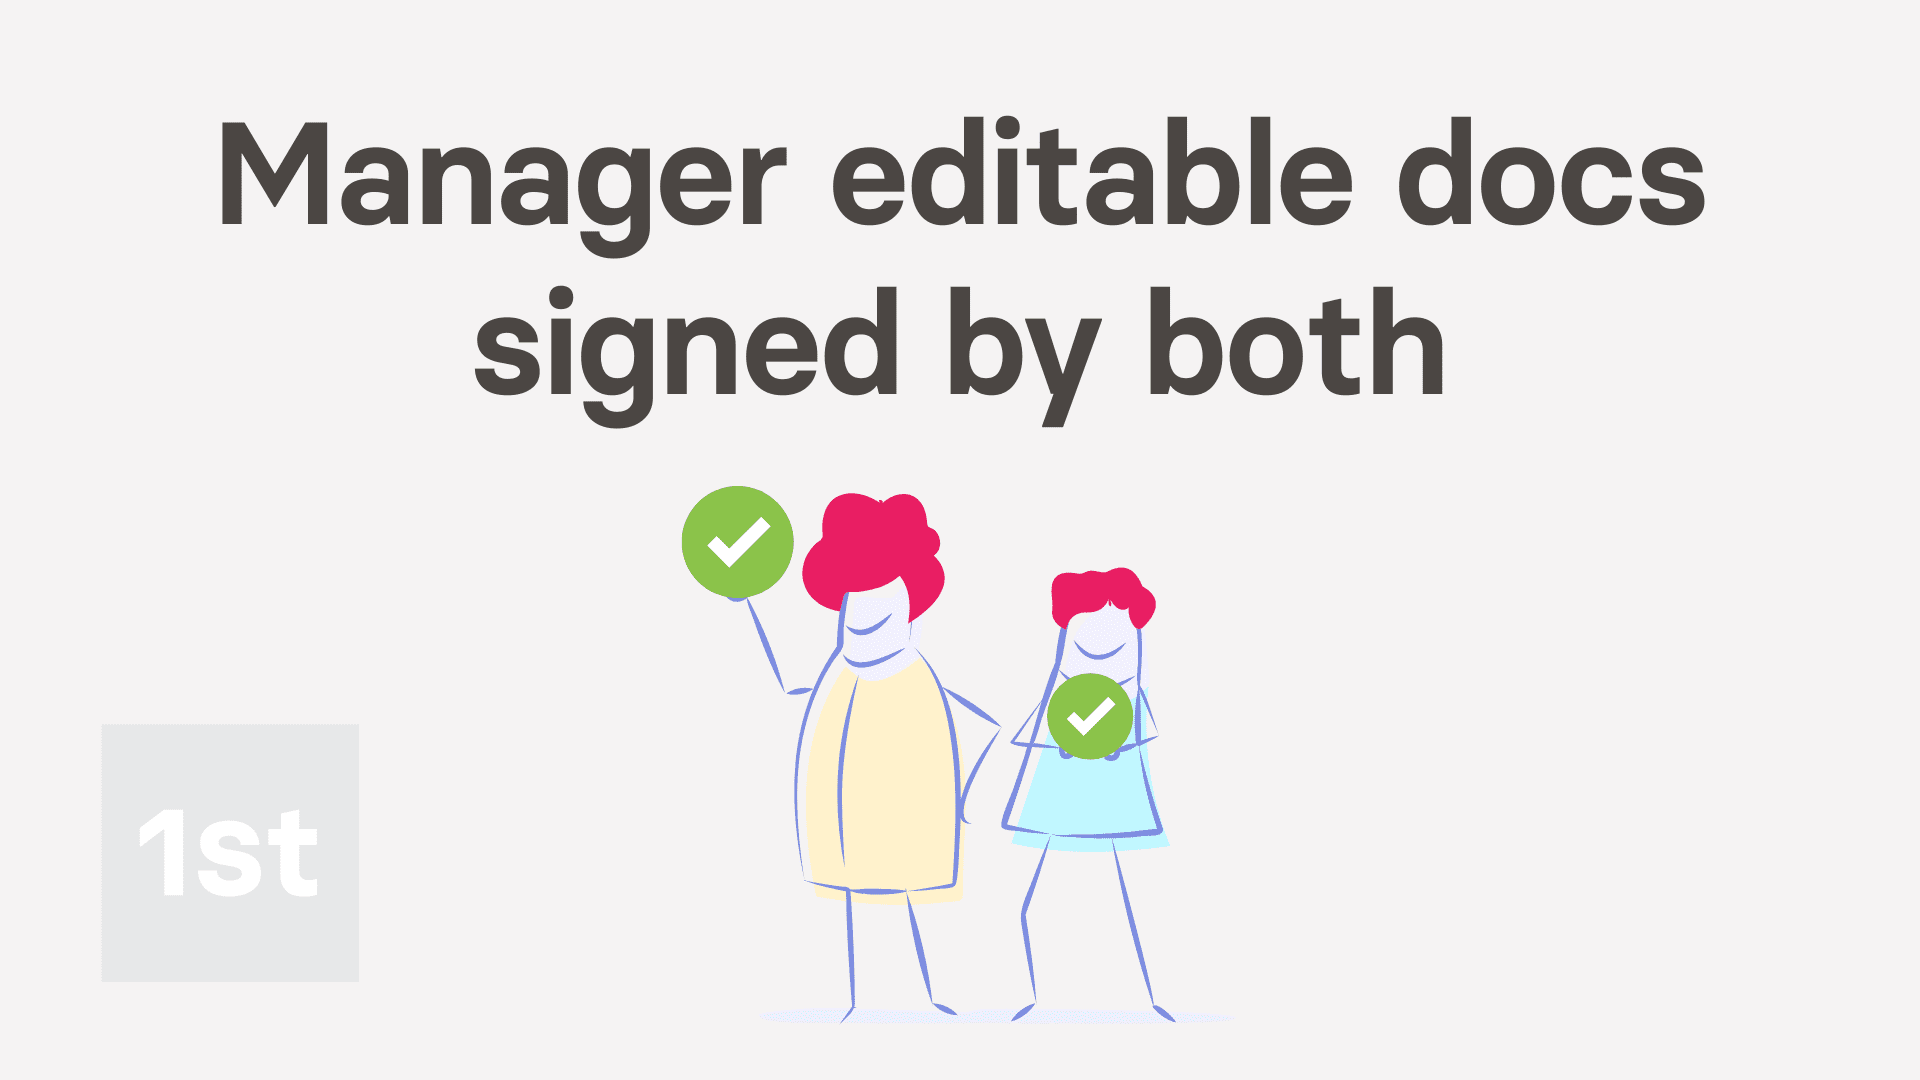
How do I create manager editable docs for both to sign?
 5:24
5:24
"How do I create manager editable docs for both to sign?"
With HR Docs, you can create a manager editable doc template for both managers and employees to sign.
To store your doc as "Mgr. edits/sends ... both sign", and then have it signed by both a manager and employee:
- First, to create the reusable doc template:
Tap: "Menu", "Docs ... all", then "New doc" - And select: "New doc"
- Once it slides out on the right, the first thing to do is to change its type. Open the bottom menu:
- And look for: "Mgr. edits/sends ... both sign"
- In the notes, you can see that the manager can edit, sign, and then send a request for the employee to also sign.
- The employee can sign, and send the doc back to their manager, but can't edit the doc.
- Once you've set the type for your doc, type in the subject and contents.
- Then optionally, tap the image circle and set the doc's colour and image.
- Currently, your doc, by default, is only shown to you.
- For a manager editable doc, there's no need to change it, unless you need other managers to send the doc to their employees too.
- Also, because the doc is to be signed by both, you'll see that it's got two signature blocks.
- Next, to save the template, tap: Save
- To open and request a person to fill in the doc:
Tap: "Menu", then "Docs ... org's" - Tap the name of the doc template that you've recently created.
- Then select the person you'd like to request it be signed by.
- Once it opens, you'll notice that it's personalised to the selected person's name and job title.
- You'll also notice that you can tap Show editor and make changes before sending.
- Next, tap: Get signed (at the bottom)
- And then because you're required to sign as well, tap: I accept & electronically sign
- Then once it's sent, you'll see the "Doc sent!" confirmation, and you can tap: Close
- To see how it looks when the person receives the request:
When the person receives your request, it includes a blue Review & sign button. - When the person taps Review & sign, the person's taken to 1st Money and shown the doc, ready for signing.
- You'll notice that when the person gets the doc, the manager's signature is already visible.
- Once the person's read the doc, the next step is to decide to accept the doc.
- However, for now, the person's got no way to open the rest of 1st Money until either the Accept or Decline is tapped.
- If the person doesn't want to accept, the person can tap Decline, and then type in their reason.
- In which case, you'll be emailed the reason the person declined. Their reason is also stored in: "Docs history"
- Otherwise, the person can tap Accept, and then: I accept & electronically sign
- Next, an email's sent to the person who signed, with an attached PDF that's signed and dated by both manager and employee.
- As the person who requested the doc, you'll also get an email letting you know that the doc's been signed by both.
- To see that the doc's been signed by both in "Docs history":
Select the person you sent it to, on: "Menu", then "People" - Then tap: "Docs", then "Docs history"
- Once it slides out on the right, you'll see a list of all the docs that've been sent to, or signed by the person.
- Then tap the "Docs history" row for the doc you recently sent, and you'll see it marked as: "Doc signed"
- You'll also see that the doc's been signed by both the manager and employee.
- And finally, tap the blue "more" link, and you'll see even more details. Including when it was signed, and what emails were used.
Keep in mind that:
- Once you've set a manager editable doc to being reusable by "Everyone", all your people can now find it in the list of docs.
- However, your people can't sign it until it's been signed by an admin or their manager.
- Requiring that the doc be signed by an admin or manager ensures that all signed copies have managerial approval.
- Also, only people with "Full org admin" permissions can create a manager editable doc, to be signed by both.
You may notice:
- That building a library of manager editable docs, to be signed by both, can make all your custom HR processes much more manageable. Examples of HR processes that need to be manager edited, then signed by both, include:
- Official changes in employment terms.
- Significant changes in policy.
- And really any other document where you need both the manager and employee to sign.
And that's it! That's everything you need to know about making manager editable docs that are signed by both, and sent back to you!
How do I create manager editable docs for employees to sign?
 4:57
4:57
"How do I create manager editable docs for employees to sign?"
With HR Docs, you can create a manager editable doc template for employees to sign, and send back to their manager.
To store your doc as "Mgr. edits/sends ... emp. signs", and then request a person to sign it:
- First, to create the reusable doc template:
Tap: "Menu", "Docs ... all", then "New doc" - And select: "New doc"
- Once it slides out on the right, the first thing to do is to change its type. Open the bottom menu:
- Then tap: Change doc type
- And look for: "Mgr. edits/sends ... emp. signs"
- In the notes, you can see that the manager can edit, and then send a request for the employee to sign the doc.
- The employee can sign, and send the doc back to their manager, but can't edit the doc.
- Once you've set the type for your doc, type in the subject and contents.
- Then optionally, tap the image circle and set the doc's colour and image.
- Currently, your doc, by default, is only shown to you.
- For an manager editable doc, there's no need to change it, unless you need other managers to send the doc to their employees too.
- Next, to save the template, tap: Save
- To open and request a person to fill in the doc:
Tap: "Menu", then "Docs ... org's" - Tap the name of the doc template that you've recently created.
- Then select the person you'd like to request it be signed by.
- Once it opens, you'll notice that it's personalised to the selected person's name and job title.
- You'll also notice that you can tap Show editor and make changes before sending.
- Next, tap: Get signed (at the bottom)
- And then tap: Yes ... get signed
- Then once it's sent, you'll see the "Doc sent!" confirmation, and you can tap: Close
- To see how it looks when the person receives the manager editable doc request:
When the person receives your request, it includes a blue Review & sign button. - When the person taps Review & sign, the person's taken to 1st Money and shown the doc, ready for signing.
- Once the person's read the doc, the next step is to decide to accept the doc.
- However, for now, the person's got no way to open the rest of 1st Money until either the Accept or Decline is tapped.
- If the person doesn't want to accept, the person can tap Decline, and then type in their reason.
- In which case, you'll be emailed the reason the person declined. Their reason is also stored in: "Docs history"
- Otherwise, the person can tap Accept, and then: I accept & electronically sign
- Next, an email's sent to the person who signed, with an attached PDF that's signed and dated.
- As the person who requested the doc, you'll also get an email letting you know that the doc's been signed.
- To see that the doc's been signed in "Docs history":
Select the person you sent it to, on: "Menu", then "People" - Then tap: "Docs", then "Docs history"
- Once it slides out on the right, you'll see a list of all the docs that've been sent to, or signed by the person.
- Then tap the "Docs history" row for the doc you recently sent, and you'll see it marked as: "Doc signed"
- And finally, tap the blue "more" link, and you'll see even more details. Including when it was signed, and what emails were used.
Keep in mind that:
- Once you've set a manager editable doc to being reusable by "Everyone", all your people can now find it in the list of docs.
- However, your people can't sign it until it's been sent to them by an admin or their manager.
- Requiring that the doc be sent by an admin or manager ensures that all signed copies have managerial approval.
- Also, only people with "Full org admin" permissions can create a manager editable doc.
You may notice:
- That building a library of manager editable employee signable docs, can make all your custom HR processes much more manageable. Example HR processes that need to be edited by the manager include:
- Changes in work responsibility.
- Renegotiation of work benefits.
- Custom disciplinary agreements.
- And much more.
And that's it! That's everything you need to know about making manager editable docs that can be requested, signed, and sent back to you!
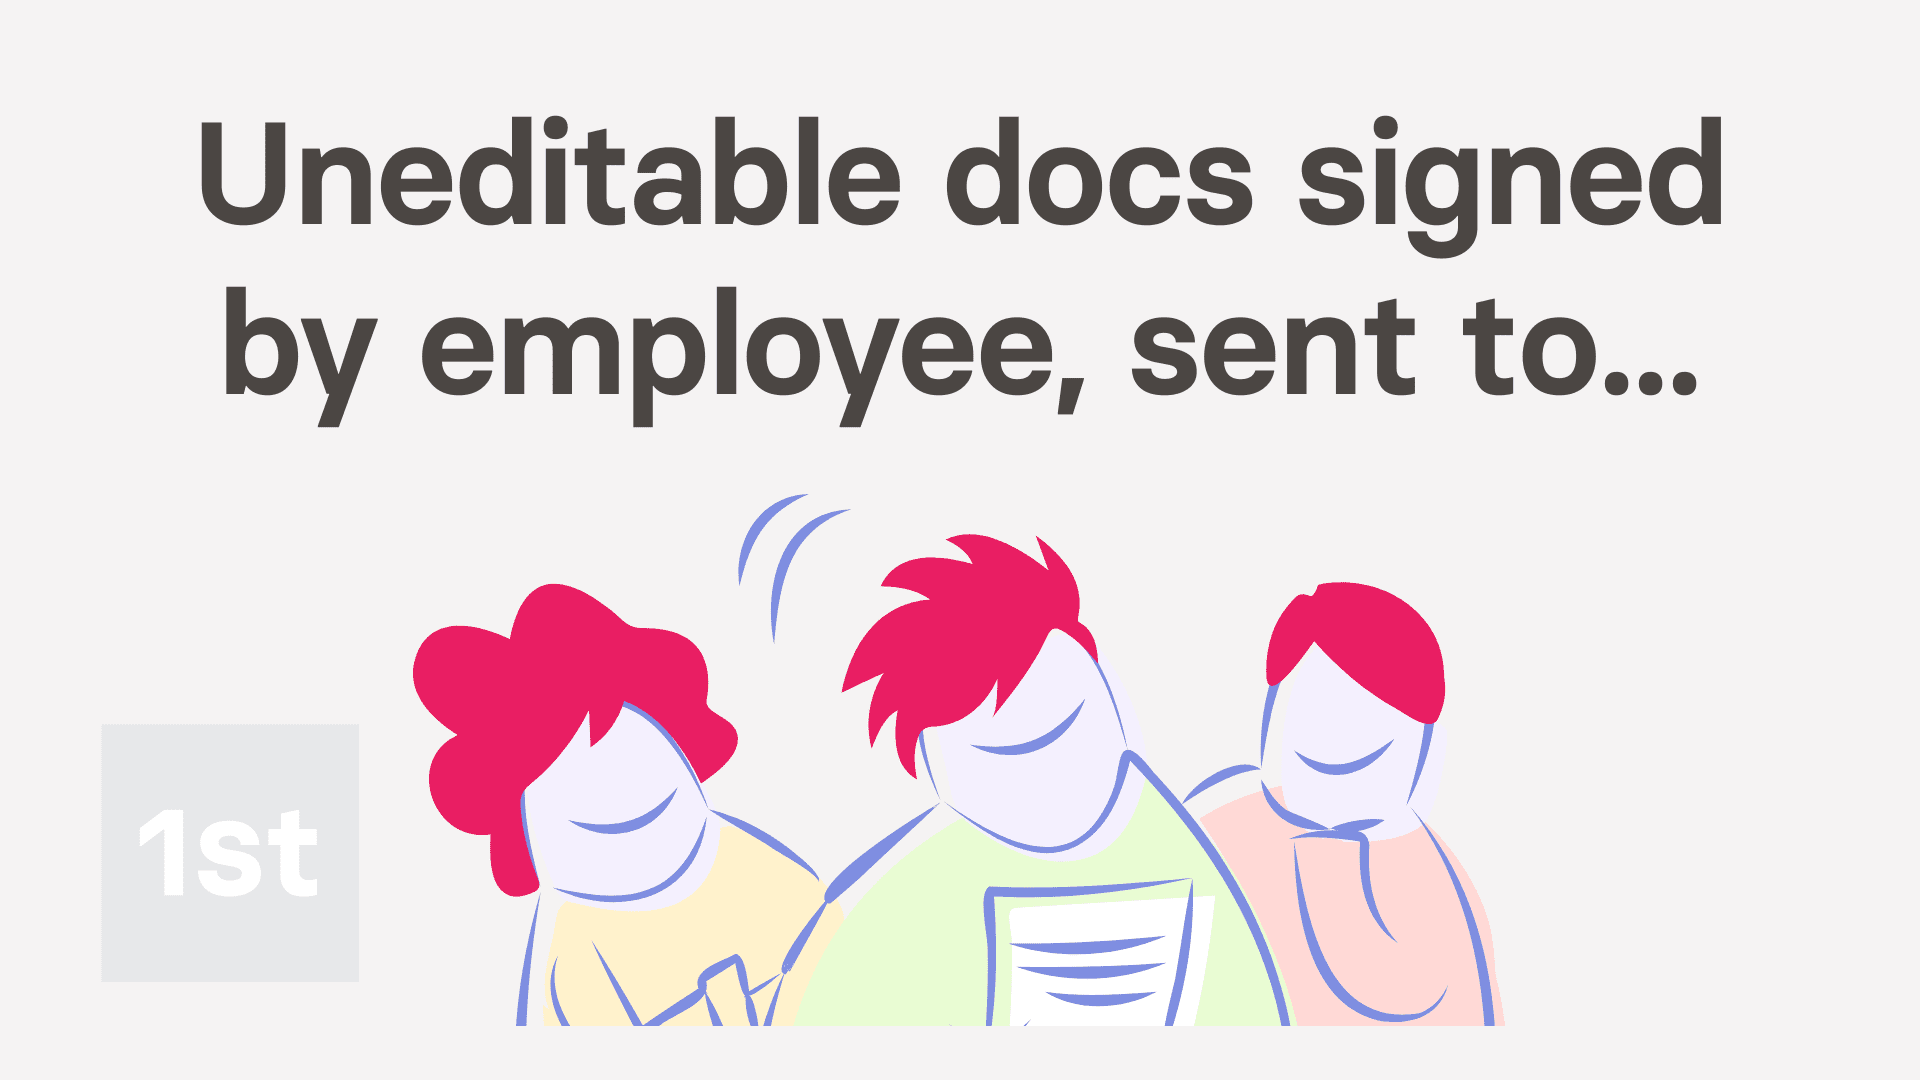
How do I create uneditable docs for my employees to sign?
 4:55
4:55
"How do I create uneditable docs for my employees to sign?"
With HR Docs, you can create an uneditable doc template for your people to sign, and send back to you, as their manager. In addition, you can be sure that none of the doc's contents have been changed.
To store your doc as "Mgr. sends ... emp. signs (no edits)", and then request a person to sign it:
- First, to create the reusable doc template:
Tap: "Menu", "Docs ... all", then "New doc" - And select: "New doc"
- Once it slides out on the right, the first thing to do is to change its type. Open the bottom menu:
- Then tap: Change doc type
- And look for: "Mgr. sends ... emp. signs (no edits)"
- In the notes, you can see that the manager can send a request for the employee to sign the doc.
- Also, whilst the employee can sign, and send the doc back to their manager, neither manager or employee can edit the doc.
- Once you've set the type for your doc, type in the subject and contents.
- Then optionally, tap the image circle and set the doc's colour and image.
- Currently, your doc, by default, is only shown to you.
- For an uneditable doc, there's no need to change it, unless you need other managers to send the doc to their employees too.
- Next, to save the template, tap: Save
- To open and request a person to fill in the doc:
Tap: "Menu", then "Docs ... org's" - Tap the name of the doc template that you've recently created.
- Then select the person you'd like to request it be signed by.
- Once it opens, you'll notice that it's personalised to the selected person's name and job title.
- Next, tap: Ask to sign this (on the side)
- And then tap: Yes ... send it
- Then once it's sent, you'll see the "Doc sent!" confirmation, and you can tap: Close
- To see how it looks when the person receives the uneditable doc request:
When the person receives your request, it includes a blue Review & sign button. - When the person taps Review & sign, the person's taken to 1st Money and shown the doc, ready for signing.
- Once the person's read the doc, the next step is to decide to accept the doc.
- However, for now, the person's got no way to open the rest of 1st Money until either the Accept or Decline is tapped.
- If the person doesn't want to accept, the person can tap Decline, and then type in their reason.
- In which case, you'll be emailed the reason the person declined. Their reason is also stored in: "Docs history"
- Otherwise, the person can tap Accept, and then: I accept & electronically sign
- Next, an email's sent to the person who signed, with an attached PDF that's signed and dated.
- As the person who requested the doc, you'll also get an email letting you know that the doc's been signed.
- To see that the doc's been signed in "Docs history":
Select the person you sent it to, on: "Menu", then "People" - Then tap: "Docs", then "Docs history"
- Once it slides out on the right, you'll see a list of all the docs that've been sent to, or signed by the person.
- Then tap the "Docs history" row for the doc you recently sent, and you'll see it marked as: "Doc signed"
- And finally, tap the blue "more" link, and you'll see even more details. Including when it was signed, and what emails were used.
Keep in mind that:
- Once you've set an uneditable doc to being reusable by "Everyone", all your people can now find it in the list of docs.
- However, your people can't sign it until it's been sent to them by an admin or their manager.
- Requiring that the doc be sent by an admin or manager ensures that all signed copies have managerial approval.
- Also, only people with "Full org admin" permissions can create an uneditable doc.
You may notice:
- That building a library of uneditable employee signable docs, can make all your custom HR processes much more manageable. Example HR processes include:
- Additional onboarding agreements.
- Security clearance agreements.
- Confidentiality agreements.
- Legal documents.
- Waivers.
- And much more.
And that's it! That's everything you need to know about making uneditable docs that can be requested, signed, and sent back to you!
How do I decide which people are allowed to reuse my saved doc?
 2:38
2:38
"How do I decide which people are allowed to reuse my saved doc?"
Whenever you make a new saved letter or doc template, by default, it can only be reused by you. Sometimes you may want to share it, so it can also be reused by others.
To share your saved letter or doc template, so that it can also be reused by others:
- First, to change the "Reusable by" setting on an existing letter or doc template, tap: "Menu", then "Docs ... org's"
- Hover your mouse over the doc template that you'd like to change, and then tap: Edit (on the right)
- Once it slides out on the right, you'll see the "Reusable by" setting (at the bottom).
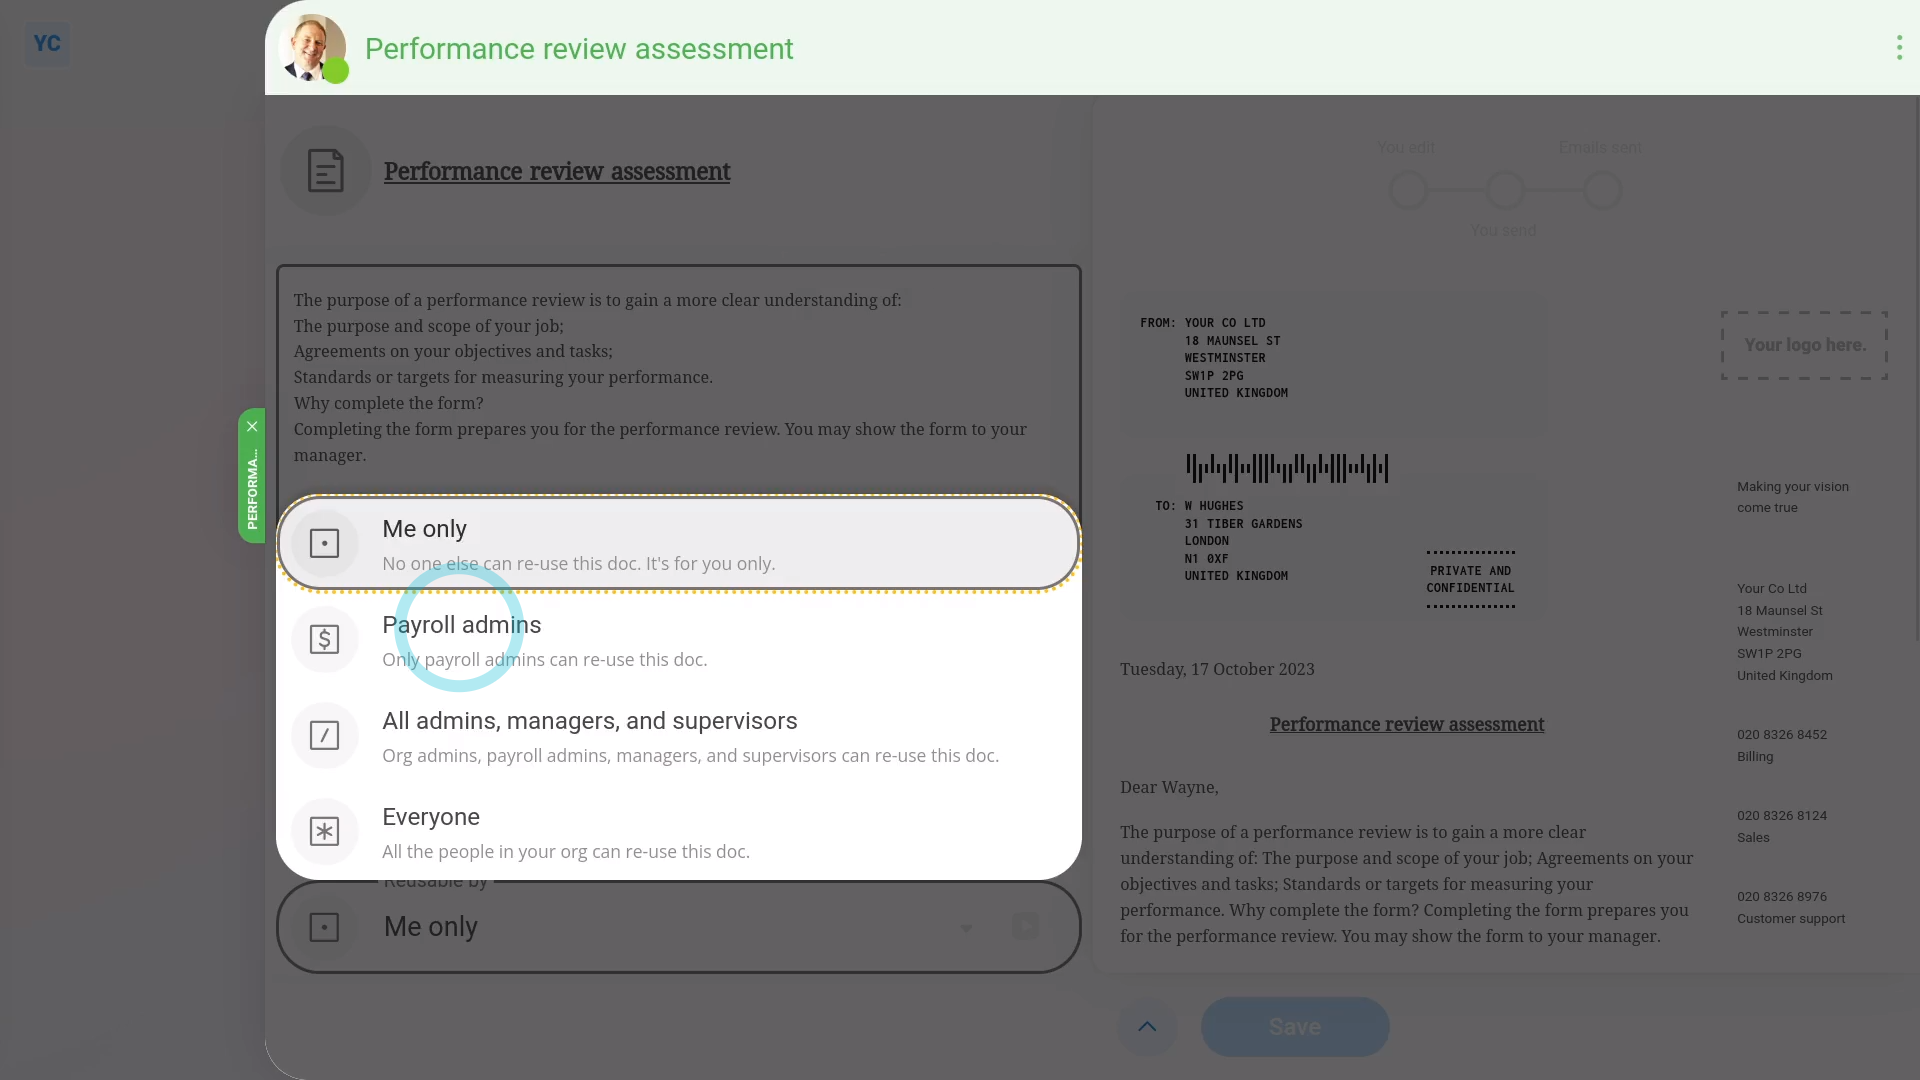
- By default, it's set to: "Me only"
- Which means you're the only person who can open and send your doc. For now, no one else has any way of even knowing it's there.
- Your options of who can reuse your doc includes "Me only", "Payroll admins", "All admins, managers, and supervisors", and: "Everyone"
- Next, select who you'd like to share your letter or doc with.
- And then when you've finished your changes, tap: Save
- Once it's saved, all the people in the group that you selected, can now open, change, and send your doc.
- Then once you go back to the "Docs ... org's" menu, you'll see that the square box has changed.
- And finally, hover your mouse over the square box, and you'll see which people you've now shared your doc with.
Keep in mind that:
- If you share the doc with "Everyone", the doc can be sent by everyone in your org.
- However, only "Payroll admins" and "All admins, managers, and supervisors" can save any changes to it.
- Alternatively, if you share your doc with "All admins, managers, and supervisors", the admin needs "Full org admin" permissions to reuse your doc.
- And if you share your doc with "Payroll admins", the admin needs "Full payroll admin" permissions to reuse your doc.
- If the admin doesn't have full admin permissions, your shared doc still won't be visible to them.
- Also, as part of sharing with full "Payroll admins" or "All admins, managers, and supervisors", the full admins can make unlimited changes to your template, including changing the subject and body wording.
- The full admins can even change who the doc is: "Reusable by"
And that's it! That's everything you need to know about choosing which people are allowed to send your letter or doc!
How do I delete a doc, if I no longer need it?
 1:24
1:24
"How do I delete a doc, if I no longer need it?"
Deleting a doc removes it from the docs listing, and makes it unavailable for anyone to send it from now on.
To delete a doc:
- First, to find the doc you want to delete, tap: "Menu", then "Docs ... org's"
- Then hover your mouse over the doc you're deleting, and tap: Edit (on the right)
- Once the doc slides out on the right, open the bottom menu:
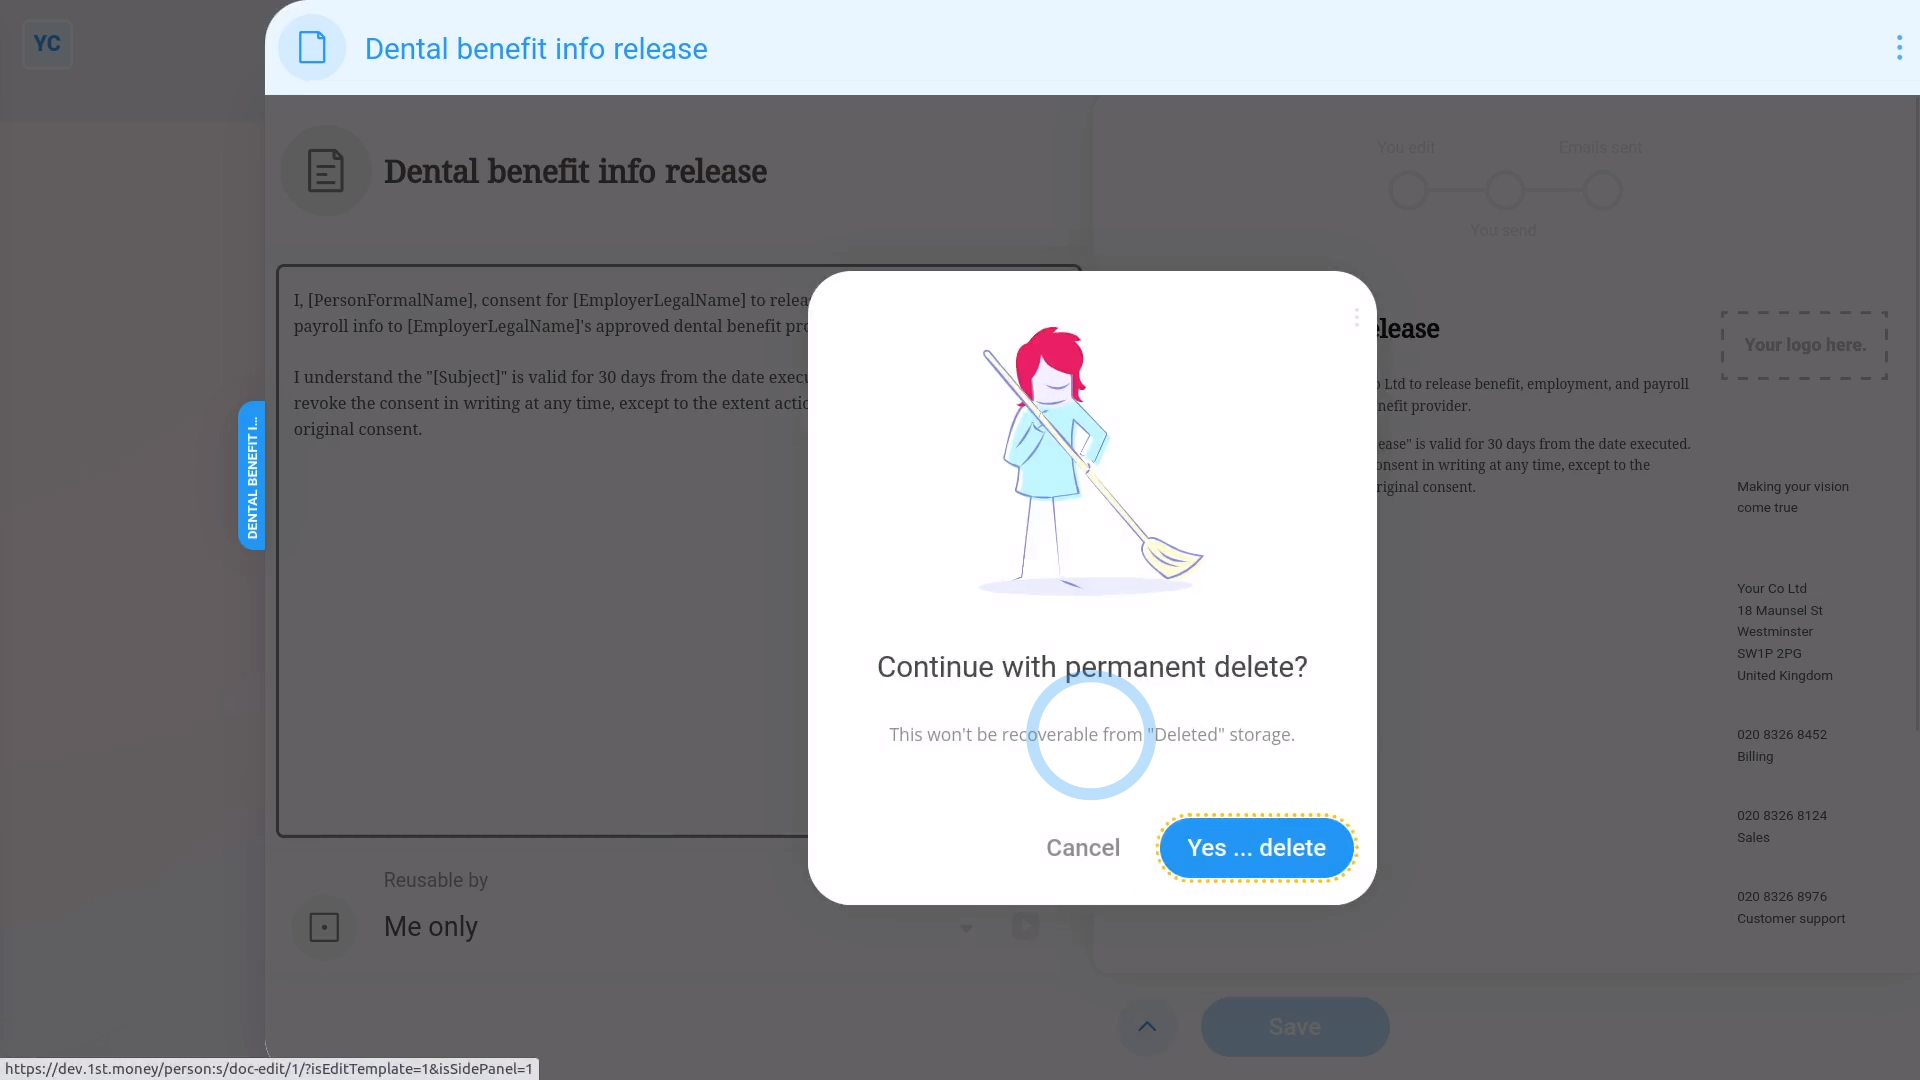
- Then tap: Delete
- You'll see a warning that once deleted, your doc won't be recoverable from "Deleted" storage.
- Then tap: Yes ... delete
- And finally, when you go back to "Docs ... org's", your doc isn't listed anymore.
You may notice:
- That many of the docs in "Docs ... all" have been created by 1st Money, which means the docs can't be deleted.
- However, all the docs listed in "Docs ... org's", which have been made by the people in your org, can be deleted.
Keep in mind that:
- Once you delete a doc, it can't be undeleted.
- Deleted docs aren't stored in the deleted bin.
And that's it! That's everything you need to know about deleting a doc!
How do I password protect the PDFs you email me?
 1:58
1:58
"How do I password protect the PDFs you email me?"
For your security, all PDFs that 1st Money emails can be password protected, with a 4-digit Doc PIN.
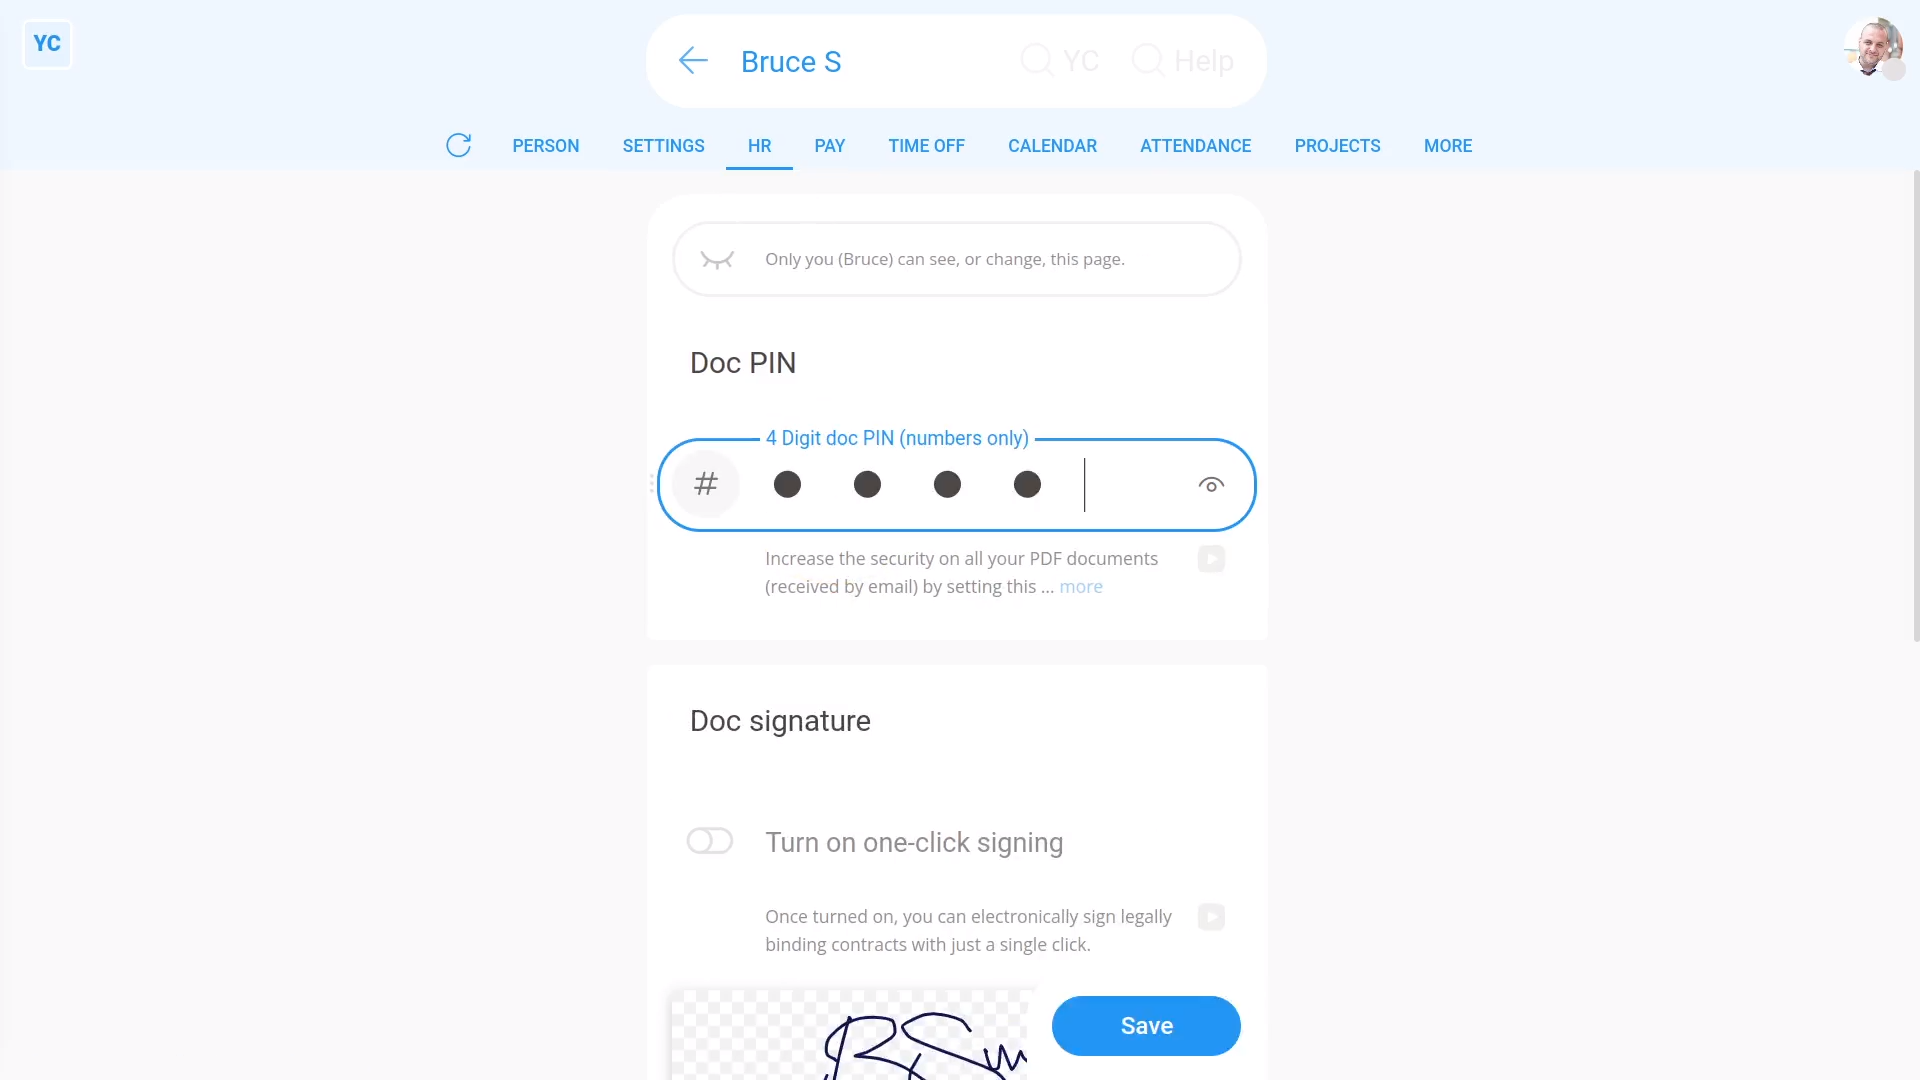
To set your Doc PIN:
- First, open yourself on: "Menu", then "Me"
- Then tap: "Docs", then "Doc PIN & doc sig."
- Type in the four digit number of your choice.
- And finally, tap: Save
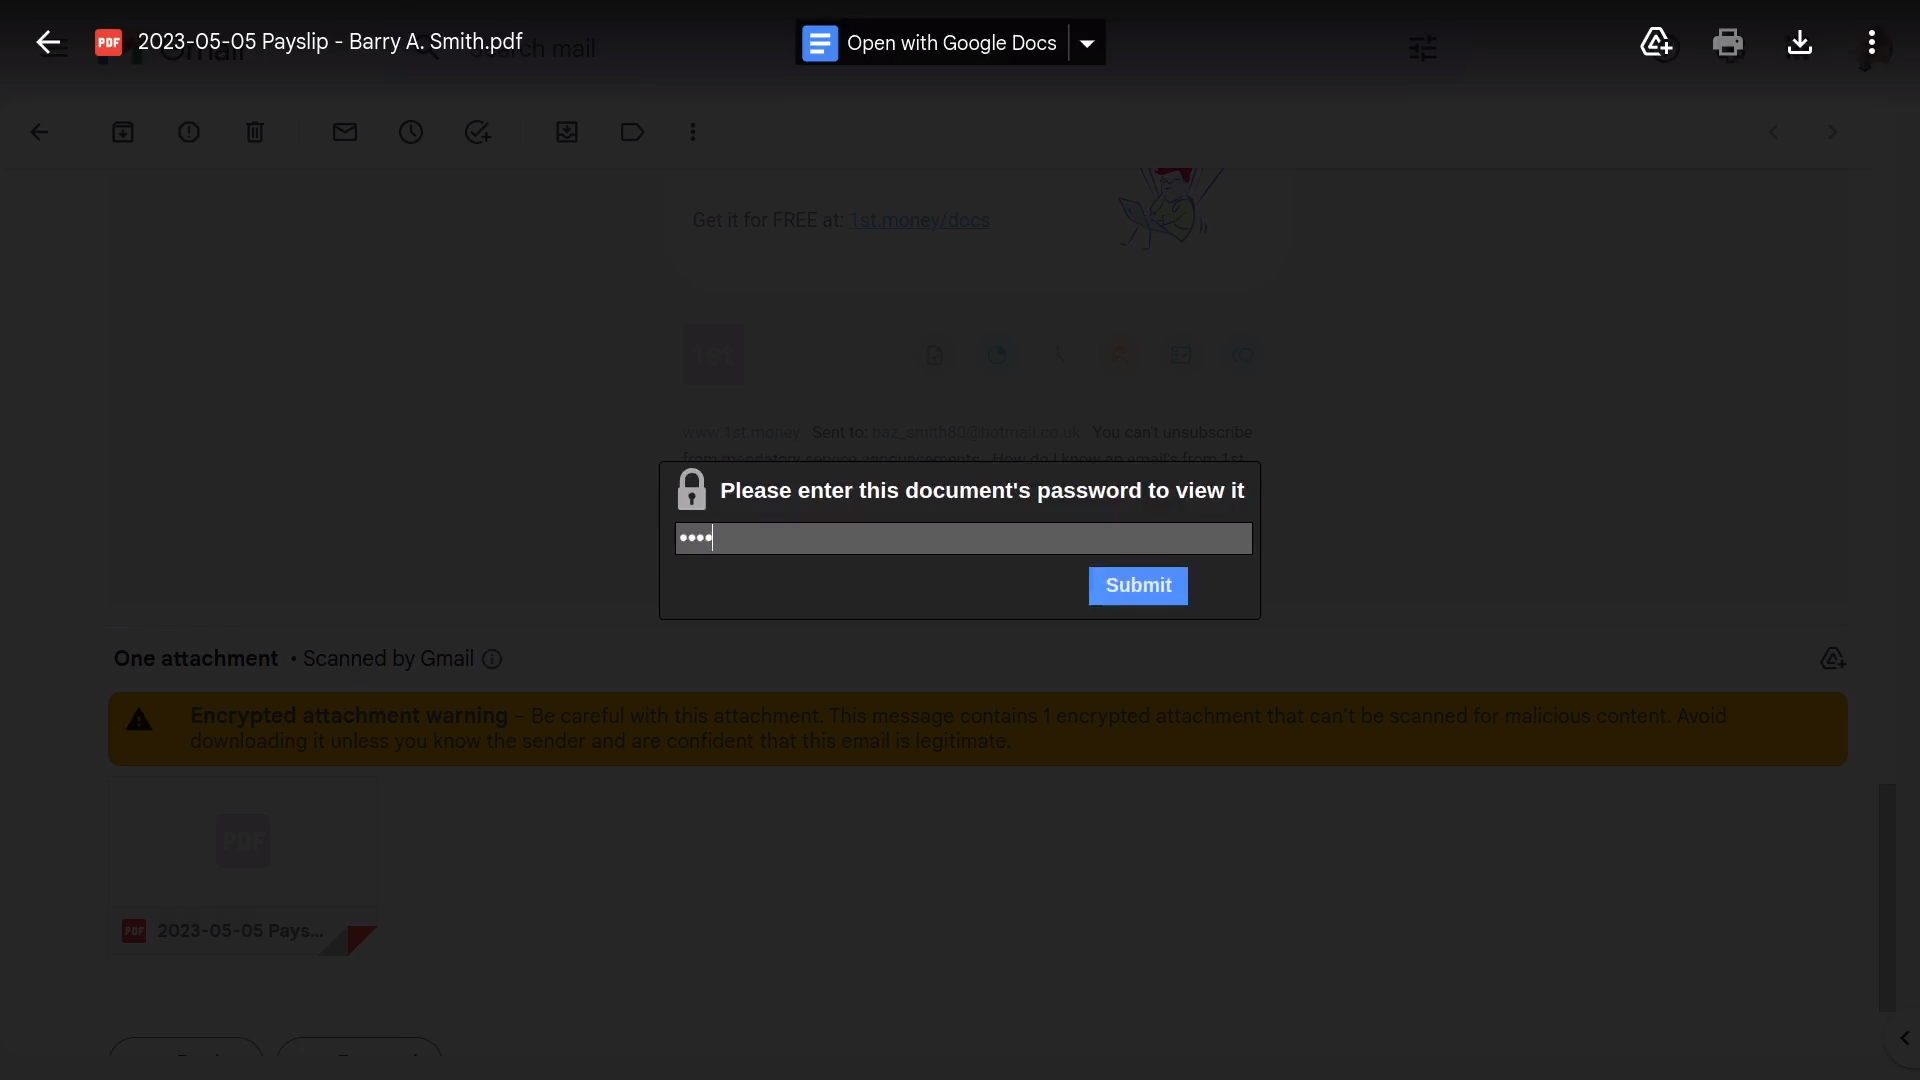
To open a password protected payslip PDF:
- First, on your next payday, once you get your payslip email.
- Scroll down and tap the PDF, and it asks you for your PIN.
- And finally, type in your 4-digit Doc PIN, and your PDF opens.
Keep in mind that:
- It's important to set your Doc PIN. Some PDFs you get by email may contain sensitive info.
- If you ever forget your PIN, come back and tap the "Eye" button.
- Alternatively, you could reset your 4-digit Doc PIN to something else.
For advanced usage:
- If you ever need a non-password protected copy, PDFs downloaded from inside 1st Money aren't password protected.
- Your filed payslip PDFs can be found at: "Pay", then "Payslips history"
- Your filed tax form PDFs can be found at: "Tax", then "Tax forms history"
- And your sent or received HR Doc PDFs can be found at: "Docs", then "Docs history"
And that's it! That's everything you need to know about password protecting PDFs you get by email!
How do I send corrections or errors that I spot in a doc?
 1:41
1:41
"How do I send corrections or errors that I spot in a doc?"
When you're using a doc supplied by 1st Money, if you spot an error, you can send a correction to 1st Money.
To send a correction for a doc to 1st Money:
- First, select the doc on: "Menu", then "Docs ... all"
- And select a doc.
- Then select the person to send the doc to.
- Once it slides out on the right, to send a doc correction, open the bottom menu:
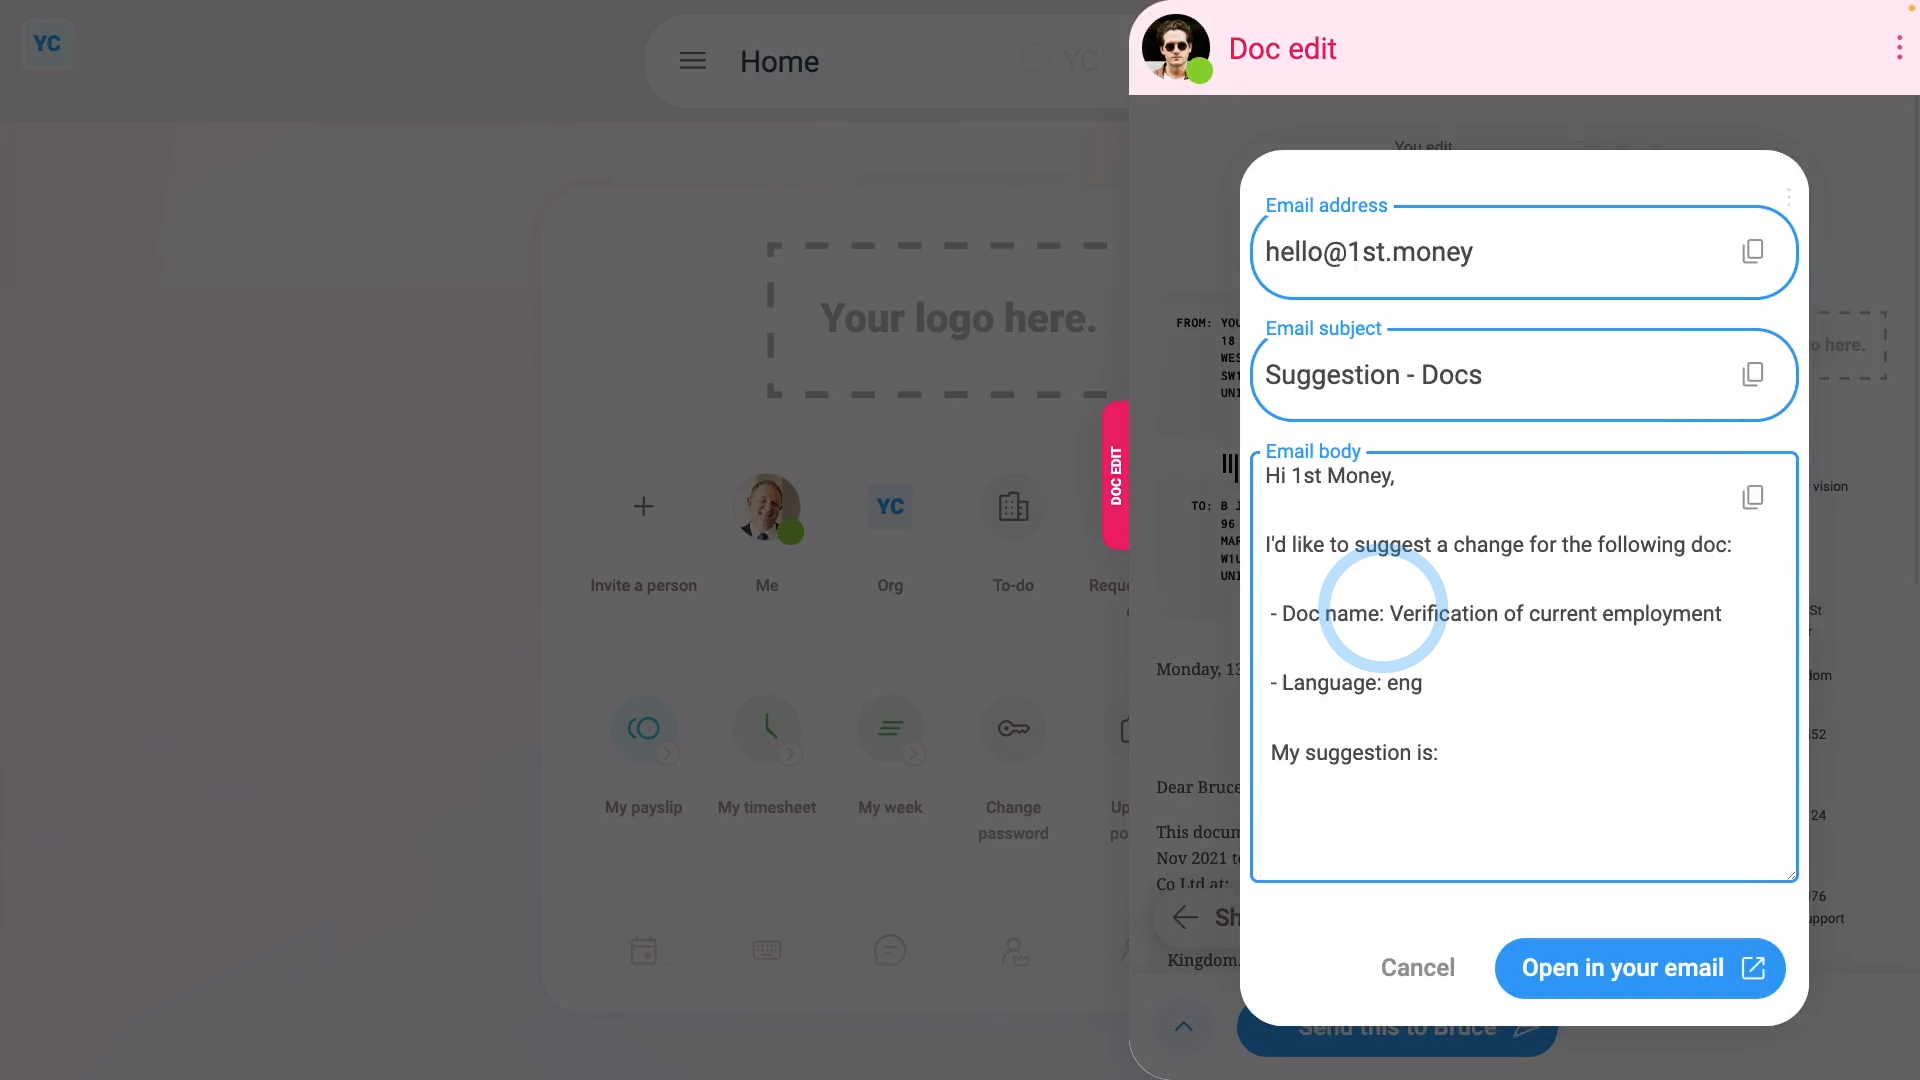
- Then tap: Report a correction
- Next, you'll see a preview of the email wording you can use to send the doc correction.
- Then tap: Open in your email
- And you'll see an email automatically started for you.
- On some devices, depending on what software's installed, the Open in your email button may not work.
- If it doesn't open an email automatically, instead copy and paste the text from each box into an email.
- Then type in all the other details about your correction.
- And finally, tap send.
Keep in mind that:
- It's important to send 1st Money your corrections and suggestions.
- Every improvement 1st Money makes to the default set of docs is instantly available to all other orgs.
- So everyone benefits!
And that's it! That's everything you need to know about reporting a correction for a doc to 1st Money!
How do I set my doc signature?
 1:42
1:42
"How do I set my doc signature?"
Setting your doc signature makes it easier to sign documents, like employment agreements and tax forms.
To set your doc signature:
- First, open yourself on: "Menu", then "Me"
- Then tap: "Docs", then "Doc PIN & doc sig."
- Then scroll down and tap: Write signature
- In the box that pops up, draw your signature.
- You'll find it easier if you login on your phone, and do it there.
- If you're not happy with your first attempt, tap: Undo
- And finally, once you're happy with your signature, tap: Save
To see how it now looks when signing a document:
- First, tap: See how it looks
- Then tap: I accept & electronically sign
- And finally, the signing is confirmed.
To turn on one-tap signing:
- First, tap: "Turn on one-tap signing"
- Then tap: Save
- And finally, when you tap See how it looks, you'll get the signing confirmation with only one-tap.
You may notice:
- Saving your signature also makes the HR Doc PDFs that you create look more authentic, with a real signature (at the bottom).
And that's it! That's everything you need to know about setting your doc signature, and turning on one-tap signing!
What are inserts, and how do I use them in my doc?
 2:31
2:31
"What are inserts, and how do I use them in my doc?"
Inserts are small snippets of text that can be put in to any doc. When the doc is printed, the insert is automatically replaced with the full text of the insert.
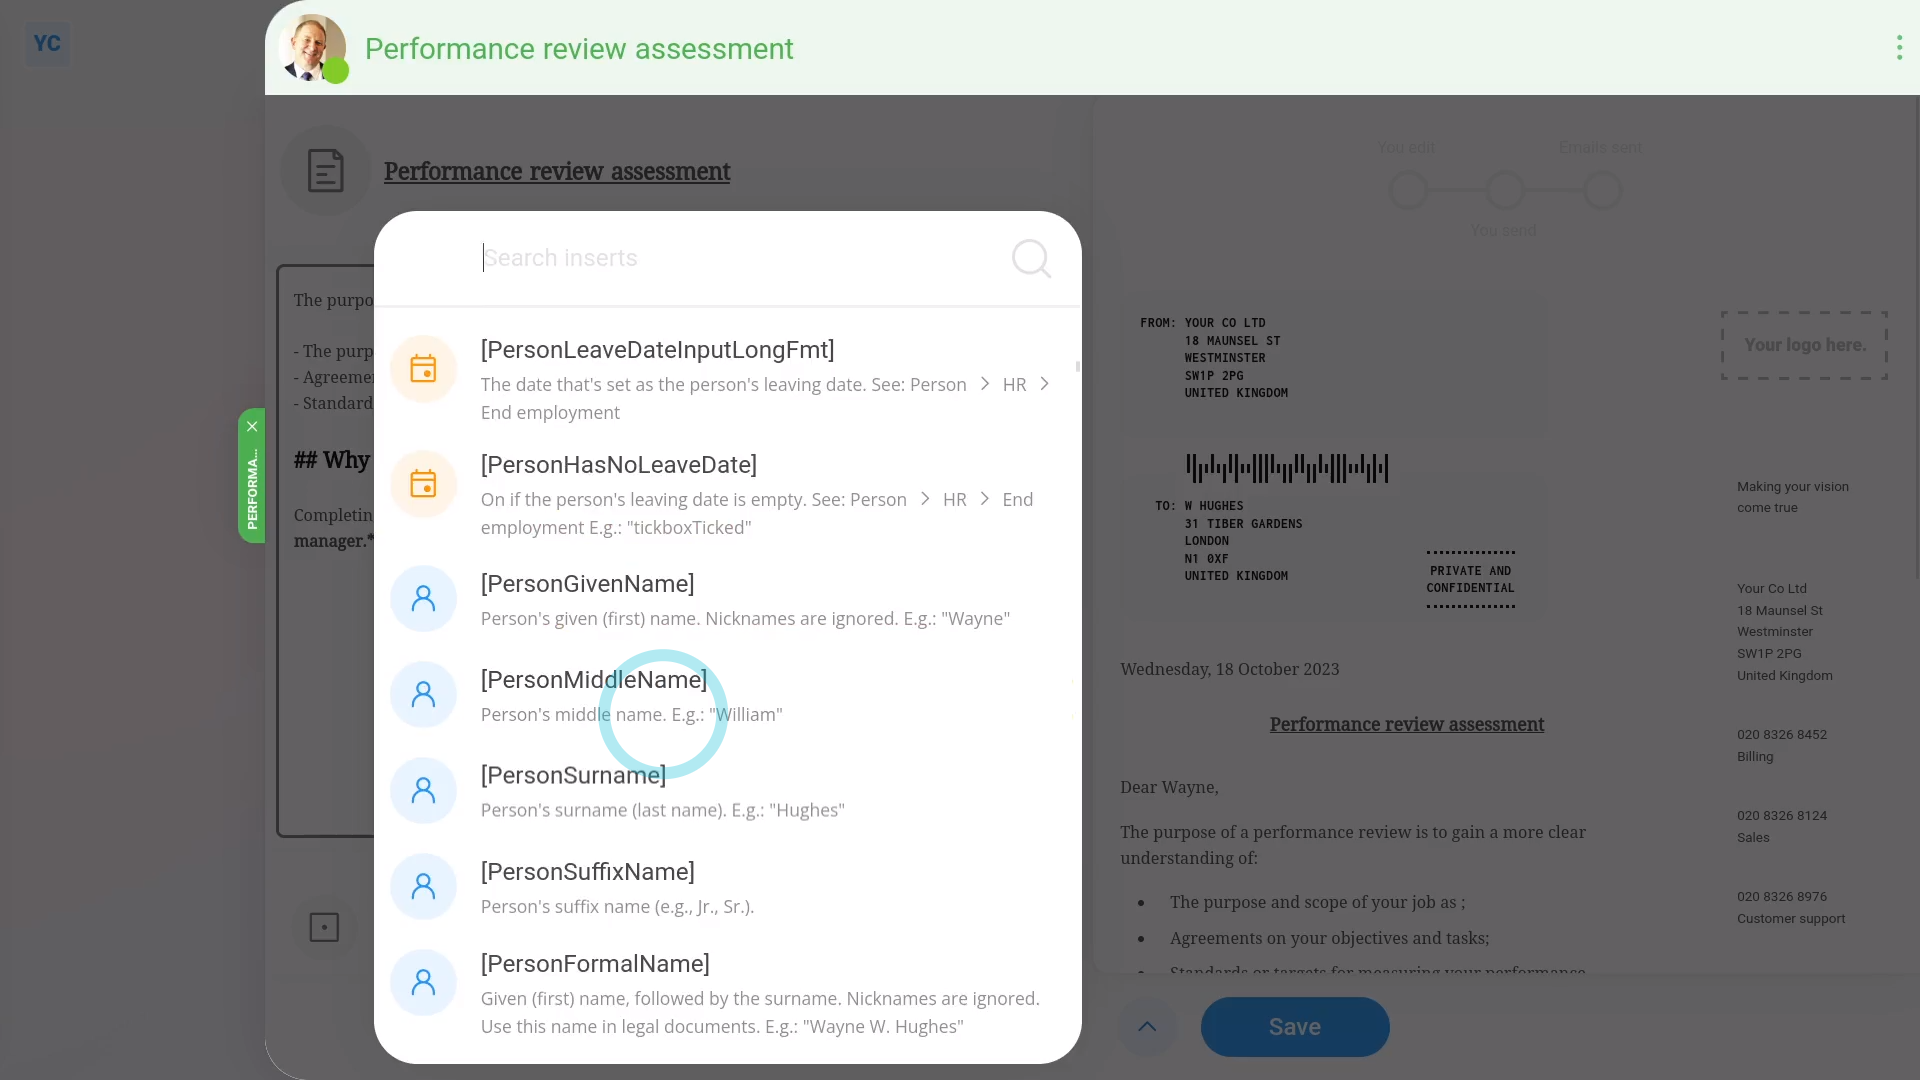
To see how inserts can be used in a doc:
- First, to change an existing letter or doc template by adding an insert, tap: "Menu", then "Docs ... org's"
- Hover your mouse over the doc template that you'd like to change, and then tap: Edit (on the right)
- Type in your changes, then leave your cursor where you want to put the insert, and tap the "Insert" button.
- The "Insert" button shows you a list of all available inserts. There's lots to pick from, and each one has an example of the text it inserts.
- You may find it easier to try the search box to find the one you're looking for.
- And then when you find the one you want, tap the insert, to enter its text where your cursor is.
- As soon as you've put in your selected insert, you'll see a preview of its text.
- For now, the insert uses text values about yourself.
- But later, when the doc's being sent to another person, the doc substitutes in the other person's text values instead.
- And then when you've finished your changes to the doc, tap: Save
- Now that your template's saved and closed, to open and send it to a person, tap: "Docs ... org's"
- Tap the name of the doc template that you've recently updated.
- Then select the person you'd like to send it to.
- Once it opens, you'll notice that it's personalised to the selected person's name and address.
- In addition, you'll notice that the doc has substituted the inserts with the selected person's text.
- And finally, if you're ready to send the doc, tap: Send this to... (at the bottom)
Keep in mind that:
- All inserts have been programmed with confidentiality in mind.
- For example, if you've got access to people's pay rates, and you put the "[PersonRateMoney]" insert into a doc, the insert works for you.
- However, if the person who doesn't have access to people's pay rates, tries to reuse that doc. The doc still opens for them, but the pay rate info is hidden.
And that's it! That's everything you need to know about how to try inserts on a doc!
What are pick lists, and how do I use them in my doc?
 2:33
2:33
"What are pick lists, and how do I use them in my doc?"
Pick lists are small drop-down lists of text that can be put into any doc. Later, when a person uses your doc, the person can select their text from the pick list. It makes filling in their doc faster and easier.
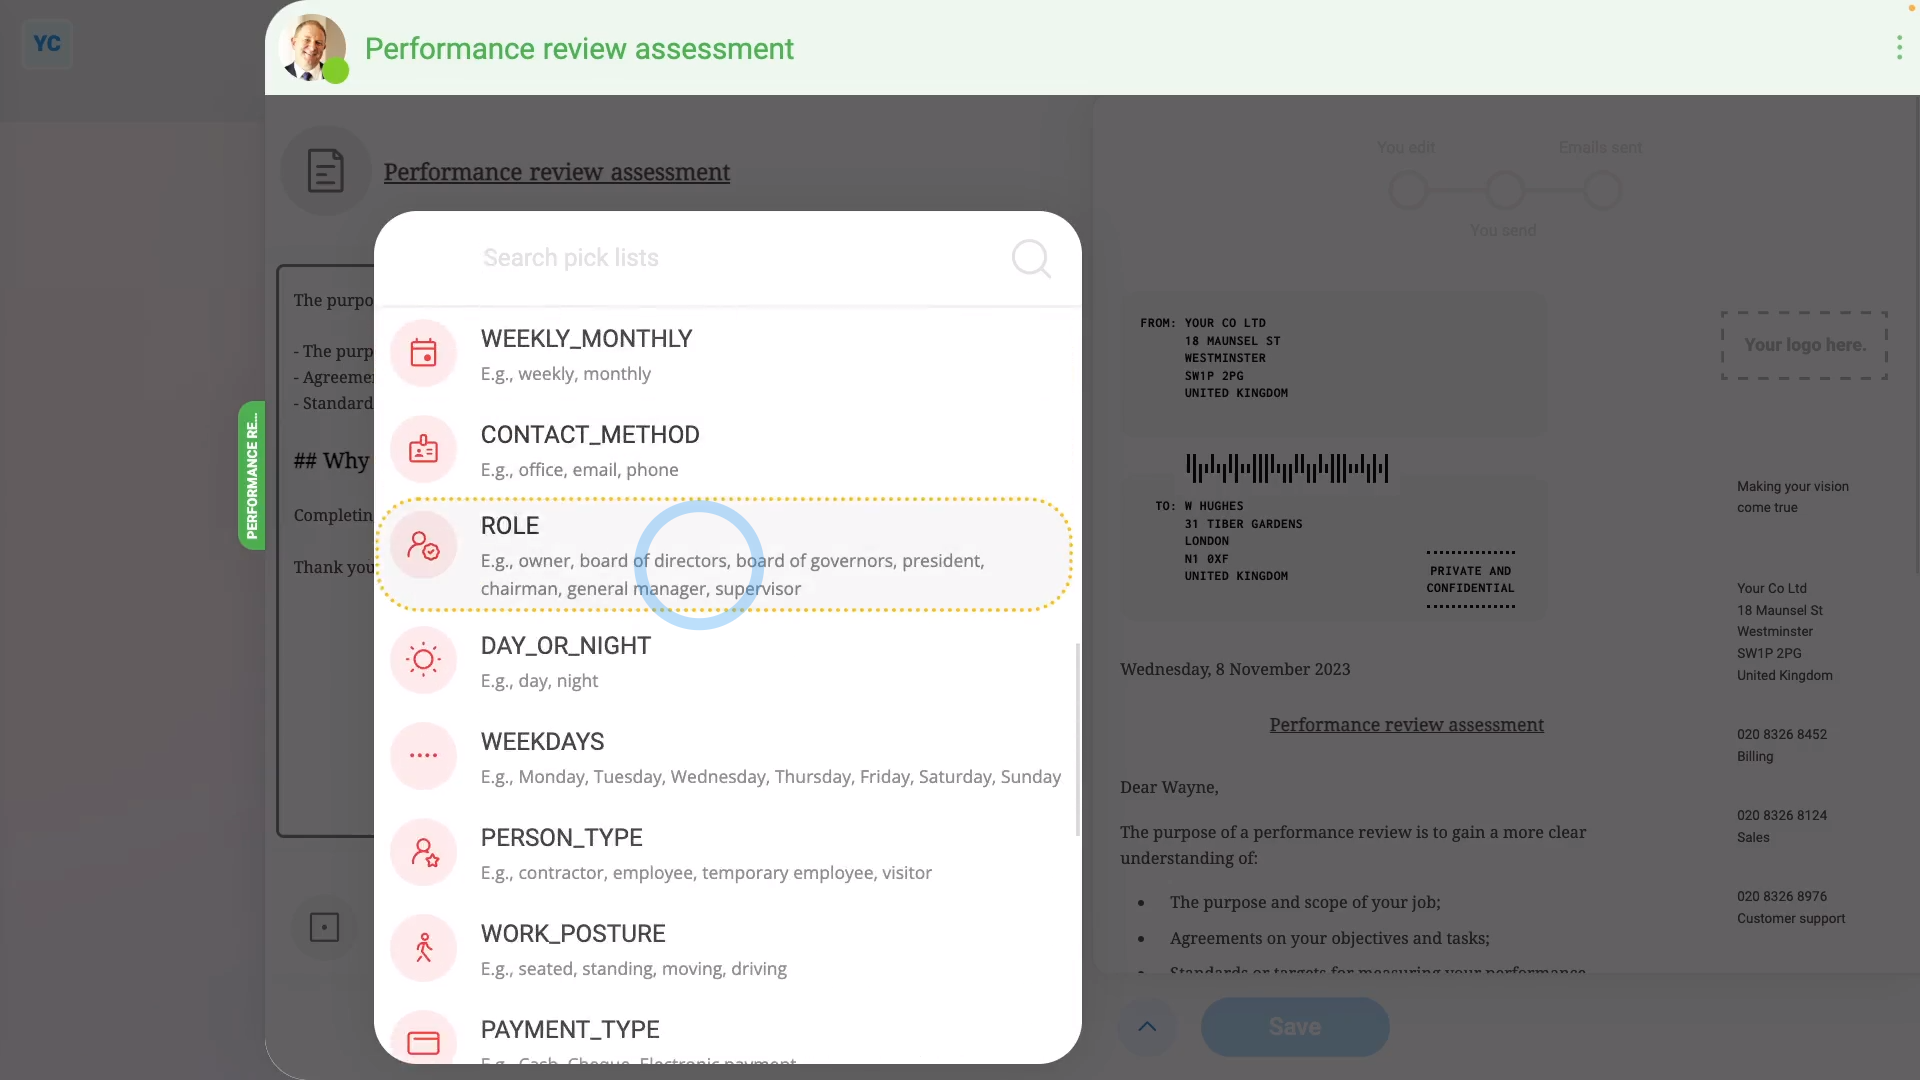
To see how pick lists can be used in a doc:
- First, to change an existing letter or doc template by adding a pick list, tap: "Menu", then "Docs ... org's"
- Hover your mouse over the doc template that you'd like to change, and then tap: Edit (on the right)
- Type in your changes, then leave your cursor where you want the pick list to be inserted, and tap the "Pick list" button.
- The "Pick list" button shows you the full selection of all available pick lists. There's lots to select from, and each one has an example of the text it adds.
- You may find it easier to try the search box to find the one you're looking for.
- And then when you find the one you want, tap the pick list, to enter its text where your cursor is.
- As soon as you've put in your selected pick list, you'll see a preview of its text in red.
- And you can now tap it to see how it works.
- Add any more pick lists that you want.
- And finally, when you've finished your changes to the doc, tap: Save
- Now that your template's saved and closed, to open and send it to a person, tap: "Menu", then "Docs ... org's"
- Tap the name of the doc template that you've recently updated.
- Then select the person you'd like to send it to.
- Once it opens, you'll notice that it's personalised to the selected person's name and address.
- In addition, you'll notice that the doc has your new pick lists, all ready for you to tap.
- If you try sending the doc without selecting from the pick lists, you'll get a warning.
- But once you select from all your new pick lists, the red unfinished blocks all go away.
- And finally, if you're ready to send the doc, tap: Send this to... (at the bottom)
And that's it! That's everything you need to know about how to try pick lists on a doc!
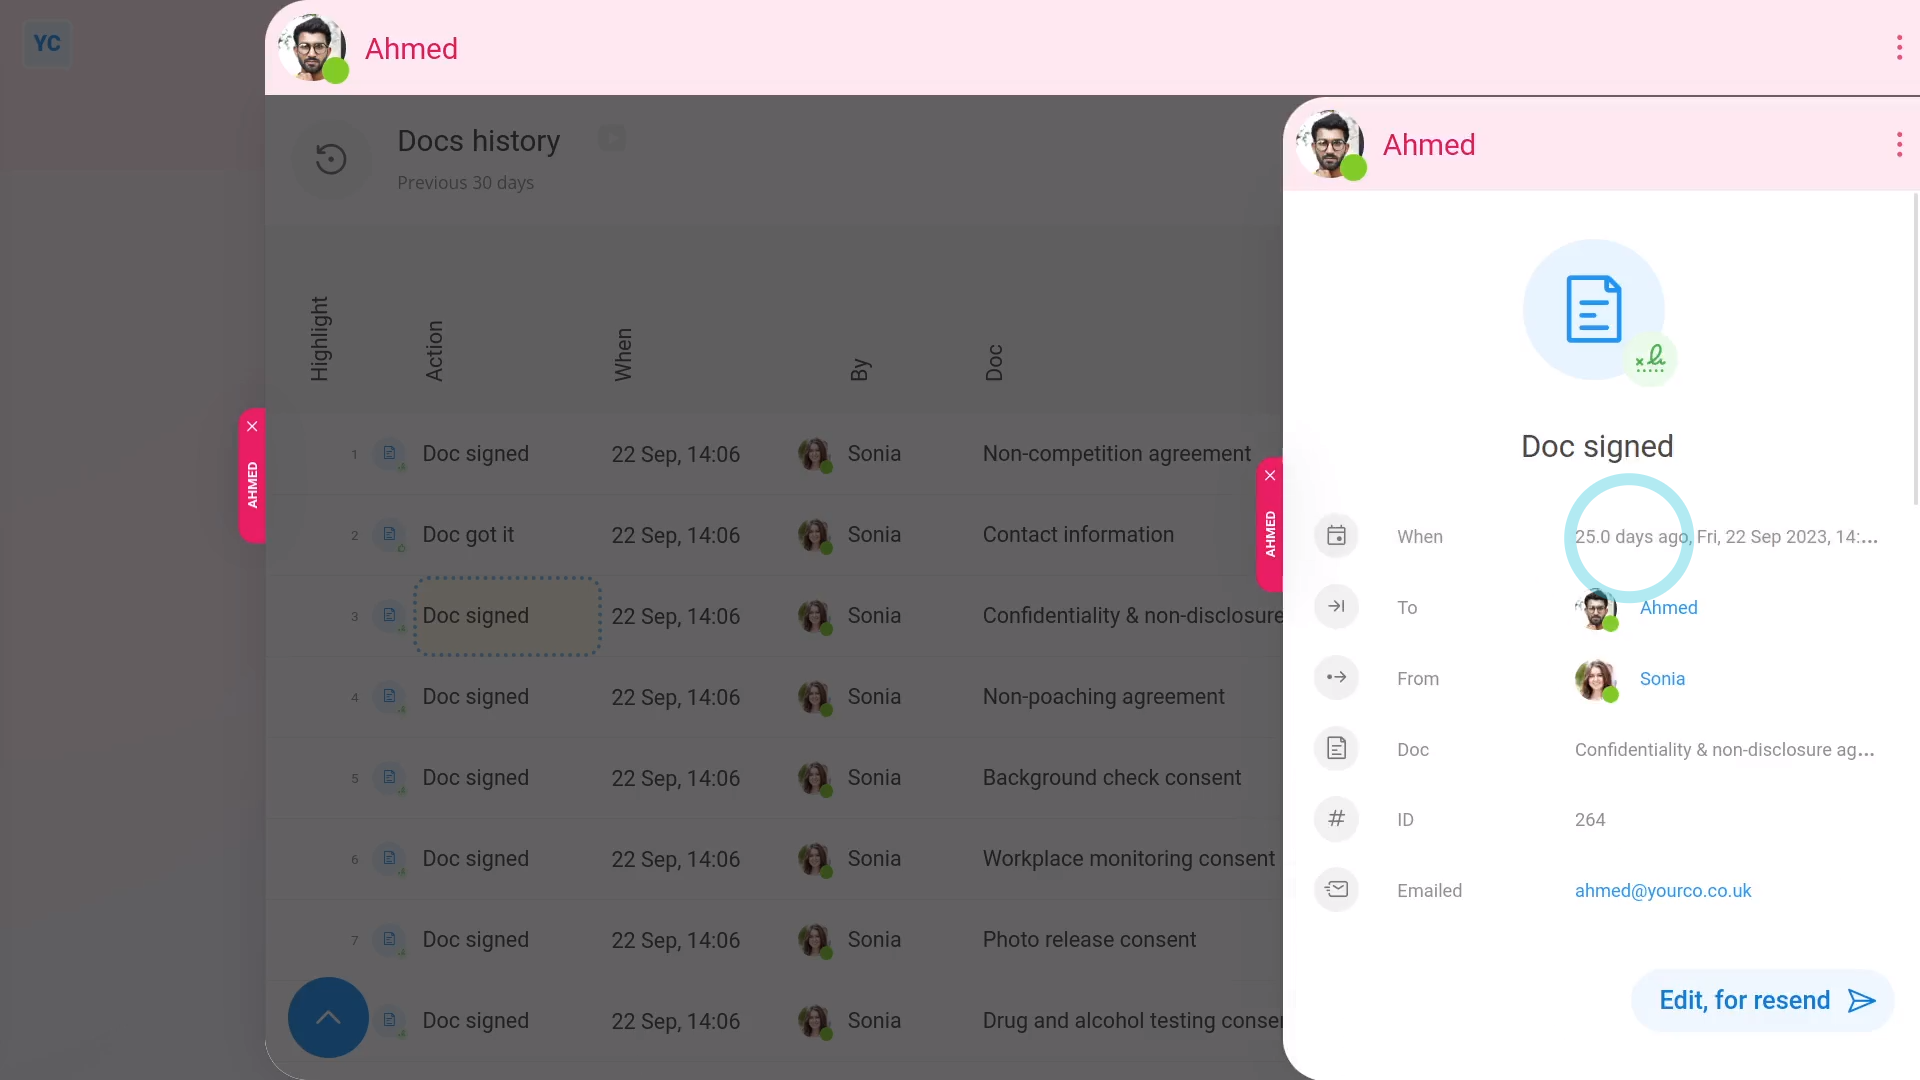
What does 'Edit, for resend' do on a doc that's already been sent?
 1:58
1:58
"What does "Edit, for resend" do on a doc that's already been sent?"
When you look at a doc that's already been sent, you may wonder what the "Edit, for resend" button's for.
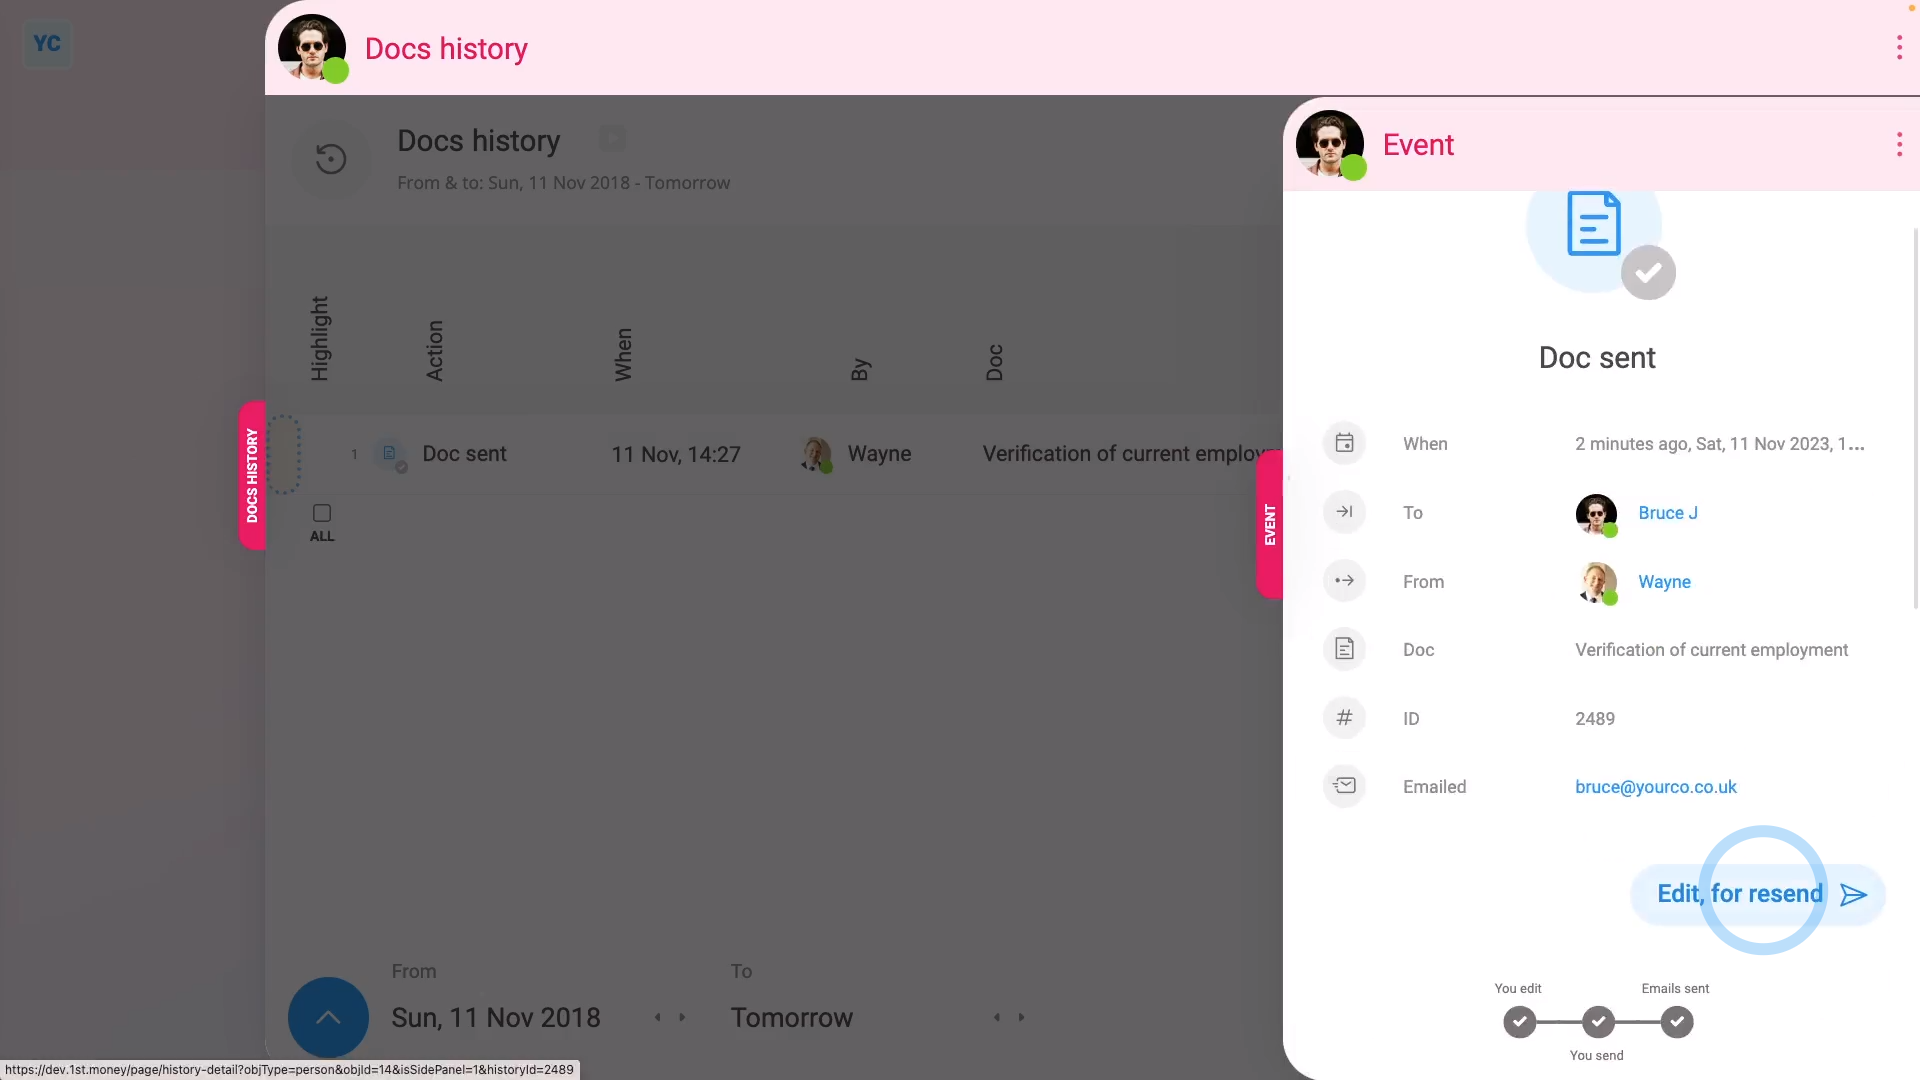
To see what a "Edit, for resend" button does on a doc that's already been sent:
- First, to see a doc that's been sent, select the person you sent a doc to, on: "Menu", then "People"
- Then tap: "Docs", then "Docs history"
- Once it slides out on the right, you'll see a list of all the docs that've been sent to the person.
- Tap a row, and when it slides out on the right, tap the blue "more" link, and you'll see details about the doc.
- You'll also now see a button for: Edit, for resend
- When you tap Edit, for resend, a new copy of the doc opens, addressed to the same person.
- Now you could tap Show editor, and make your changes on the left.
- And then if you're ready to email it, tap: Send (at the bottom)
- Alternatively, to send the exact same doc, but to a different person, you could open the bottom menu:
- Then tap Change person and select the new person to send it to.
- And finally, the doc is all ready to send to a different person.
Keep in mind that:
- When you use "Edit, for resend", you'll be resending an exact copy of the doc you're copying from.
- Which means that if the original sender added text to the doc, your copy has the added text included as well.
- Also, even when you tap Change person, the added text is still carried over and included.
And that's it! That's everything you need to know about what an "Edit, for resend" button does for a doc!