
Offboarding
 2:28
2:28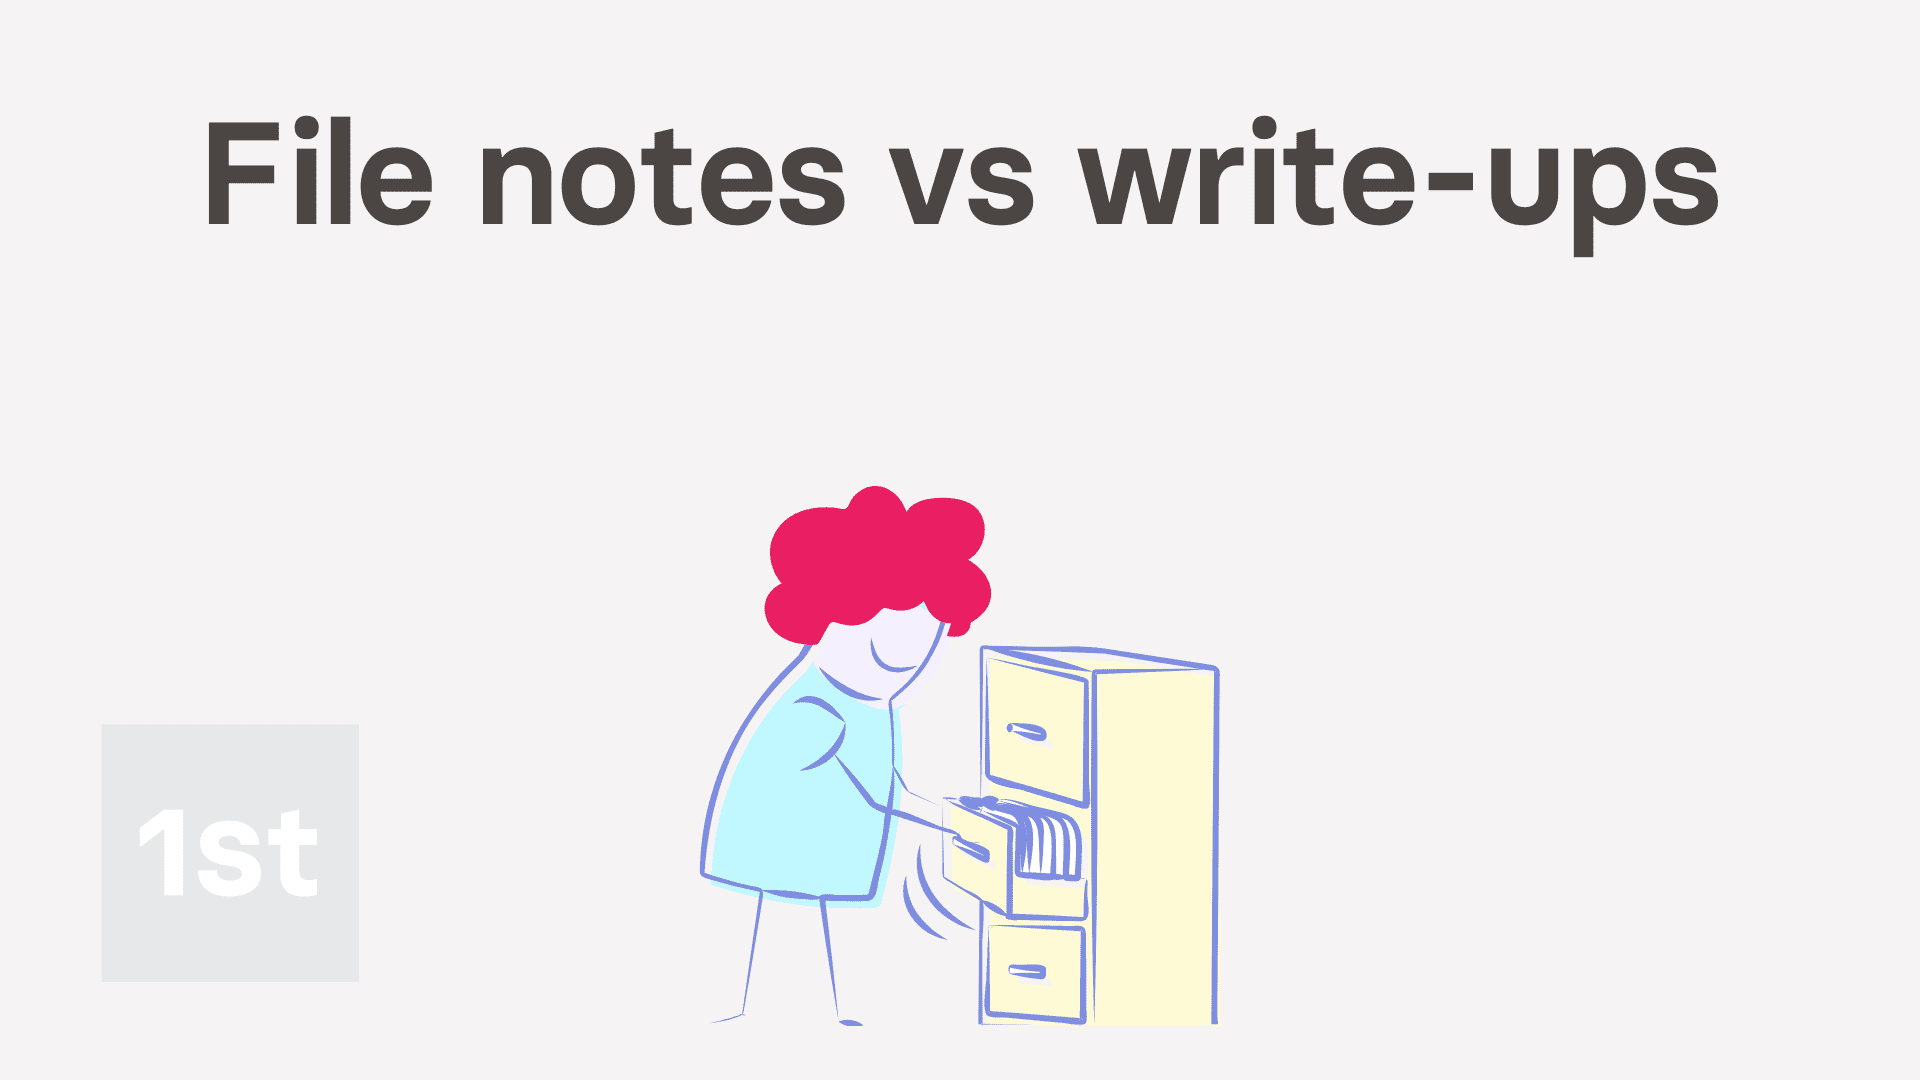 2:08
2:08 4:25
4:25 3:41
3:41 6:20
6:20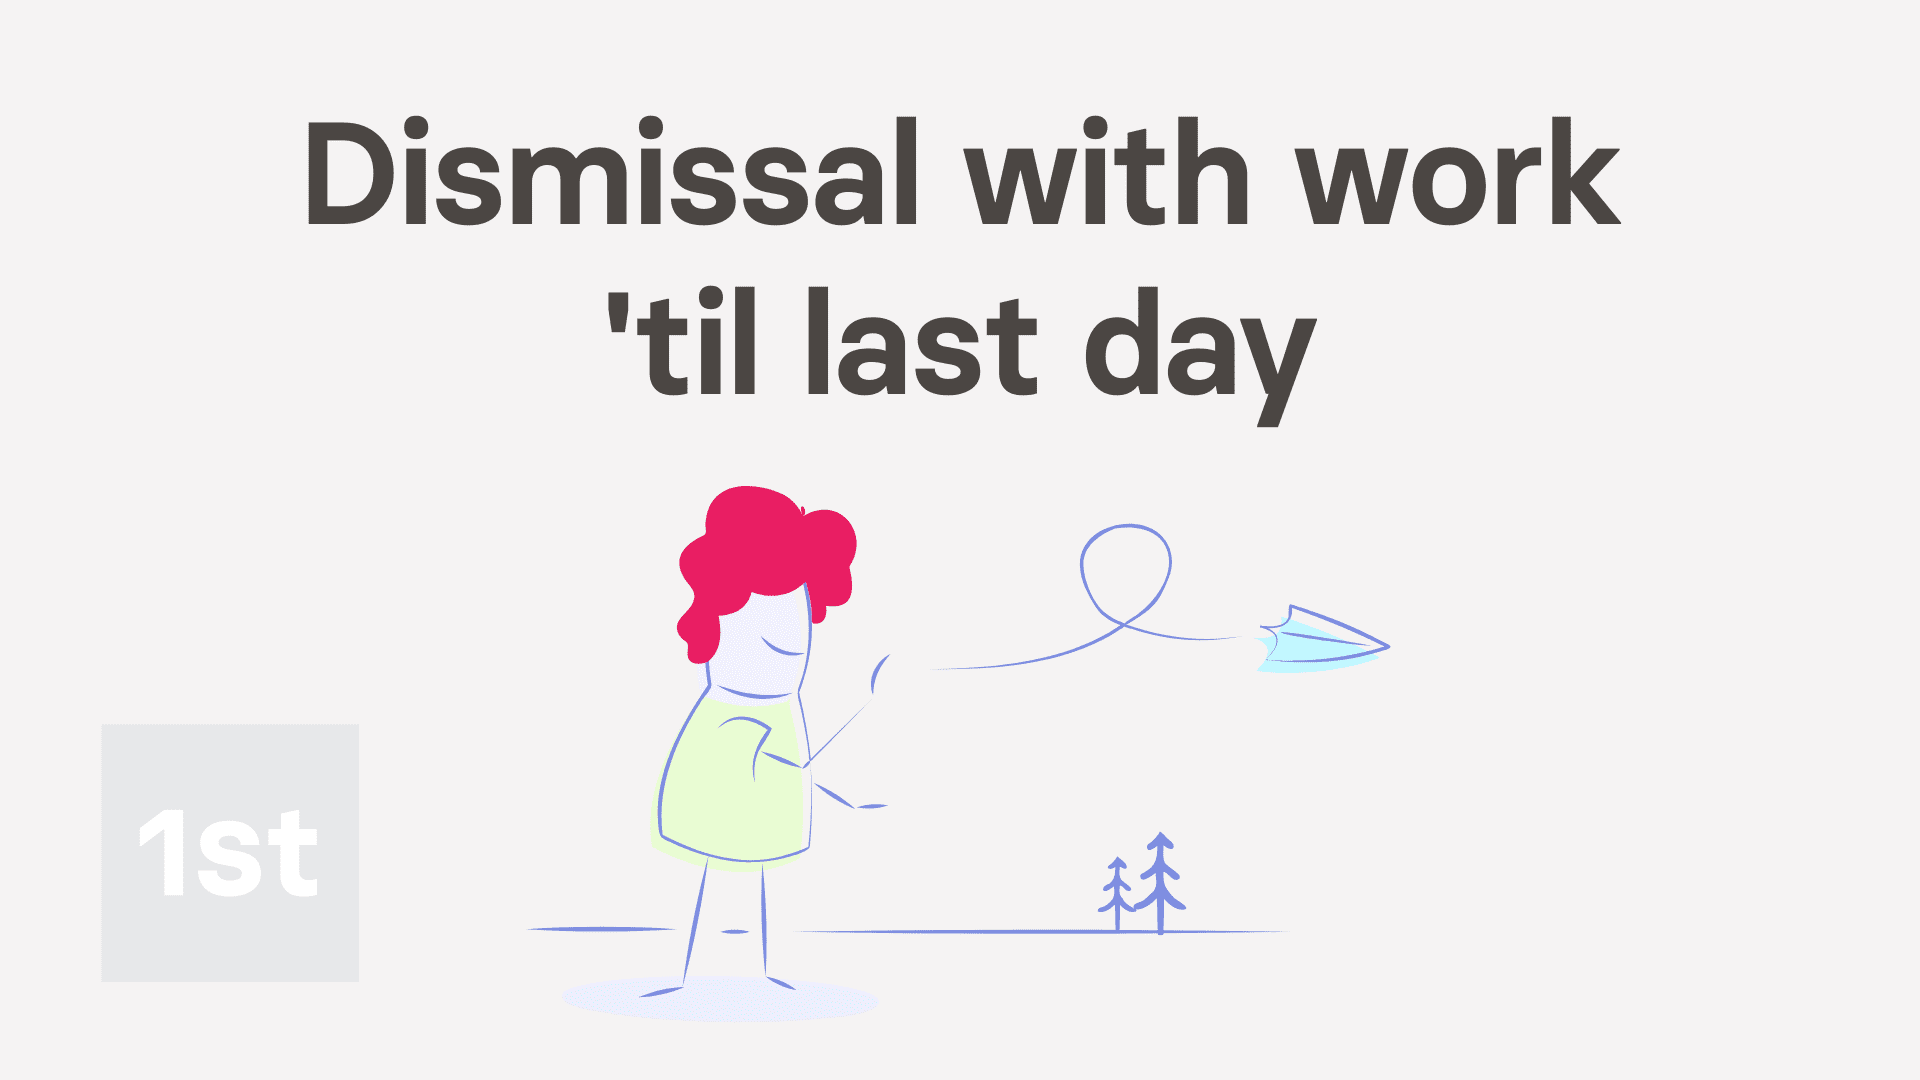 6:06
6:06 4:47
4:47 5:55
5:55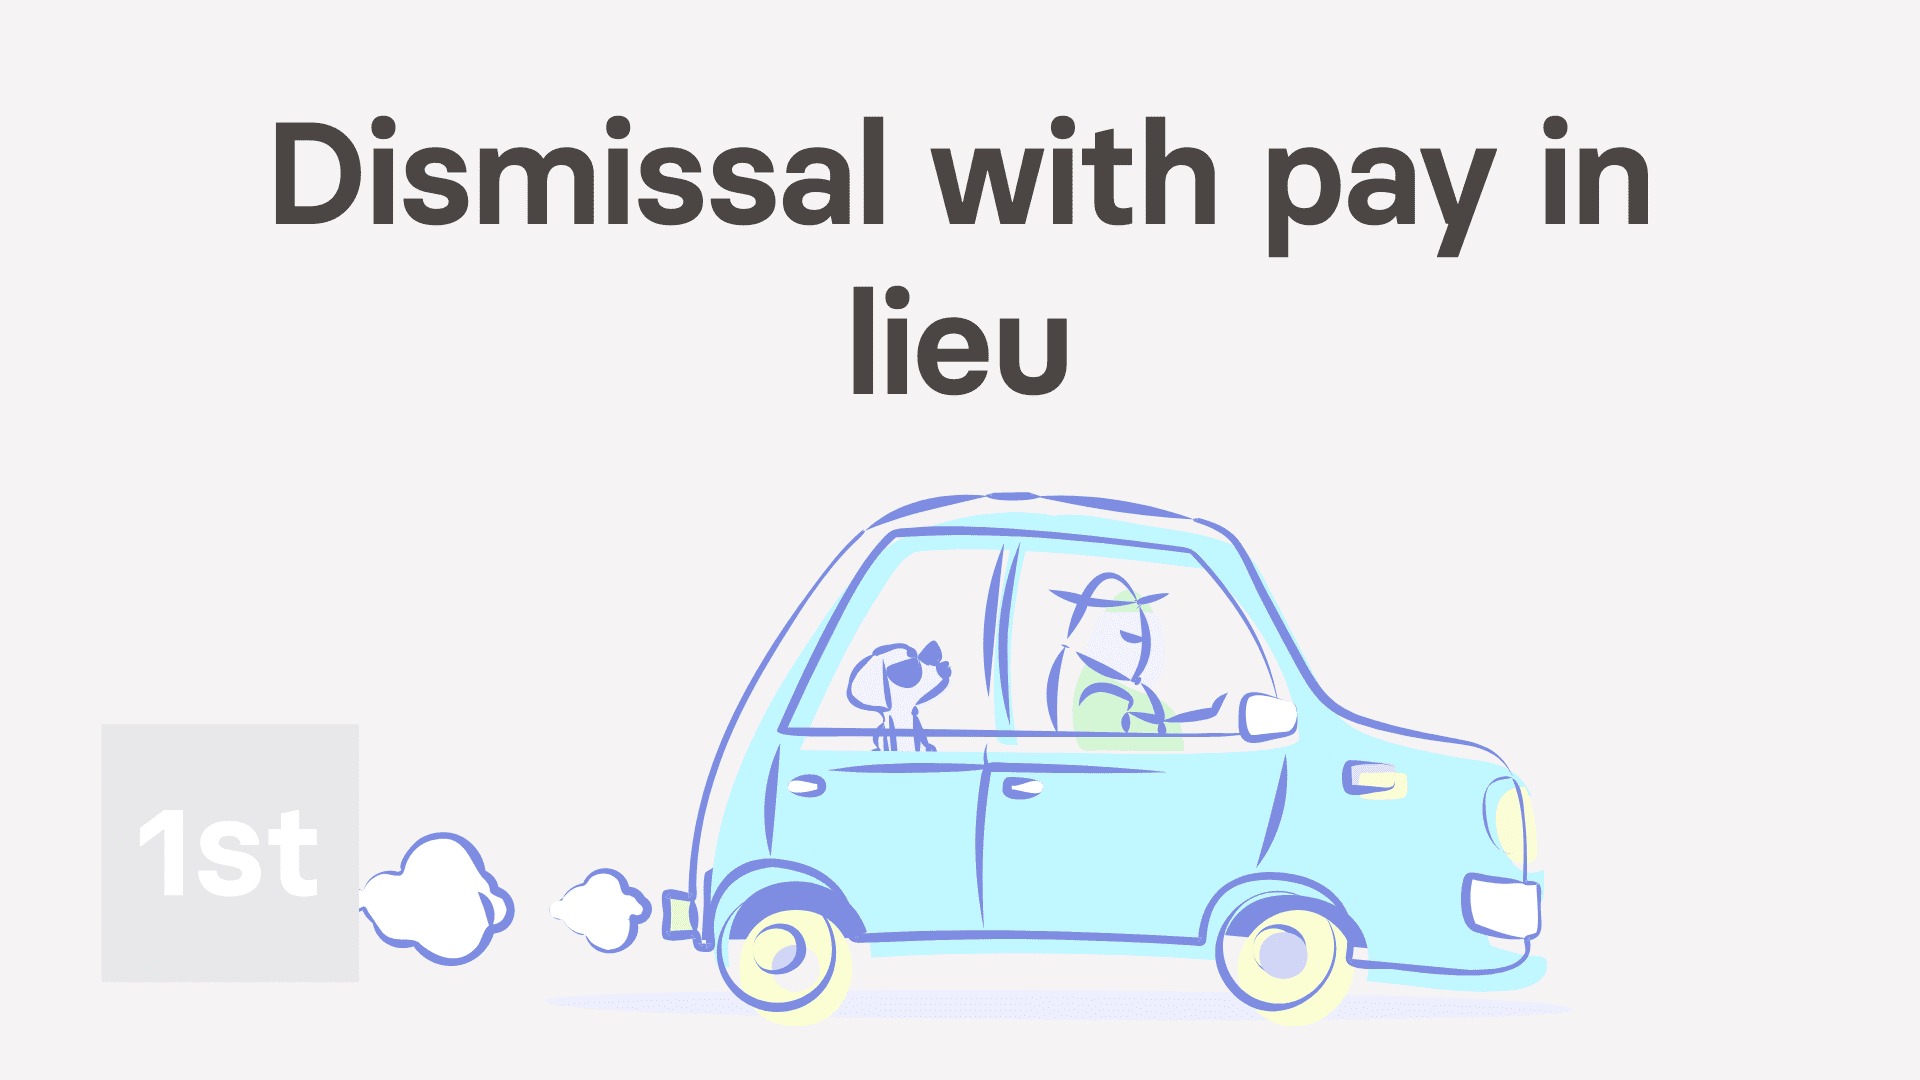 6:05
6:05 5:41
5:41 4:32
4:32 6:23
6:23 3:51
3:51 1:54
1:54 2:21
2:211. How do I use the recorded events page?

 2:33
2:33
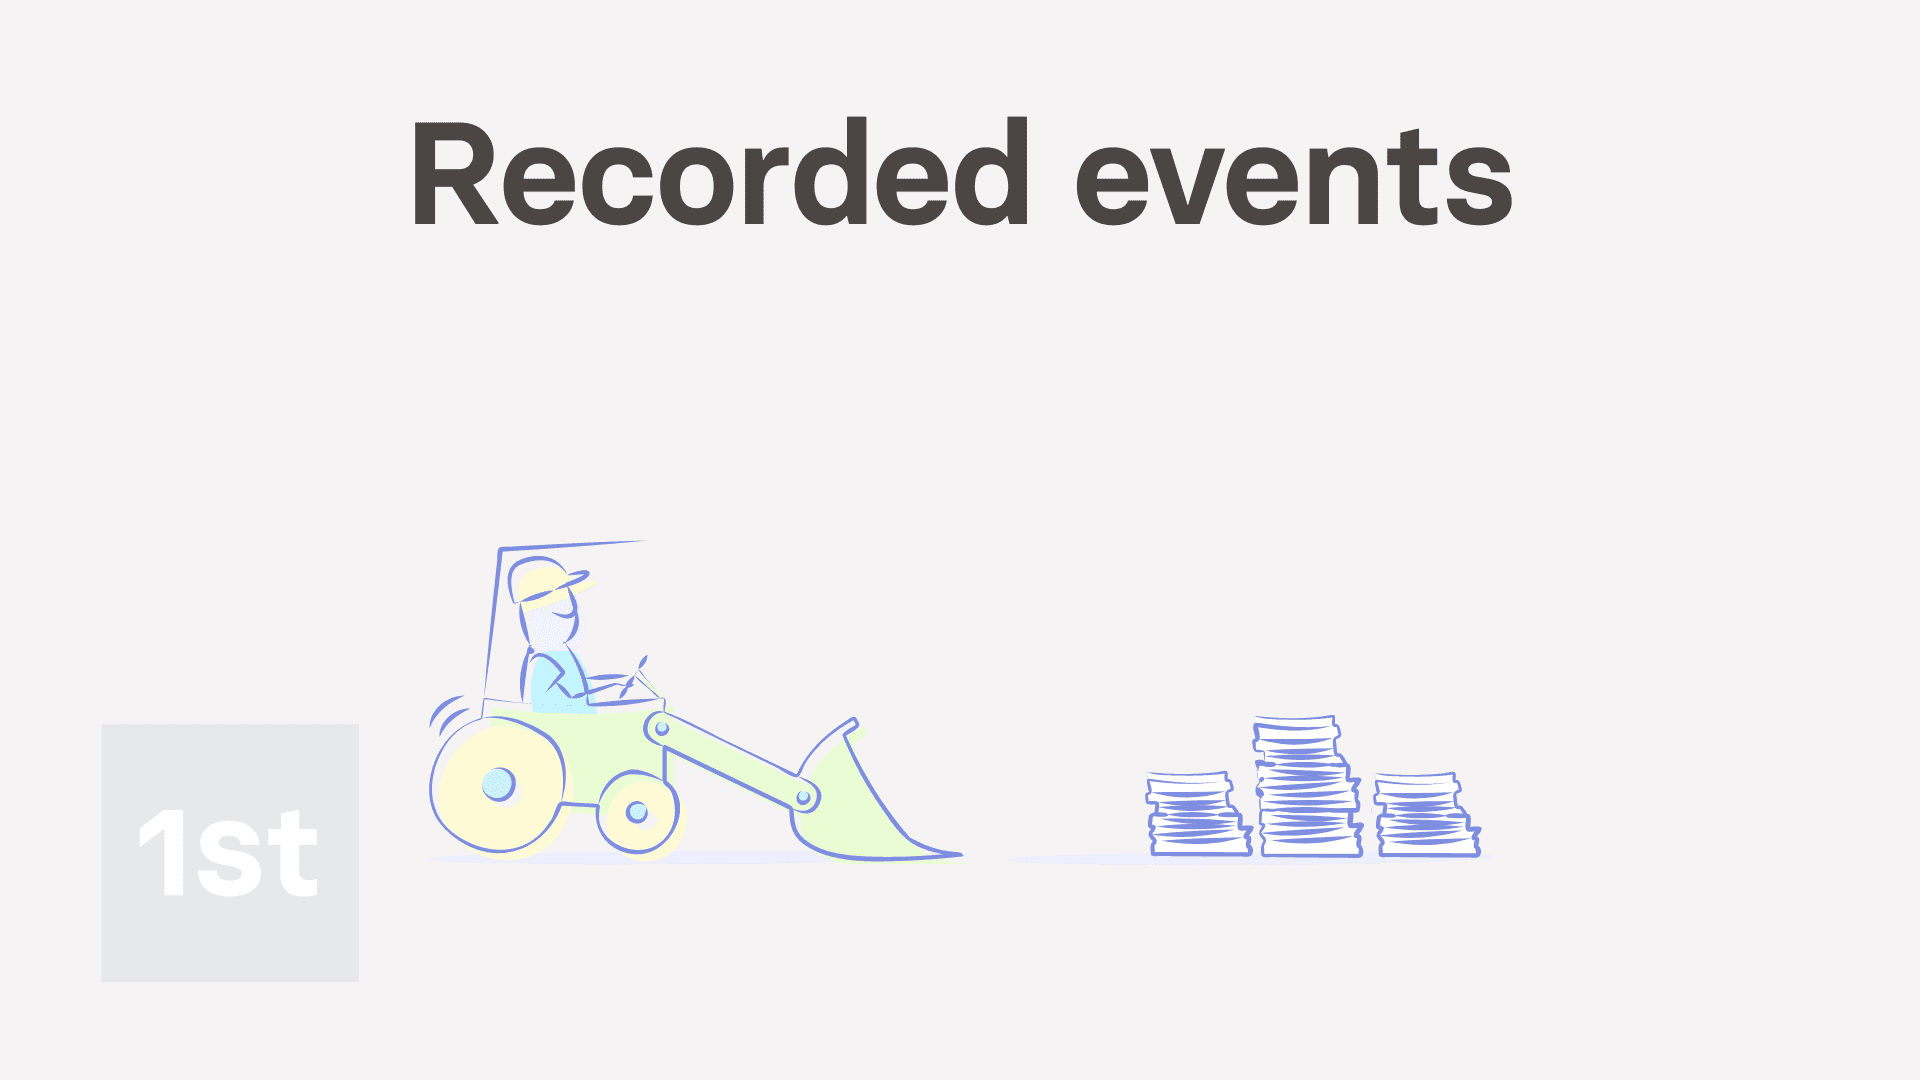
"How do I use the recorded events page?"
The recorded events page stores a rolling six month record of all leave, disciplinary, dismissal, and resignation events for a person.

To see a person's recorded events:
- First, select the person on: "Menu", then "People"
- Then tap: "HR", then "Recorded events"
- Near the top of the page, you'll see a six month record of "File notes" in pink, and below that, "Write-ups" in navy.
- With a count of how many disciplinaries happened in each category, for each of the last six months.
- When you scroll down the page, you'll see a list of each of their disciplinaries, with the most recent near the top.
- When you tap any of the monthly numbers, the page scrolls you down and highlights the disciplinaries, even if there's more than one.
- To see more about a single disciplinary, tap it, and you'll see more details.
- Including if a doc was sent, who did the disciplinary, and when.
- To see a copy of the sent doc, tap the "View" button: (at the end of the row)
- And to download a copy of the sent doc, tap the "Download PDF" button: (on the right)
- If a doc wasn't sent for a disciplinary, and can no longer be sent, you'll see the words: "doc not sent"
- However, if a doc wasn't sent, but can still be sent, you'll see a blue "review & send doc" link in the heading which takes you to the doc.
- When you expand the details, you'll see a yellow waiting circle on the first row showing that the doc is still waiting to be sent.
- And if the disciplinary involved a hearing or suspension, you'll see additional details about those as well.
- And finally, if you need to see disciplinaries that are older than six months shown on the page, scroll to the bottom and tap: See full history

Keep in mind that:
- A prepared disciplinary doc is stored, ready to be sent, only for the most recent disciplinary.
- Or, in other words, if you haven't sent a disciplinary doc yet, the doc can still be sent right up until a new disciplinary is added.
To learn more:
- About the differences between file notes and write-ups, watch the video on: File notes vs write-ups
 File notes vs write-ups
And that's it! That's everything you need to know about a person's recorded events!
2. What's the difference between file notes and write-ups?
 2:12
2:12
"What's the difference between file notes and write-ups?"
When creating a disciplinary, it's important to select the right type. File notes are for minor disciplinaries or first time offences. While write-ups are a more formal record of misconduct.
To set a disciplinary as a file note or write-up:
- First, select the person on: "Menu", then "People"
- Then tap: "HR", then "Disciplinary"
- To select the subcategory of disciplinary, either tap Help me pick one, or select a subcategory from the list.
- Once you've selected the subcategory, tap: Next
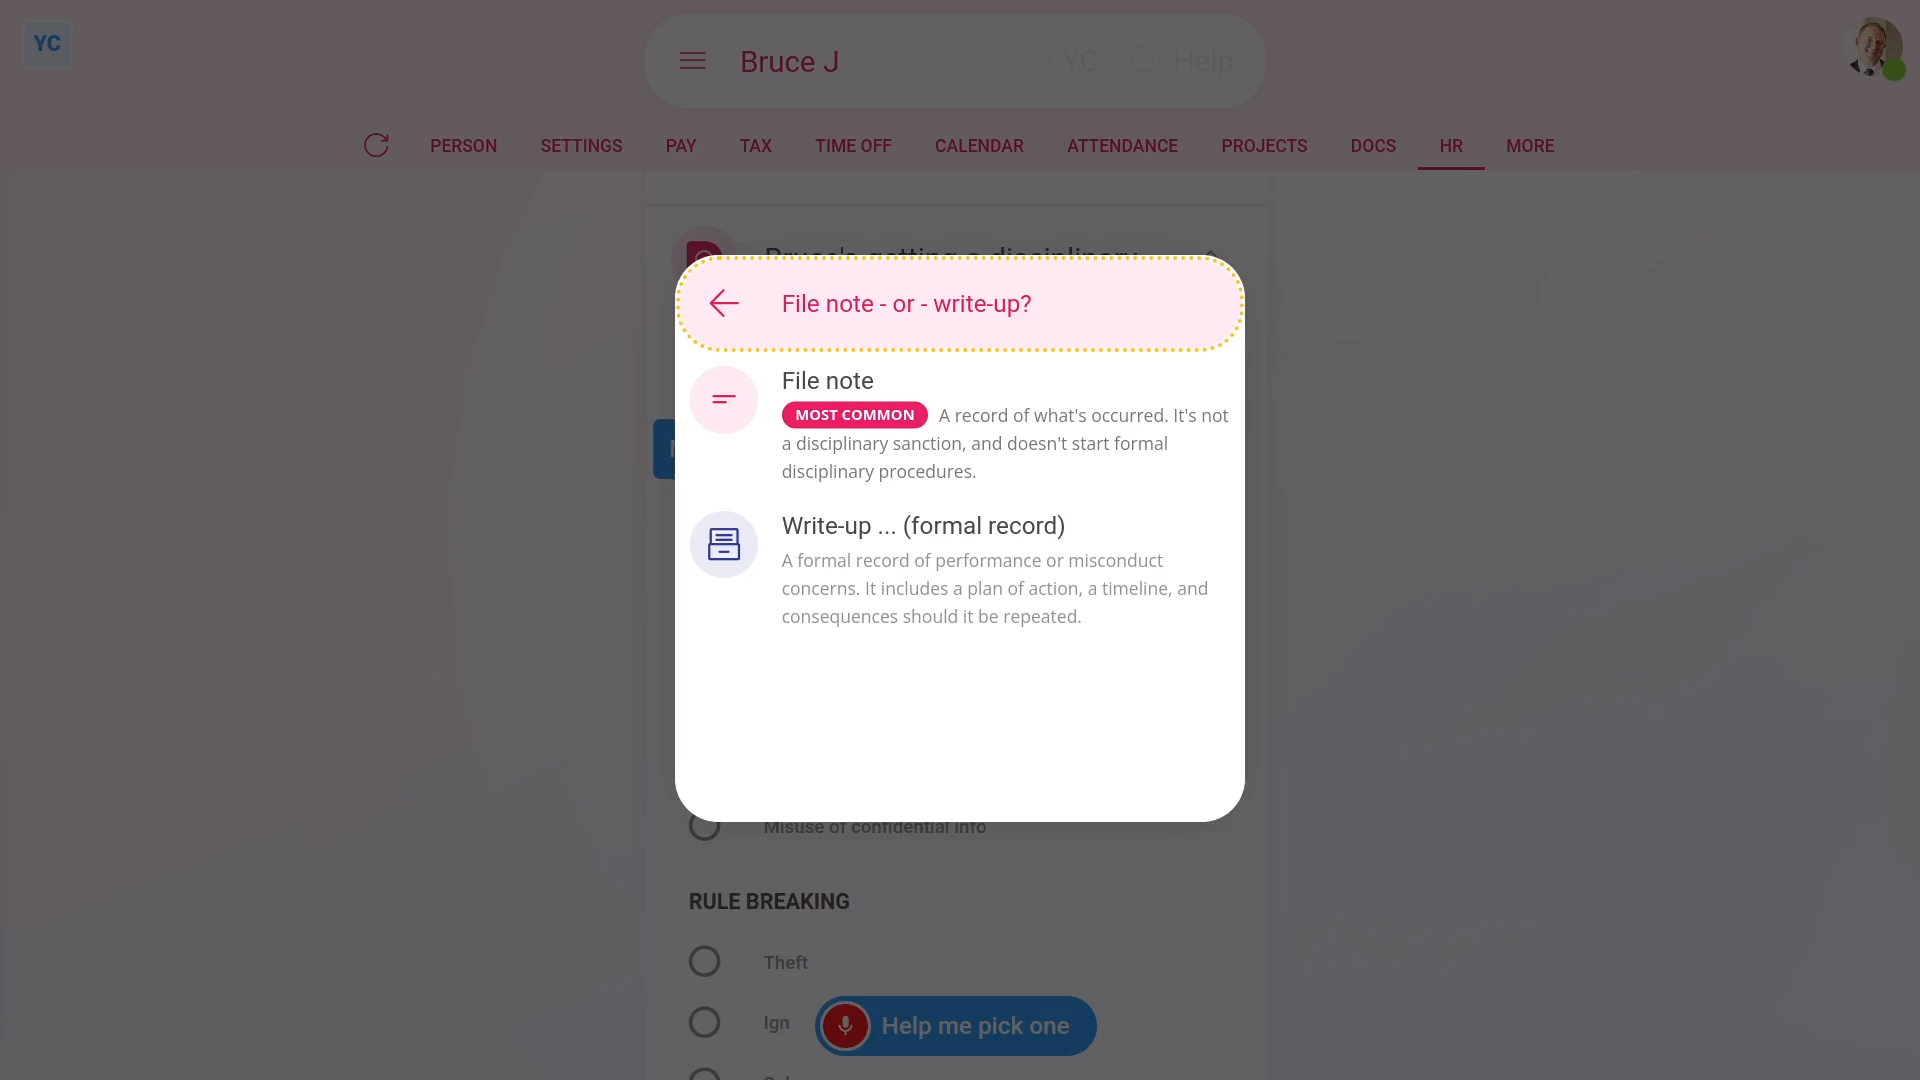
- Now you'll need to select between a "File note" or a: "Write-up"
- Because file notes are for minor disciplinaries, file notes don't have any extra options.
- However, because write-ups are a more serious and formal record of misconduct, you'll be offered extra options. You can add a hearing, a suspension, or both.
- The other place you'll see the difference between file notes and write-ups is when you go to: "HR", then "Recorded events"
- Near the top of the page, you'll see a six month record of "File notes" in pink. Below that, you'll also see a six month record of "Write-ups" in navy.
- And finally, you'll see a count of how many disciplinaries happened in each category, for each of the last six months.
Keep in mind that:
- Most of the disciplinaries you do are usually for minor disciplinaries or first time offences.
- So in most cases, you'll be setting your disciplinaries as a file note.
You may notice:
- If a subcategory has a "Gross misconduct" label on it, you won't be offered the option of making it a file note.
- Any disciplinary that's "Gross misconduct" is always set to being a write-up.
And that's it! That's everything you need to know about differences between file notes and write-ups!
3. How do I issue a disciplinary as a file note or write-up?
 4:25
4:25
"How do I issue a disciplinary as a file note or write-up?"
There's two kinds of disciplinary. A file note, or a write-up. Each kind has 18 subcategories. The process of selecting, preparing, issuing, and tracking receipt of disciplinaries is all automated by 1st Money.
To issue a disciplinary to a person, as a file note or write-up:
- First, select the person on: "Menu", then "People"
- Then tap: "HR", then "Disciplinary"
- There's two ways to select the subcategory of disciplinary.
- The first way to select the subcategory:
Is to select from the list of subcategories. - The second way to select the subcategory:
Which is recommended, and much easier, is to tap: Help me pick one (at the top) - You'll now see the microphone pop-up open. Start talking into your device's microphone.
- Explain, in your own words, what's happened that's causing you to issue a disciplinary to the person.
- Sometimes it may take a few sentences to explain what's happened.
- 1st Money then takes what you've said, and automatically recommends the subcategory of disciplinary that best matches.
- And finally, once you've found the subcategory of disciplinary that you're looking for, tap: Next
- Preparing the disciplinary:
Now you'll need to select between "File note" or: "Write-up" - File notes are for minor disciplinaries. Write-ups are a more formal record of misconduct.
- Once it slides out on the right, you'll see the number of tasks that 1st Money automatically does for you.
- To see the details of what each task does, tap: See all tasks
- Then tap expand all: (at the top)
- Some of the tasks send an email, or doc. To see a preview of any emails or docs, tap the blue links.
- Once you're happy with all the tasks, tap Continue, and then: Yes ... do it
- All the tasks are now done in the background.
- And finally, you'll see the disciplinary added to the six month recorded events.
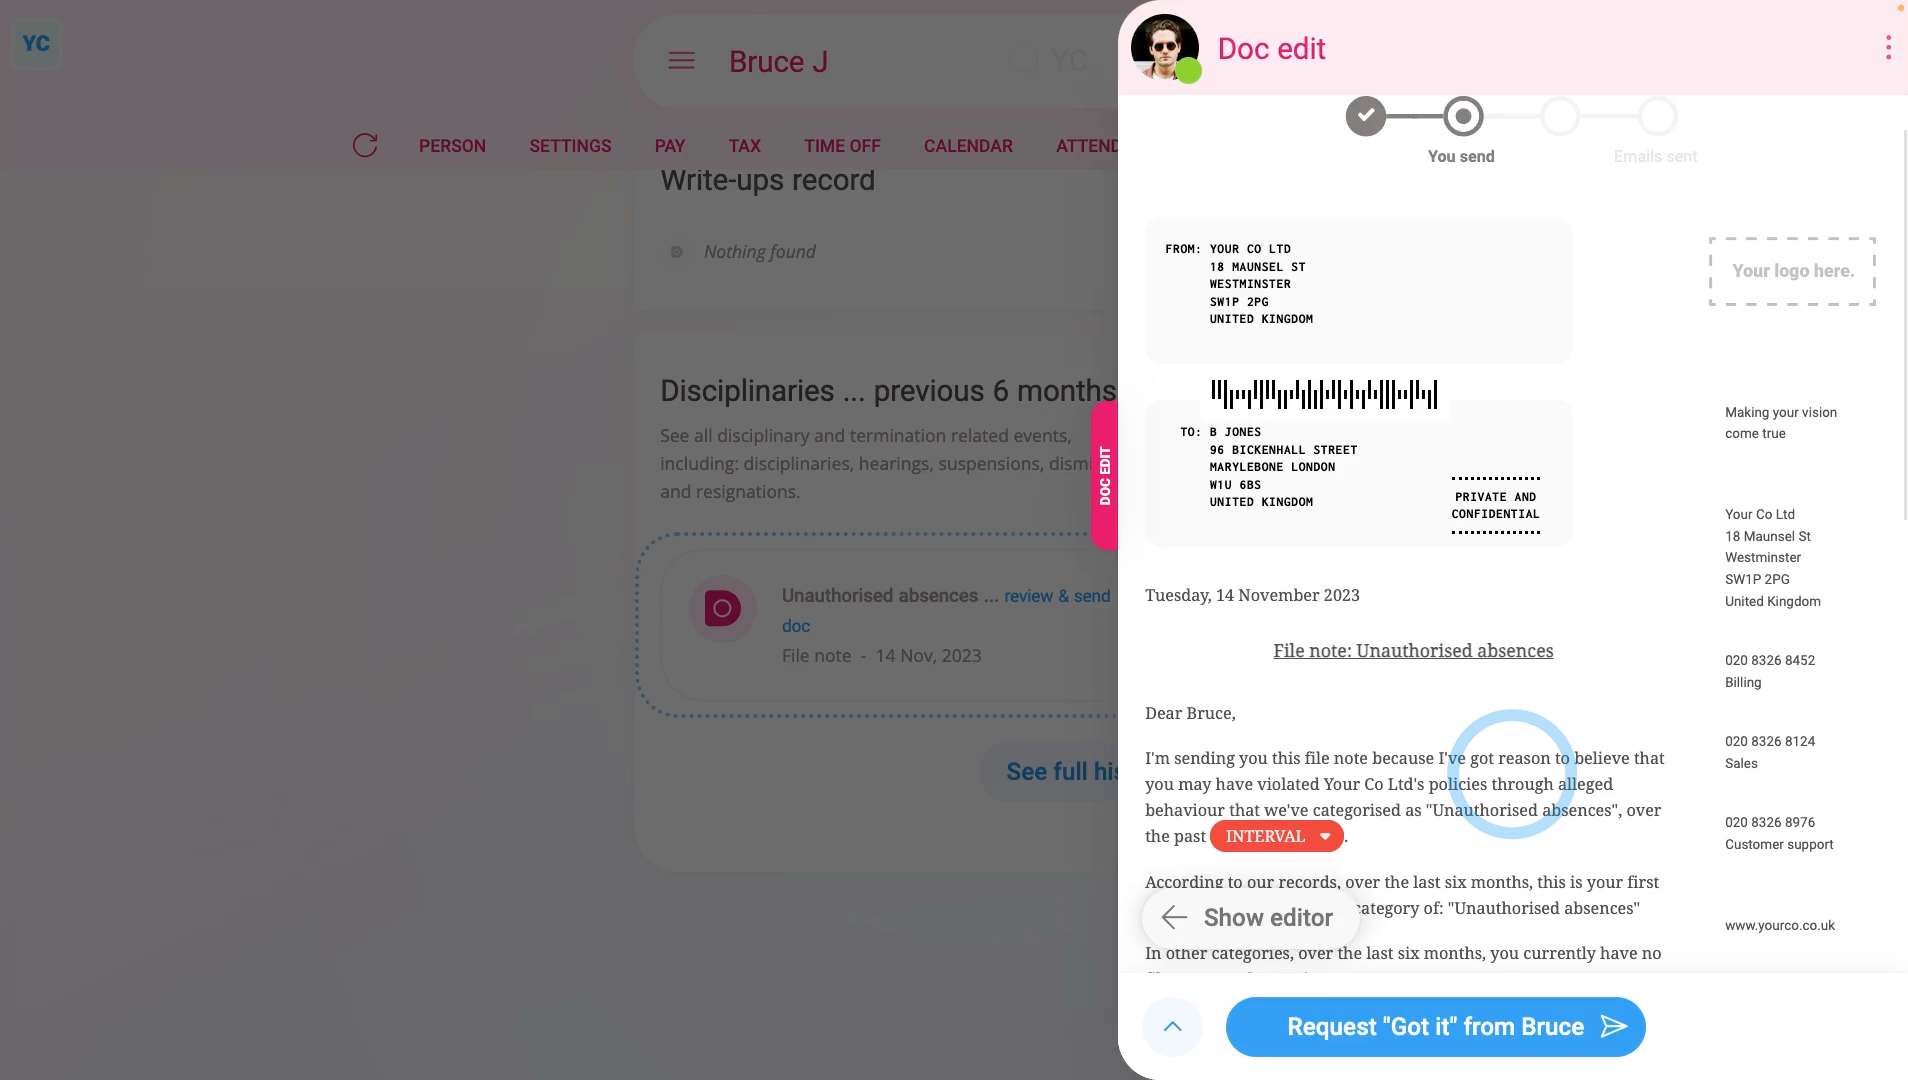
- Issuing the disciplinary doc:
Next, the person needs to be informed, in writing, about the disciplinary. - A disciplinary doc is prepared in the foreground, all ready for you to complete and send.
- Read through the disciplinary doc, and tap the black pick lists, one-by-one, until you're finished.
- If you want to change some text, or type more text in, tap Show editor, and make your changes.
- Then when you're ready to send the disciplinary doc, tap Request "Got it", then Yes ... request "Got it", and then: Close
- Receiving the disciplinary doc:
The person now gets an email, asking them to confirm that the disciplinary doc you've sent has been received. - The person can't access the rest of 1st Money until the person's tapped Got it to the disciplinary doc.
- Recorded events:
Now, on "Recorded events" tap the disciplinary, to expand it. - You'll see that the doc's been sent.
- To see a copy of the sent doc, tap the "View" button: (at the end of the row)
- And finally, you'll see the status change, once the person eventually marks the doc as: "Got it"
To learn more:
- About how to see the six month history of disciplinary docs, watch the video on: Recorded events
- To see what it looks like for the person to mark the doc as "Got it", watch the video on: Letters & docs confirmed with "Got it"
- And to see understand the differences between file notes and write-ups, watch the video on: File notes vs write-ups
And that's it! That's everything you need to know about issuing a disciplinary as a file note or write-up!
How do I change the default docs for disciplinaries?
 3:44
3:44
"How do I change the default docs for disciplinaries?"
When you finish processing a person's disciplinary, dismissal, or resignation, the last step is to send the person a doc. By default, the suggested doc is a template prepared by 1st Money. If the default doc isn't perfect for your needs, you can clone it, add your changes. Then set your newly cloned doc as the new default doc.
To clone a disciplinary doc, add your changes, and then set your newly cloned doc as a new default for a pay batch:
- First, to clone a disciplinary doc:
Select the pay batch on: "Menu", then "Pay batches" - Then tap: "HR", then "Docs ... disciplinary, dismiss, resign"
- Scroll down and select the disciplinary type from all those listed on the page.
- Then tap the "View" button:
- Once it slides out from the right, check it's the doc you want to clone, then tap: Clone (at the top)
- You've now got an exact duplicate of the original doc. The only difference is that the colour and image have been reset to the default.
- To add your changes to your cloned doc:
Start by setting the colour and image to what you want. - Then type in your other changes in the editor.
- You can add as many changes as you'd like.
- And when you're done adding your changes, tap Save, and then: Close
- To set your newly cloned doc as the disciplinary default:
Tap your selected disciplinary type, and you'll see your newly cloned doc in the list. - You'll know which is your clone because it's got the colour and image you set.
- Tap it, to select it, and then tap: Save
- To send your newly cloned doc in a person's disciplinary:
Select the person who's getting the disciplinary on: "Menu", then "People" - Then tap: "HR", then "Resign"
- And select the disciplinary type.
- Then tap "Yes" to all the above, then: See all tasks
- Next, expand the task that talks about: "doc for you to send"
- And when you tap the blue "see preview" link, you'll see your newly cloned doc with the changes you typed in.
- And finally, you can tap Continue to finish the disciplinary, and send your cloned doc.
Keep in mind that:
- Changes to default docs work equally well for dismissal, resignation, and leave docs as well.
You may notice:
- If you've got more than one pay batch, you'll need to set the default doc on each pay batch.
- If your newly set default doc isn't showing up when you're doing a person's disciplinary, check which pay batch the person's in.
- Then check that you've set the default doc for that pay batch.
For advanced usage:
- Your company may have its own process for sending written notice. If so, you may prefer to not send any doc at all.
To learn more:
- About permanently turning off disciplinary docs, watch the video on: Turning off disciplinary docs
And that's it! That's everything you need to know about changing default docs for disciplinaries!
How do I dismiss a person, and put them on garden leave?
 6:23
6:23
"How do I dismiss a person, and put them on garden leave?"
Dismissing, or in other words, firing a person with garden leave means the person remains fully employed and paid for the full notice period. However, despite being on full pay, the person's asked to not do any work for the company, and not come in to the office.
To dismiss a person, and put them on garden leave until their last day:
- First, select the person you're dismissing on: "Menu", then "People"
- Then tap: "HR", then "Dismiss"
- And tap the Next button on: "Notice of dismissal ... garden leave"
- You'll now see a list of questions that you'll need to confirm "Yes" to.
- In particular, you'll see the person's default minimum notice period, based on how long the person's worked for you.
- You can tap it to change it to a longer notice period, but you can't make it shorter than the minimum.
- To understand the calculation of the minimum notice period, read the notes below the slider.
- Once you've read the questions, tap: "Yes" to all the above
- Setting the dismissal tasks:
Next, you'll see the number of tasks that 1st Money automatically does for you. - To see the details of what each task does, tap: See all tasks
- And then tap expand all: (at the top)
- In particular, pay attention to the "starts on" date of the person's "paid notice" period.
- By default, it's set to tomorrow's date. Tap it, if you want to change it to a different date.
- If the person's paid hourly, by timesheets, pay attention to the target hours used to add "garden leave" hours to the person's final payslip.
- If any of the target hours aren't up to date, change them now.
- If the person's paid a salary, or hourly by targets, you won't see anything about target hours as it's got no effect on: "garden leave"
- If there's any other updates you'd like to make, do those updates now.
- For example, you could update their paid time off hours, or update their personal email.
- Some of the tasks send an email, or doc. To see a preview of any emails or docs, tap the blue links.
- Once you're happy with all the tasks, tap Continue, and then: Yes ... do it
- All the tasks are now done in the background.
- Sending the dismissal doc:
Next, the person needs to be informed, in writing, about their upcoming dismissal. - A dismissal doc is prepared in the foreground, all ready for you to complete and send.
- Read through the dismissal doc, and tap the red pick list for the best matching reason for the dismissal.
- If you want to change some text, or type more text in, tap Show editor, and make your changes.
- Then when you're ready to send the dismissal doc, tap Request "Got it", then Yes ... request "Got it", and then: Close
- Receiving the dismissal doc:
The person now gets an email, asking them to confirm that the dismissal doc you've sent has been received. - The person can't access the rest of 1st Money until the person's tapped Got it to the dismissal doc.
- Recorded events:
Now, on "Recorded events" tap the dismissal, to expand it. - You'll see that the doc's been sent.
- To see a copy of the sent doc, tap the "View" button: (at the end of the row)
- And you'll see the status change, once the person eventually marks the doc as: "Got it"
- Then to see their final payslip, tap the "See final payslip" button: (at the end of the row)
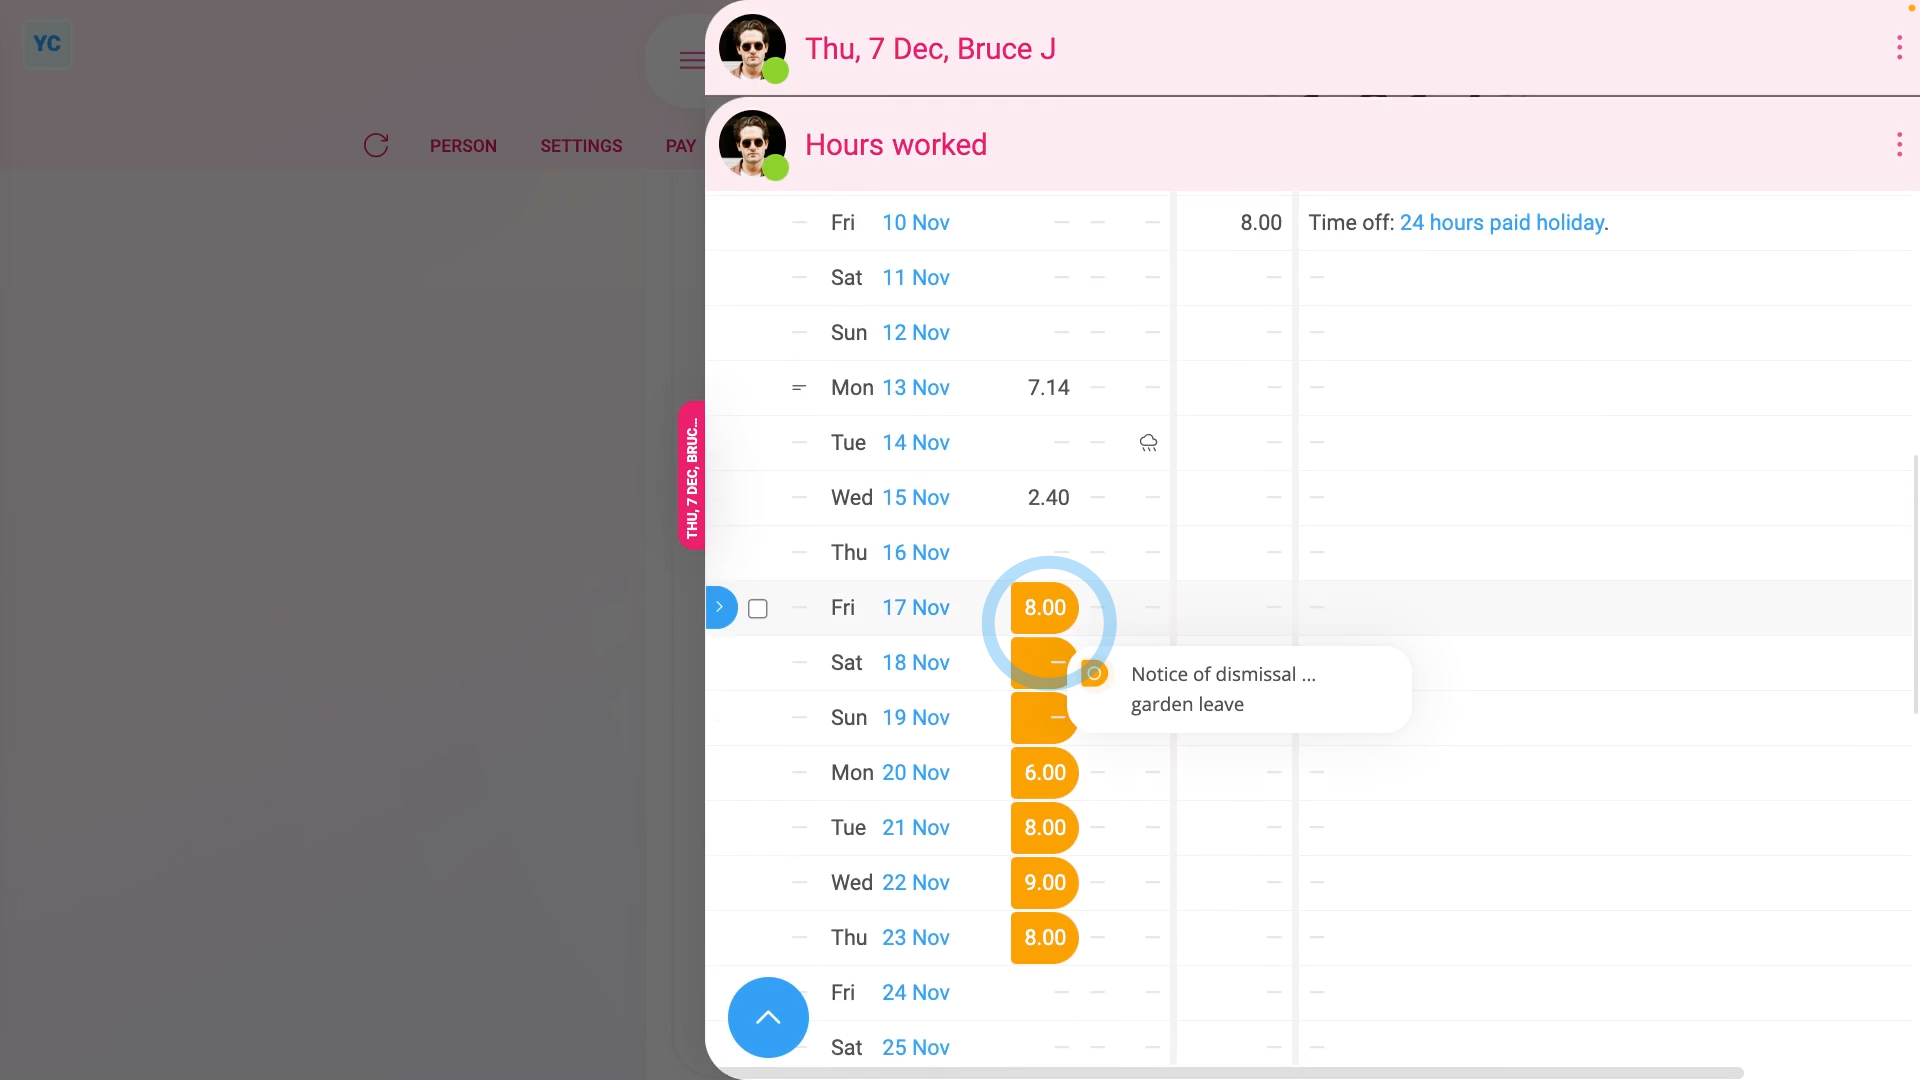
- And if the person's paid hourly, by timesheets, when you tap the blue "hours" link, under "Earnings", you'll see the added "garden leave" hours in orange.
- And finally, even if the person adds clocked-in timesheet time during their garden leave, it ignores the timesheet "done time". Instead, it only pays them for the hours in orange, so you can be confident that the person won't be double paid.
Keep in mind that:
- If there's any doubt about whether the person's going to look at their email, it's recommended that you also call the person by phone.
- And personally tell them that a dismissal doc's been sent to their email.
- Also, it's important to check that it's going to send the docs to the person's personal email before you tap: Yes ... do it
- Especially if it currently only lists their work email, and if you suspect the person may lose access to their work email once the person's dismissed.
- Depending on your situation, in some cases, you may even need to print the doc, and hand deliver it to the person.
Also remember that:
- During the "garden leave" notice period, the person's not expected to do any work, but still gets paid as usual.
For advanced usage:
- Your company may have its own process for sending written notice. If so, you can still have the automated execution of tasks, but may prefer to not send the supplied dismissal doc.
- You can either skip the sending of the dismissal doc, when it's shown, or alternatively, you can permanently turn it off.
- To learn about permanently turning off dismissal docs, watch the video on: Turning off disciplinary docs
To learn more:
- About what it looks like for the person to mark the doc as "Got it", watch the video on: Letters & docs confirmed with "Got it"
- And to learn about the alternative of having a person work normally right up until their last working day, watch the video on: Dismissal with work 'til last day
And that's it! That's everything you need to know about dismissing a person, and putting them on garden leave until their last day!
How do I give a person notice of their upcoming dismissal?
 6:09
6:09
"How do I give a person notice of their upcoming dismissal?"
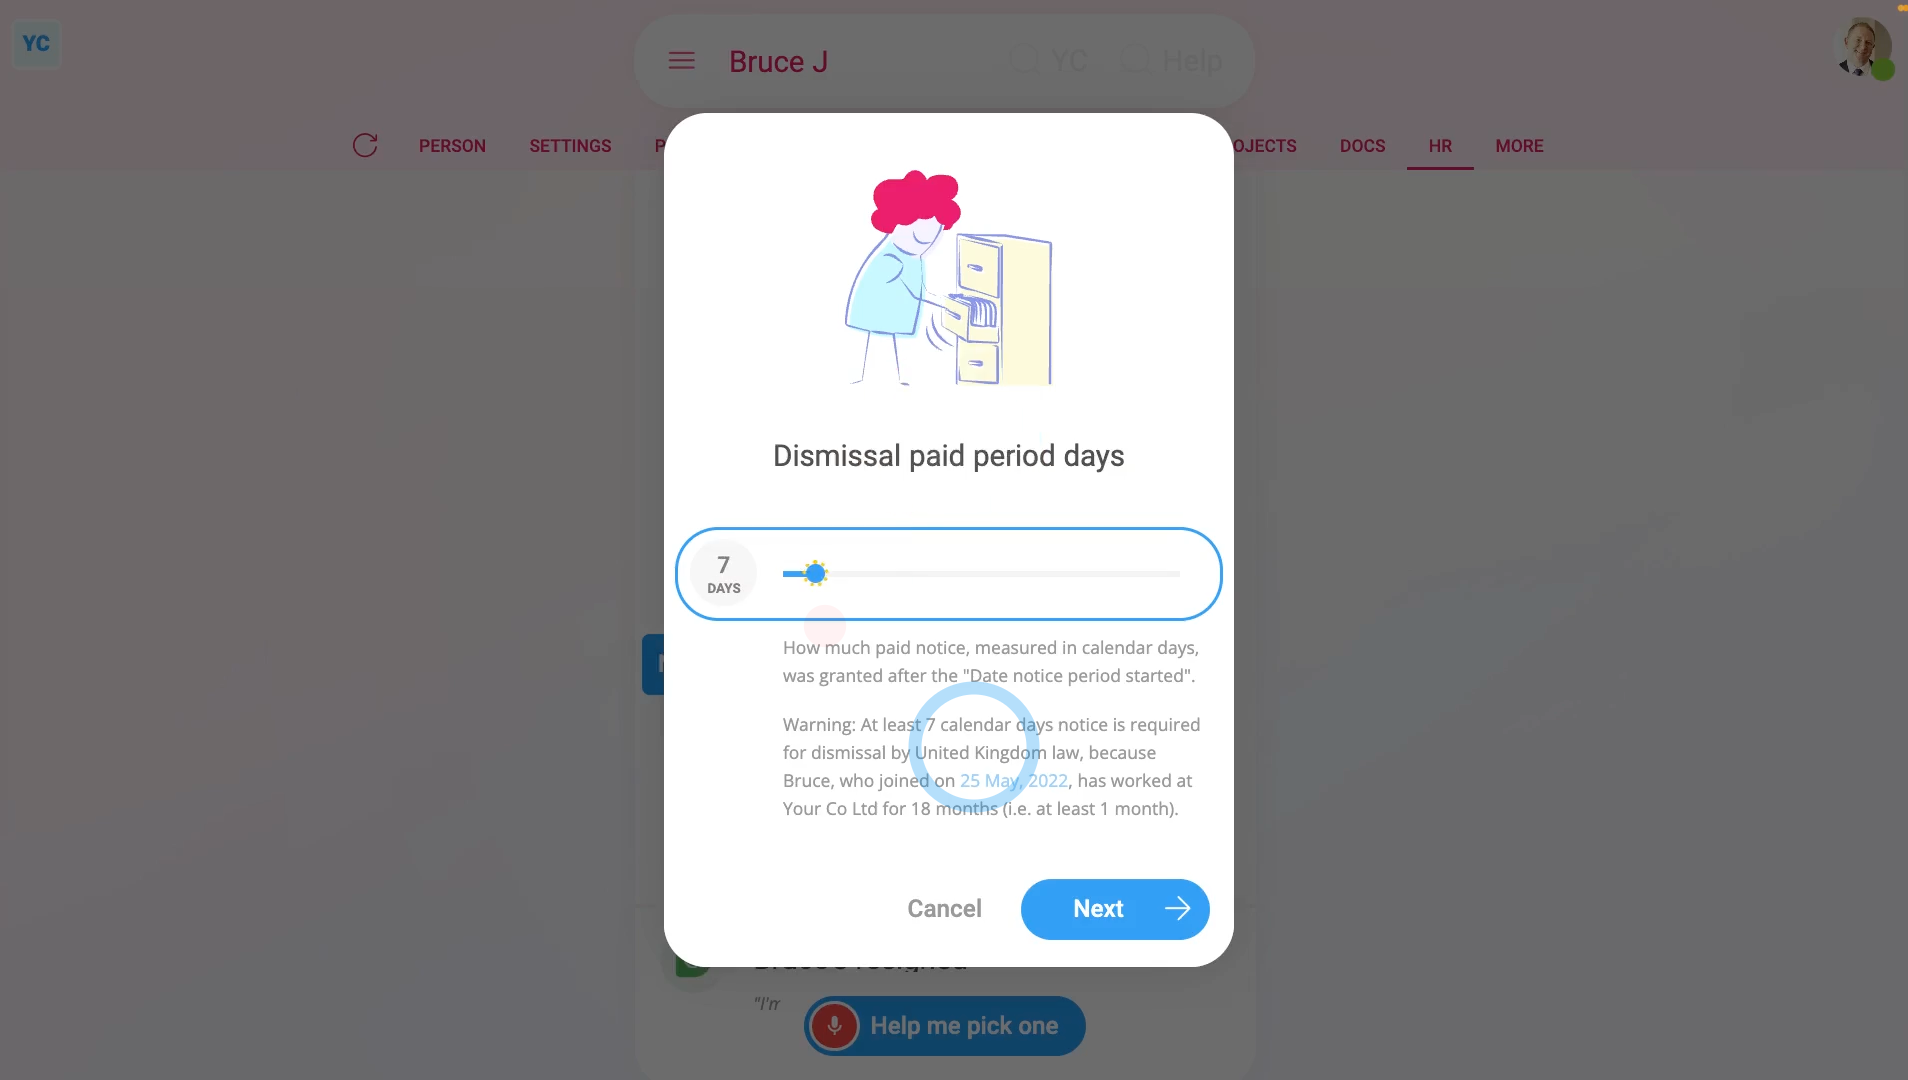
Dismissing, or in other words, firing a person with a notice period usually means the person's expected to work until their last day.
To dismiss a person with a notice period, and have them work until their last day:
- First, select the person you're dismissing on: "Menu", then "People"
- Then tap: "HR", then "Dismiss"
- And tap the Next button on: "Notice of dismissal ... work 'til last day"
- You'll now see a list of questions that you'll need to confirm "Yes" to.
- In particular, you'll see the person's default minimum notice period, based on how long the person's worked for you.
- You can tap it to change it to a longer notice period, but you can't make it shorter than the minimum.
- To understand the calculation of the minimum notice period, read the notes below the slider.
- Once you've read the questions, tap: "Yes" to all the above
- Setting the dismissal tasks:
Next, you'll see the number of tasks that 1st Money automatically does for you. - To see the details of what each task does, tap: See all tasks
- And then tap expand all: (at the top)
- In particular, pay attention to the "starts on" date of the person's "paid notice" period.
- By default, it's set to tomorrow's date. Tap it, if you want to change it to a different date.
- If there's any other updates you'd like to make, do those updates now.
- For example, you could update their paid time off hours, or update their personal email.
- Some of the tasks send an email, or doc. To see a preview of any emails or docs, tap the blue links.
- Once you're happy with all the tasks, tap Continue, and then: Yes ... do it
- All the tasks are now done in the background.
- Sending the dismissal doc:
Next, the person needs to be informed, in writing, about their upcoming dismissal. - A dismissal doc is prepared in the foreground, all ready for you to complete and send.
- Read through the dismissal doc, and tap the red pick list for the best matching reason for the dismissal.
- If you want to change some text, or type more text in, tap Show editor, and make your changes.
- Then when you're ready to send the dismissal doc, tap Request "Got it", then Yes ... request "Got it", and then: Close
- Receiving the dismissal doc:
The person now gets an email, asking them to confirm that the dismissal doc you've sent has been received. - The person can't access the rest of 1st Money until the person's tapped Got it to the dismissal doc.
- Recorded events:
Now, on "Recorded events" tap the dismissal, to expand it. - You'll see that the doc's been sent.
- To see a copy of the sent doc, tap the "View" button: (at the end of the row)
- And you'll see the status change, once the person eventually marks the doc as: "Got it"
- And finally, to see their final payslip, tap the "See final payslip" button: (at the end of the row)
Keep in mind that:
- If there's any doubt about whether the person's going to look at their email, it's recommended that you also call the person by phone.
- And personally tell them that a dismissal doc's been sent to their email.
- Also, it's important to check that it's going to send the docs to the person's personal email before you tap: Yes ... do it
- Especially if it currently only lists their work email, and if you suspect the person may lose access to their work email once the person's dismissed.
- Depending on your situation, in some cases, you may even need to print the doc, and hand deliver it to the person.
Also remember that:
- During the notice period, the person's expected to work as usual, and is also paid as usual, with no changes to their payroll.
- In some cases, a person with a dismissal notice period may stop coming in, or abandon their job. In other cases the person may find another job and ask to end their notice period early.
- For a suggestion on what to do if the person stops coming in, or has other "Unauthorised absences", watch the video on: Issuing a disciplinary
- For a suggestion on what to do if the person abandons their job, watch the video on: Dismissal for gross misconduct
- And for a suggestion on what to do if the person finds another job and asks to end their notice period early, watch the video on: Resignation, and you've agreed
For advanced usage:
- Your company may have its own process for sending written notice. If so, you can still have the automated execution of tasks, but may prefer to not send the supplied dismissal doc.
- You can either skip the sending of the dismissal doc, when it's shown, or alternatively, you can permanently turn it off.
- To learn about permanently turning off dismissal docs, watch the video on: Turning off disciplinary docs
To learn more:
- About what it looks like for the person to mark the doc as "Got it", watch the video on: Letters & docs confirmed with "Got it"
- And to learn about the alternative of having a person work right up until their last working day, but not come into the office, watch the video on: Dismissal with garden leave
And that's it! That's everything you need to know about dismissing a person with a notice period, and have them work until their last day!
How do I instantly dismiss a person during their first month?
 4:54
4:54
"How do I instantly dismiss a person during their first month?"
Dismissing, or in other words, firing a person during their first month usually means instant termination of their employment.
To dismiss a person during their first month:
- First, select the person you're dismissing on: "Menu", then "People"
- Then tap: "HR", then "Dismiss"
- And tap the Next button on: "Dismissal ... during first month"
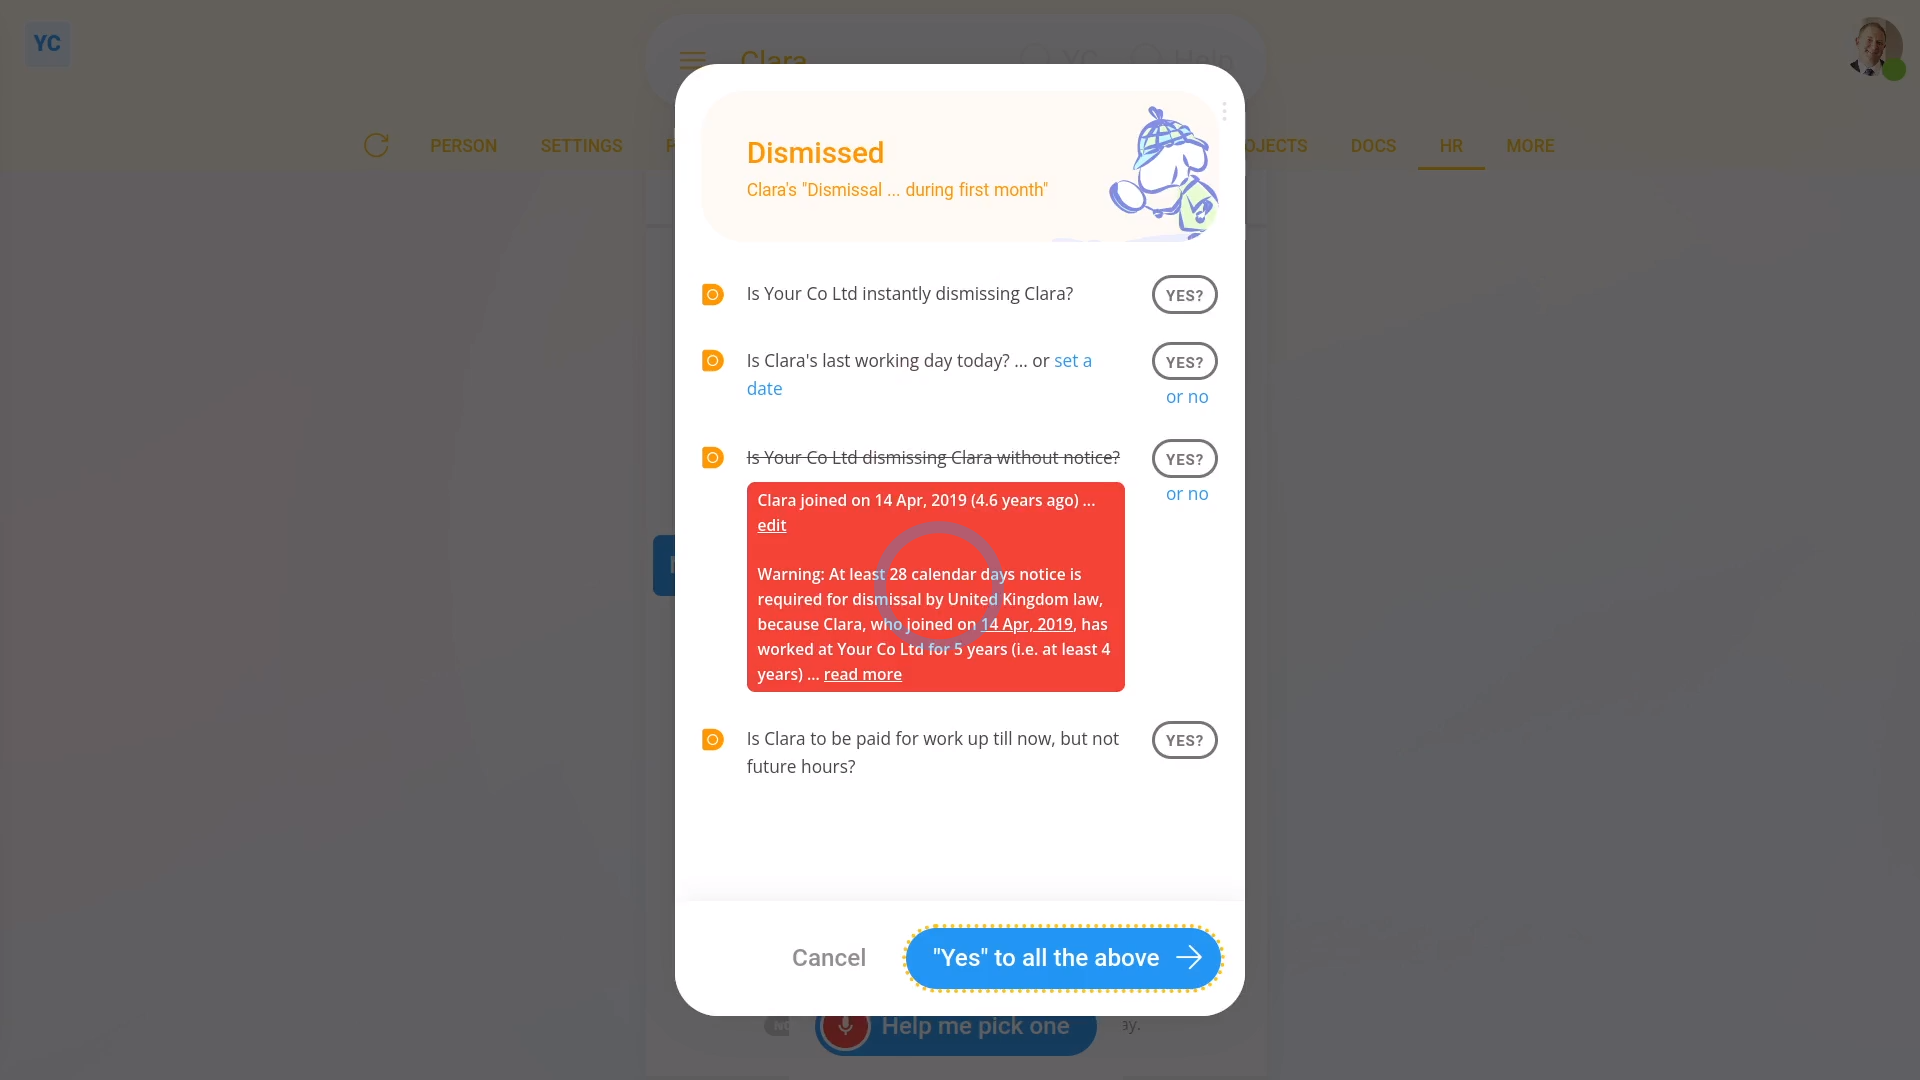
- You'll now see a list of questions that you'll need to confirm "Yes" to.
- If your selected person's worked for you for more than one month, you'll get a red warning message.
- When you switch to a person who's worked for you for less than one month, there's no red warning message.
- Once you've read the questions, tap: "Yes" to all the above
- Setting the dismissal tasks:
Next, you'll see the number of tasks that 1st Money automatically does for you. - To see the details of what each task does, tap: See all tasks
- And then tap expand all: (at the top)
- In particular, pay attention to the person's: "Date employment ended"
- By default, it's set to today's date. Tap it, if you want to change it to a different date.
- If there's any other updates you'd like to make, do those updates now.
- For example, you could update their paid time off hours, or update their personal email.
- Some of the tasks send an email, or doc. To see a preview of any emails or docs, tap the blue links.
- Once you're happy with all the tasks, tap Continue, and then: Yes ... do it
- All the tasks are now done in the background.
- Sending the dismissal doc:
Next, the person needs to be informed, in writing, about their dismissal. - A dismissal doc is prepared in the foreground, all ready for you to complete and send.
- Read through the dismissal doc.
- If you want to change some text, or type more text in, tap Show editor, and make your changes.
- Then when you're ready to send the dismissal doc, tap Request "Got it", then Yes ... request "Got it", and then: Close
- Receiving the dismissal doc:
The person now gets an email, asking them to confirm that the dismissal doc you've sent has been received. - The person can't access the rest of 1st Money until the person's tapped Got it to the dismissal doc.
- Recorded events:
Now, on "Recorded events" tap the dismissal, to expand it. - You'll see that the doc's been sent.
- To see a copy of the sent doc, tap the "View" button: (at the end of the row)
- And you'll see the status change, once the person eventually marks the doc as: "Got it"
- And finally, to see their final payslip, tap the "See final payslip" button: (at the end of the row)
Keep in mind that:
- If there's any doubt about whether the person's going to look at their email, it's recommended that you also call the person by phone.
- And personally tell them that a dismissal doc's been sent to their email.
- Also, it's important to check that it's going to send the docs to the person's personal email before you tap: Yes ... do it
- Especially if it currently only lists their work email, and if you suspect the person may lose access to their work email once the person's dismissed.
- Depending on your situation, in some cases, you may even need to print the doc, and hand deliver it to the person.
For advanced usage:
- Your company may have its own process for sending written notice. If so, you can still have the automated execution of tasks, but may prefer to not send the supplied dismissal doc.
- You can either skip the sending of the dismissal doc, when it's shown, or alternatively, you can permanently turn it off.
- To learn about permanently turning off dismissal docs, watch the video on: Turning off disciplinary docs
To learn more:
- About what it looks like for the person to mark the doc as "Got it", watch the video on: Letters & docs confirmed with "Got it"
And that's it! That's everything you need to know about dismissing a person during their first month!
How do I instantly dismiss a person for gross misconduct?
 6:02
6:02
"How do I instantly dismiss a person for gross misconduct?"
Dismissing, or in other words, firing a person for gross misconduct usually means instant termination of their employment.
To dismiss a person for gross misconduct:
- First, select the person you're dismissing on: "Menu", then "People"
- Then tap: "HR", then "Dismiss"
- And tap the Next button on: "Dismissal ... gross misconduct"
- You'll now see a list of questions that you'll need to confirm "Yes" to.
- Once you've read the questions, tap: "Yes" to all the above
- Setting the dismissal tasks:
Next, you'll see the number of tasks that 1st Money automatically does for you. - To see the details of what each task does, tap: See all tasks
- And then tap expand all: (at the top)
- In particular, pay attention to the date of the person's: "Date employment ended"
- By default, it's set to today's date. Tap it, if you want to change it to a different date.
- If there's any other updates you'd like to make, do those updates now.
- For example, you could update their paid time off hours, or update their personal email.
- Some of the tasks send an email, or doc. To see a preview of any emails or docs, tap the blue links.
- Once you're happy with all the tasks, tap Continue, and then: Yes ... do it
- All the tasks are now done in the background.
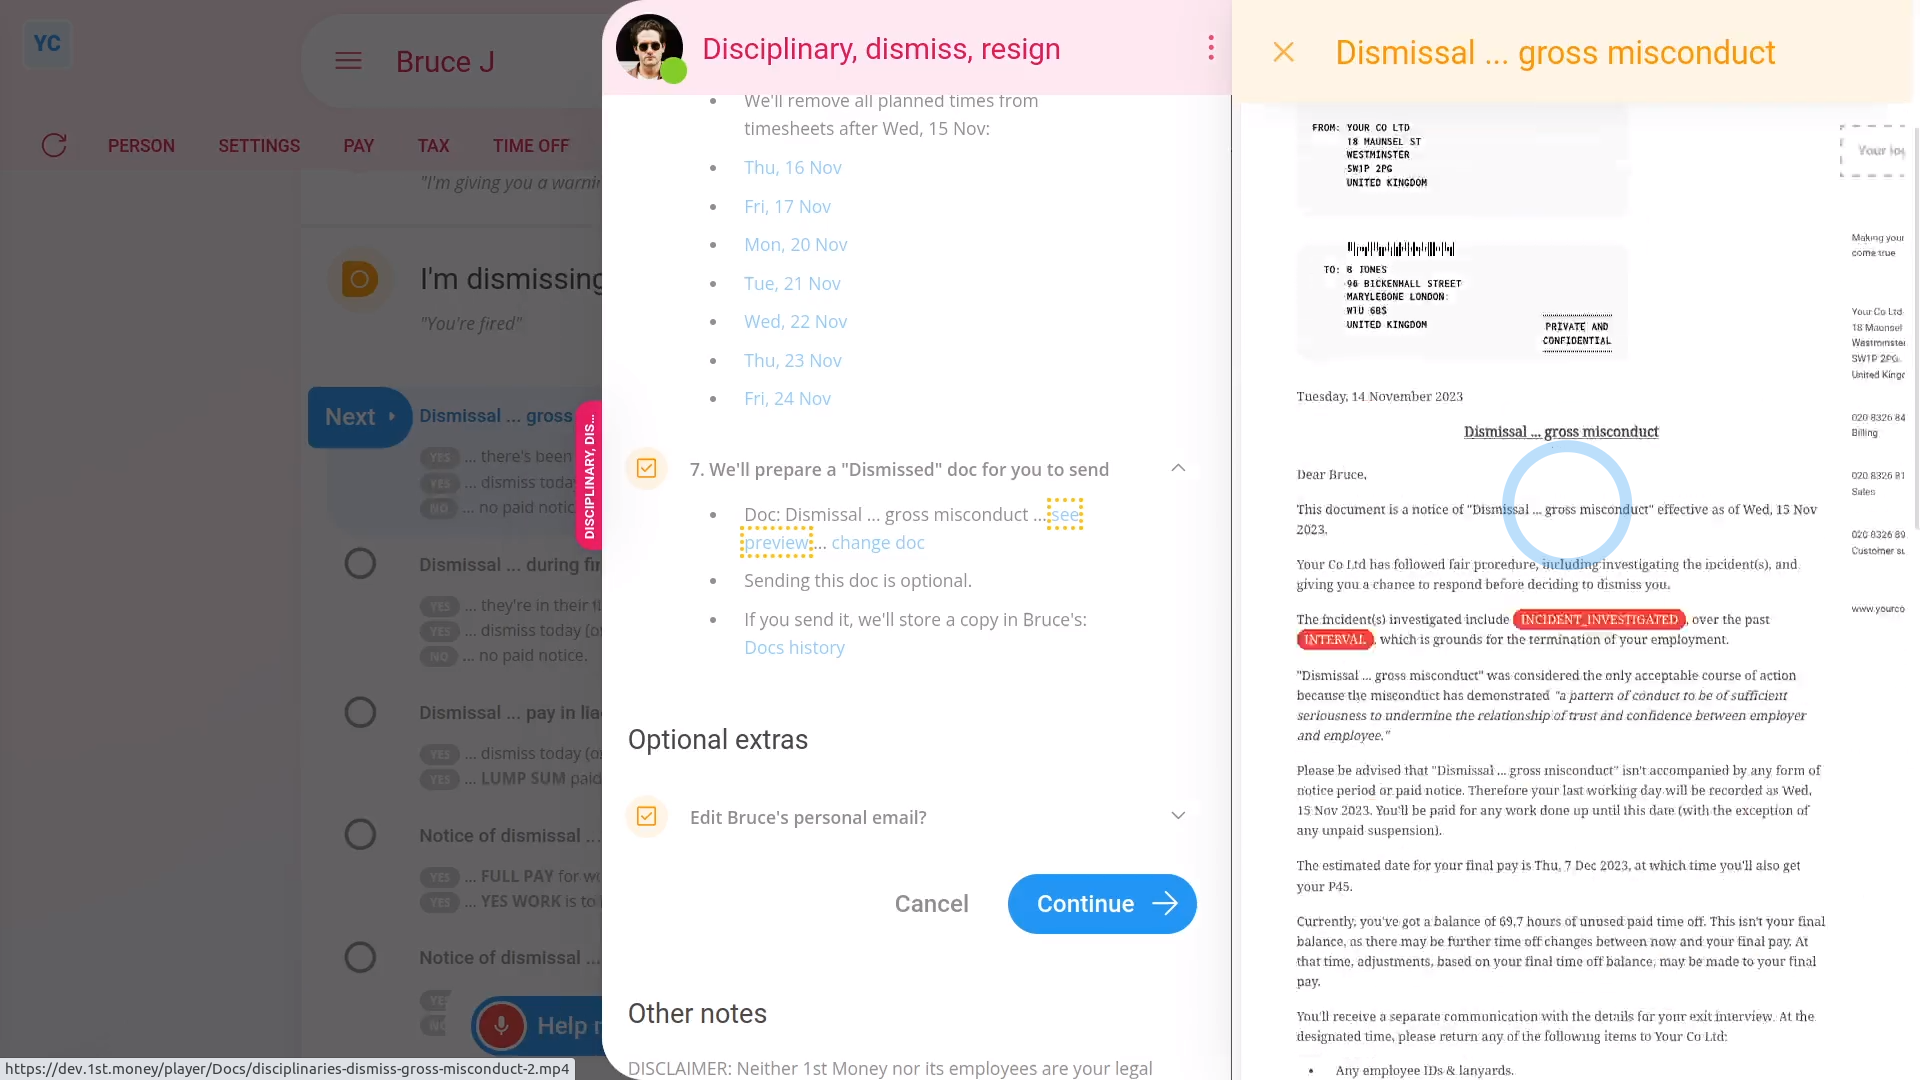
- Sending the dismissal doc:
Next, the person needs to be informed, in writing, about their dismissal. - A dismissal doc is prepared in the foreground, all ready for you to complete and send.
- Read through the dismissal doc, and tap the black pick lists, one-by-one, until you're finished.
- If you want to change some text, or type more text in, tap Show editor, and make your changes.
- Then when you're ready to send the dismissal doc, tap Request "Got it", then Yes ... request "Got it", and then: Close
- Receiving the dismissal doc:
The person now gets an email, asking them to confirm that the dismissal doc you've sent has been received. - The person can't access the rest of 1st Money until the person's tapped Got it to the dismissal doc.
- Recorded events:
Now, on "Recorded events" tap the dismissal, to expand it. - You'll see that the doc's been sent.
- To see a copy of the sent doc, tap the "View" button: (at the end of the row)
- And you'll see the status change, once the person eventually marks the doc as: "Got it"
- And finally, to see a preview of their final payslip, tap on the "Final payslip" row.
Keep in mind that:
- If there's any doubt about whether the person's going to look at their email, it's recommended that you also call the person by phone.
- And personally tell them that a dismissal doc's been sent to their email.
- Also, it's important to check that it's going to send the docs to the person's personal email before you tap: Yes ... do it
- Especially if it currently only lists their work email, and if you suspect the person may lose access to their work email once the person's dismissed.
- Depending on your situation, in some cases, you may even need to print the doc, and hand deliver it to the person.
Also remember that:
- Instant dismissal can be for even a single instance of gross misconduct, like: theft, serious insubordination, physical violence, or fraud.
- It can also be for repeated instances of lesser misconduct, such as unauthorised absences.
- Always get proper advice when deciding if the person's misconduct is: "gross misconduct"
Bear in mind that:
- If the gross misconduct has recently happened, such as physical violence, you may want to take some time to investigate.
- In some cases, issuing a disciplinary as a write-up, with a hearing, and with suspension, gives you time to properly investigate what's happened.
- The hearing gives the person a chance to give their side of the story.
- And the suspension removes the chance of any further physical violence while it's being properly investigated.
- Then once you've reached an informed decision, only then would you issue the: "Dismissal for gross misconduct"
- As always, be sure to seek proper advice when deciding on the best path to take.
For advanced usage:
- Your company may have its own process for sending written notice. If so, you can still have the automated execution of tasks, but may prefer to not send the supplied dismissal doc.
- You can either skip the sending of the dismissal doc, when it's shown, or alternatively, you can permanently turn it off.
- To learn about permanently turning off dismissal docs, watch the video on: Turning off disciplinary docs
To learn more:
- About issuing a hearing, watch the video on: Issuing a hearing
- To learn about issuing a suspension, watch the video on: Suspension period days
- To learn about what it looks like for the person to mark the doc as "Got it", watch the video on: Letters & docs confirmed with "Got it"
- And to learn about the alternative of having a person work right up until their last working day of a future dismissal date, watch the video on: Dismissal with work 'til last day
And that's it! That's everything you need to know about dismissing a person for gross misconduct!
How do I instantly dismiss a person with pay in lieu?
 6:09
6:09
"How do I instantly dismiss a person with pay in lieu?"
Dismissing, or in other words, firing a person with pay in lieu usually means instant termination of their employment. However, instead of, or in lieu of having to work their normal notice period, the person gets "free" money added to their final pay. The money added is to cover what their pay would've been for a normal notice period.
To dismiss a person with pay in lieu:
- First, select the person you're dismissing on: "Menu", then "People"
- Then tap: "HR", then "Dismiss"
- And tap the Next button on: "Dismissal ... pay in lieu"
- You'll now see a list of questions that you'll need to confirm "Yes" to.
- In particular, you'll see the person's default minimum notice period, based on how long the person's worked for you.
- You can tap it to change it to a longer notice period, but you can't make it shorter than the minimum.
- To understand the calculation of the minimum notice period, read the notes below the slider.
- Once you've read the questions, tap: "Yes" to all the above
- Setting the dismissal tasks:
Next, you'll see the number of tasks that 1st Money automatically does for you. - To see the details of what each task does, tap: See all tasks
- And then tap expand all: (at the top)
- In particular, pay attention to the date of the person's: "Date employment ended"
- By default, it's set to today's date. Tap it, if you want to change it to a different date.
- If the person's paid hourly, by timesheets or by targets, pay attention to the target hours. The target hours are used to calculate the "pay in lieu" amount added to the person's final payslip.
- If any of the target hours aren't up to date, change them now.
- If the person's paid a salary, you won't see anything about target hours. Instead, you'll see a calculation of the person's "pay in lieu" based on their salary.
- If there's any other updates you'd like to make, do those updates now.
- For example, you could update their paid time off hours, or update their personal email.
- Some of the tasks send an email, or doc. To see a preview of any emails or docs, tap the blue links.
- Once you're happy with all the tasks, tap Continue, and then: Yes ... do it
- All the tasks are now done in the background.
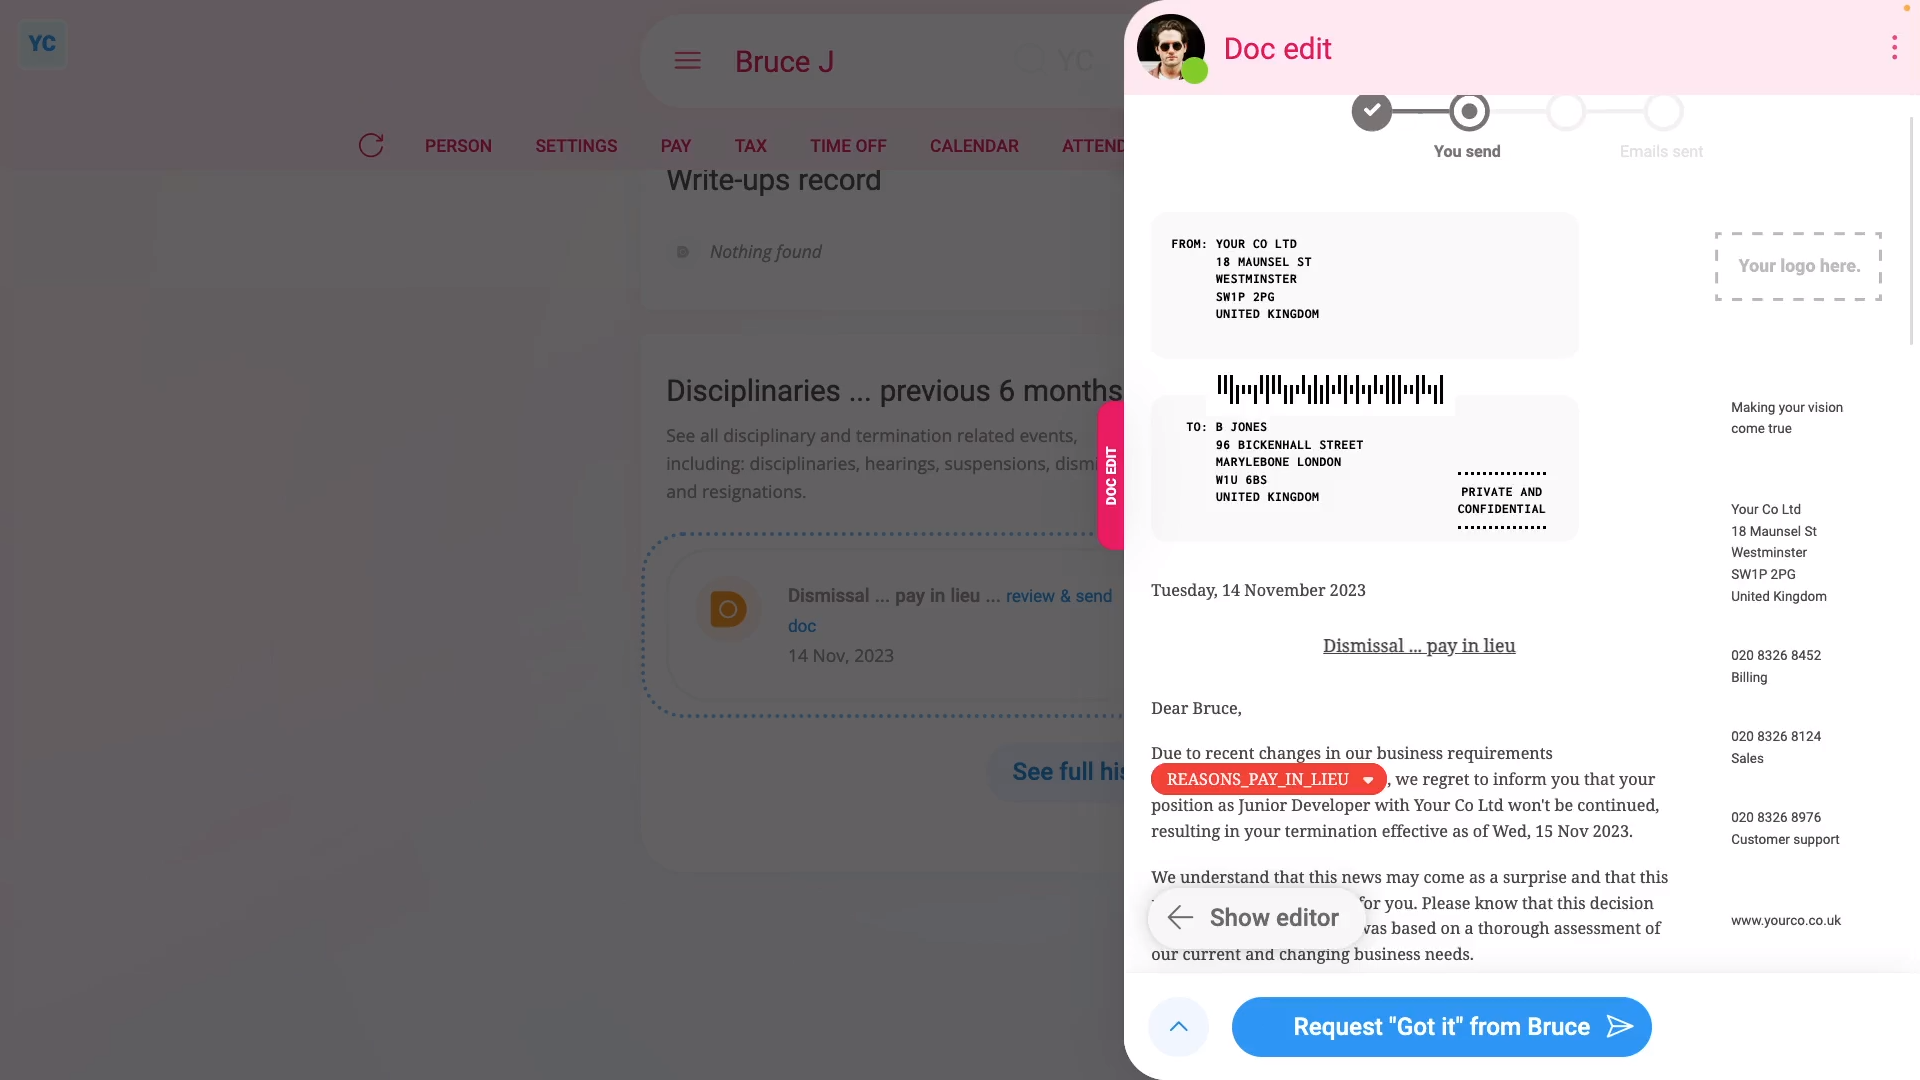
- Sending the dismissal doc:
Next, the person needs to be informed, in writing, about their dismissal. - A dismissal doc is prepared in the foreground, all ready for you to complete and send.
- Read through the dismissal doc, and tap the red pick list for the best matching reason for the dismissal.
- If you want to change some text, or type more text in, tap Show editor, and make your changes.
- Then when you're ready to send the dismissal doc, tap Request "Got it", then Yes ... request "Got it", and then: Close
- Receiving the dismissal doc:
The person now gets an email, asking them to confirm that the dismissal doc you've sent has been received. - The person can't access the rest of 1st Money until the person's tapped Got it to the dismissal doc.
- Recorded events:
Now, on "Recorded events" tap the dismissal, to expand it. - You'll see that the doc's been sent.
- To see a copy of the sent doc, tap the "View" button: (at the end of the row)
- And you'll see the status change, once the person eventually marks the doc as: "Got it"
- You'll also see their "pay in lieu" amount.
- And finally, to see their final payslip with the "pay in lieu" amount included, tap the "View" button: (at the end of the row)
Keep in mind that:
- If there's any doubt about whether the person's going to look at their email, it's recommended that you also call the person by phone.
- And personally tell them that a dismissal doc's been sent to their email.
- Also, it's important to check that it's going to send the docs to the person's personal email before you tap: Yes ... do it
- Especially if it currently only lists their work email, and if you suspect the person may lose access to their work email once the person's dismissed.
- Depending on your situation, in some cases, you may even need to print the doc, and hand deliver it to the person.
For advanced usage:
- Your company may have its own process for sending written notice. If so, you can still have the automated execution of tasks, but may prefer to not send the supplied dismissal doc.
- You can either skip the sending of the dismissal doc, when it's shown, or alternatively, you can permanently turn it off.
- To learn about permanently turning off dismissal docs, watch the video on: Turning off disciplinary docs
To learn more:
- About what it looks like for the person to mark the doc as "Got it", watch the video on: Letters & docs confirmed with "Got it"
- And to learn about the alternative of having a person work right up until their last working day of a future dismissal date, watch the video on: Dismissal with work 'til last day
And that's it! That's everything you need to know about dismissing a person with pay in lieu!
How do I issue a suspension?
 5:49
5:49
"How do I issue a suspension?"
The default suspension period days sets the initial number of calendar days that any person's suspension period is automatically set to. The number of days can be changed later, when you actually issue the suspension.
To set a default suspension period days, and see it used when issuing a suspension:
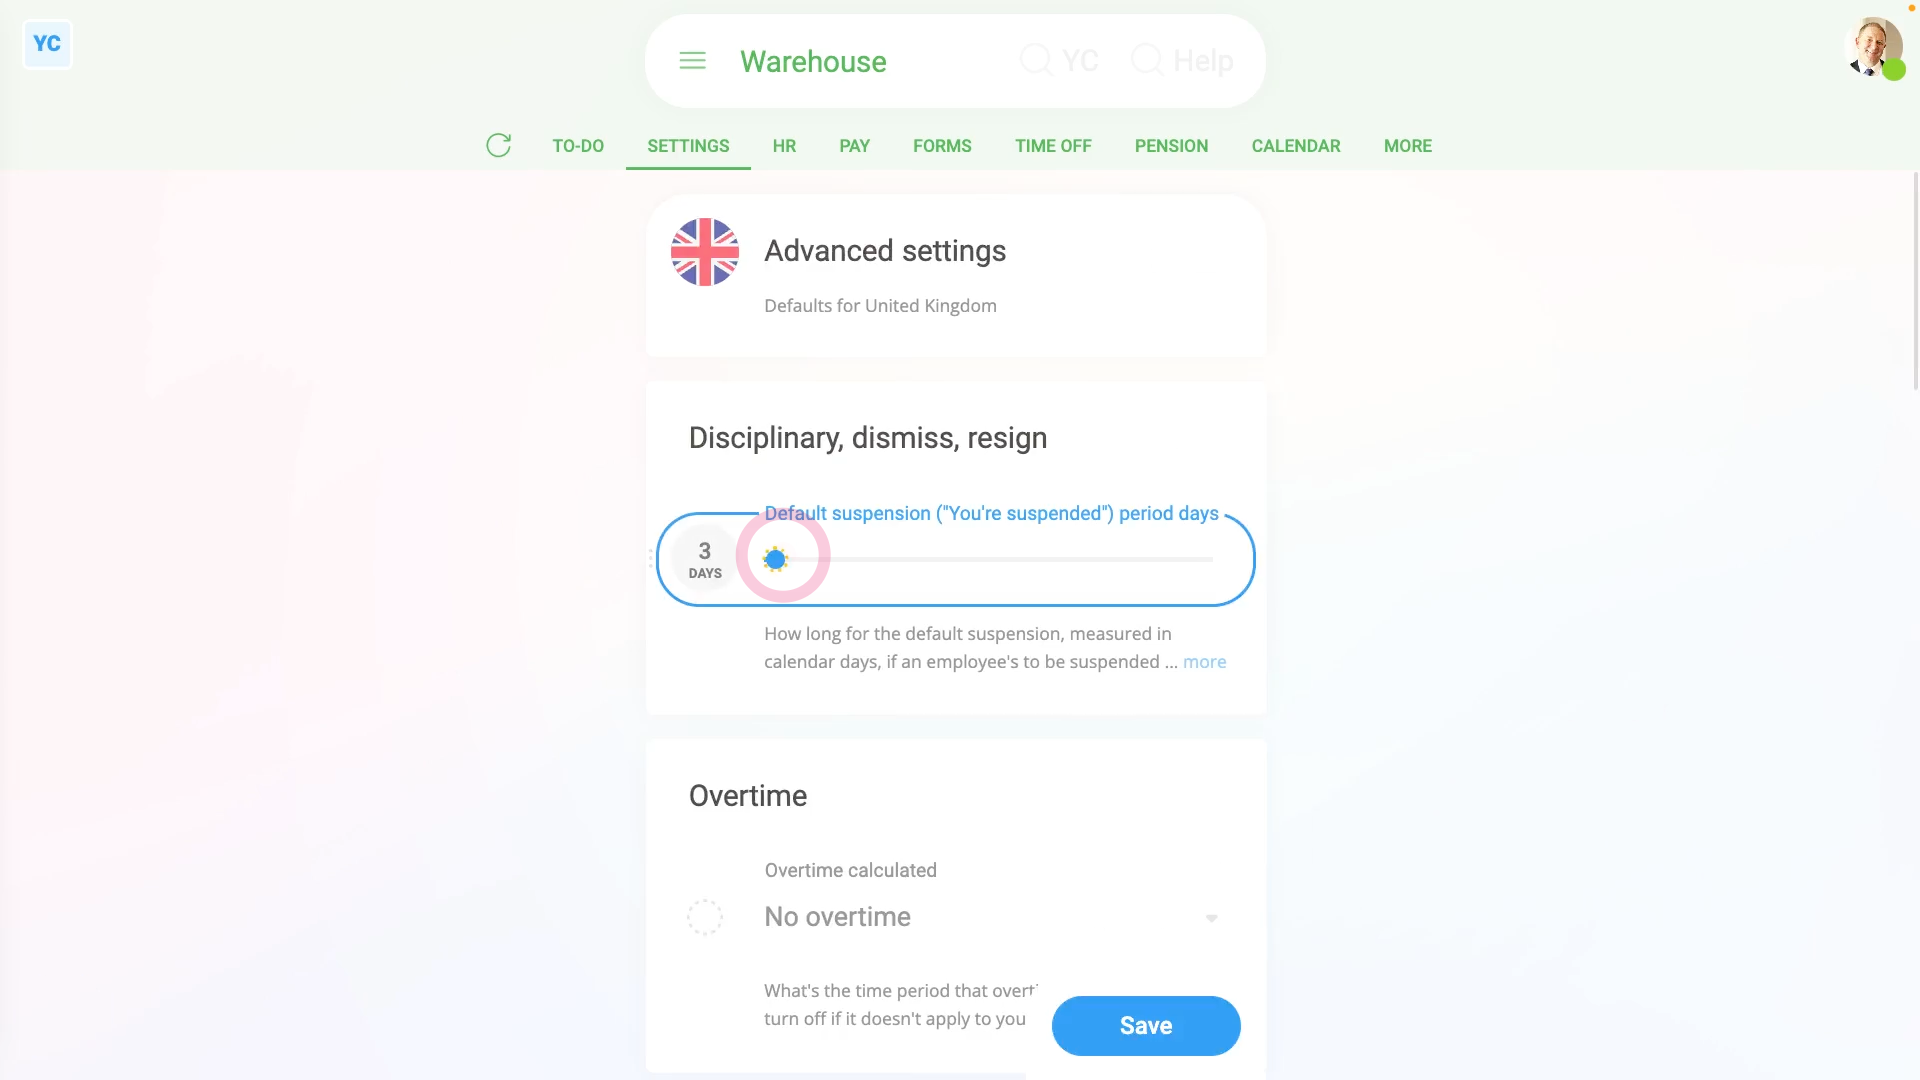
- First, to set the default suspension period days:
Select the pay batch on: "Menu", then "Pay batches" - Then tap: "Settings", then "Advanced"
- Select your preferred default suspension period days by changing: "Default suspension ("You're suspended") period days"
- Then tap: Save
- To check the person you're suspending is in the right pay batch:
Select the person you're suspending on: "Menu", then "People" - Then tap: "Pay", then "Pay settings"
- And then check which pay batch the person belongs to.
- To do the suspension for the person:
Tap: "HR", then "Disciplinary" - Then select the category that best fits the reason the person's being suspended.
- In many cases, disciplinaries that are marked as "Gross misconduct" could be accompanied with a suspension.
- And select a "Write-up level" that includes: "suspension"
- Then decide if the person's suspension period is to be paid or un-paid.
- Next, you'll see the default suspension period days that you set for the person's pay batch.
- To change it to the actual number of calendar days you'd like to apply, tap it, and change it.
- Then tap Next, and you'll see the number of calendar days has changed.
- Then when you're ready, tap: "Yes" to all the above
- To see the details of the suspension, tap See all tasks, and then expand the first section.
- And finally, you'll see the suspension's number of calendar days, the start date, and the end date.
- In some cases, you may want to adjust the start date, or number of days. Especially if the suspension's going over a weekend, when the person normally doesn't work.
- And you'll see both start and end dates automatically update.
- It may also be helpful to read the notes about suspension.
- Then when you're ready, tap Continue, and then: Yes ... do it
- To send the doc:
Fill in the black pick lists. - Then scroll down to the "Suspension" section and check you're happy with everything.
- Then when you're ready, tap Request "Got it", and then: Yes ... request "Got it"
- The person's now been emailed a link to their doc, and you can tap: Close
- You'll now be left on the "Recorded events" page.
- And you'll see the "Write-up" you've issued.
- Tap it, to expand it, and see the details.
- And finally, you'll see details about the suspension, including if it was paid, when it starts, how many calendar days, and when it's set to end.
- To see a copy of the doc you've issued:
Tap the "View" button: (at the end of the first row) - Once the person's tapped Got it on their doc, the person gets a PDF copy emailed to them, and you'll see the yellow hourglass change to a green tick.
- To see any pay adjustment on their payslip:
If the person's paid "hourly by timesheets", and it's a paid suspension, the person's got those days' target hours added to their pay. - To see the hours added to their pay, tap: "Pay", then "Payslip"
- Check that the suspension starts before the end of the payslip's pay period.
- If the suspension starts after the end of the payslip's pay period, tap the "Next payslip" circle to go forward a payslip.
- Then tap: "Hours worked"
- And finally, for the paid "hourly by timesheets" suspended person. You'll see that because it's a paid suspension, the correct hours have been added to their pay.
For advanced usage:
- If the person's paid "hourly by timesheets", and it's an UNPAID suspension, then no hours are added.
- If the person's paid by salary, or "hourly by targets", and it's an UNPAID suspension, then a proportionate amount of pay, or hours, are deducted.
- And if the person's paid by salary, or "hourly by targets", and it's a PAID suspension, then nothing's added or deducted from their pay, or hours.
Keep in mind that:
- The suspension period days is always set as calendar days, not working days.
- For example, setting the suspension period days to 7 calendar days, for most people would mean suspension for 5 working days. Because most people don't work for the 2 weekend days.
- However, it could vary depending on their target working hours.
You may notice:
- That suspensions can only be attached to a disciplinary that's a: "Write-up"
- If the disciplinary's only a "File note", it's not considered severe enough. So the hearing and suspension options won't show up.
And that's it! That's everything you need to know about setting default suspension period days, and seeing how it's used when issuing a suspension!
How do I record a person's resignation, if it's NOT agreed?
 4:38
4:38
"How do I record a person's resignation, if it's NOT agreed?"
When a person resigns, there's usually a discussion about the notice period and ending date. In some cases, you may refuse to agree to the date the person's offered as their last working day.
To record a person's resignation, if you've NOT agreed on their notice period and ending date:
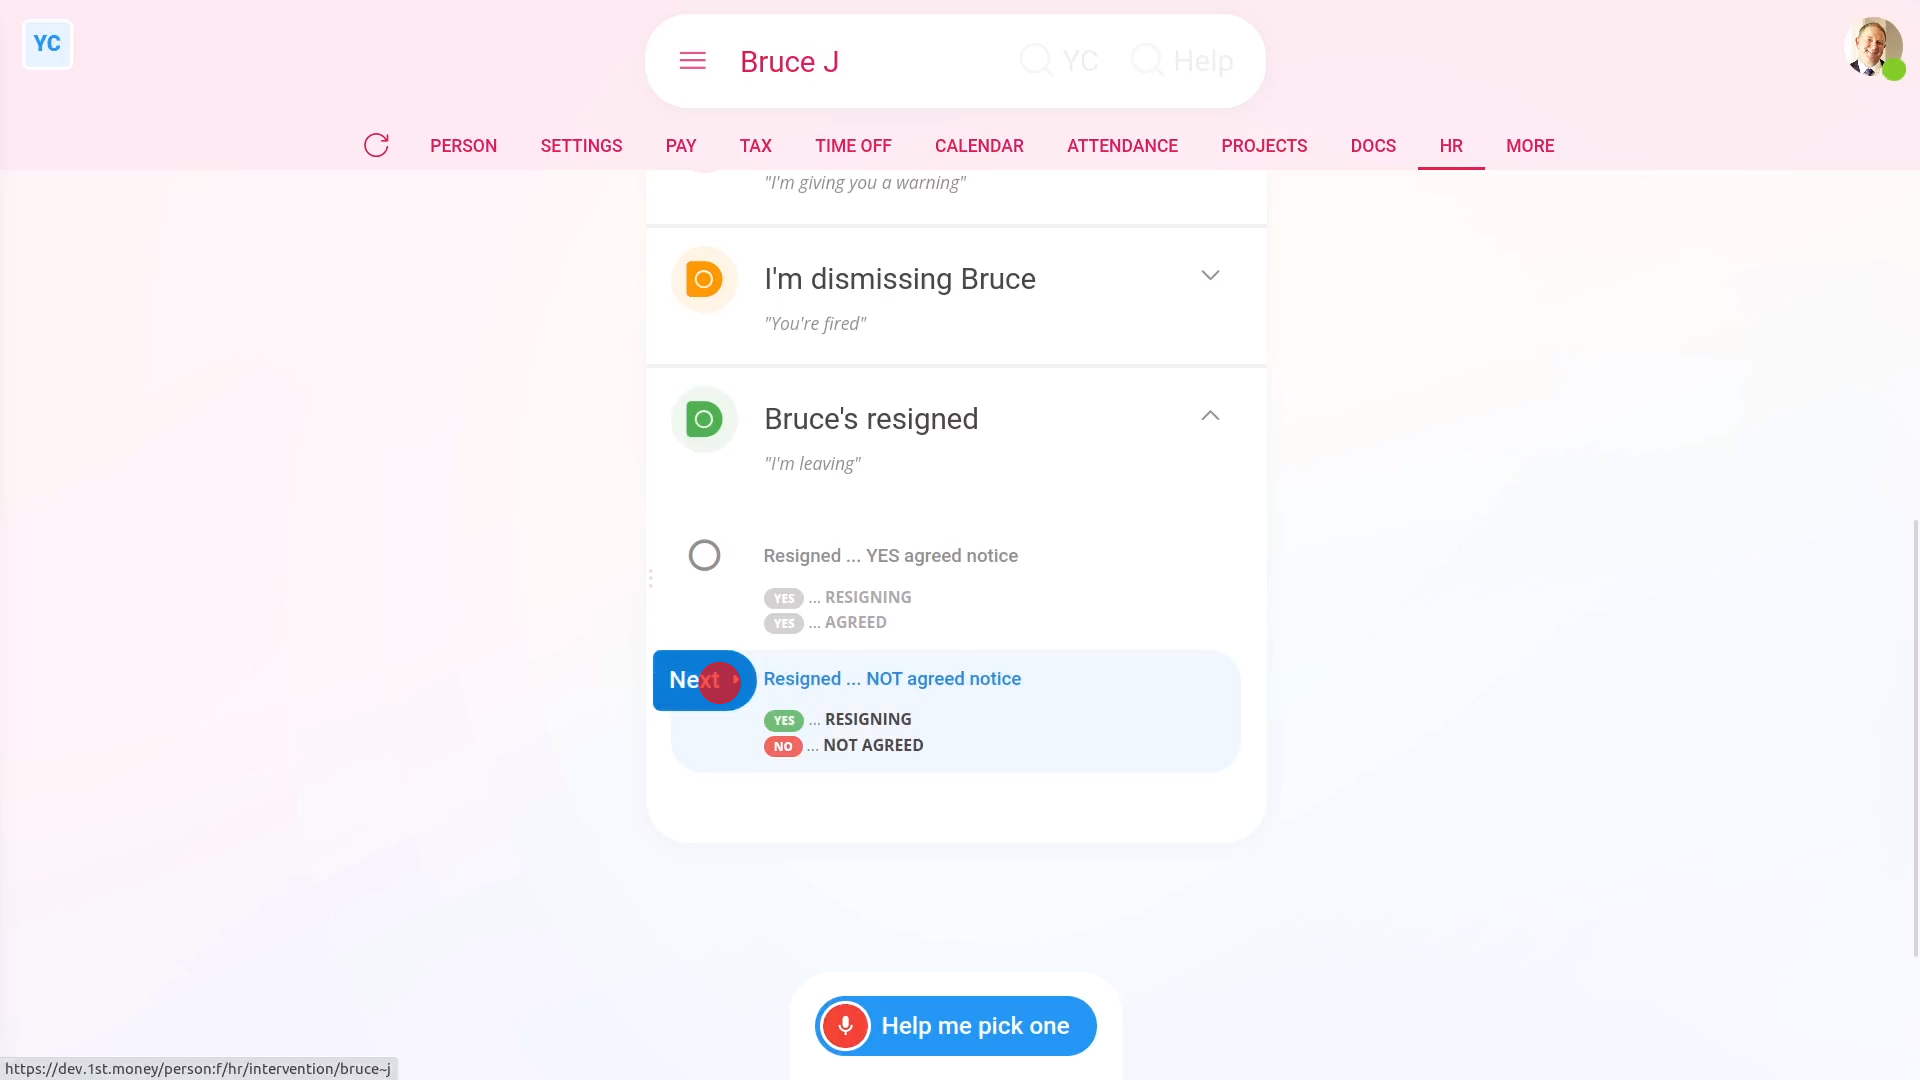
- First, select the person who's resigning on: "Menu", then "People"
- Then tap: "HR", then "Resign"
- And tap the Next button on: "Resigned ... NOT accepted notice"
- A pop-up opens showing you a list of questions that you'll need to confirm "Yes" to.
- In particular, you'll see the person's default minimum resignation notice period, based on how long the person's worked for you.
- Also, by default, it records the date you received the resignation as today.
- In many cases, you may have gotten the resignation a few days ago, and then spent a few days trying to agree on their ending date.
- Be sure to change the resignation received date back to the date you actually received it.
- Next, you'll need to consider if the person's offering you at least the minimum resignation notice period days.
- If the person's offering you the minimum days, you probably can't refuse their right to resign.
- If the person's offering less than the minimum days, you've got the right to refuse their resignation because of: "breach of contract"
- But remember, you can also decide to accept their resignation, regardless.
- However, if you decide to refuse their resignation, tap: "Yes" to all the above
- Setting the resignation tasks:
Next, you'll see the number of tasks that 1st Money automatically does for you. - To see the details of what each task does, tap: See all tasks
- And then tap expand all: (at the top)
- Some of the tasks send an email, or doc. To see a preview of any emails or docs, tap the blue links.
- Also, now would be a good time to upload their resignation letter, so you'll always have a copy.
- Once you're happy with all the tasks, tap Continue, and then: Yes ... do it
- All the tasks are now done in the background.
- Sending the "Unable to accept resignation" doc:
Next, the person needs to be informed, in writing, that their resignation's NOT been accepted. - An "Unable to accept resignation" doc is prepared in the foreground, all ready for you to complete and send.
- Read through the "Unable to accept resignation" doc.
- If you want to change some text, or type more text in, tap Show editor, and make your changes.
- Then when you're ready to send the "Unable to accept resignation" doc, tap Request "Got it", then Yes ... request "Got it", and then: Close
- Receiving the "Unable to accept resignation" doc:
The person now gets an email, asking them to confirm that the "Unable to accept resignation" doc you've sent has been received. - The person can't access the rest of 1st Money until the person's tapped Got it to the "Unable to accept resignation" doc.
- Recorded events:
Now, on "Recorded events" tap the resignation record, to expand it. - You'll see that the doc's been sent.
- To see a copy of the sent doc, tap the "View" button: (at the end of the row)
- And you'll see the status change, once the person eventually marks the doc as: "Got it"
- To see their uploaded resignation letter, you can either tap the resignation "View" button:
- And finally, if instead, you're deciding to upload their resignation letter at some future time, you can also find it at: "HR", then "End employment"
To learn more:
- About what it looks like for the person to mark the doc as "Got it", watch the video on: Letters & docs confirmed with "Got it"
- And to learn about the alternative of agreeing to the person's resignation, watch the video on: Resignation, and you've agreed
And that's it! That's everything you need to know about recording a person's resignation, if you've NOT agreed on their notice period and ending date!
How do I record a resignation, once their ending date is agreed?
 6:31
6:31
"How do I record a resignation, once their ending date is agreed?"
When a person resigns, there's usually a discussion about the notice period and ending date. In some cases, you may both agree that the person can resign immediately. In other cases, you may both agree that the person is to stay on for a number of weeks, maybe to train their replacement.
To record a person's resignation, once you've agreed on their notice period and ending date:
- First, select the person who's resigning on: "Menu", then "People"
- Then tap: "HR", then "Resign"
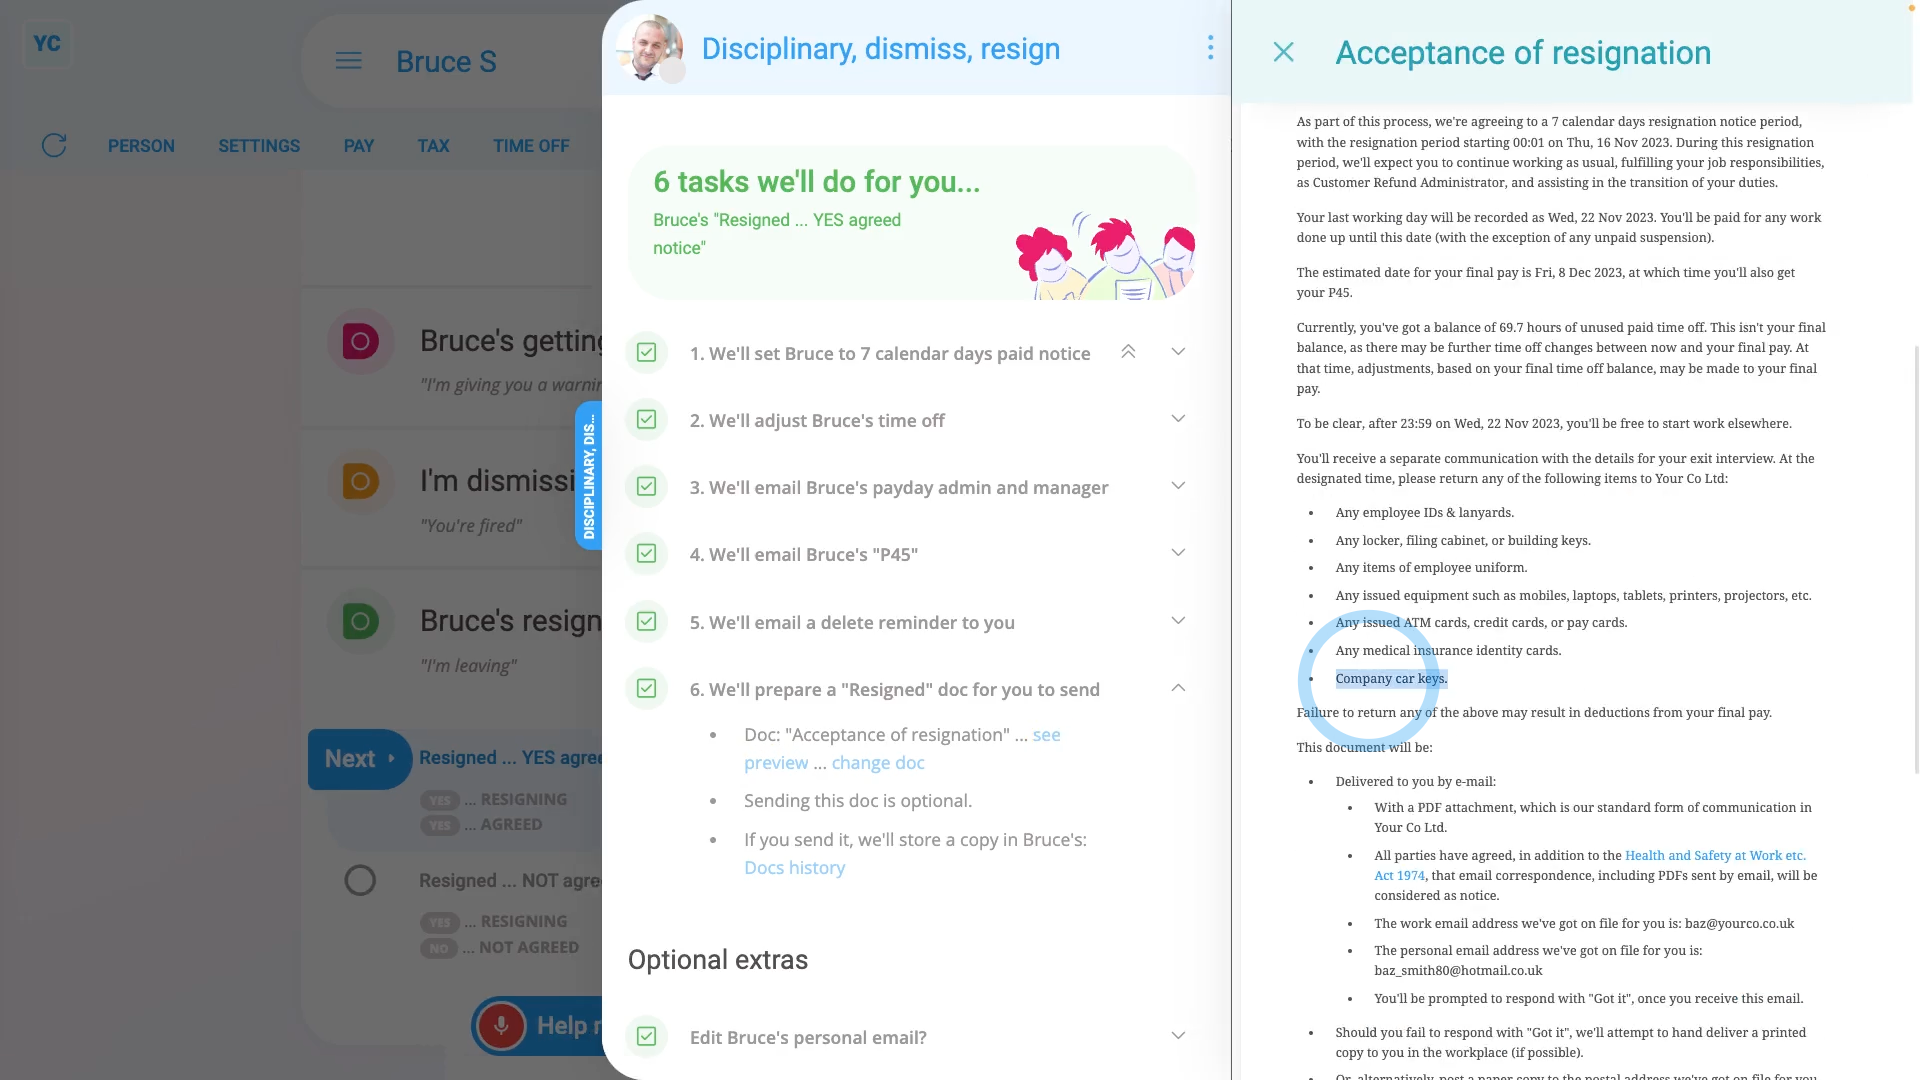
- And tap the Next button on: "Resigned ... YES accepted notice"
- A pop-up opens showing you a list of questions that you'll need to confirm "Yes" to.
- In particular, you'll see the person's default minimum resignation notice period, based on how long the person's worked for you.
- Also, by default, it records the date you received the resignation as today.
- In many cases, you may have gotten the resignation a few days ago, and then spent a few days agreeing on their ending date.
- Be sure to change the resignation received date back to the date you actually received it.
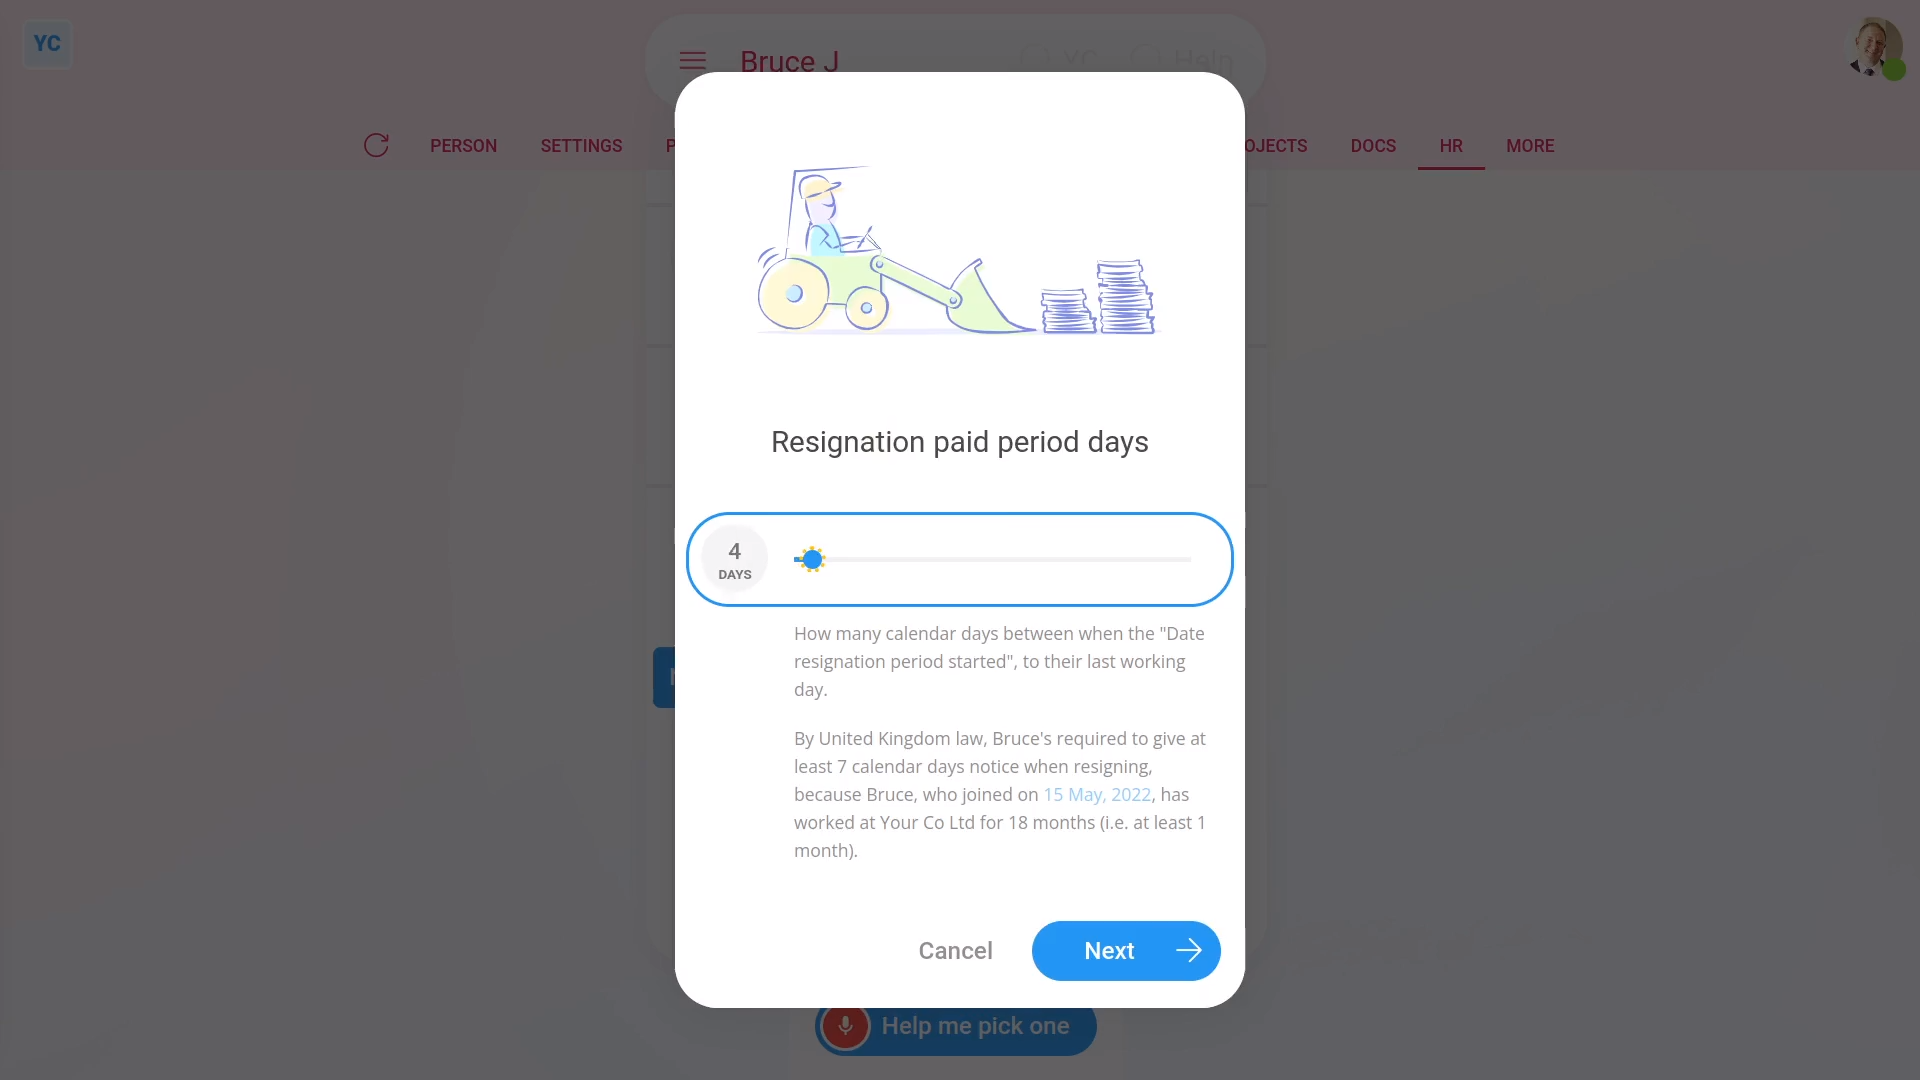
- Next, you'll need to set the resignation notice period days to whatever you've agreed on.
- You can make it longer, and you can make it shorter. You can even set it to zero days, if you're agreeing to an instant resignation.
- To understand the calculation of the minimum notice period, read the notes below the slider.
- Once you've read the questions, tap: "Yes" to all the above
- Setting the resignation tasks:
Next, you'll see the number of tasks that 1st Money automatically does for you. - To see the details of what each task does, tap: See all tasks
- And then tap expand all: (at the top)
- In particular, pay attention to the "starts on" and "ends on" dates of the person's "paid notice" period.
- If there's any other updates you'd like to make, do those updates now.
- For example, you could update their paid time off hours, or update their personal email.
- Some of the tasks send an email, or doc. To see a preview of any emails or docs, tap the blue links.
- Also, now would be a good time to upload their resignation letter, so you'll always have a copy.
- Once you're happy with all the tasks, tap Continue, and then: Yes ... do it
- All the tasks are now done in the background.
- Sending the "Acceptance of resignation" doc:
Next, the person needs to be informed, in writing, that their resignation's been accepted. - An "Acceptance of resignation" doc is prepared in the foreground, all ready for you to complete and send.
- Read through the "Acceptance of resignation" doc.
- If you want to change some text, or type more text in, tap Show editor, and make your changes.
- Then when you're ready to send the "Acceptance of resignation" doc, tap Request "Got it", then Yes ... request "Got it", and then: Close
- Receiving the "Acceptance of resignation" doc:
The person now gets an email, asking them to confirm that the "Acceptance of resignation" doc you've sent has been received. - The person can't access the rest of 1st Money until the person's tapped Got it to the "Acceptance of resignation" doc.
- Recorded events:
Now, on "Recorded events" tap the resignation record, to expand it. - You'll see that the doc's been sent.
- To see a copy of the sent doc, tap the "View" button: (at the end of the row)
- And you'll see the status change, once the person eventually marks the doc as: "Got it"
- To see their final payslip, tap the "View" button: (at the end of the row)
- To see their uploaded resignation letter, you can either tap the resignation "View" button:
- And finally, if instead, you're deciding to upload their resignation letter at some future time, you can also find it at: "HR", then "End employment"
Keep in mind that:
- If there's any doubt about whether the person's going to look at their email, it's recommended that you also call the person by phone.
- And personally tell them that an "Acceptance of resignation" doc's been sent to their email.
- Also, it's important to check that it's going to send the docs to the person's personal email before you tap: Yes ... do it
- Especially if it currently only lists their work email, and if you suspect the person may lose access to their work email once the person's resigned.
- Depending on your situation, in some cases, you may even need to print the doc, and hand deliver it to the person.
Also remember that:
- It's recommended to receive a proper resignation letter from the person. Preferably from their personal email account, or handwritten, dated, and signed.
- If possible, the resignation letter could also include the reason the person's resigning, and the date the person's asking to be their last working day.
For advanced usage:
- Your company may have its own process for sending written notice. If so, you can still have the automated execution of tasks, but may prefer to not send the supplied dismissal doc.
- You can either skip the sending of the "Acceptance of resignation" doc, when it's shown, or alternatively, you can permanently turn it off.
- To learn about permanently turning off "Acceptance of resignation" docs, watch the video on: Turning off disciplinary docs
To learn more:
- About what it looks like for the person to mark the doc as "Got it", watch the video on: Letters & docs confirmed with "Got it"
- And to learn about the alternative of not agreeing to the person's resignation, watch the video on: Resignation, and you've NOT agreed
And that's it! That's everything you need to know about recording a person's resignation, once you've agreed on their notice period and ending date!
How do I send a write-up that includes a hearing invitation?
 3:53
3:53
"How do I send a write-up that includes a hearing invitation?"
A hearing is a formal meeting where the person can defend their side of the story of a more serious disciplinary. After the hearing the company can then decide the outcome. The process of selecting, preparing, issuing, and tracking receipt of a hearing invitation is all automated by 1st Money.
To send a write-up that includes a hearing invitation:
- First, select the person on: "Menu", then "People"
- Then tap: "HR", then "Disciplinary"
- To select the subcategory of disciplinary that the hearing's about, either tap Help me pick one, or select from the list of subcategories.
- In many cases, a hearing involves a subcategory marked with "Gross misconduct", but any subcategory can be selected.
- Once you've selected the subcategory, tap: Next
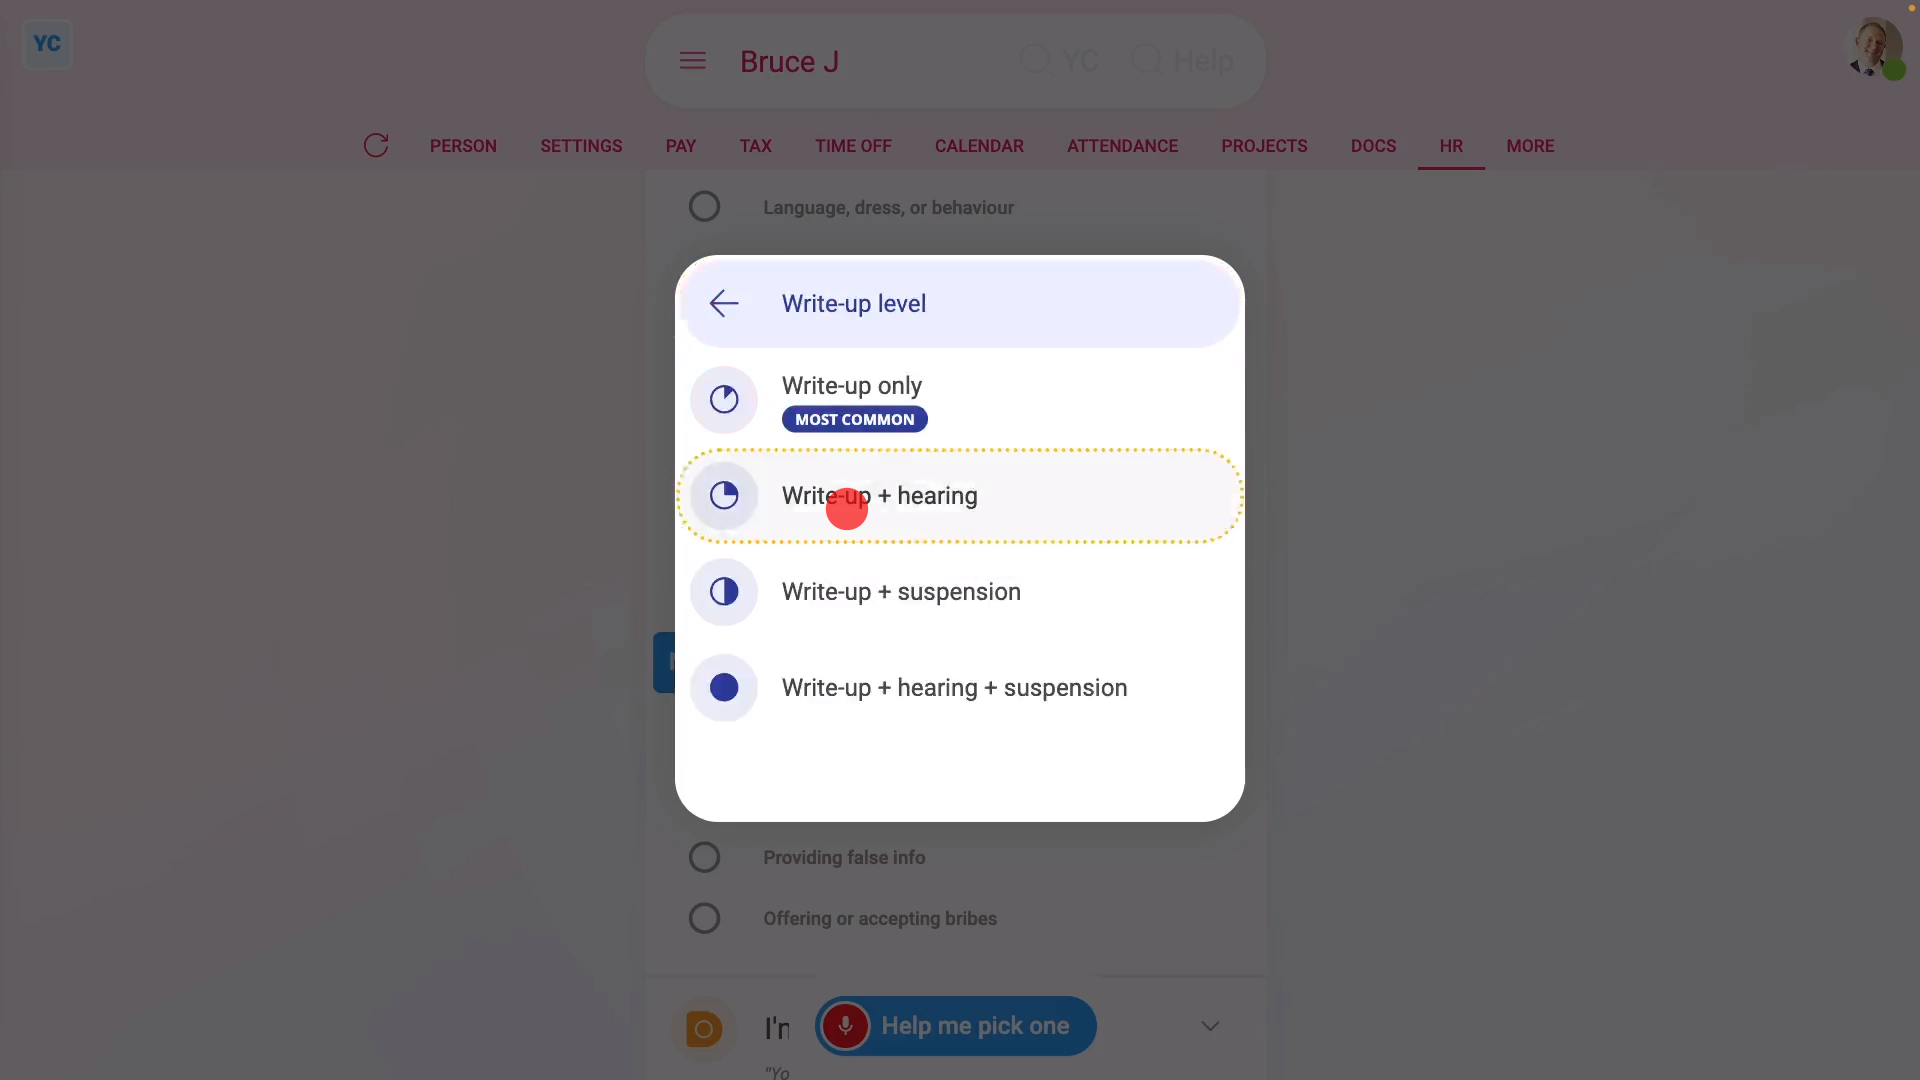
- Preparing the disciplinary:
Next, in order to include a hearing invitation, select "Write-up", and then: "Write-up + hearing" - Once it slides out on the right, you'll see a list of questions that you'll need to confirm "Yes" to.
- Once you've read the questions, tap: "Yes" to all the above
- Next, you'll see the number of tasks that 1st Money automatically does for you.
- To see the details of what each task does, tap: See all tasks
- And then tap expand all: (at the top)
- Once you're happy with all the tasks, tap Continue, and then: Yes ... do it
- All the tasks are now done in the background.
- And finally, you'll see the disciplinary added to the six month recorded events.
- Issuing the disciplinary doc:
Next, the person needs to be invited to the hearing. - A disciplinary doc is prepared in the foreground, all ready for you to complete and send.
- Read through the disciplinary doc, and tap the black pick lists, one-by-one, including for the date and time of the hearing.
- Generally, it's recommended that you set the hearing date at least five working days from today.
- If you want to change some text, or type more text in, tap Show editor, and make your changes.
- Then when you're ready to send the disciplinary doc, tap Request "Got it", then Yes ... request "Got it", and then: Close
- Receiving the disciplinary doc:
The person now gets an email, asking them to confirm that the disciplinary doc you've sent has been received. - The person can't access the rest of 1st Money until the person's tapped Got it to the disciplinary doc.
- Recorded events:
Now, on "Recorded events" tap the disciplinary, to expand it. - You'll see that the doc's been sent.
- To see a copy of the sent doc, tap the "View" button: (at the end of the row)
- And finally, you'll see the status change, once the person eventually marks the doc as: "Got it"
Keep in mind that:
- If there's any doubt about whether the person's going to look at their email, it's recommended that you also call the person by phone.
- And to tell them that a hearing invitation's been sent to their email.
To learn more:
- About what it looks like for the person to mark the doc as "Got it", watch the video on: Letters & docs confirmed with "Got it"
And that's it! That's everything you need to know about how to send a write-up that includes a hearing invitation!
How do I strike a disciplinary from the record?
 1:57
1:57
"How do I strike a disciplinary from the record?"
Sometimes a disciplinary may have been issued in error. If an error is made, you can strike the disciplinary from the person's record so it no longer counts against them.
To strike a disciplinary from a person's record, or to restore it:
- First, select the person on: "Menu", then "People"
- Then tap: "HR", then "Recorded events"
- When you scroll down the page, you'll see a list of each of the person's disciplinaries, with the most recent near the top.
- Find the disciplinary that you'd like to strike from the record, then tap it to expand it.
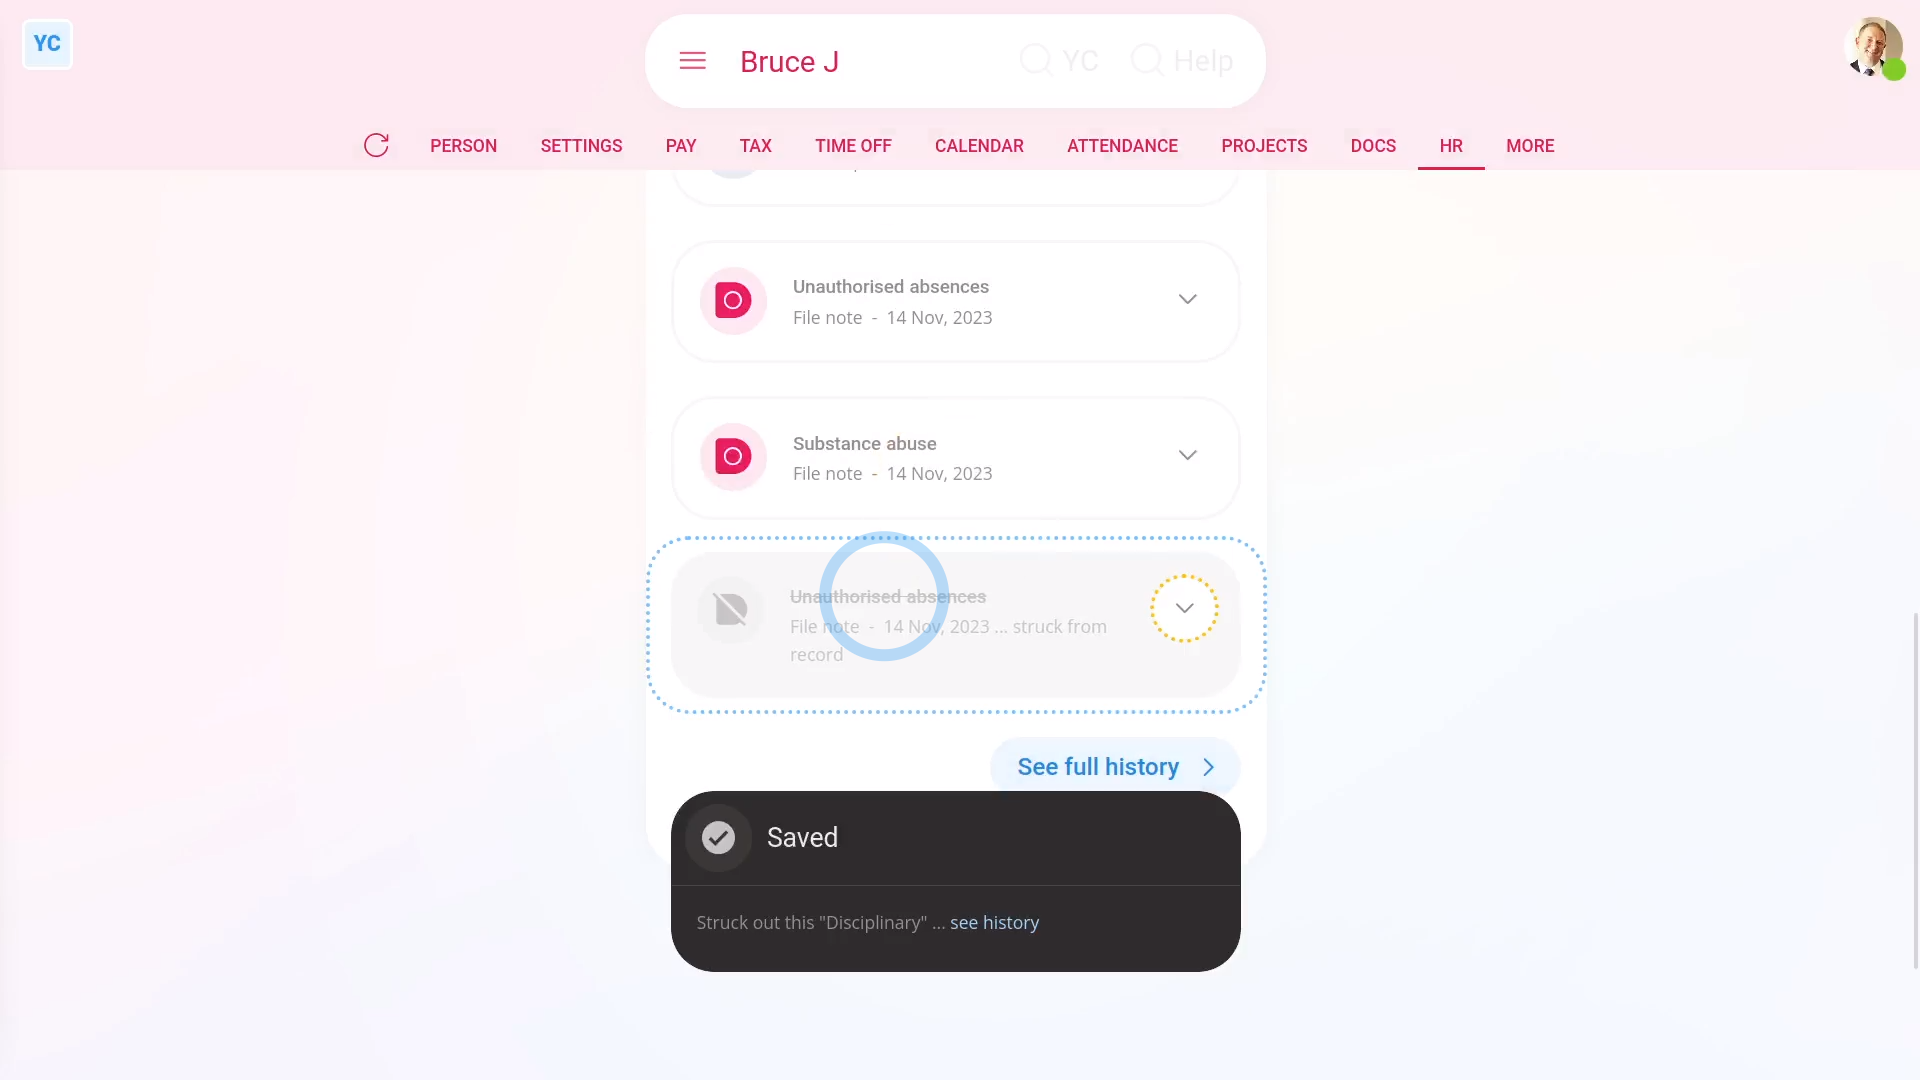
- Then tap the three dots: (at the bottom), then tap Strike from the record, and then tap: Yes ... strike it
- You'll now see the disciplinary crossed out, and moved to the bottom of the list.
- Also, when you scroll to the top of the page, you'll see that the struck out disciplinary is no longer in the person's monthly count.
- Which means it no longer counts against them, in their record.
- If you again change your mind, and want to restore the disciplinary back to the record, follow the same steps.
- Find and expand the struck out disciplinary.
- Tap the three dots: (at the bottom), and then tap: Restore back to the record
- And finally, the disciplinary is moved back into the list, and now appears again in the person's monthly count.
Keep in mind that:
- The date and name of the person who struck out the disciplinary is permanently stored inside the details of the disciplinary.
- Also, both org admins and payroll admins can strike or restore disciplinaries from the record.
And that's it! That's everything you need to know about striking a disciplinary from a person's record!
How do I turn off the default docs for disciplinaries?
 2:23
2:23
"How do I turn off the default docs for disciplinaries?"
When you finish processing a person's disciplinary, dismissal, or resignation, the last step is to send the person a doc. By default, the suggested doc is a template prepared by 1st Money. If you don't want to ever send the default doc, you can instead turn it off.
To turn off a default doc for a disciplinary in a pay batch:
- First, to turn off the default doc setting:
Select the pay batch on: "Menu", then "Pay batches" - Then tap: "HR", then "Docs ... disciplinary, dismiss, resign"
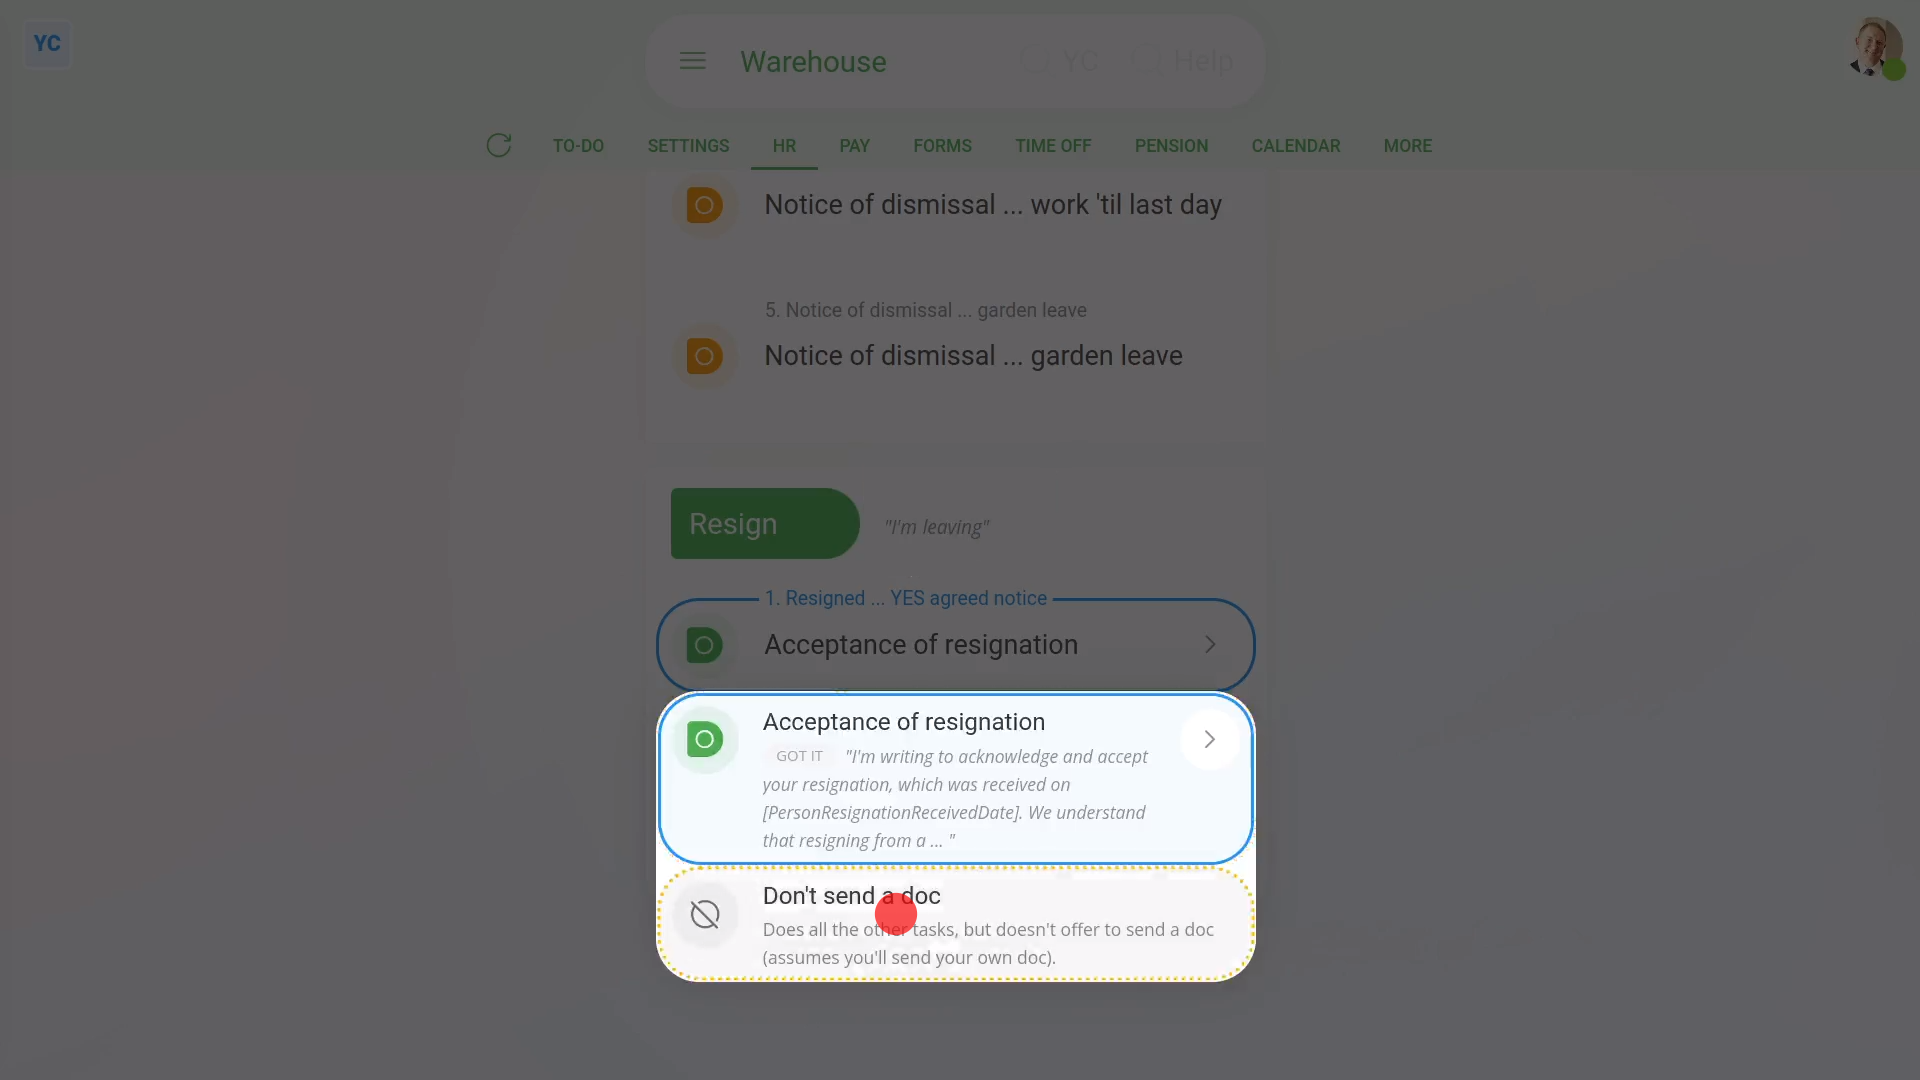
- Scroll down and tap the disciplinary type that you want to turn off the default doc for.
- Select "Don't send a doc", and then tap: Save
- To see that the default doc is turned off for a person's disciplinary:
Select the person who's getting the disciplinary on: "Menu", then "People" - Then tap: "HR", then "Disciplinary"
- And select the disciplinary type.
- Then tap "Yes" to all the above, then: See all tasks
- You'll now see that there's no mention of any: "doc for you to send"
- And finally, you can tap Continue, and then Yes ... do it, and you'll see that there also aren't any default docs opened for you to send.
Keep in mind that:
- Turning off the default doc works equally well for dismissal, resignation, and leave docs as well.
- And if you change your mind, you can always turn it back on.
You may notice:
- If you've got more than one pay batch, you'll need to turn off the default doc on each pay batch.
- If your newly turned off default doc is still showing up when you're doing a person's disciplinary, check which pay batch the person's in.
- Then check that you've turned off the default doc for that pay batch.
To learn more:
- About cloning a doc, adding changes, and then setting a newly cloned doc as the new default doc, watch the video on: Changing the disciplinary doc
And that's it! That's everything you need to know about turning off default docs for disciplinaries!